100% Achievement Guide for Astrea Six-Sided Oracles with tips for the tricky ones!
Introduction
Hello and welcome to my guide for Astrea: Six-Sided Oracles! I love this game but noticed the lack of a guide so I thought I’d make one myself after hundred percenting it yesterday. This is my first time writing a guide so let me know if I miss anything and apologies in advance for the lack of fancy formatting!
Spoiler Warning: As this is a 100% completion guide it has spoilers for things like final bosses, unlockables, and so on!

Basic Progression
All achievements in this section are unlocked by simply playing the game. They should be pretty straight forwards but I’ll make things clear as need be.
Unlocked after completing the first tutorial battle
Unlocked after completing your first real battle

Sentinels can be acquired at Sentinel nodes or from beating the Act boss.
Dice can be forged at Forge nodes. Buy a face and apply it to one of your dice.
This can be spent on anything. To make sure you get enough shards, try to path to them often and make sure that you hit at least one shop in Act 3 to spend them. It shouldn’t be to hard to hit this value.

Sentinels can be upgraded at Sentinel nodes as well. Using Hevelius can help with this, as he gets two level 1 Sentinels for free and benefits from having strong sentinels. Make sure to take star shard rewards often as this is rather pricey (~2500 shards if memory serves). Some events also upgrade your sentinels, so you can try to find those.


Astrea’s Heart is reached after completing Act 3 and after you’ve unlocked all heroes and reached the gate at least once. It’s essentially Act 4 so be ready!


Each time you either win or lose a run you’ll get experience equal to your score. Level 6 is the last level for each character. You need 1000 x your level to level up.
Bosses
Sanctuary Guardian is one of the Act 1 bosses (the plant). If you’re having trouble with it, make sure to pay attention to it’s retaliation counter. Sometimes pre-emptively ending your turn or playing your dice in a different order can help.
Smoldering Beast is the other Act 1 boss (the turtle). If you’re having trouble with it, try using your rerolls to make it not apply Unholy Mist to itself. Try not to have to heal yourself too much, as the mists will keep stacking as the fight goes on; only do what you have to to avoid losing hearts.

Doomed Astronomer is one of the Act 2 bosses (the squidhead). If you’re having trouble with it, try to avoid using your abilities as much as possible. This fight is also easier if you either don’t have sentinels or, if you’re playing Hel, if you can frequently break them so the debuffs don’t stack. Also, avoid randomly targeting attacks, as you’ll likely waste hits on the immortal orbs.
Corrupted Assembler is the other Act 2 boss (the robot). If you’re having trouble with it, try to avoid targeting the other sentinels if you can avoid it. Only break them yourself if they’re putting a hard stop on your strategy. Even then, try to rid them with AOE if possible. Focus on the Assembler; it’s going to keep scaling stronger every turn so you have to race it down.
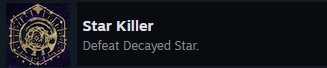
Decayed Star is one of the Act 3 bosses (the black hole). If you’re having trouble with it, try using your rerolls to prevent it from gaining decay or putting ruin on you. Watch the Overcorruption meter carefully. It doesnt do much damage outside hitting Overcorrupted so, as is often the case, just try to kill it as quickly as possible.

Uncaged Anomaly is the other Act 3 boss (the cubes). If you’re having trouble with it, try to not kill the small cubes on turns where it’s going to summon fresh ones, as that helps waste it’s actions. Instead, kill them when you can afford to a few turns into the fight. In the meanwhile, focus as much damage onto the main body as possible. This fight is easier with 2 sentinels and AOE protection effects.
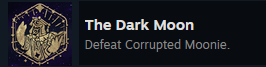
Corrupted Moonie (and all the Corrupted Oracles) are found in Astrea’s Heart, so you must have unlocked it and be playing at Astrea 1 in order to find and face them. Two of the six will be randomly selected, so if you’re having trouble finding one you’ll just have to keep doing runs. Corrupt Moonie will invert your dice and flood your deck with bad dice, so bringing dice that don’t actually have values to corrupt help, as do rerolls, discard effects, and the blessing that destroys bad dice.
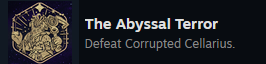
Corrupted Cellarius isn’t too complex and mostly deals big damage. Kill his fish friends first and then focus on whittling him down, paying attention to his corruption meter. Star Blessings that trigger on Overcorrupt are especially useful here.

Corrupted Hevelius is the opposite of Cellarius. He builds up slowly, so try to hit him fast and hard. Ignore the sentinels for as long as possible and only damage them if and when it’s necessary to stay alive.
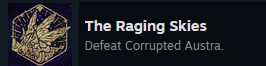
Corrupted Austra is more an annoyance than anything. Use your smaller dice and damage abilities first to try and burn off as much dodge as possible before swinging with your big hits.

Corrupted Sothis also likes to fill your deck with bad dice and then forces you to reroll them. He also ends your turn after 10 actions. Use this to your advantage by playing the bad dice last if possible. Pay attention to the count so you don’t get surprised.
Corrupted Orion slowly spins his orbs hitting you with a variety of effects. Take this fight slow, pay attention to where his orbs are at, how much Reinforced he has, what effects are coming next. As long as you don’t rush, it should be pretty simple to play around his effects with a good deck.

You’ll get this eventually. There’s a 1/3 chance you see yourself as an option each time you reach the heart. Simply choose that as your opponent and beat them to unlock this.

Astrea’s Avatars appear in Astrea’s Heart after the corrupted oracles. There’s three of them, and they apply buffs to all of themselves each turn. Each die-face references one of the six-oracles, but there’s really only one you need to worry about, and that’s the Cellarius side. If you can, reroll this whenever you see it so that the Avatars dont have any scaling. If you kill one, it’ll go into hibernation for 6 turns (sped up if it gets hit with corruption), so if you feel confident you’re fast you can pick them off one at a time, else it’s best to whittle them all down and take them out close together.

Astrea is the true final boss of the game, and can be found in Astrea’s heart immediately after killing the avatars. You go straight into this fight, but you do get a full heal, purge, and restoration of any sentinels. Astrea requires you to go slow and pay attention. She swaps between two forms every so many times you use a virtue, which needs to be timed carefully. Form 1 has powerful dice and does 2 damage to your entire team every so many dice you place, but it’s overcorruption deals very little. Form 2 has low damage die, but it hastens her overcorruption which flat out destroys one of your hearts, no virtues restored, no incorruptible will protect you. Just do what your deck wants to do while watching these variables carefully and you’ll have it. Each time you beat her, you’ll unlock the next Astrea level, each one adding additional health or making her counters faster (it also does much the same for the Avatars before her.) The strategy remains the same.
Remember, you can always quit to main menu as long as you haven’t seen the score screen and come back to reset the fight and try again.


Beat Astrea with each Oracle to unlock these! Remember, you can do these all on Anomaly 0 Astrea 1, so don’t overtax yourself.
Challenge Runs
For most of these challenge runs, there are multiple paths to victory, so I will give the ways I think are most likely but there are certainly several ways to achieve most of them. Experiment around if a strategy isn’t working for you. Also, remember again that you can always restart an individual combat by quitting out to the main menu.

The easiest path for this achievement is to play Moonie and get the die Perdition Dive in Act 1. This die deals 50 damage on one side. Both Act 1 bosses have 60 health, so you just need 10 more damage in your opening hand (a high-value corruption die you can convert would be an easy way to close this gap). Keep restarting until you get it in your opening hand and with the right face!
Make your deck small and load up with as many draw dice as possible for this achievement. Take advantage of Forging area to put more dice draw on your dice. Black Hole blessing often give you more draws, there are sentinels that add more draws, a few heroes have draw options in their virtues and unique dice. Ultimately, it sounds high but this achievement isn’t too hard to reach.

A few things can help you get rerolls. Auxillary Sphere gives you some each turn, you have one on your virtue bar, and one star blessing gives you a free reroll on turn one. You can get the remaining few a few ways, but probably the easiest would be to use Celarius who can go up and down his virtue bar several times per turn.

This is probably the most diverse in terms of potential paths, to the point I don’t even remember which character I achieved it with. For some ideas: Moonie can scale Research, Hel can scale Lightshield, Austra can scale random damage, critical, or chaos.

This should be pretty easy to achieve in terms of being strong enough to beat bosses, the real difficulty is making sure you path to enough Destroy and Forge nodes to slim your deck down. A few good dice should easily win Anomaly 0 Astrea 0 runs.

This is a little harder. Taking every die offered to me, I ended up with around 54 on my successful run of this. So, you’re going to need to take dice pretty much every time one is offered. A couple Blessings help with this; Dicesmith’s helmet ups your damage per so many dice owned, the glove one ups your damage with safe and starter dice, and Austra has a butterflynet blessing that ups your critrate per safe die owned. All of these can hopefully help mitigate your decks lack of cohesive strategy. Avoid combo-centric characters for this like Sothis and Hel

Remember that sacrificing a heart at a shrine doesn’t count! For this one I recommend a defensive character like Hel or Austra. Reset via main menu any time you get hurt. As long as you play safe this achievement isn’t too hard.


I’d recommend getting these on the same run (you can even get them with the take-all-the-dice run if you only grab safe dice!). Just remember to only take one type of dice. I’d recommend taking only safe dice and using Moonie or Austra’s effect that care about safe dice, or Risky dice using Moonie’s effects that care about them and the card that gives incorruptible after so many plays. Remember to skip the epic die, it’s real easy to accidentally take one.

This should be pretty easy as long as you’re always taking Epic fights and always sacrificing a heart at Astrea shrines (which is how you should be playing the game anyways except for casual runs; the blessings are always worth it). I do not know if starting blessing counts for this, but to be safe if you’re struggling with this play as anyone but Moonie or Cellarius

The inverse of the last one, I don’t know if starting blessing counts for this so play as one of the others. It might be good to play as Hel for this and to funnel the extra money you’re getting for skipping blessings into upgrading your sentinels. The hardest part of this achievement will be remembering to skip, believe me.

Pretty obviously, don’t do this one with Hel. Anyone else can get this one just remembering to skip the sentinels. Austra has an especially easy time here as her “hit random targets” styles appreciate having fewer enemy targets.
Each time you win while on your current hardest Anomaly, your anomaly rating will go up. I would recommend doing this with Astrea set to 0, because even Anomaly 1 is a pretty steep step up in terms of difficulty. I have little specific advice here, just run your best character and try to find good pieces by the first elite fight or restart the run.
Character specific challenges
Moonie Specific
Two things are needed to enhance an enemy die. First you need to change it to purification, via the Manipulate die or the blessing that automatically does it when you apply enough corruption. Then you need to use an Enhance die on it, which means it must be a die that does 1 damage. As such, this is easiest to do in act 1, but a few later act enemies have 1 damage options.
Defeating an enemy also requires you to use the Manipulate dies or the blessing and for the enemy to be doing a self-corruption action that you’ll change to self purify. Just make sure they’re low enough on health that it finishes them off.

Some dice add Plague dice to your deck, which then add more and more plague dice. Note, not all bad dice are plague dice, so be careful what you take. You can also stall versus certain enemies that add plague dice to your deck. Just keep playing them to add more and more and you’ll get this eventually.
Cellarius Specific

This one is pretty easy. Make sure an enemy has any amount of wave, then finish of that enemy with either an attack that deals self-corruption or that the enemy has death bomb. Then the wave should heal you off of losing your heart.

This may seem baffling at first, but it’s a fun bit of math. Get the die that looks like an anchor that deals 25% of an enemies remaining health, then find either the Doomed Astronomer or the elite fight against the double hammer shark. 25% of infinity is still infinity, so hit the infinite health target to trigger this achievement!

This is one of the hardest achievements in the game. There’s a few ways to potential get it, but the easiest one for me was getting a very small deck with draw, Surf, and Refreshing Headbutt. Get enough wave on a high health target then keep looping headbutts to get your virtues back.
Hevelius

This one isn’t too hard just make sure your deck is built around repairing and scrapping your sentinels then stall the fight until you get to 20.

This is another of the hardest achievements, though not because of difficulty, just because of odds. You need all four different boosts. Enhance and Vorpal Armor appear at all levels, but Boost and Rock Armor only appear in Risky or Epic pools. There’s a blessing that copies the links from one sentinel onto another; you’ll want that. Try to get sentinels that draw dice or do rerolls to help, and then stall a fight against a non-aoe opponent if possible while you apply all four. Good luck, this one took me several full runs to find all the pieces at once.

While you can get this by constantly getting new Sentinels, the easiest way is to get the Recycle die and then just spam it constantly. You’ll eventually get the 12 you need.
Austra Specific
I’d say the name is misleading here; the easiest way to get this is not with critical multiplier but instead by stacking Aerial Needle enough times to make a random-target safe die deal the necessary damage. Stall until you get the value high enough.
Simple and easy; take a bunch of dodge dice, buff your dodge really high, get lucky enough to get 4 dodges.

You’ll want the die ALL IN for the highest base confuse action you can get, and then the die who doubles the value of all confuse dice in your hand while also not playing any of your dice that affect confuse percent (Doubt Dispeller, Brilliance, etc.)
Sothis

You’ll absolutely need the Blessing that makes it so your Soul Heat has no cap in order to get this. Then I recommend taking multi-hit dice, Concentration, and the die that keeps your soul heat for a turn.

This one is fun. Just take every source of chanting you can get and only play chanting dice. It might help to be against a boss or infinite health opponent so that you can keep climbing the number.

Another one of the hardest achievements to get. While not necessary, I recommend the feather blessing that makes it so Affliction doesn’t affect Overcorruption. I also recommend getting into a fight with multiple enemies who apply affliction to the board; this is one time you might want to leave Astrea turned on. “Creatures” is an odd word choice here but they just mean anyone in the fight: Sothis, your sentinels, and all enemies. It’s probably easiest to do your 3 enemies and then Sothis himself.
Orion Specific

Just make sure you’re running a deck that doesn’t necessarily need to rotate and hope that you spin to the correct orb in one of the fights. I can’t offer much help here as I got this one in a glitch because I was specifically using a rotate deck when it was awarded.

Beyblade. Just take every rotation and reversion and oscillation you can get. Honestly my favorite way to play Orion anyways.
This one’s on the harder end too. There’s a few paths here, but I think the most consistent option is to take high-value multicasts and the die that lower the amount of astrium needed to trigger it and then hope to get lucky. It might be good to try to keep your health low going into this so you can get the free 4-cast virtue.
Scoring


The first of these will likely be quite easy, the second you might get while going for other achievements, but that last will leave you scratching your head if you don’t know how scoring works. So, to give you an idea, here’s my scoring for the run that got me the last achievement.
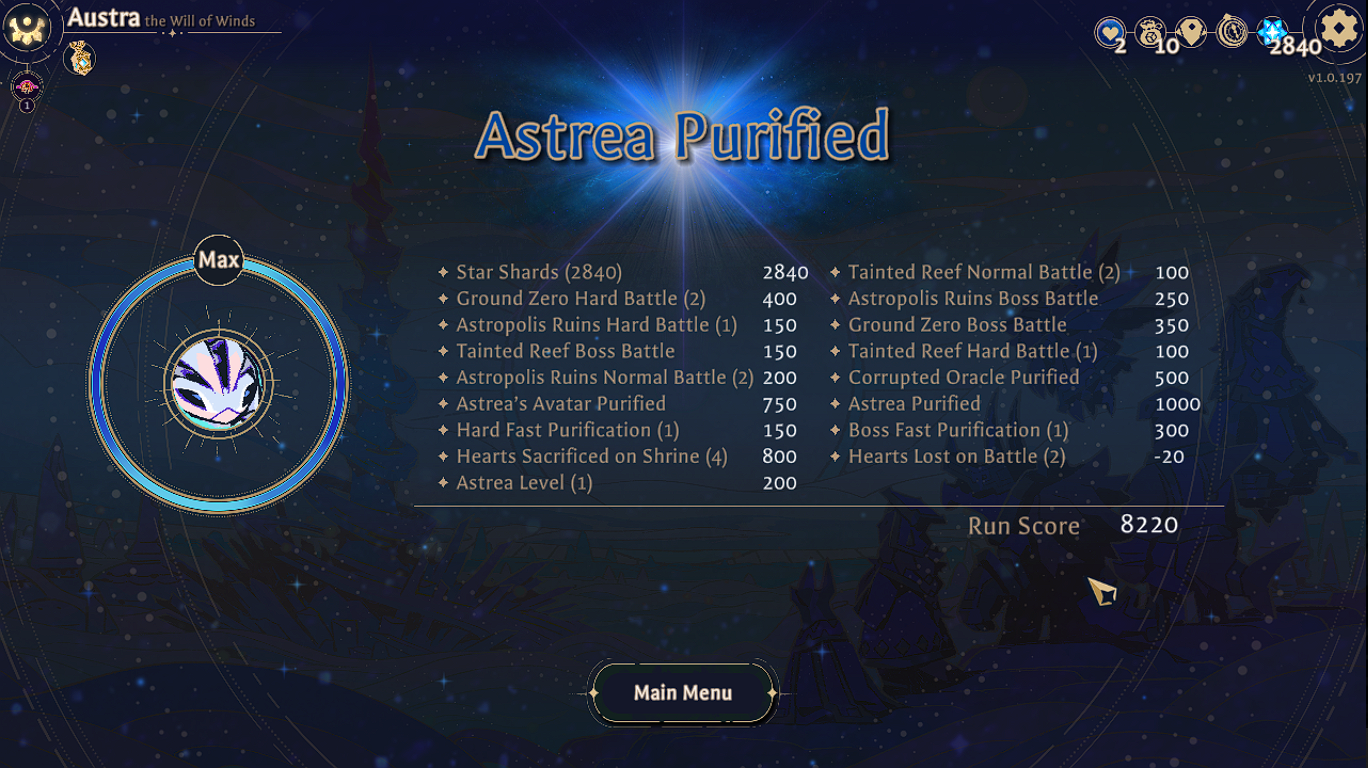
There’s obviously a few things you want to do to get your score high enough. You need to beat Astrea for the bonuses to beating her, her avatars, and the corrupted oracle. You’ll want to be taking every elite you can, and sacrificing hearts at every alter. But the real thing that makes up your score is unspent star shards. Getting 7000 points is basically a “take nothing” challenge run where you take shards as often as possible.
If you’re struggling, my winning run was to use Austra with two of the ALL IN die and the die that doubles it value, along with one of the +20 Brilliance die. Everything else I passed on and, as you can see, that was a bit excessive. I probably could have taken 1 or 2 blessings and 1 or 2 epic dice and still been perfectly fine. ALL IN also helps you get a few fast victories which help your score. This took a LOT of reseting though, needing to land crits and get purifications, so only try this if you want a strategy that requires that. Else I encourage you to find your own path! Maybe Hevelius with his built in Sentinels!
And with that you should have 100% of achievements! Good luck, Oracle!