This guide will give new players information, a sense of direction, and tips on progressing through the early content of Bar. The guide has information directly from the creator of Bar.
Introduction
Bar is a uniquely designed incremental rogue-lite. Bar may be interesting and fun, but it also has complexities that could confuse less familiar players. The goal of this guide is to give players that are earlier in the game information regarding mechanics, progression, strategy, and other useful tips. Straight from the developer of Bar herself! The goal of this guide is to give the reader a clear outline of the function of Bar and to get the player to the 500th bar.
Starting
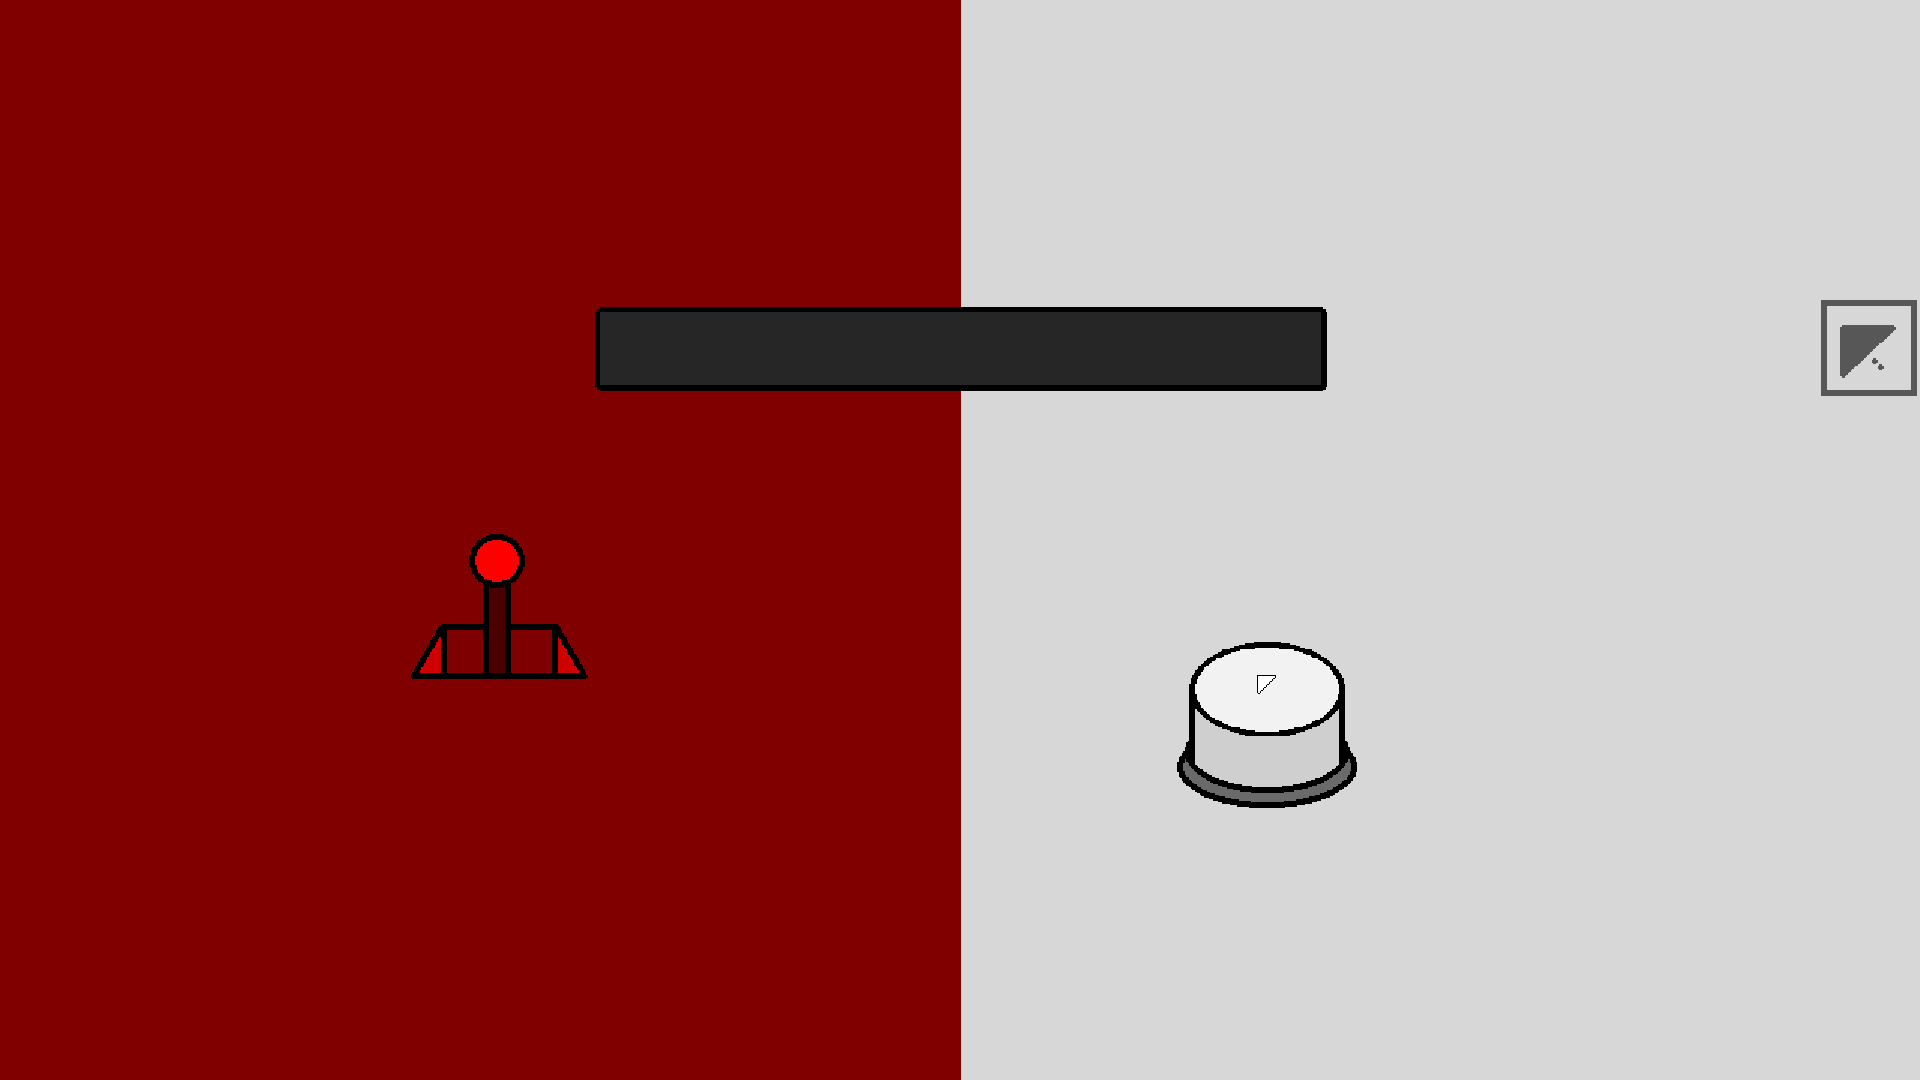
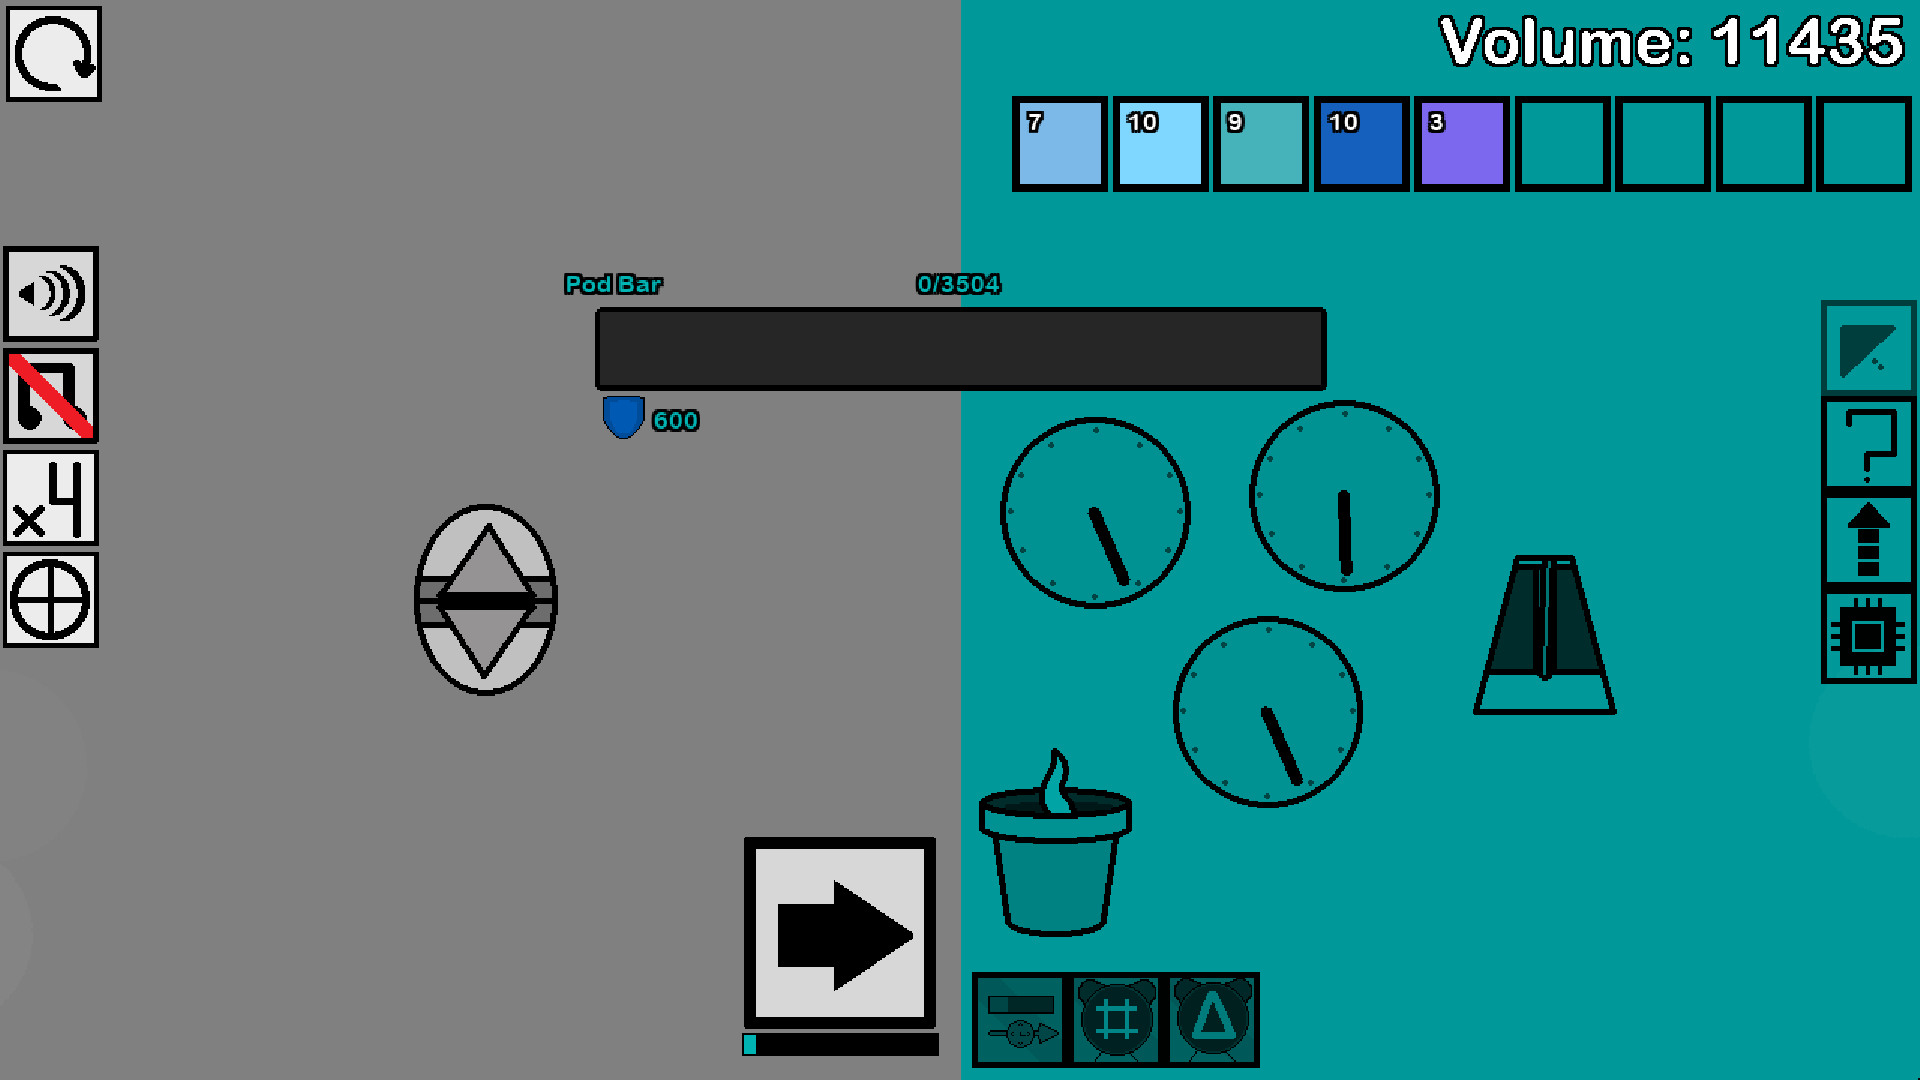
Upon starting your Bar playthrough, you will be met with an empty screen with a bar and a button. These are widgets. Widgets are one of the most important things in Bar as these are the main way you fill the bar. Think of them as little gadgets that you get to handpick to add to your bar-filling dashboard. They are all unique and bring different things to the table, but let’s not get too ahead of ourselves. Let’s finish the tutorial first.
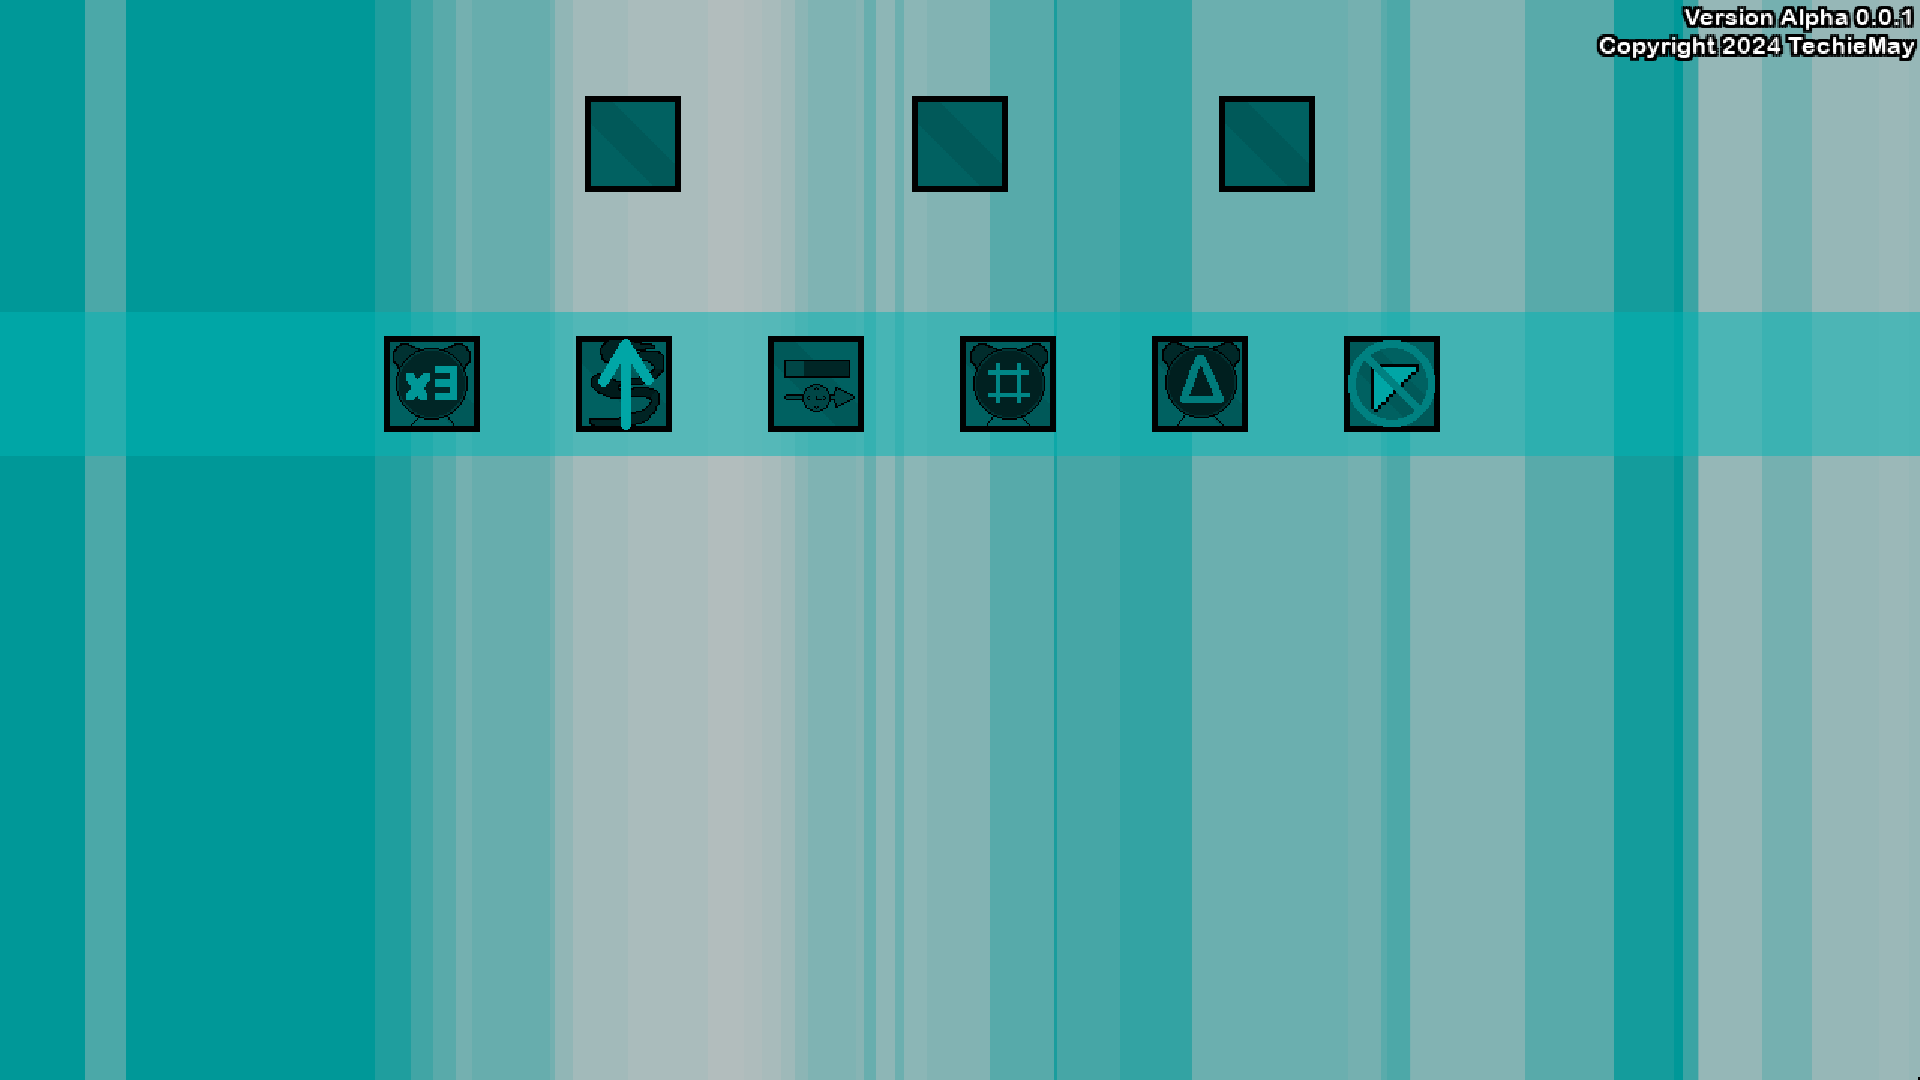
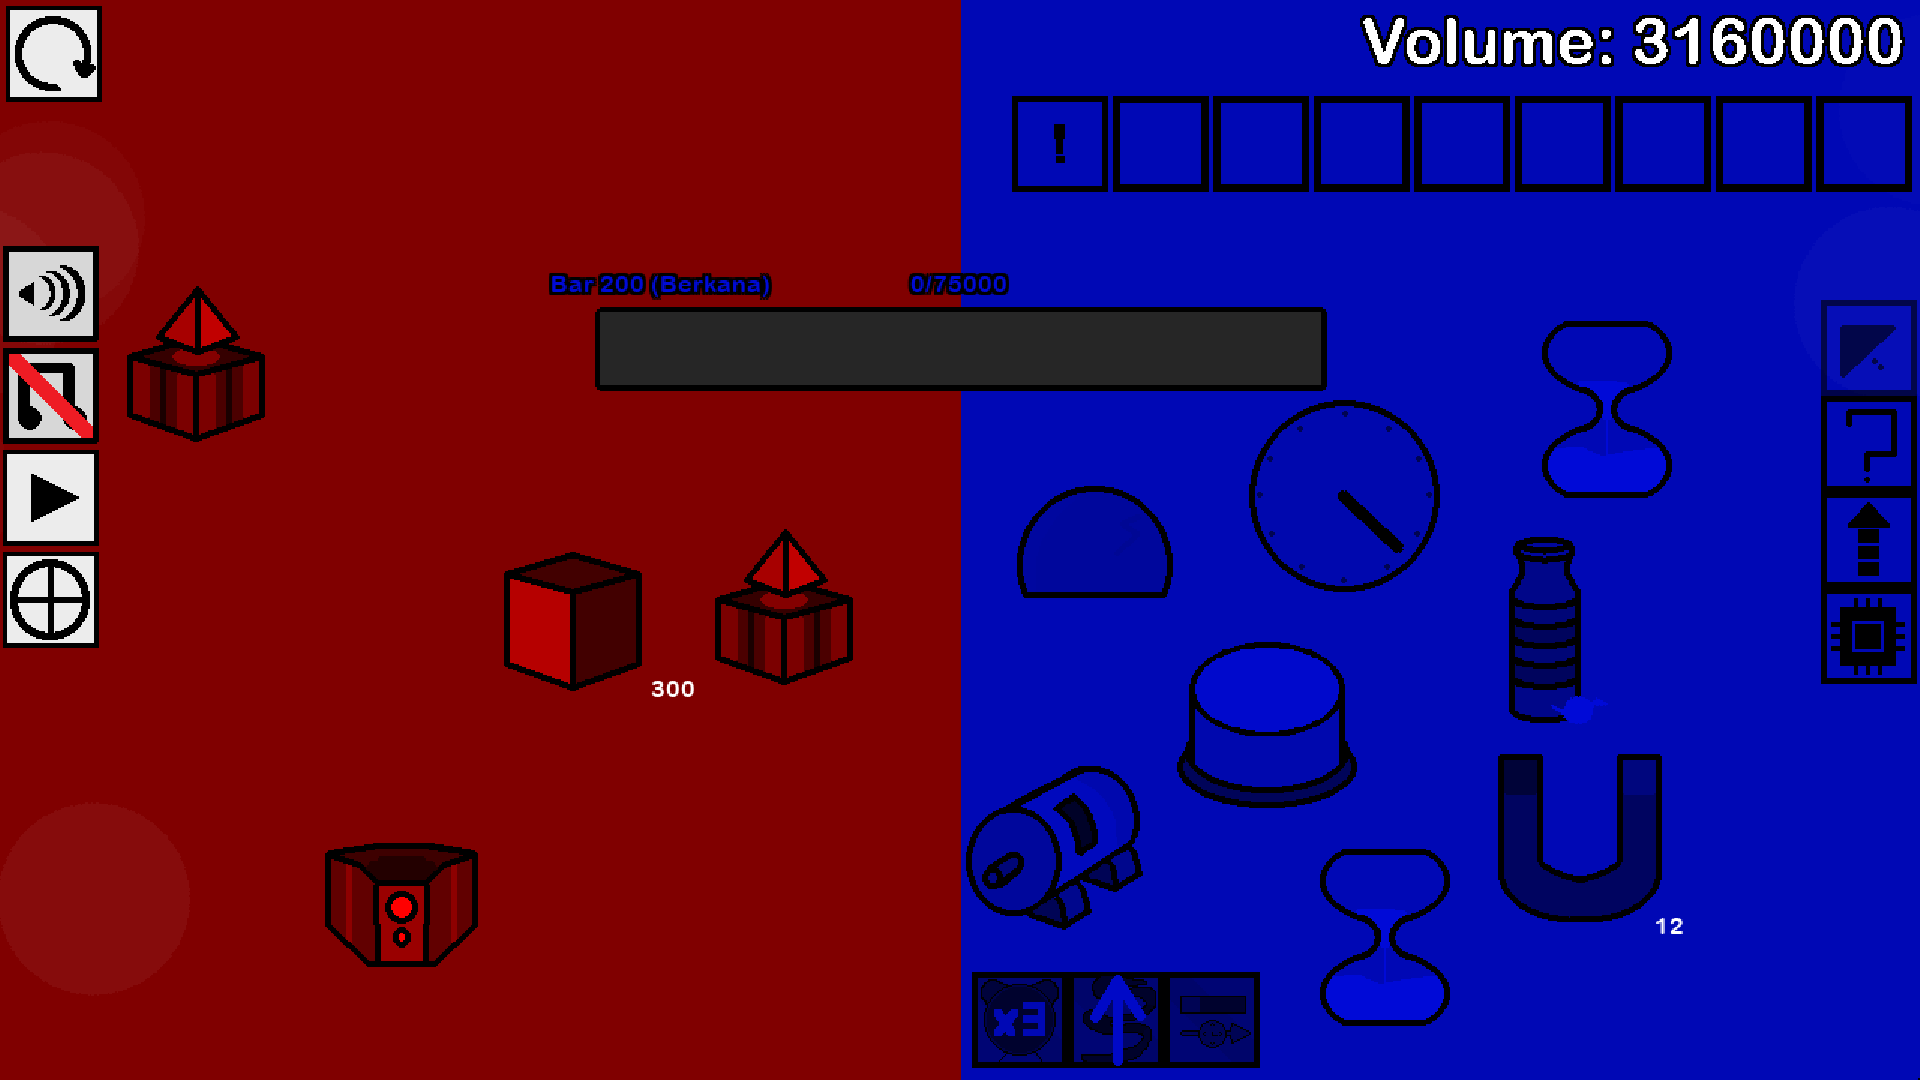
The game’s point-and-click system functions with different click modes that are in boxes on the left of your screen.

This icon is the pointer. It is for activating effects, using generic UI, and some other minor things. This is the mode you will be using the most.

This icon is the help icon. This icon can be used to hover over UI or widgets to reveal information about them.

This is the upgrade icon. This is solely used to upgrade things, whether it be in your run or outside of it.

This icon is used for managing your augments on your widgets. You don’t need to worry too much about this yet, but augments are effectively equippable items for your widgets that give them other effects. This icon reveals which widgets have what augments.
This section is there to give the player a show-don’t-tell tutorial on the core gameplay of Bar. The core gameplay is mainly filling the bar, getting upgrades, and receiving rewards.
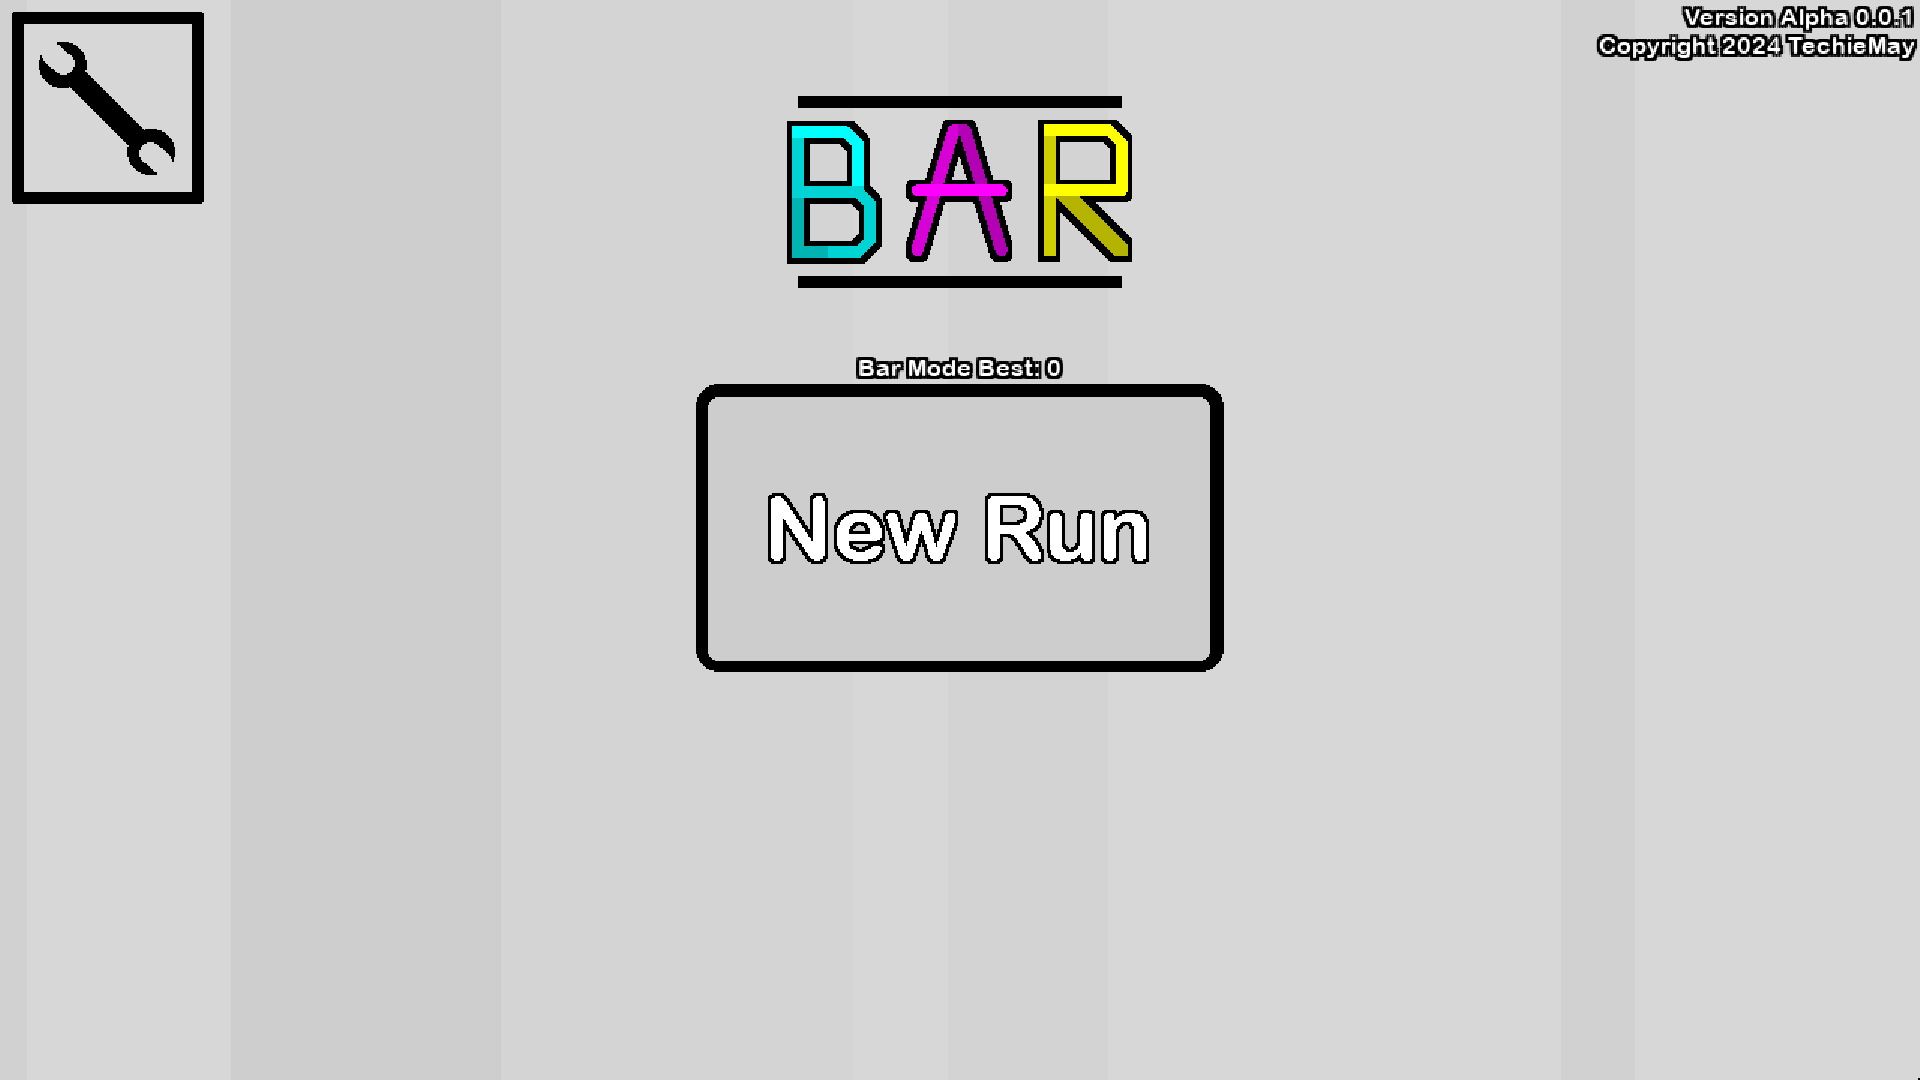
Basically, fiddle with this section until you are forced to restart your run and you are met with the title screen for the first time. This is the first time you are seeing the title screen so it will look rather bland and empty. However, the title screen will become more full as you make progress through the game.
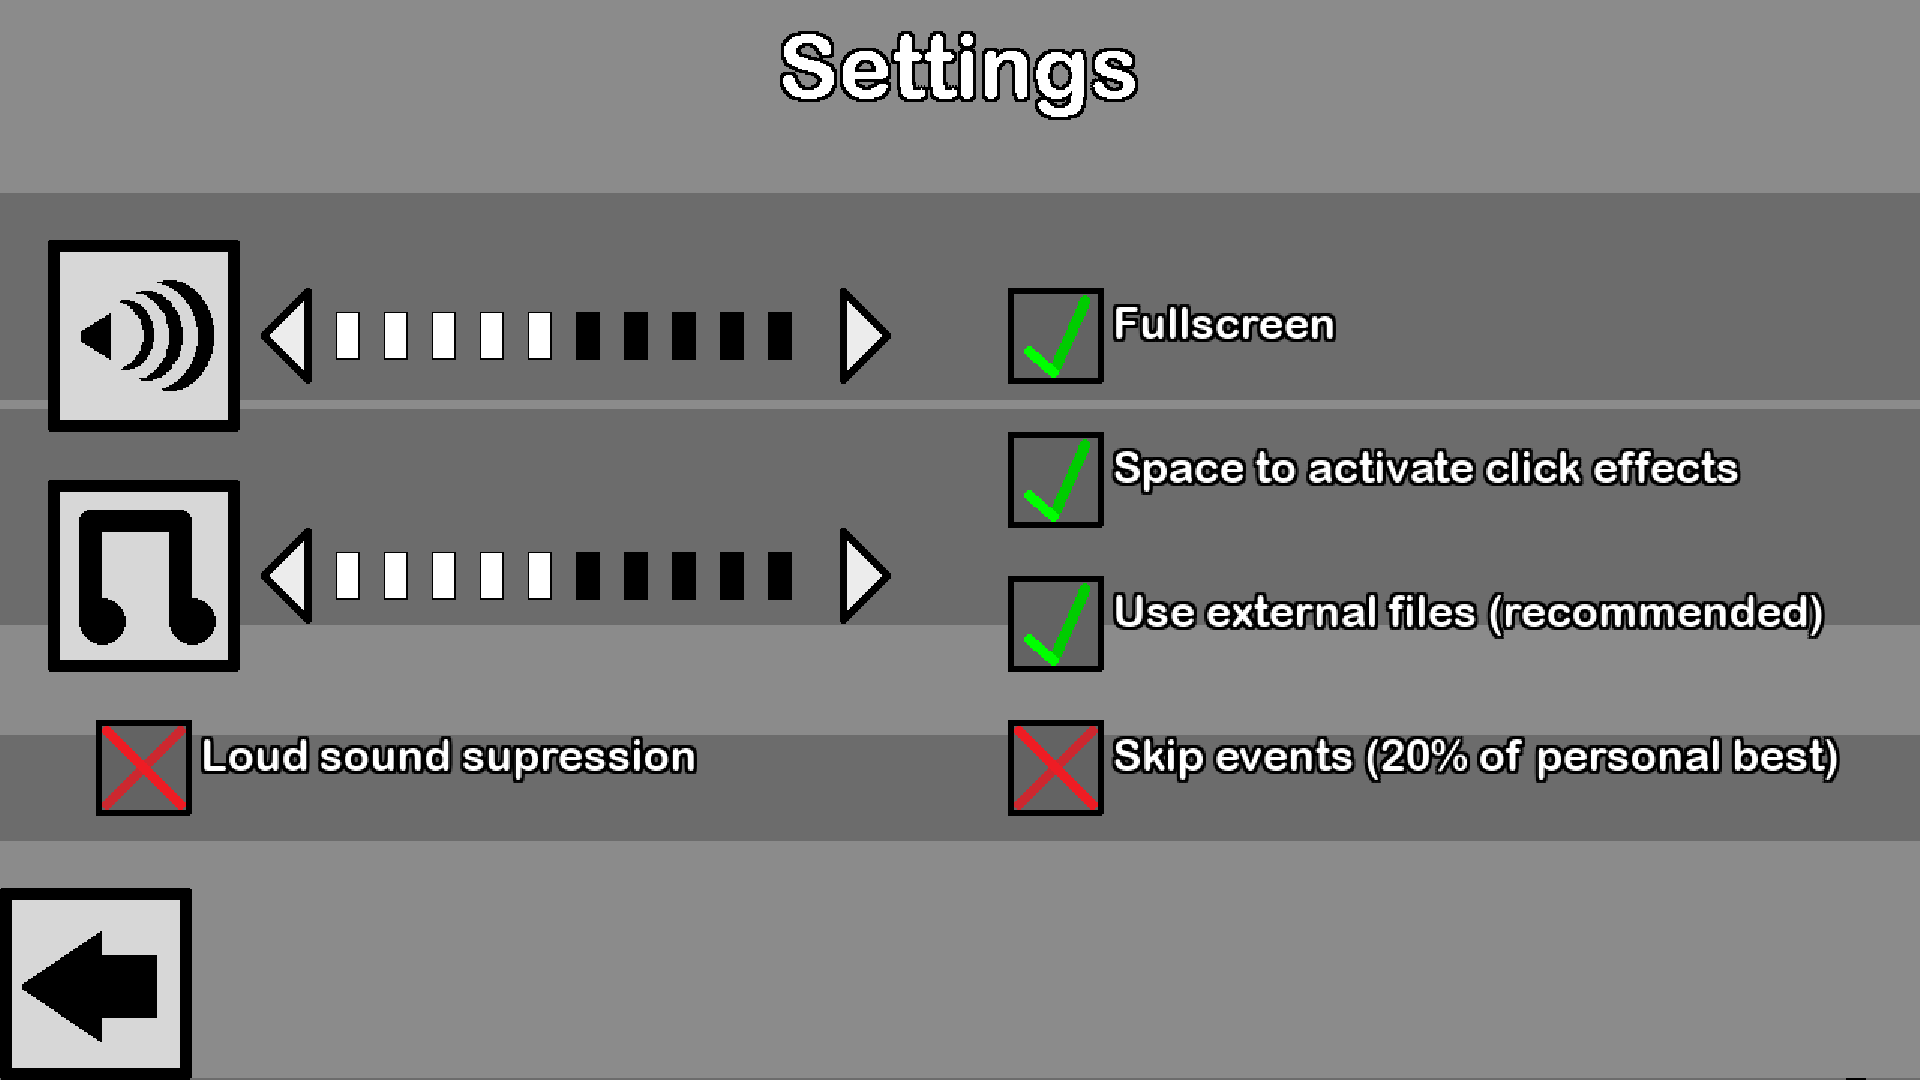
Before we continue, I do recommend visiting the settings page to adjust the settings to your liking, as you cannot change settings inside an active run. If you dislike repetitive sounds or want common sounds to be less loud so you can hear more important sounds, then enable loud sound suppression. The skip events setting is not something you will need to use for a long time, but it just makes it so you skip all events up to 20% of the furthest you’ve ever been in a run. This is mainly used for people later in the game who can instantly complete bars and just want to increase their AFK efficiency.
Do not disable external files unless you know what you are doing.With that said, press ‘New Run’ to start a new run!
First Run
Your goal in your first run of Bar is solely to unlock two core mechanics in Bar; the color changer and swatches. You don’t actually need to make it very far in your run in order to unlock these. In fact, you will be walled off very early by high level widgets in order to direct you to these new features.
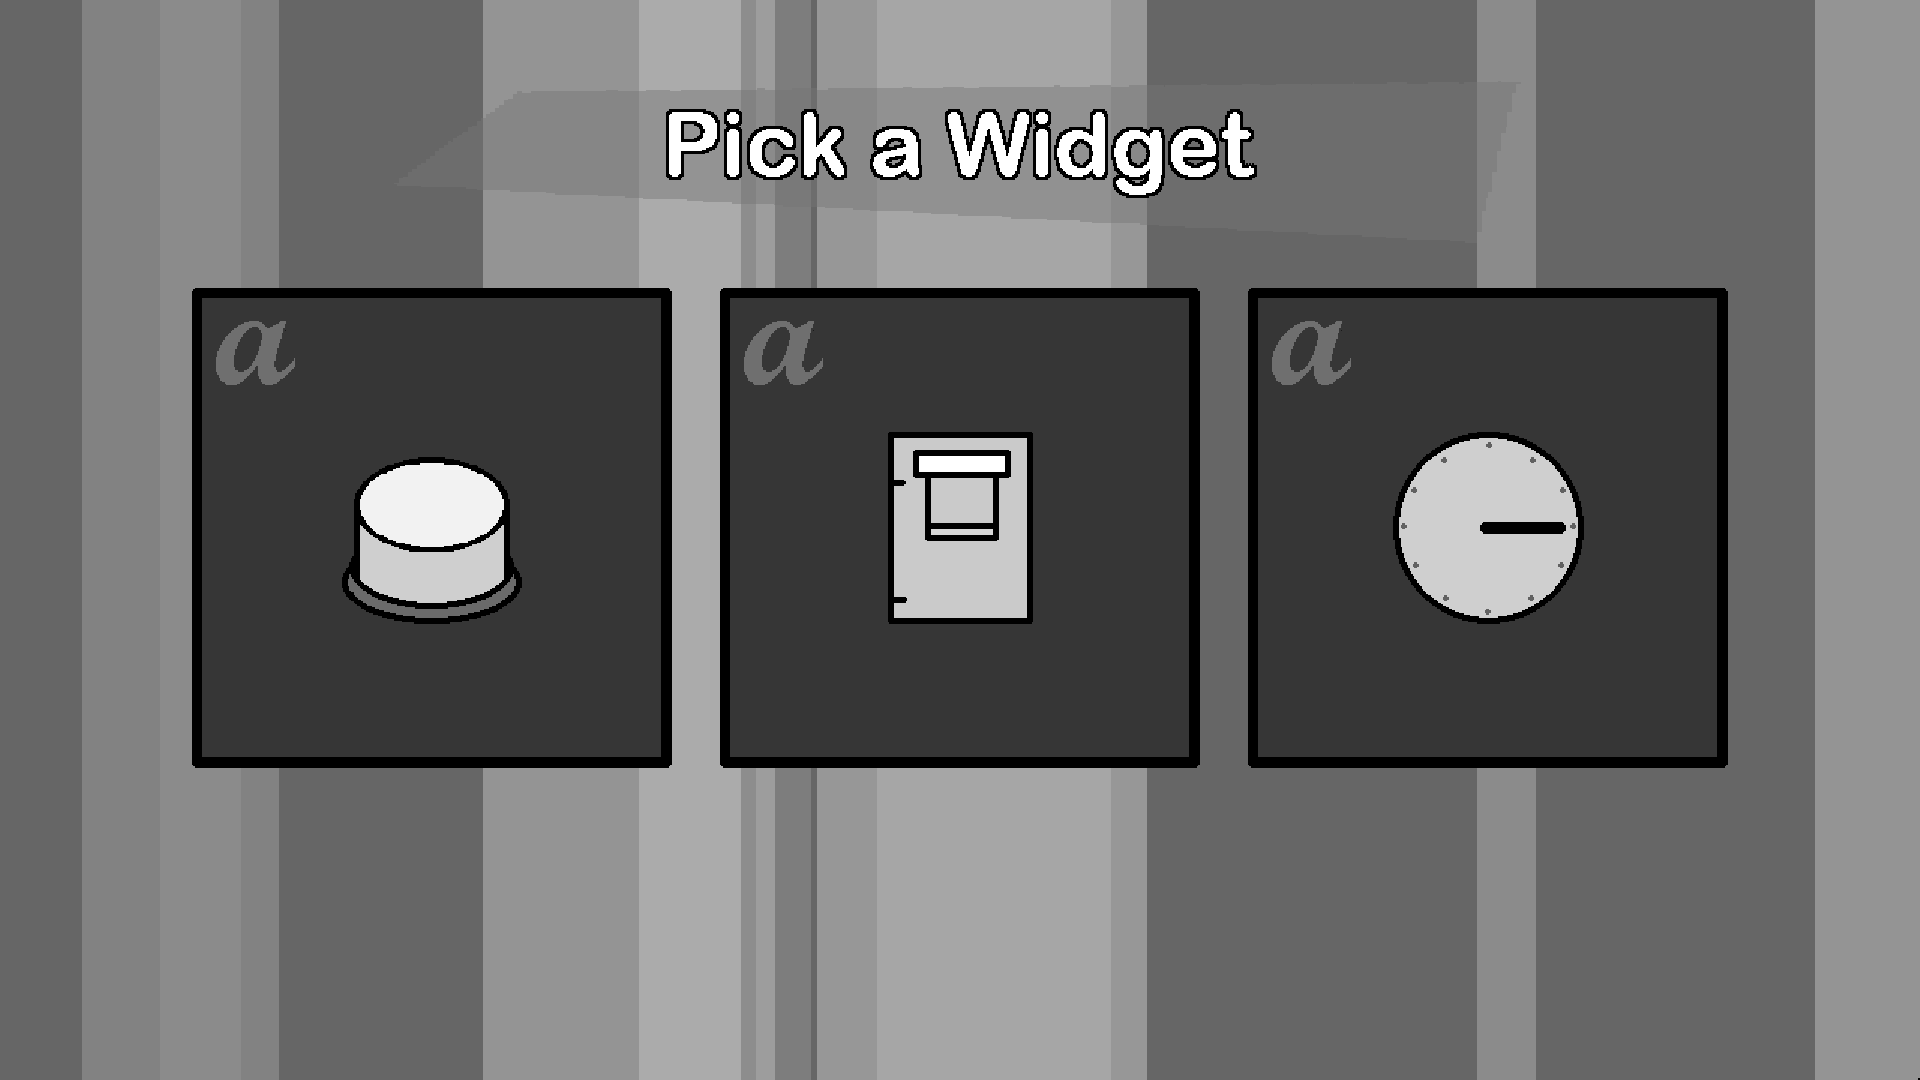
At the start of all runs you will be presented with the decision of your first widget in that run. I recommend you choose the lever for your first run to get it over with as quickly and easily as possible.
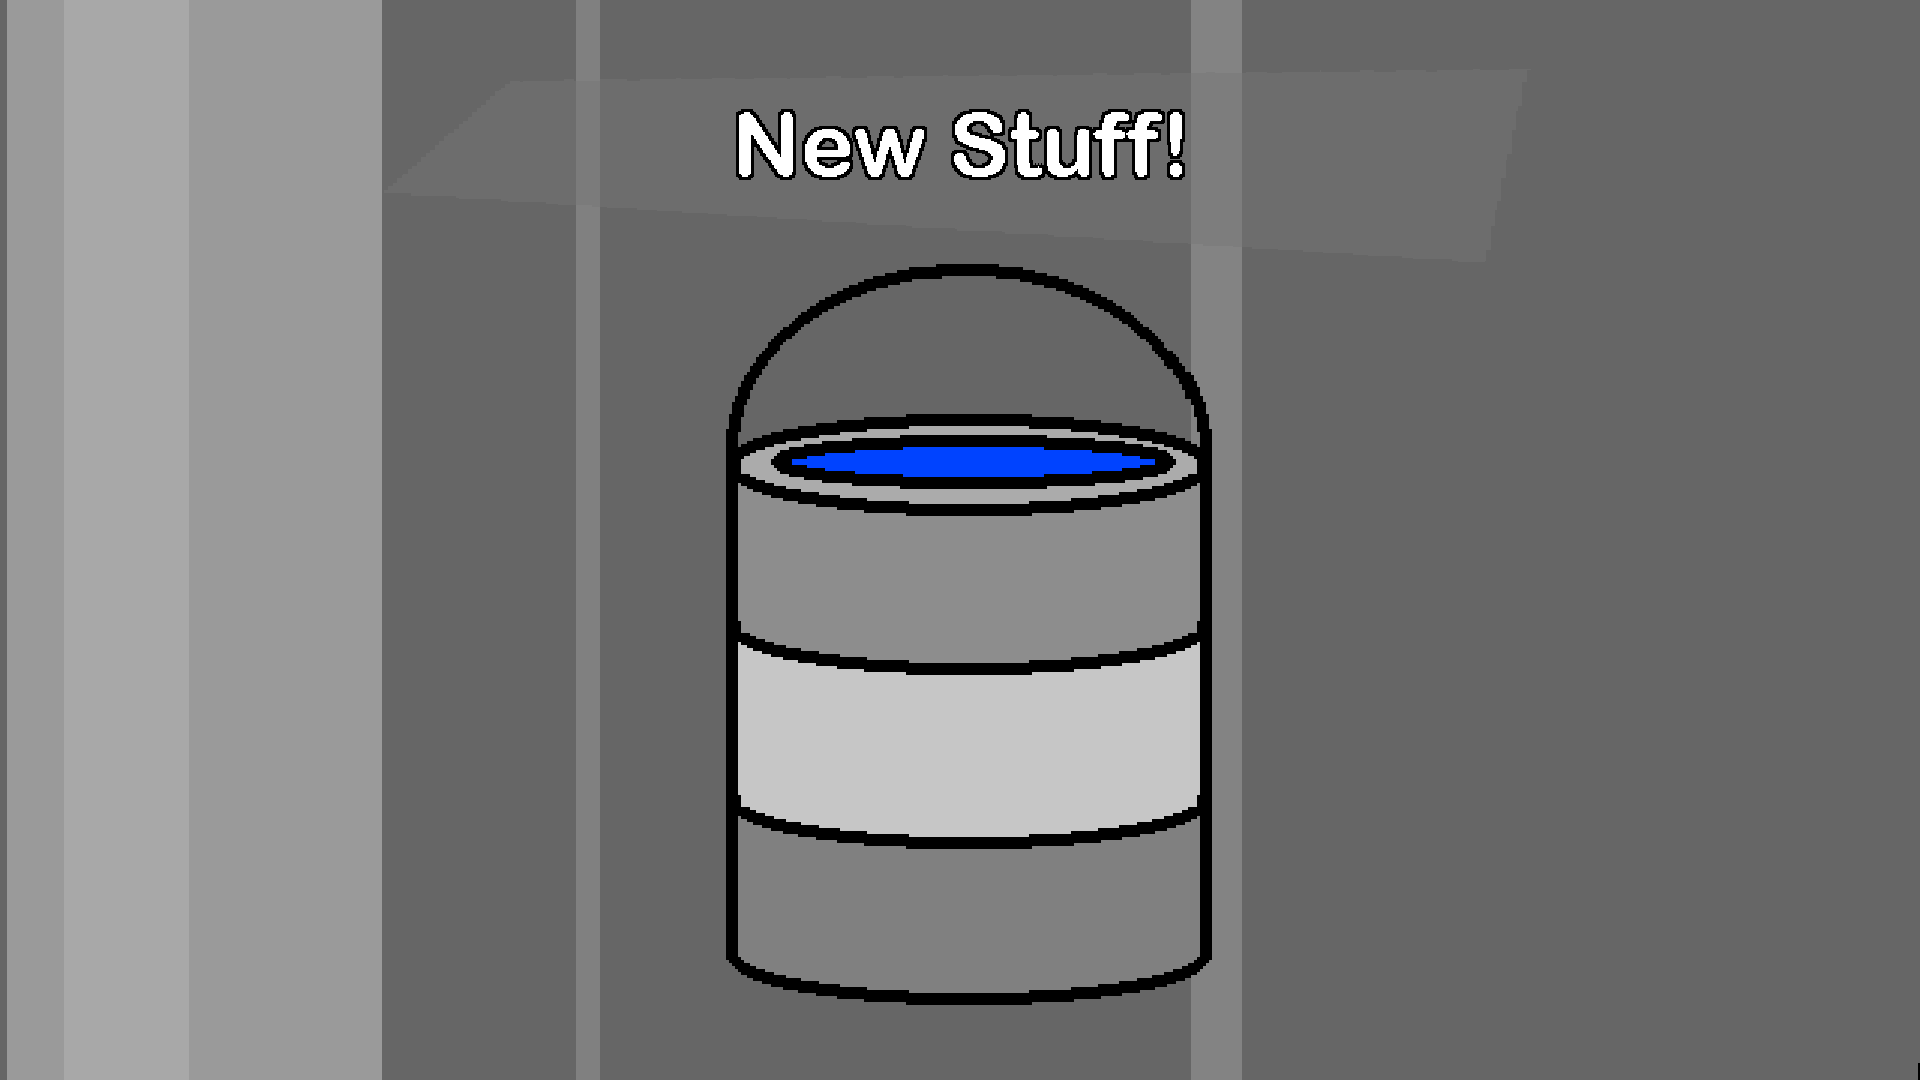
After you clear a couple bars you will be met with a bucket. This the color changer being unlocked. It will be available once you end the run. Don’t end your run yet, though, as you need to get to the second bucket. The second bucket contains the swatch collection. Once you get to the second bucket, you are ready to end your run. You will need these new features in order to start progressing through the game.
Main Colors
Upon ending your run, you will notice a new button on the main menu. The button has a bucket on it. This is the color changer. When you click it you will be presented with the three main colors of Bar. The colors are cyan, magenta, and yellow. You are now choosing the color that you want to play as. You can click two colors to combine them and play as the combined colors: red, blue, or green. You can also double-click the same color to play as cyan, magenta, or yellow. This makes six different colors that you can play as. Cyan, magenta, and yellow each have unique identities and play-styles. This means that red, green, and blue have play-styles that are a blend of their respective combined colors. The color identities are as follows:
Cyan
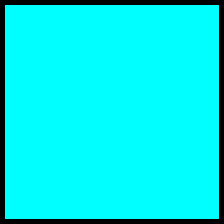
Cyan has a playstyle defined mainly by over-time effects and ticking. Cyan has a multitude of bonuses for ticking and applying effects to the bar.
Magenta
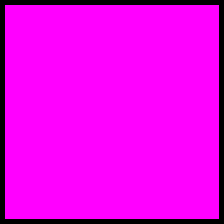
Magenta has a playstyle defined mainly by direct, powerful, single-target effects and clicking. Magenta has ways to create very large numbers through multipliers and combos.
Yellow
Yellow has a playstyle defined mainly by chaotic and random effects. Yellow has strange built-in strategies and ways to affect the game in different ways than normal, like volume manipulation.
After you choose the color you want to play, you will need to choose your skills. Skills are activated effects that go on cooldown for a set number of bars after you use them. Cyan, magenta, and yellow each have their own set of skills to pick from. You start with three in each color but more can be unlocked by playing with the colors you want to unlock skills for. When using a combined color you get to pick skills from both parent colors.
Swatches
The second feature that you unlocked is the swatches feature. This is the first way to permanently increase the power of your bar filling. You can access the swatch collection to the right of the color changer.
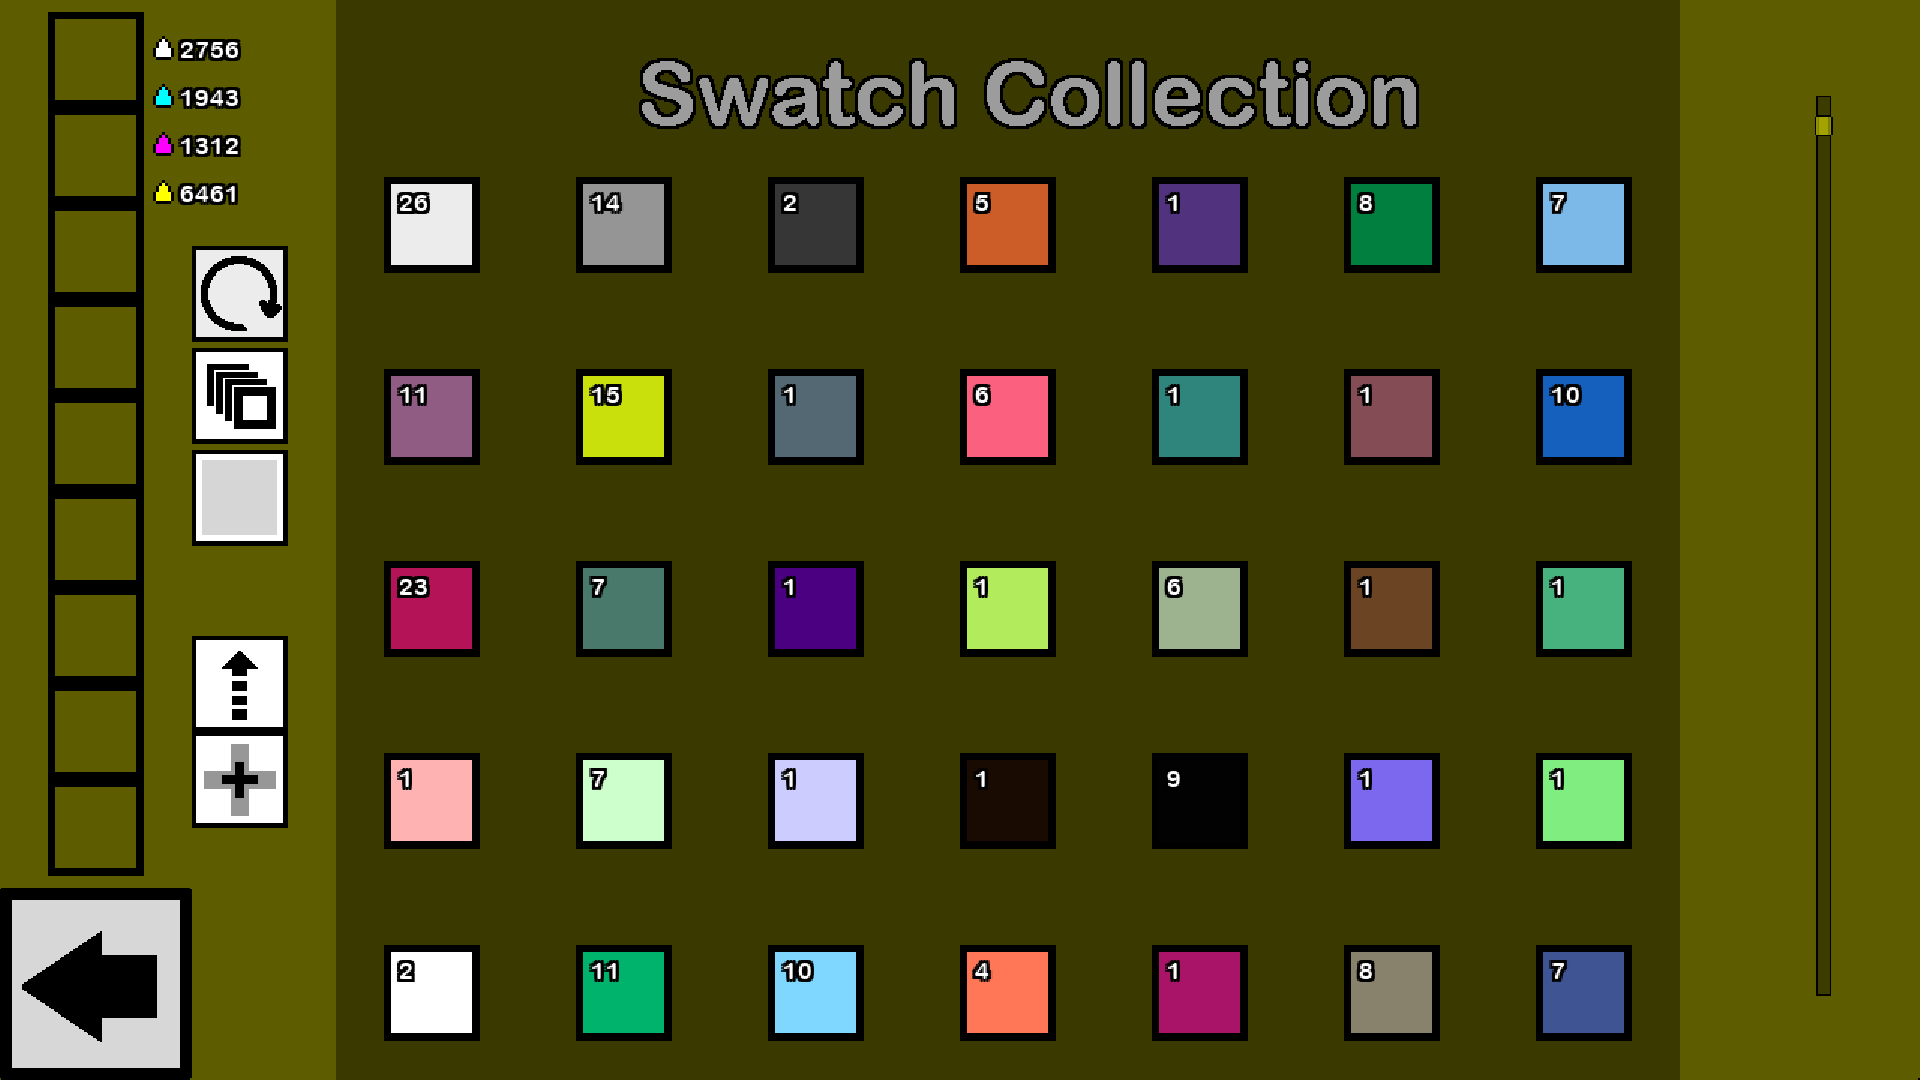
This is your swatch collection. A swatch is a specific color that you can add to your color palette. Equipped swatches give you bonuses during your runs. Each swatch has a unique effect, and you can equip up to nine swatches. You can only equip a swatch if the supported colors contain the color that you are playing with. All colors can use a swatch if the supported color is white. Your swatch collection will start empty, but you can accumulate swatches by using splotches (the four paint drops in the upper-left corner). You earn splotches by clearing bars. You can press the plus sign button to use some of your splotches to add a new swatch to your collection. You can also enter upgrade mode to use splotches to strengthen the effects of your swatches. By default, you will start with enough splotches to mix two swatches. Your first swatch will always be Nigh White. This color gives a flat bonus to all of your widgets. The second one will be a random swatch from the core set. Any swatches that you obtain this way will be from the core set. The core set is a set of swatches that are there to give you a base of different bonuses to experiment with different playstyles before you gain access to the other sets.
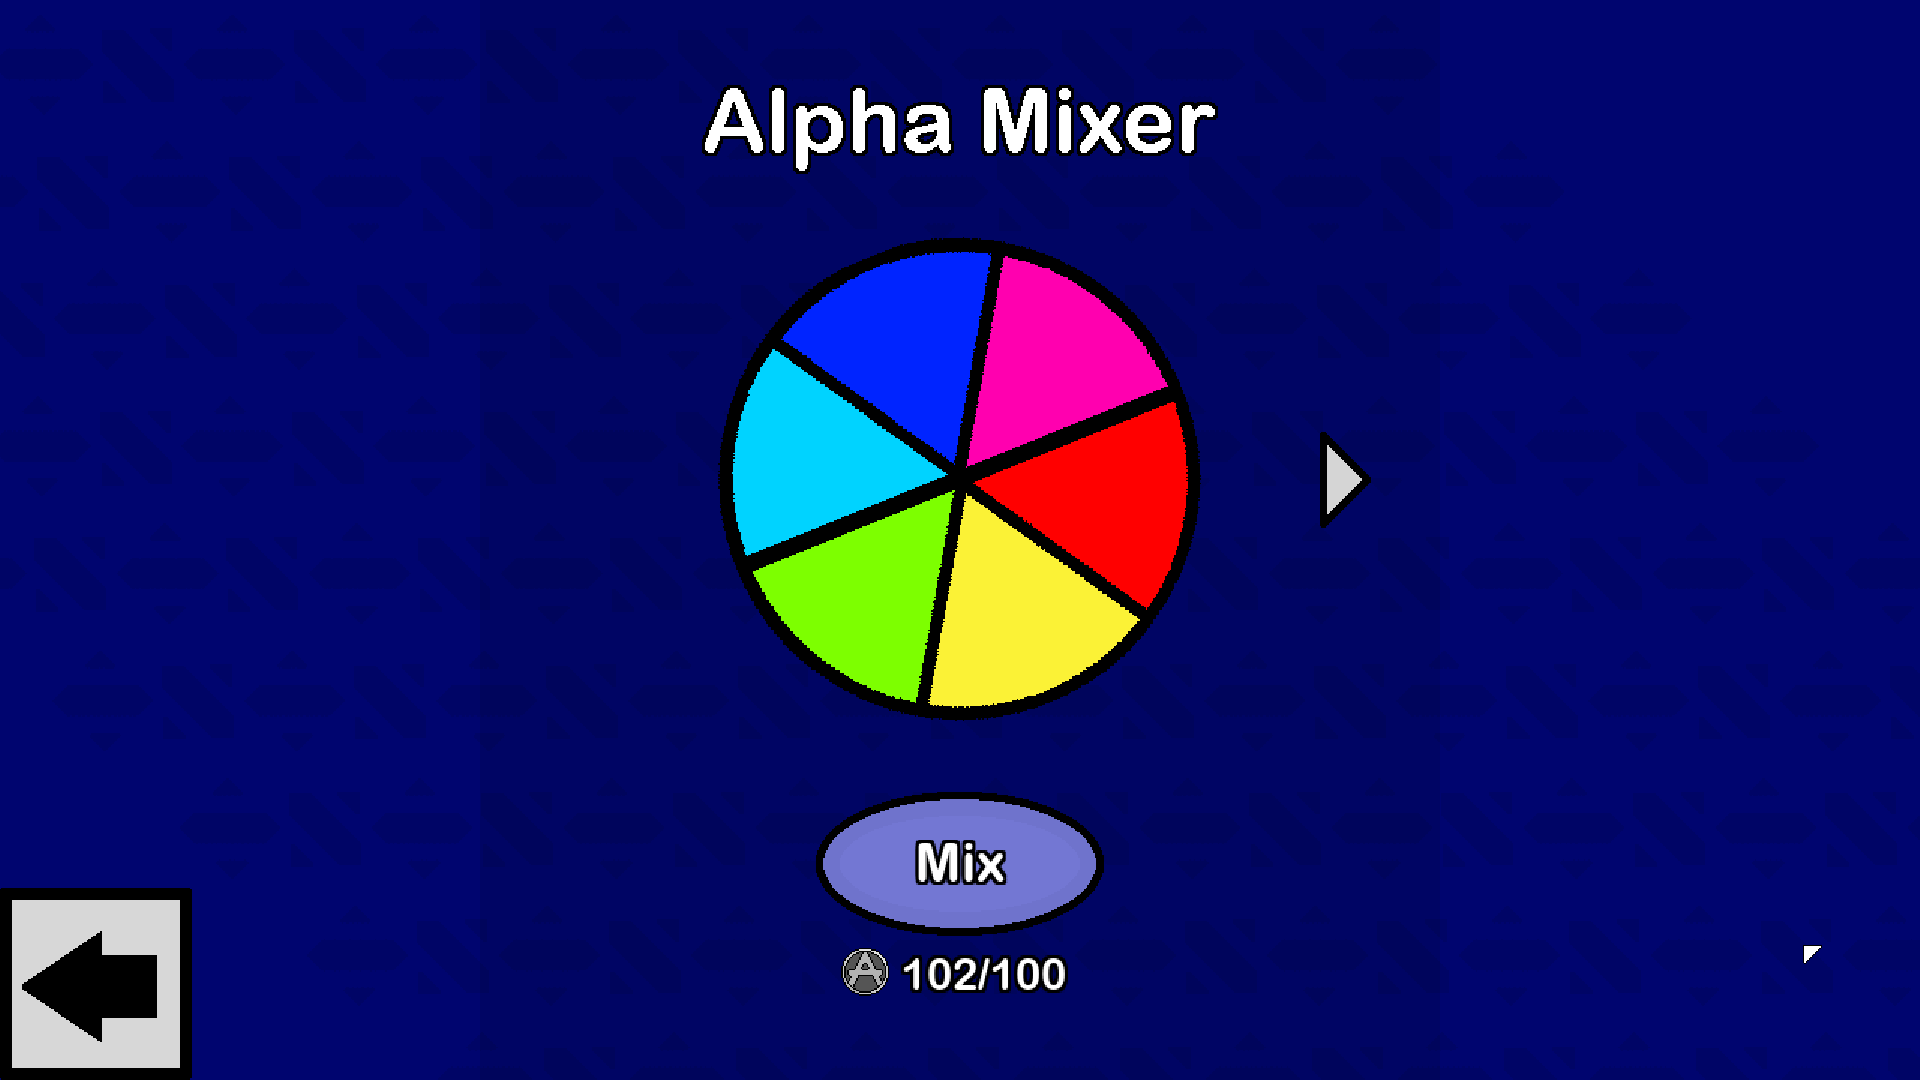
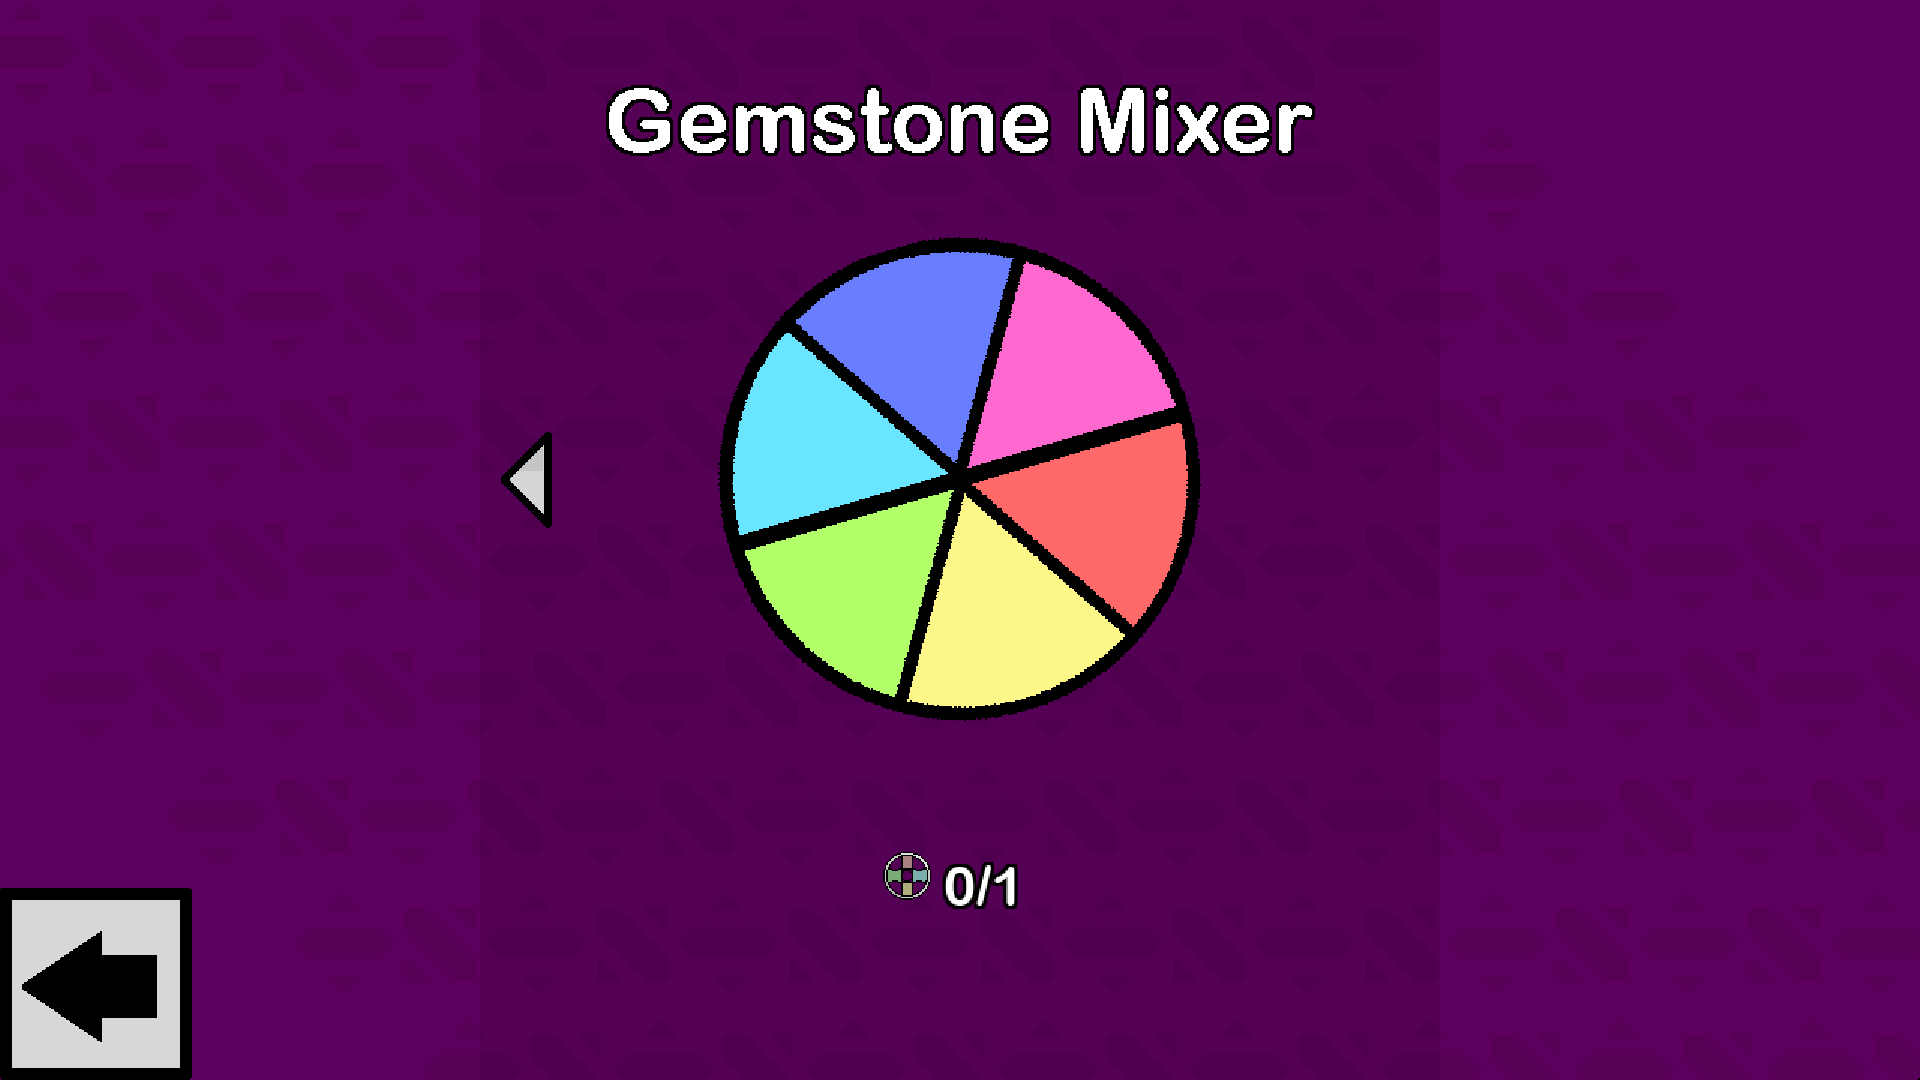
Once you complete the 49 swatch core set, the plus sign button will become enhanced. The plus sign button will now bring you to the swatch mixers. These let you get random swatches from different sets. These swatches are significantly harder to get than the core set swatches, as they use different materials to mix swatches. You can also get duplicate swatches from these mixers. Duplicate swatches are converted into extra splotches. These mixers get easier to use the further you progress through the game. Experiment with different swatches to see what kind of playstyle you enjoy!
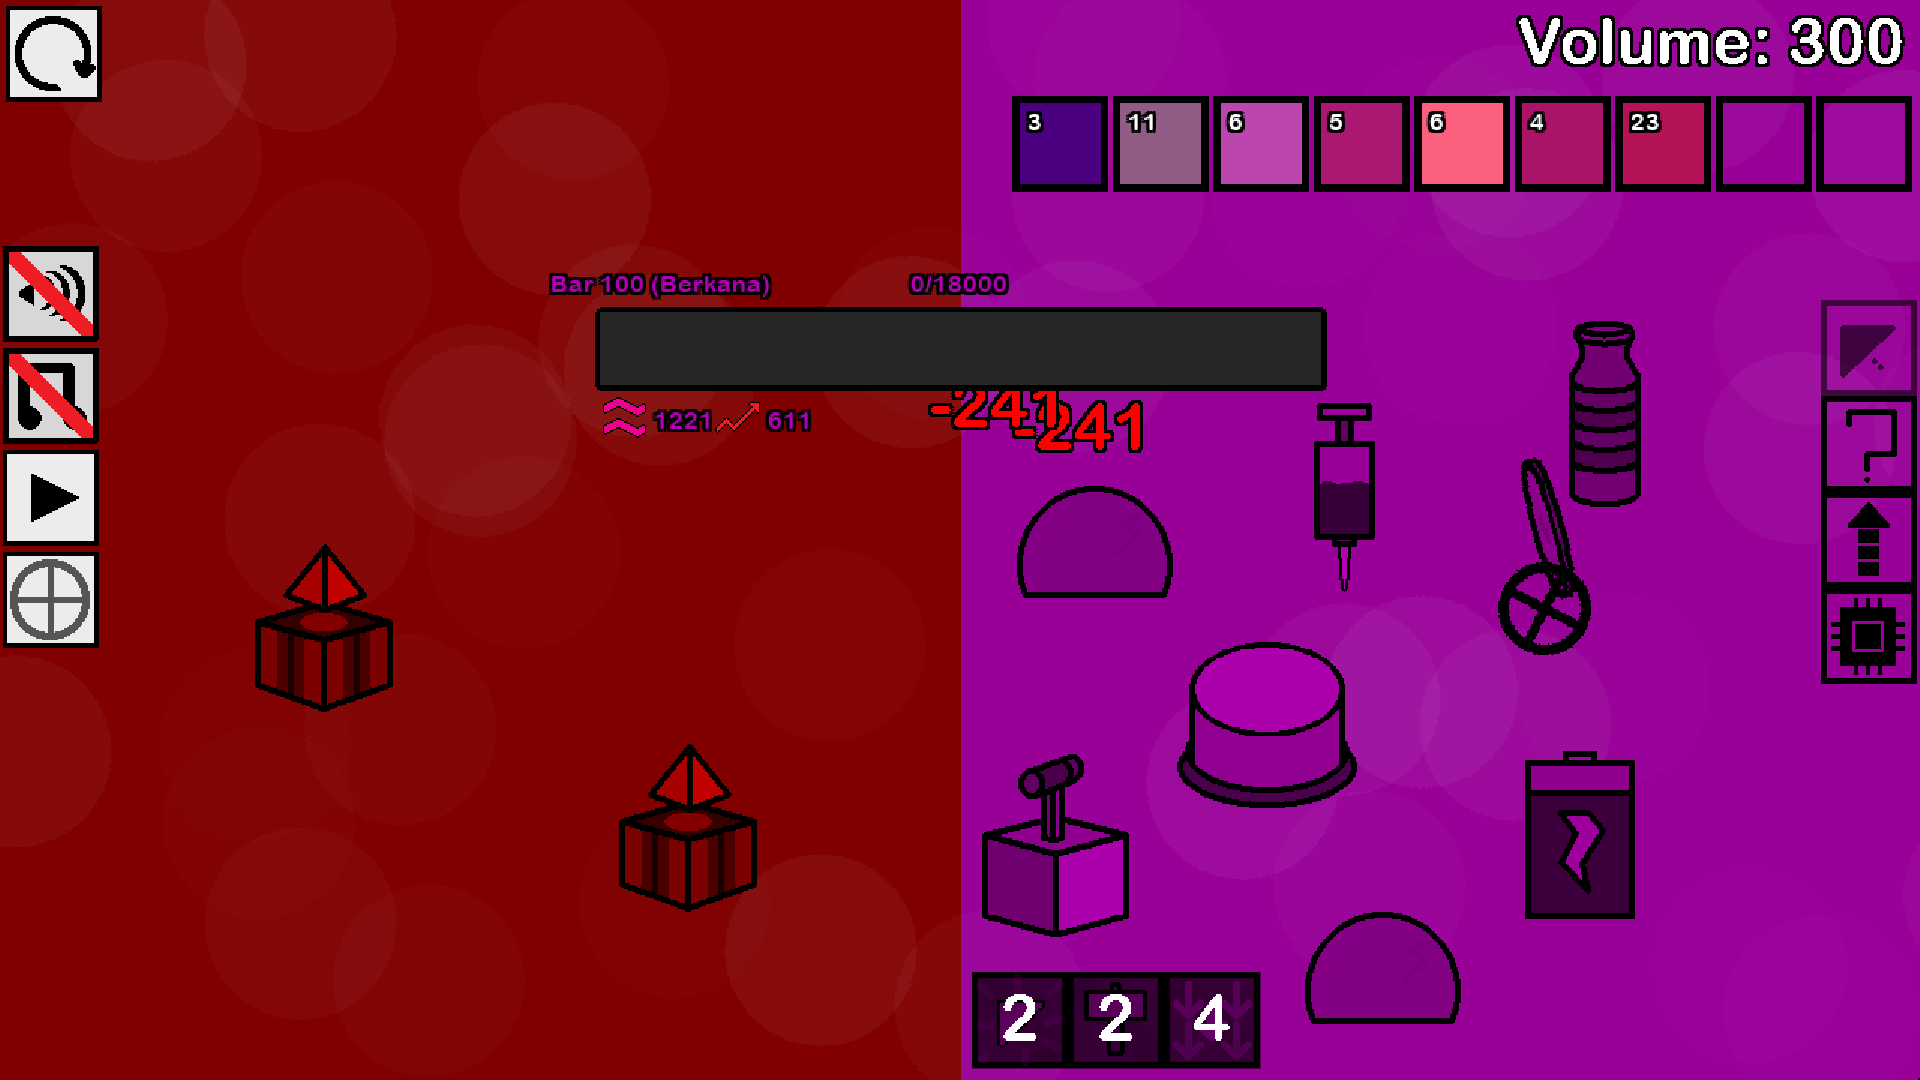
Reaching Bar 200
The first goal to reach is bar 200. Depending on a combination of your skill and luck, you could take many runs to reach bar 200, or you could make it on your first try. Regardless, you will make progress as long as you play. Upon reaching bar 200, you will unlock the machine menu. This is very important to your progression. In order to reach bar 200, you will need to pick widgets that align with your build and play strategically to ensure you don’t get out-scaled by opposing widgets. You will also need to make use of events in order to get to higher bar numbers.
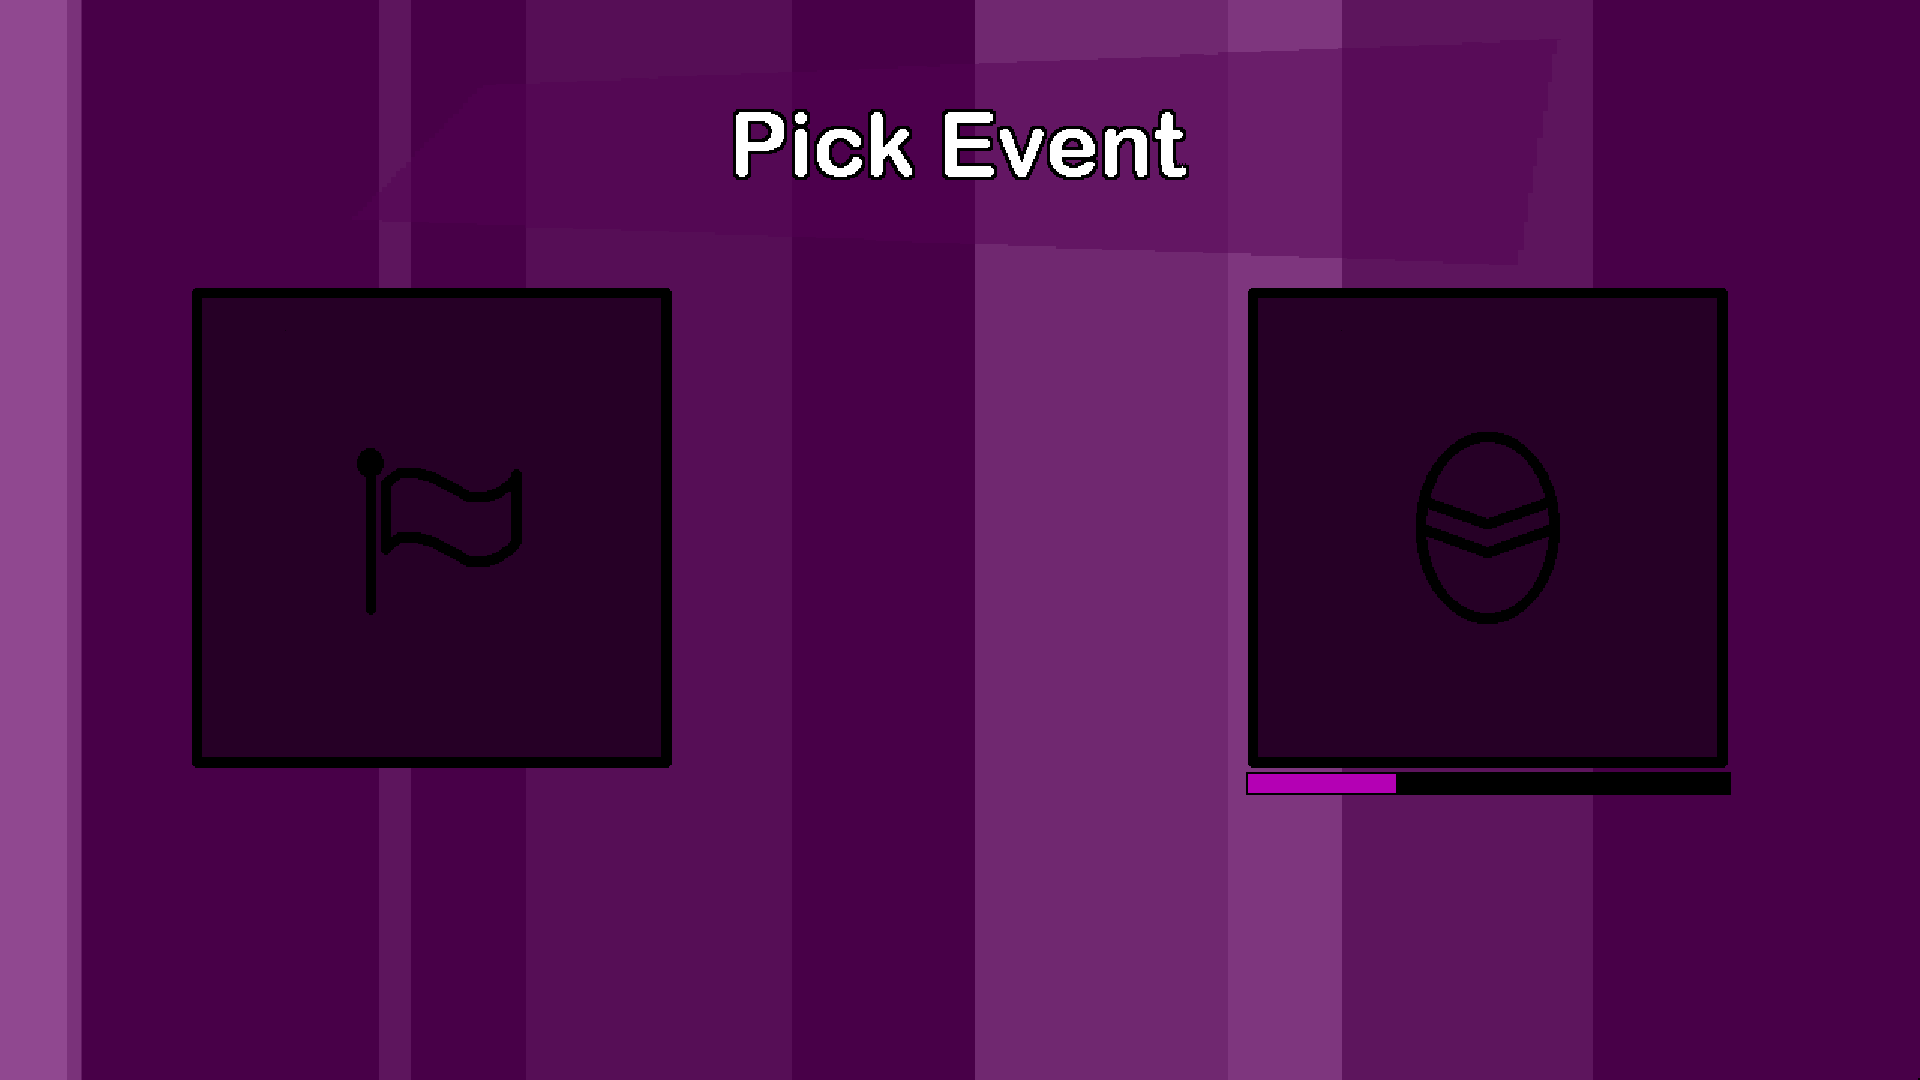
Every bar that ends with a 0 will grant you a choice of an extra widget. Every bar that ends in a 5 (with the exception of bar 5) will let you choose an event. Events are ways to strengthen your run. Most of the time you will pick between the allied bar event and the augment pod event.
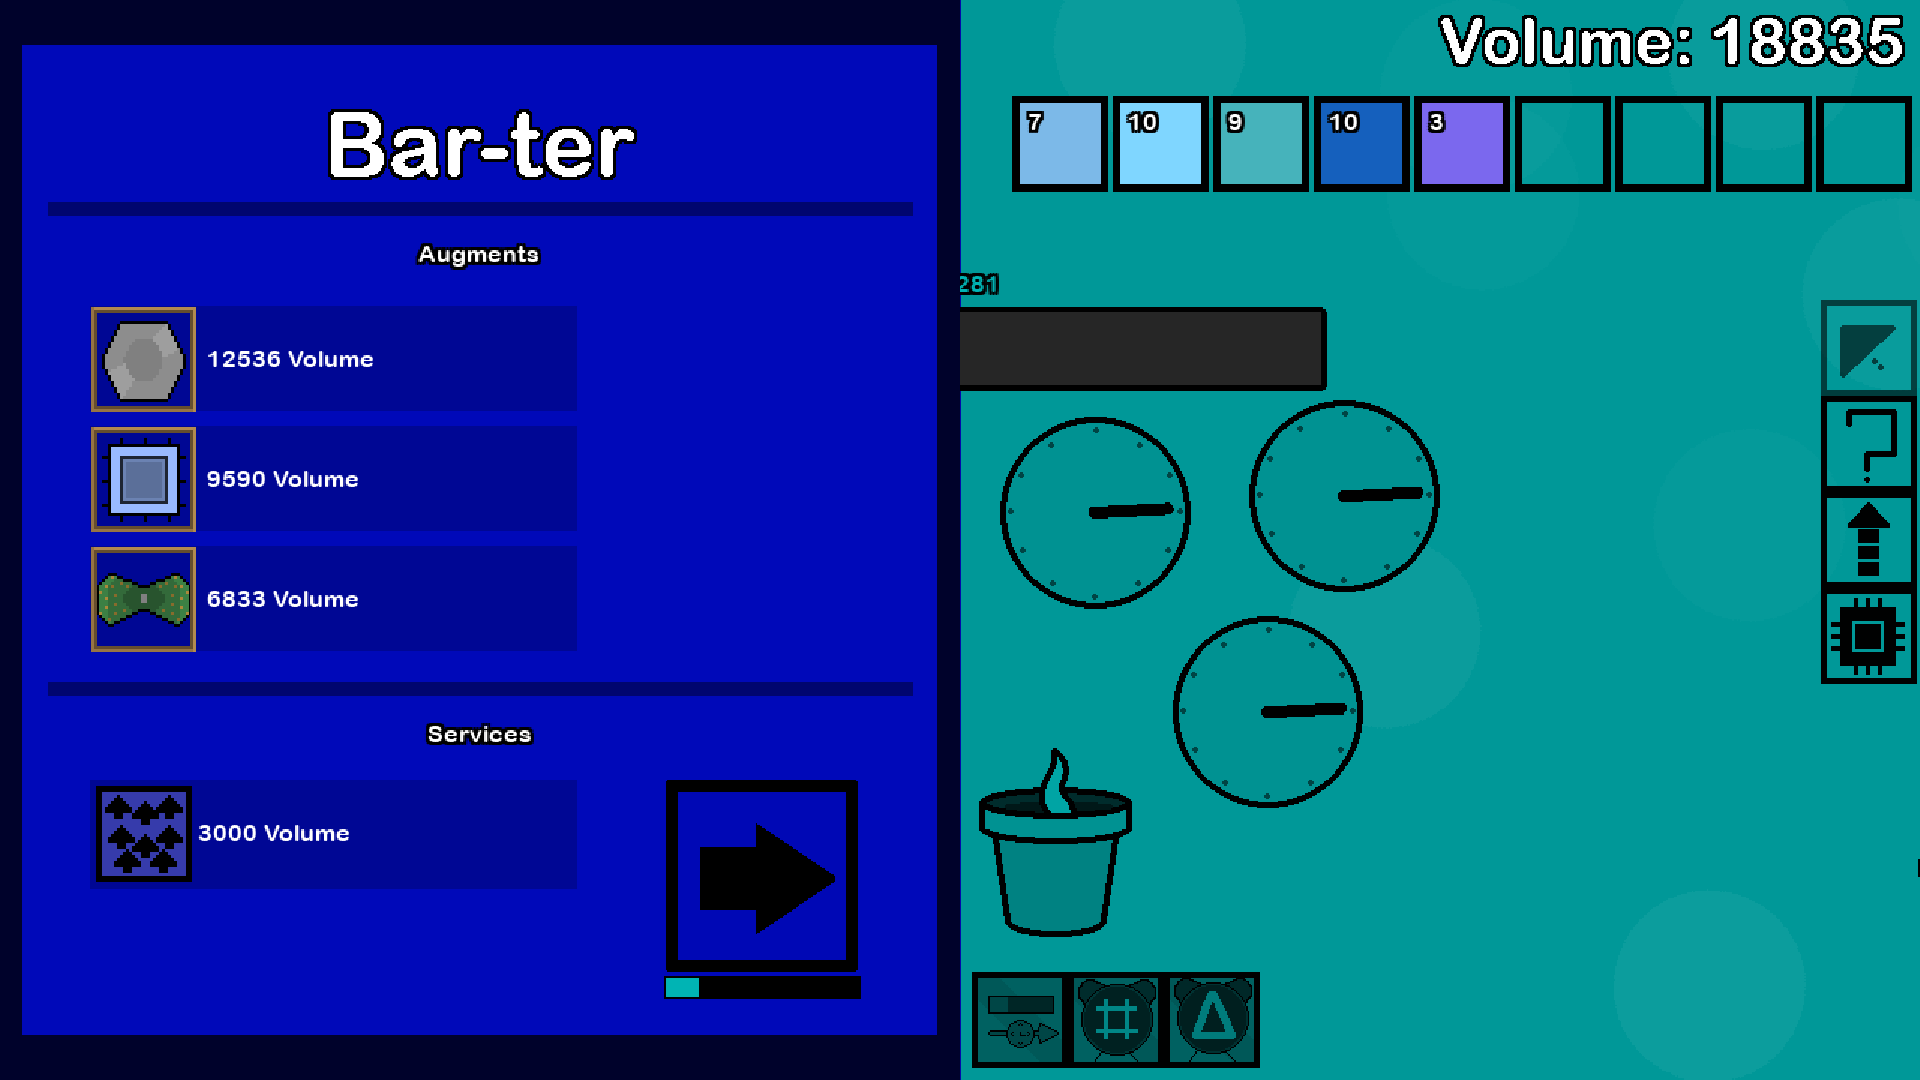
The allied bar event is effectively a shop. You can buy augments for varying prices and you can buy a unique service depending on the color of the allied bar. The services can only be bought so many times and are transferred between events. Augments will be different each time you visit an allied bar.
The augment pod event just gives you a random augment for free. The chance of you getting a common one is more likely than not.
Be aware that although each bar has a randomly assembled opposing force, some specific bar numbers will be the same each run. These bar numbers are usually harder than the average bar by a fair amount. Sometimes you will need to prepare in advance for these bars if you know they are coming, as they can get very difficult the further in you are on your run. There are four bars that you need to worry about on your way to bar 200.
Bar 50
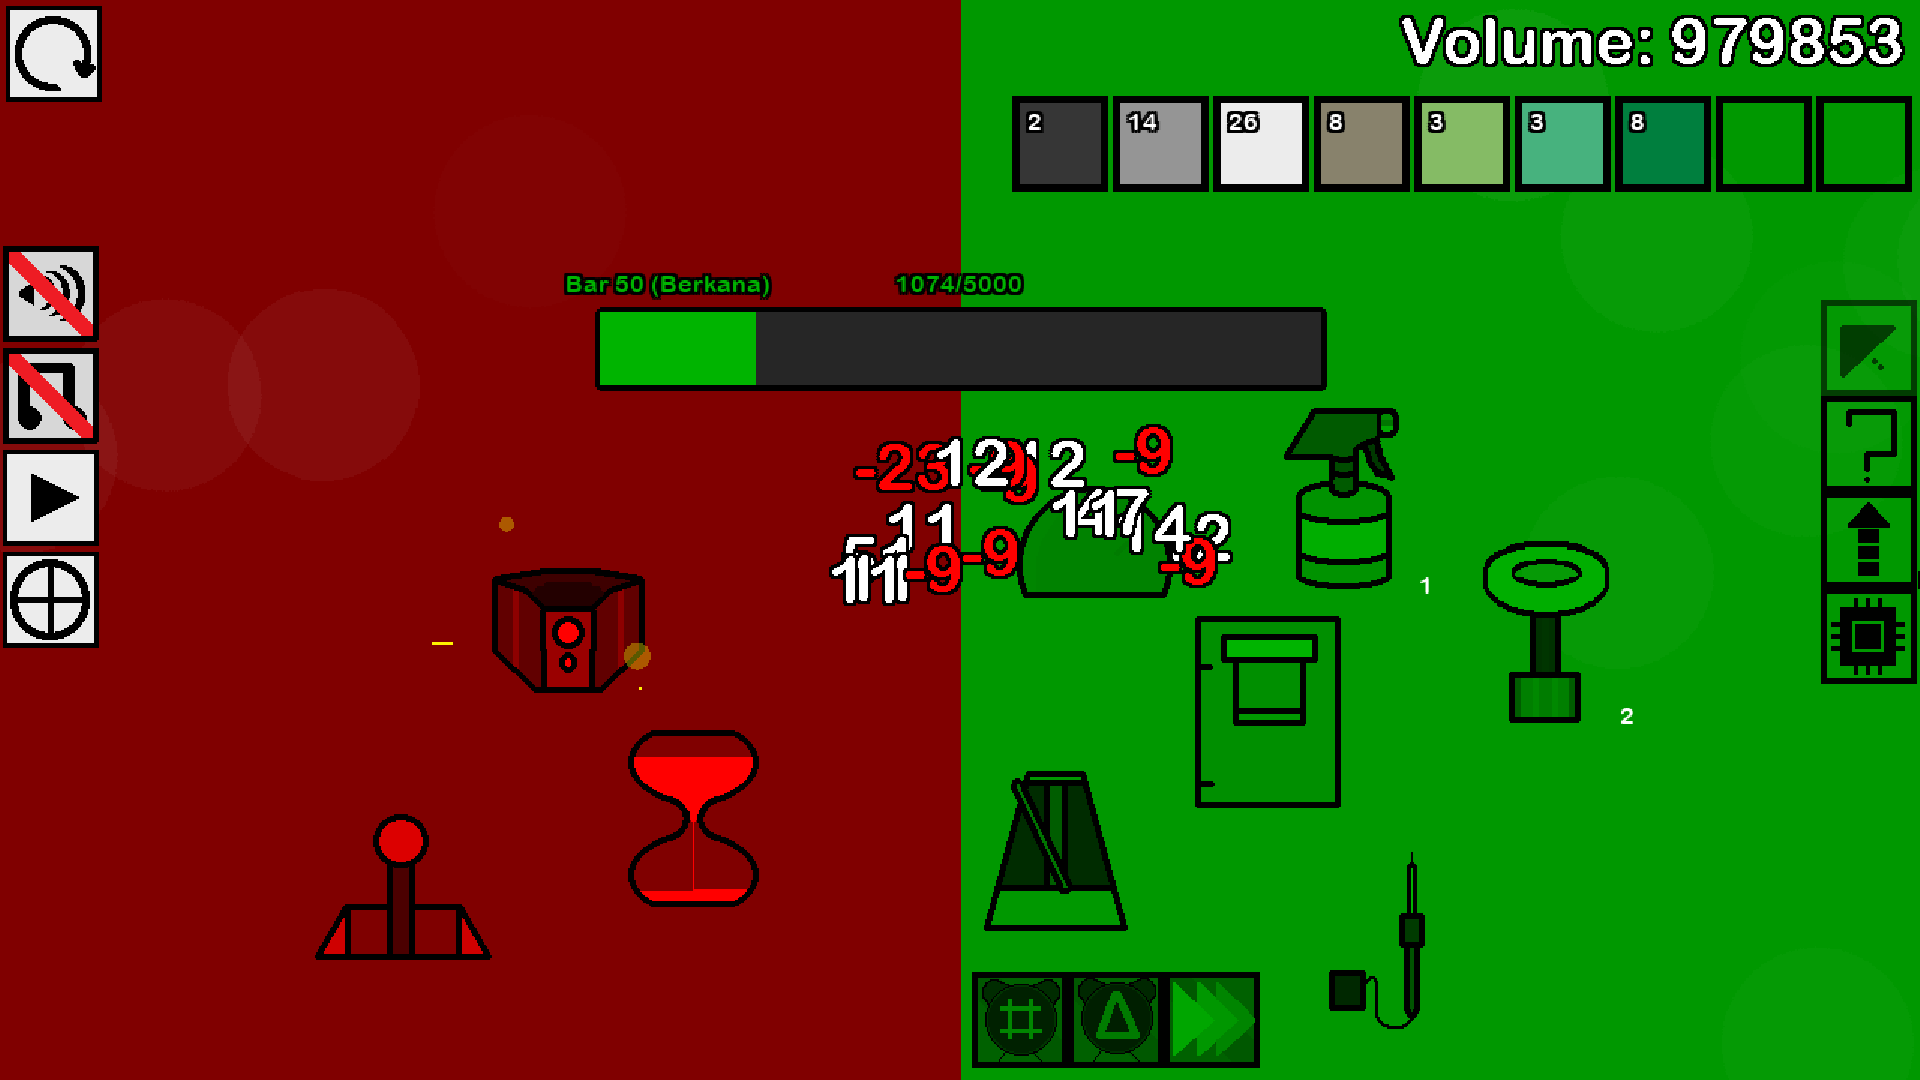
Bar 50 is the first bar that is dangerous and needs to be approached with caution. This bar is the first time you encounter something that can destroy your widgets. The invalidator widget is a maroon-exclusive widget that will pick two widgets and destroy them if they are lower level than it. Although, the invalidator is only level 10. You can protect yourself by upgrading your key widgets to level 10. Widgets that are destroyed will come back on the next bar.
Bar 100
Bar 100 is only dangerous due to the sheer power of the widgets on the bar. There are two hypervalue instigators on this bar. These are maroon-exclusive widgets that are indestructible and simply deplete the bar by very large amounts. You just need to make sure you have a solid base of widgets and a strategy when going into this bar in order to outpace the opposing widgets.
Bar 150
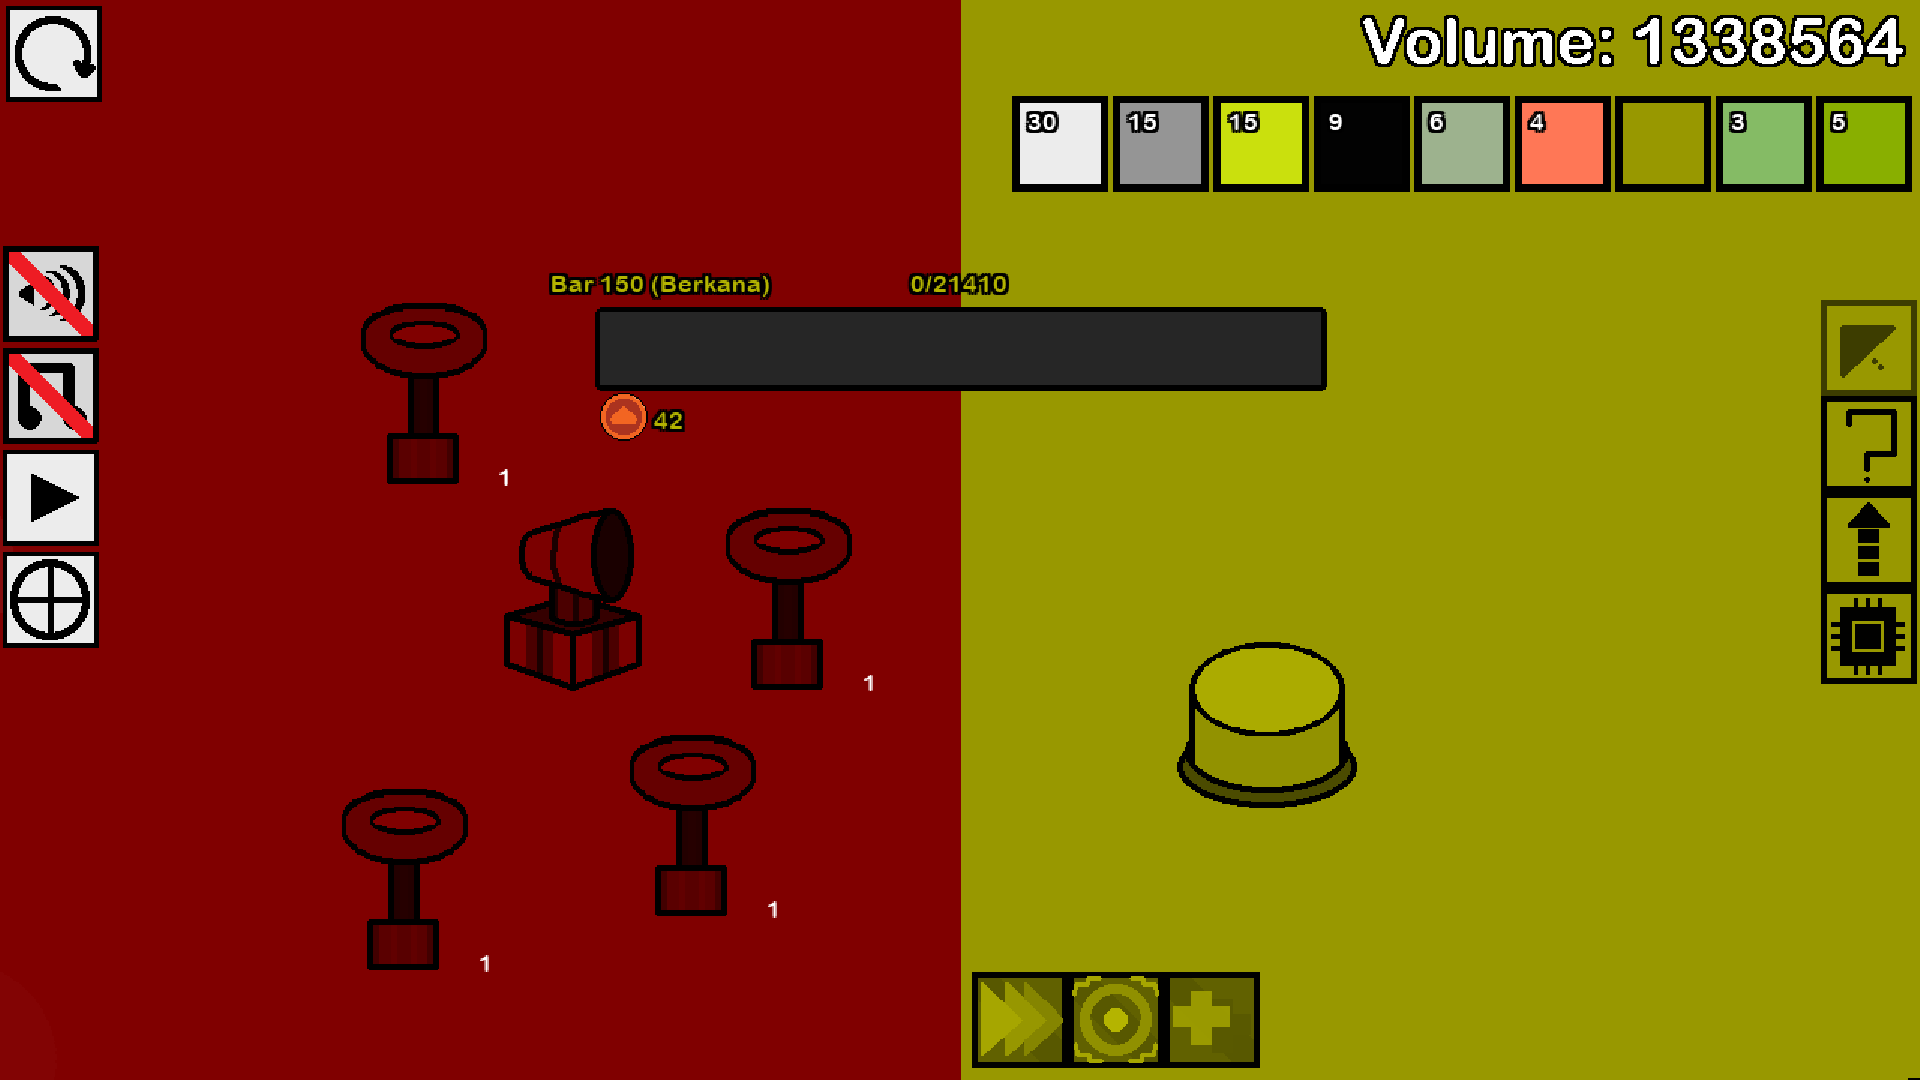
Bar 150 contains a lock-on discharger. This maroon-exclusive widget will destroy your lowest level widget every 30 seconds. To combat this, purposely keep your less useful widgets underleveled. Tesla coils will try to slow your progress as well.
Bar 200
Bar 200 is the bar where you unlock machines. This bar contains a few dangerous widgets. The most dangerous, however, is the allender. The allender will charge itself over time. Once it is charged to 10,000, it will destroy all widgets on the bar. The goal is to have enough force to complete the bar before this happens, or to have a way to get around destruction.
Congrats! You have unlocked machines, a vital mechanic to progressing in Bar.
Machines
Machines are massive boosts that you can get by building them with different materials acquired throughout the game. Different materials appear on different bars and become more plentiful the higher the bar number. Machines can also be upgraded to enhance their effects.
Power Chamber
The Power Chamber is a machine built from gears. Gears are a material you get from the Berkana bar. The Power Chamber increases the size of all positive values that fill the bar. The amount that these numbers are increased by depends on the level of the machine and the totaled levels of every swatch you own. This makes putting levels into every swatch useful, regardless of what the swatch does.
Caliber Tower
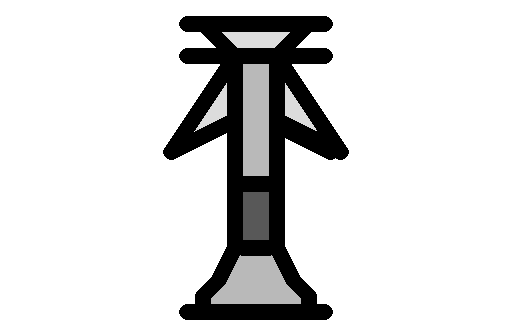
The Caliber Tower is a machine built from pillars. Pillars are a material you get from the Dagaz bar. This machine simply increases the level cap of your widgets depending on its level.
Antimatter Dynamo

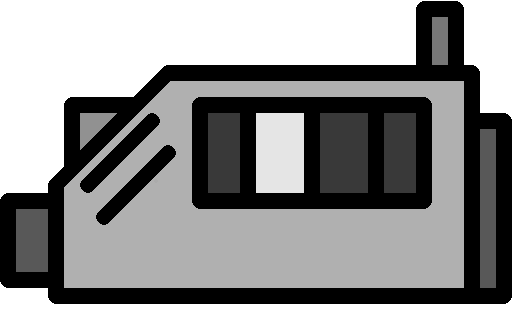
The Antimatter Dynamo is a machine built from nails. Nails are a material you get from the Berkana bar at very high bar numbers. This machine increases the size of all positive values that fill the bar and are unrelated to widgets. The amount that these numbers are increased by depends on the level of the machine and the total number of 100s in your personal bests for each type of bar. This makes getting to high bar numbers give you permanent buffs.
Liquid Promoter
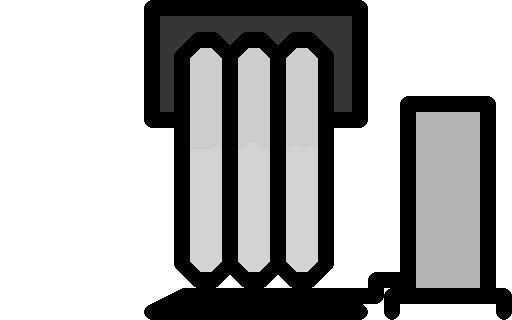
The Liquid Promoter is a machine built from paint bottles. Paint bottles are a material you get from the Algiz bar. This machine simply increases the amount of splotches you get when completing bars, depending on its level.
Reaching Bar 500
With machines unlocked and a fair amount of levels put into swatches, you should be able to reach bar 500. Bar 500 is a monumental goal to reach because it will unlock the second type of bar, Dagaz. Dagaz has materials that are used to increase your widgets’ level cap. This is crucial to extending the longevity of your runs. Below are the bars you need to be aware of on your way to bar 500.
Bar 300
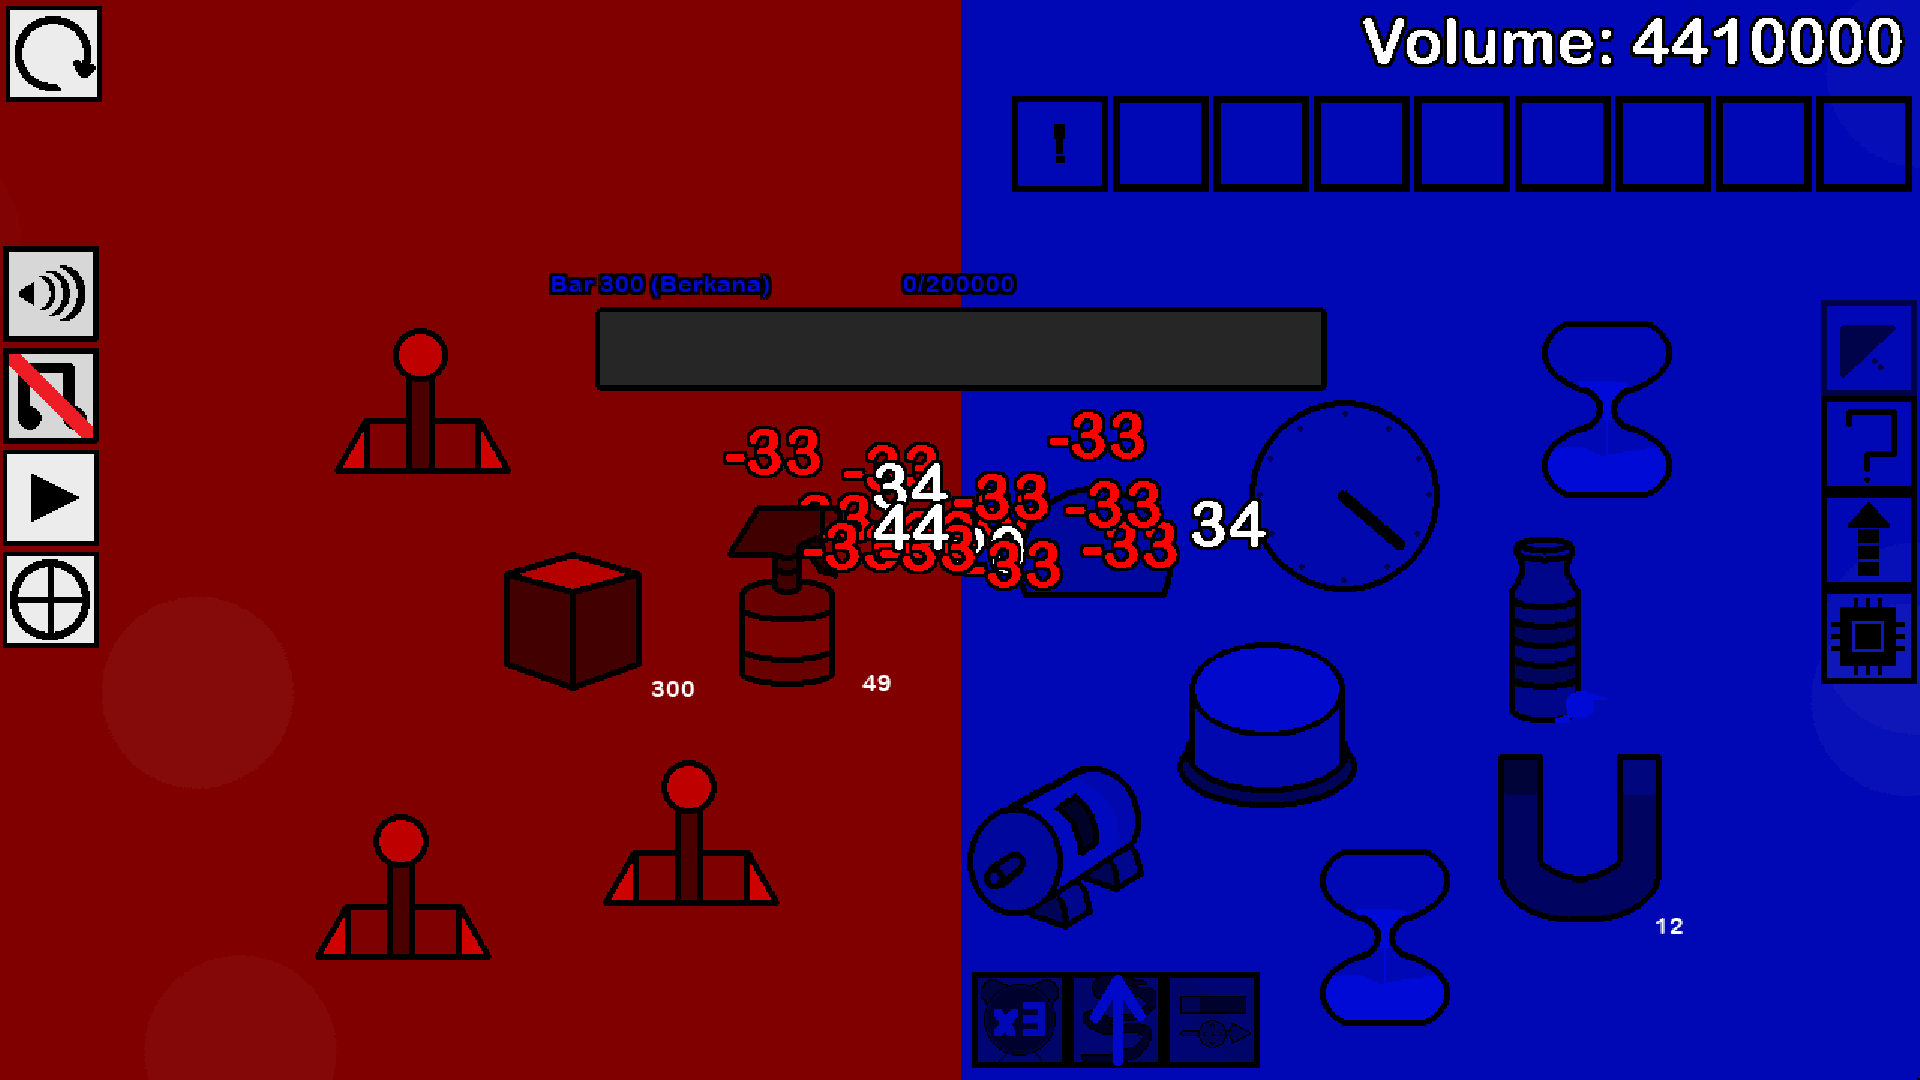
This bar can be a tough bar for those who specialize in effect application strategies because of the spray bottle and wyres in addition to the short amount of time you get before your widgets are destroyed. The best way for those who are in trouble on this bar to get around this is to have an led or some other unreactable widget and give it a cardboard support to make it indestructible. This will guarantee that eventually you can complete the bar.
Bar 450
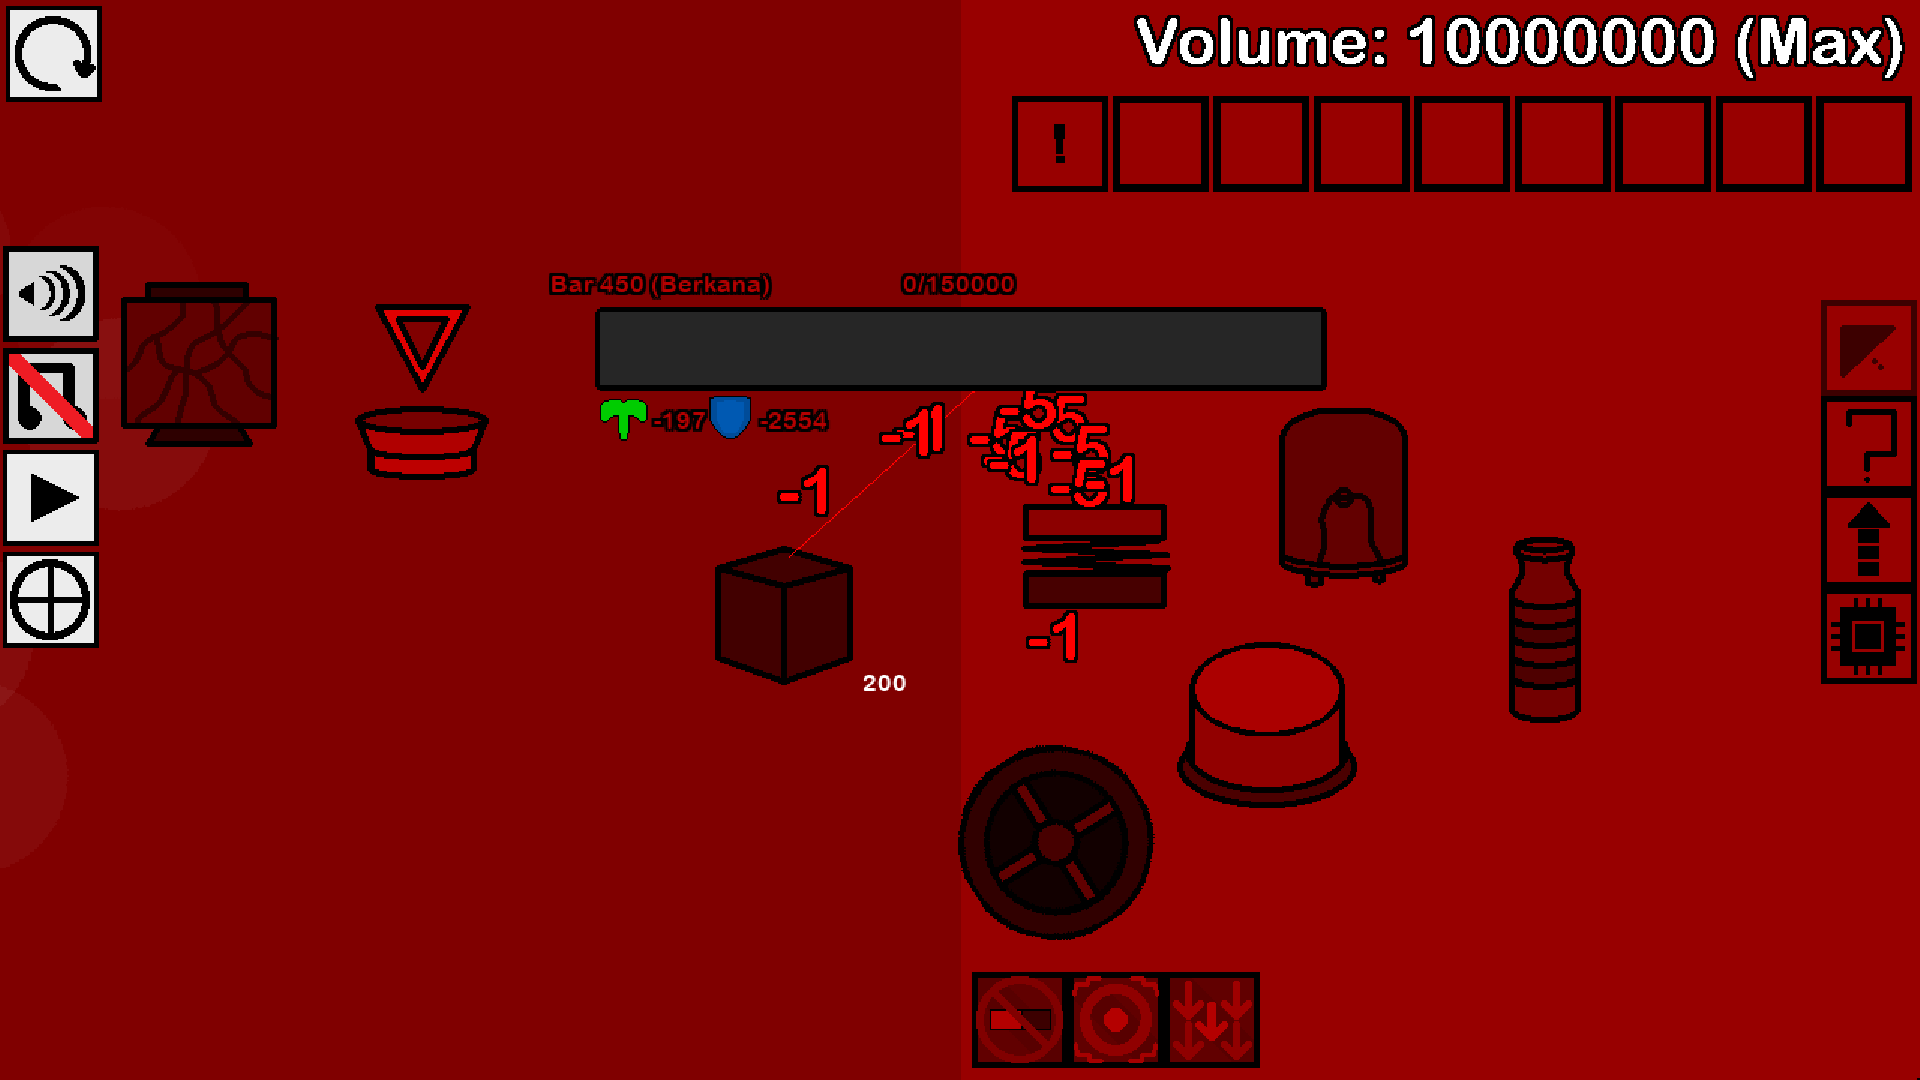
This bar is simply a more difficult version of bar 200. The only difference being if most of your widgets are destroyed, the ant farm will keep the bar empty.
Bar 500
Bar 500 is possibly the most dangerous bar until bar 750. Bar 500 has an apex reamer. This can uninstall your lowest level widget every 25 seconds. Uninstalling means that the widget is gone forever, and you need to replace it. Hit this bar with everything you got.
Congrats! You have reached bar 500 and have the next bar type unlocked. The guide ends here, but there is much more to do and see in Bar. I recommend playing each main color to bar 300 as your next goal.