This guide is designed to help players select the most powerful combination of organs in order to make the game easier and more predictable. By following the strategies and tips provided in this guide, players can optimize their gameplay experience and increase their chances of success.
Tentacle Debuff Combo
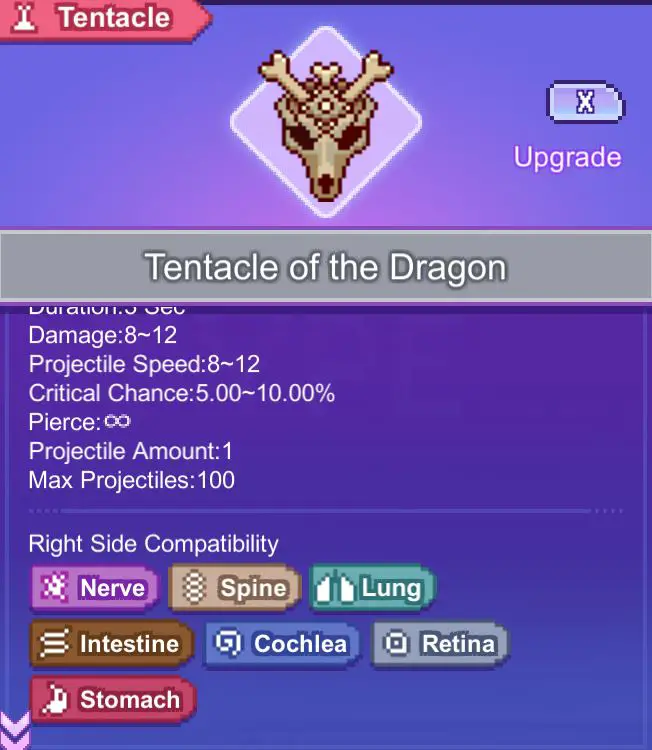
For the ultimate debuff-spreading combo, connect a Tentacle with long duration to both the Intestine and Lung organs.
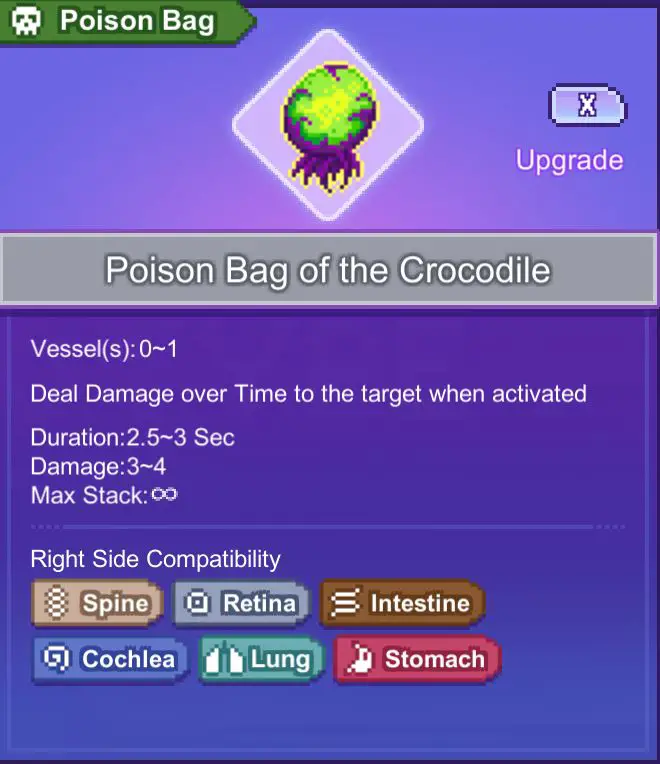

For example, connecting the Tentacle of the Dragon with the Intestine and Poison Bag of the Crocodile will create multiple poison pools that cover a large area of the field.
Another killer combo involves the Lung and Belly organs of the Fire Lizard. When connected, these organs create a large aura that surrounds the flying skull and inflicts blaze stack damage on any enemies that pass through it.
How to Efficiently Use Your Offspring
Each offspring species has different characteristics, so certain organs may be more suitable or unsuitable for a particular species. Based on my experiences, here’s a guide to help you efficiently use your offspring and choose the right organs to optimize their abilities.
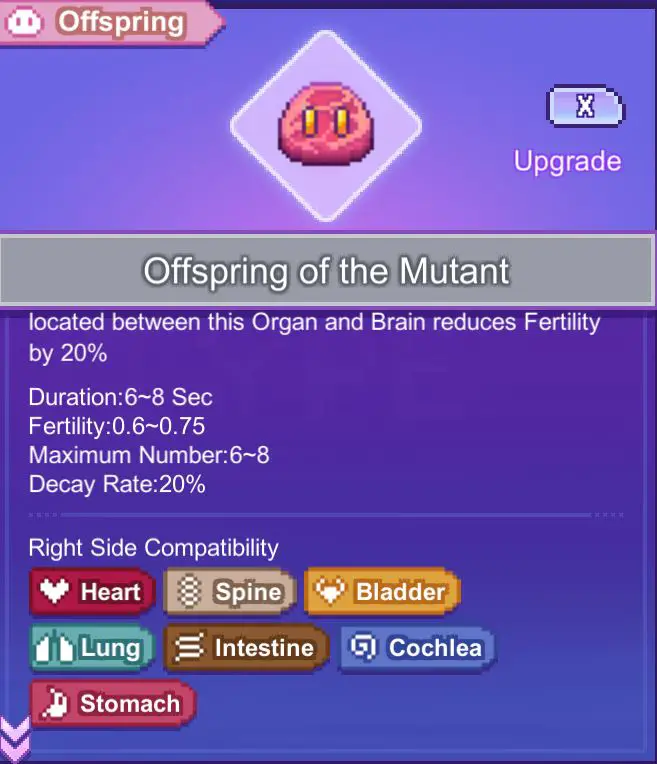
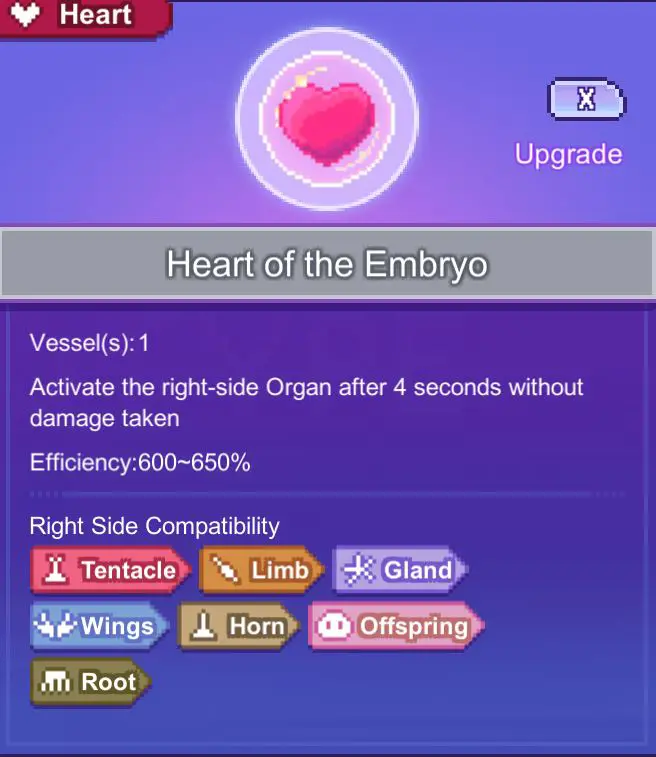
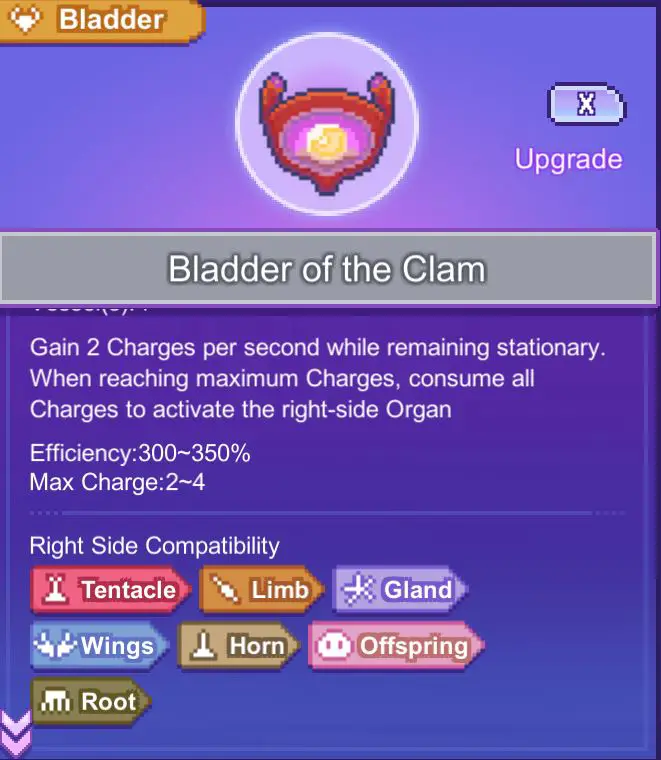
Offspring of the Mutant is actually the name of a specific species. This type of offspring is the most basic one and is unable to be damaged or moved. After spawning, it remains in place for several seconds before expiring. Due to its unique properties, the best compatible organs for the Offspring of the Mutant are the Bladder of the Clam and the Heart of the Embryo, which can be connected to a horn or gland.
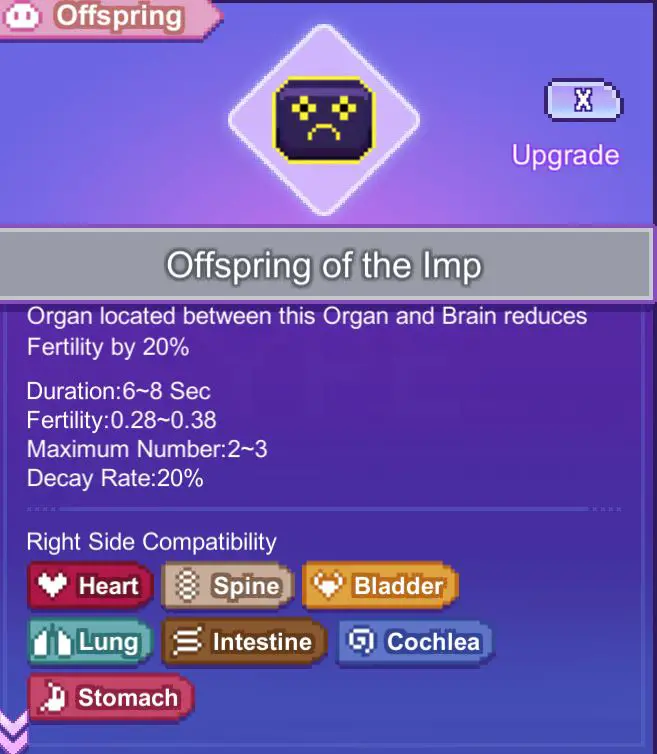
Next up is the Offspring of the Imp, which is the most powerful among the offspring. This is due to its unique characteristic of being able to be damaged by the player, allowing it to combine with the Heart of the Wolf organ. The Heart of the Wolf triggers every time the Offspring of the Imp gets damaged, with an efficiency of 600-700%, making it a devastating combination. The most efficient way to damage the Imp is to cover yourself with a damage aura from the Lung organ, which can increase your damage output and make it easier to trigger the Heart of the Wolf.


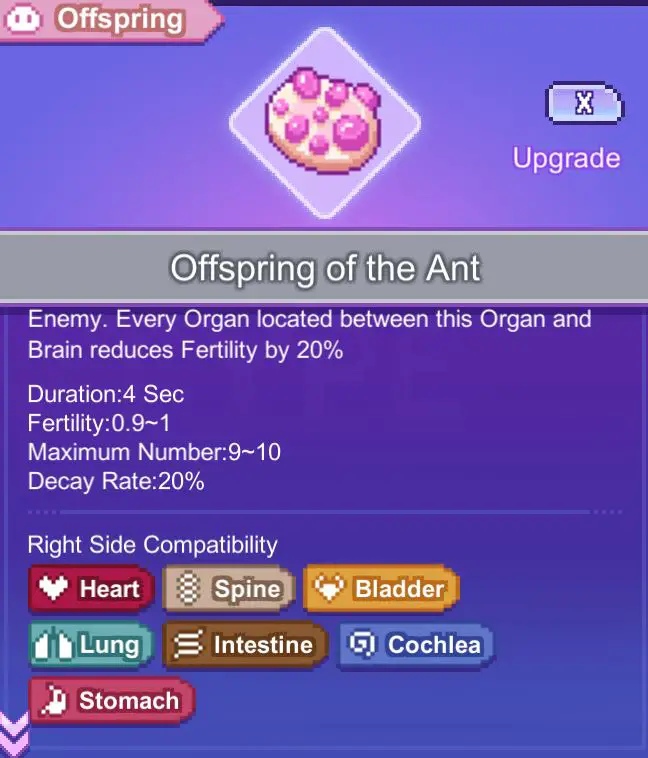
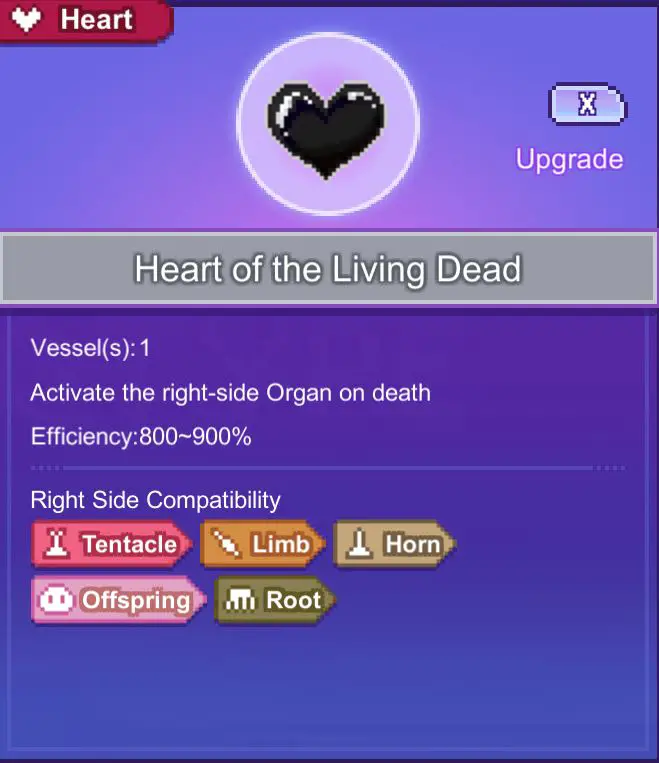
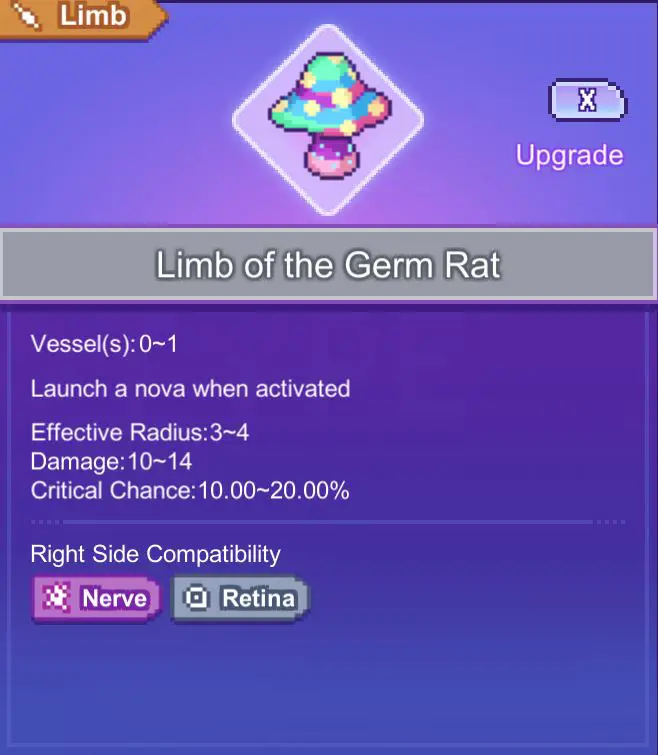
Another noteworthy species is the Offspring of the Ant, which has the unique characteristic of instantly dying upon contact with an enemy. To make the most of this trait, the best organ to connect with is the Heart of the Living Dead, which has an efficiency of 800-900% upon trigger. The Heart of the Living Dead is best paired with short-range AOE organs like the Limb of the Germ Rat, which can guarantee that the explosion will hit the group of enemies very hard if they come into contact with an ant egg.
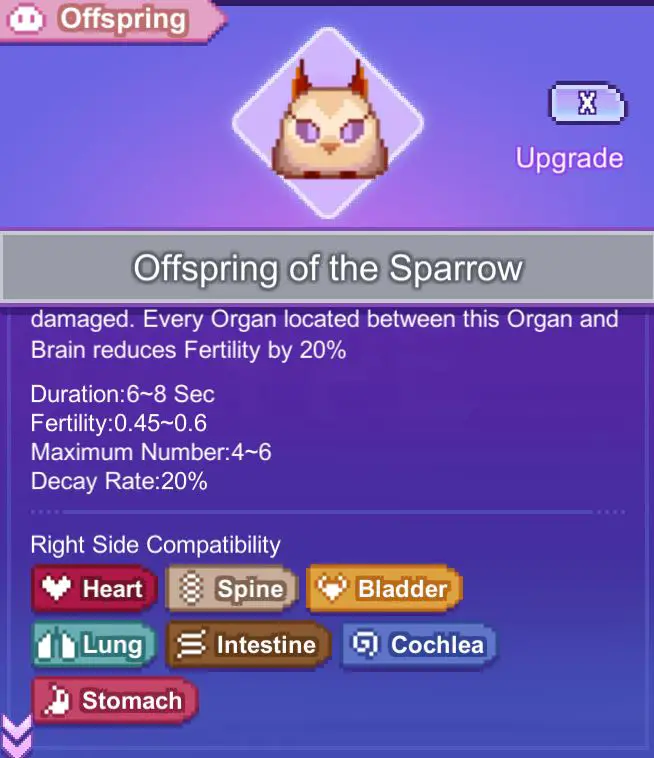
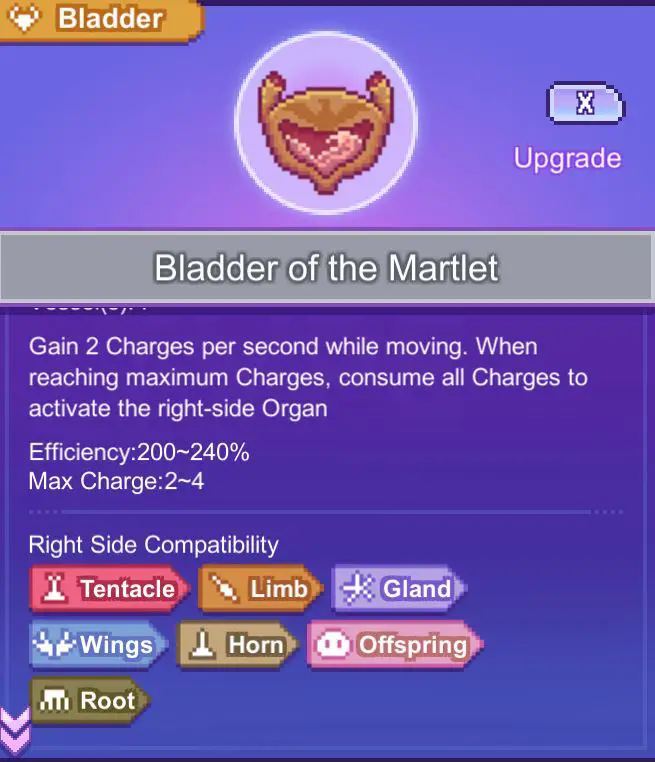
The most aggressive offspring is the Offspring of the Sparrow, which moves towards enemies on sight. To make the most of this behavior, I recommend equipping it with the Lung organ along with some debuff organs like the Belly/Poison Bag or the Bladder of the Marlet. These organs are especially effective because the Offspring of the Sparrow is always moving around the field, making it a powerful force to be reckoned with.
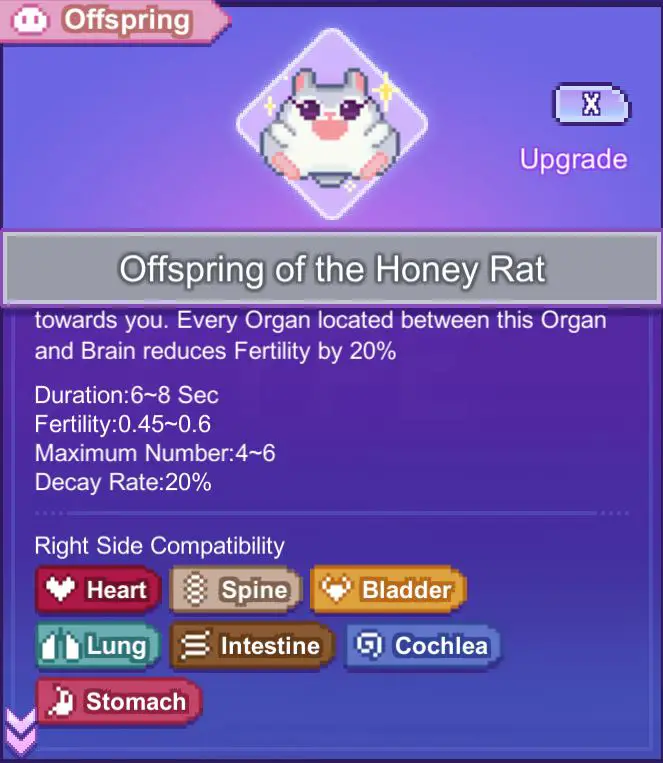
The final offspring is the cringy Offspring of the Honey Rat, which has the characteristic of moving towards the player. The best compatible organ for this offspring is the Lung organ, along with a supportive Wing. This will allow the Honey Rat to share its buff from the Wing organ with the player. Alternatively, you can also equip the Honey Rat with offensive organs to protect yourself. It’s up to your own personal preference and play style.

Understanding Hard-to-Grasp Organs
In the game, there are many organs that can be difficult to understand just from the in-game description alone. To help you make the most of these organs, I will provide explanations on how to use them and recommend good combinations that can make the organs work more effectively.
Retina
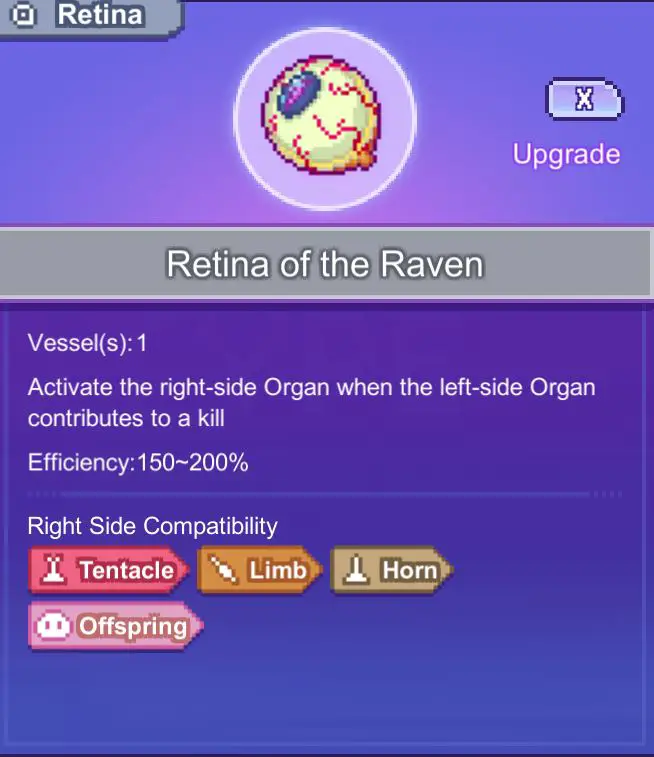
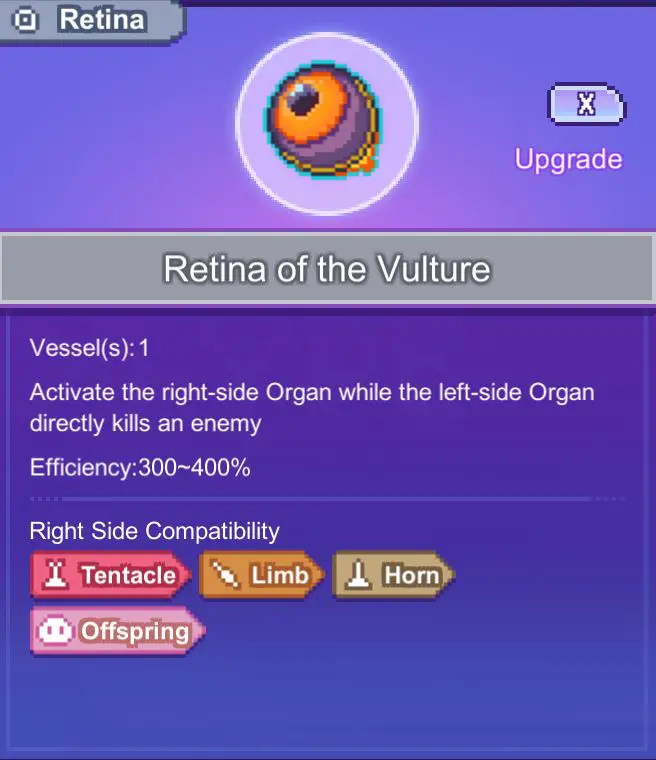
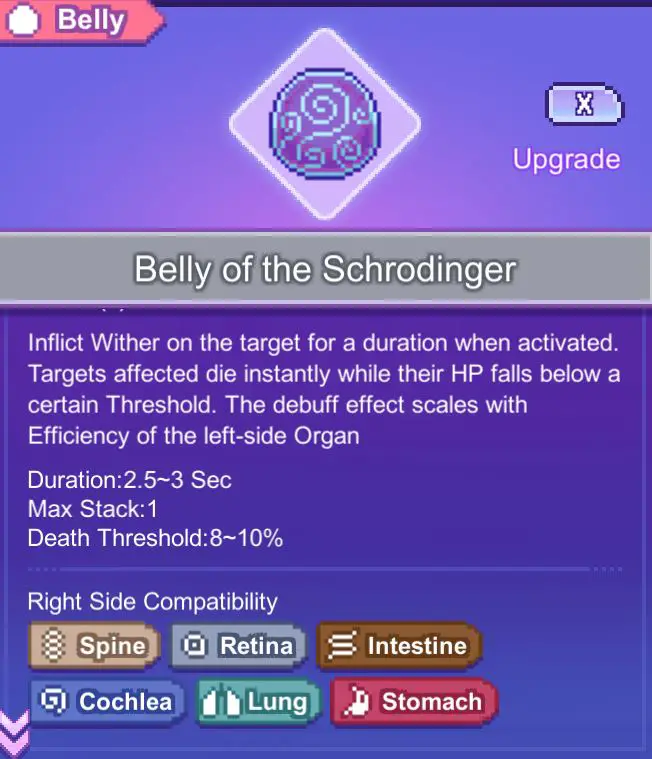
The Retina organ only activates when an enemy is killed by the left-side organ, which can be difficult to time precisely. To make the most of this organ, it’s best to pair it with a hard-hitting organ like the Horn/Limb or, alternatively, the Belly of Schrodinger. The Belly of Schrodinger grants enemies the Wither debuff, which instantly kills them when their HP falls under a certain threshold. By using this organ, you can ensure that the Retina organ will activate, especially if you have the Retina of the Vulture, which requires the left-side organ to make the killing blow.
Cochlea
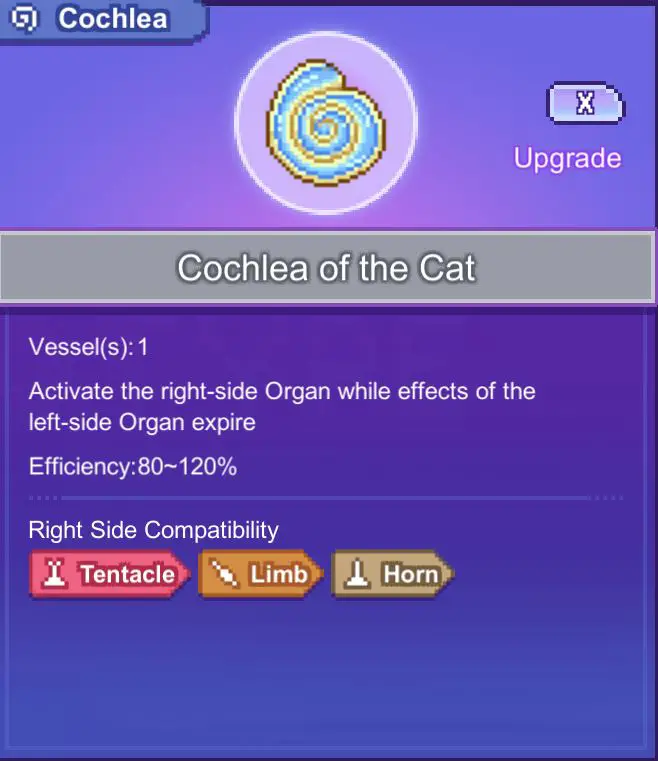
The Cochlea, at the first sight, it is not very hard to understand its effect which described as activate when the left side organ effect expire. For the example, if you put Cochlea of the Cat at the left side of Tentacle of the Starfish which has effect duration of 1 second, you would expect that the cochlea would active after 1 second passed. But there is the hidden meaning behind this description, the Cochlea will also active when the effect prematurely end, such as when the bullet which shot out from tentacle hit the enemy and the bullet has 0 pierce characteristic, it will disperse immediately regardless the left duration. so Cochlea will work best with short duration tentacle with low piercing characteristic.
Nerve of the Boxer
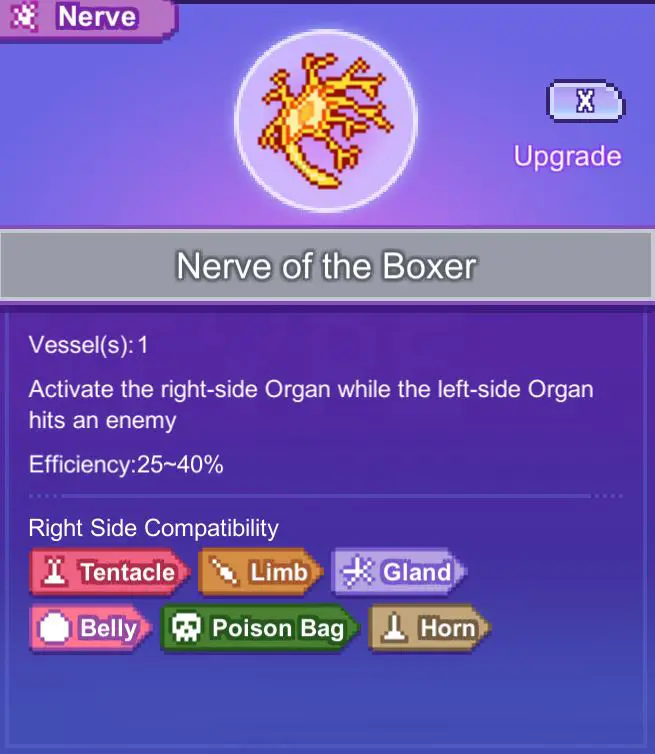
The Nerve of the Boxer is the counterpart to the Cochlea organ, as it activates when the left-side organ hits an enemy, making it a very easy condition to meet. However, it only provides an output of 25-40% efficiency, which may seem low compared to other organs. Nevertheless, it can be useful when paired with high-piercing/chain tentacles or AOE limbs, which can take advantage of the Nerve of the Boxer’s activation condition and deal additional damage to the enemy.
Cochlea of the Owl/Nerve of the Raptor
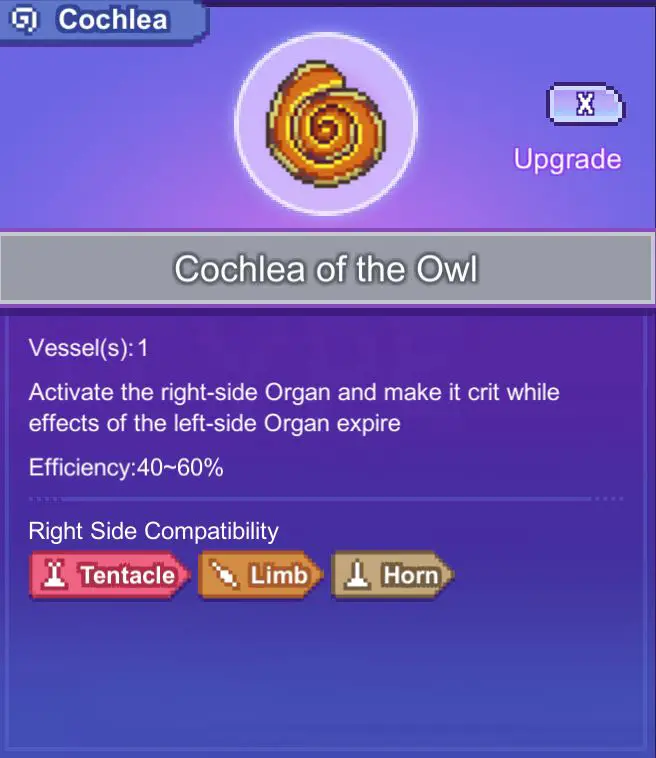
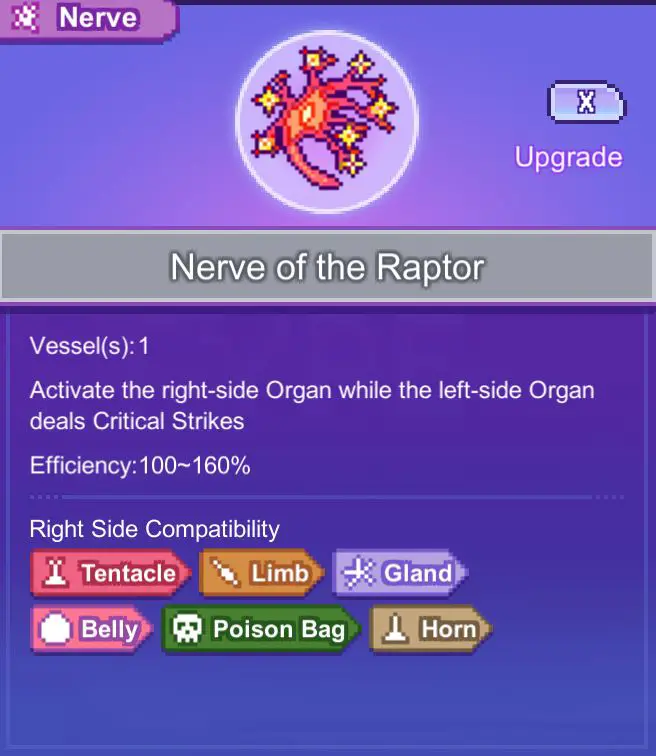
The Cochlea of the Owl and the Nerve of the Raptor are a powerful pair, as the Cochlea of the Owl guarantees that the right-side organ will land a critical hit, while the Nerve of the Raptor only activates when the left-side organ lands a critical hit. This affinity makes the Cochlea of the Owl and Nerve of the Raptor one of the best combos in the game, as it allows for consistent critical hits and maximizes damage output. On the other hand, it’s important to avoid pairing the Nerve of the Raptor with the Cochlea of the Sloth, as the Sloth’s effect prevents organs from landing critical hits.
Gland of the Sludge/Nerve of the Jellyfish/Bladder of the Frog
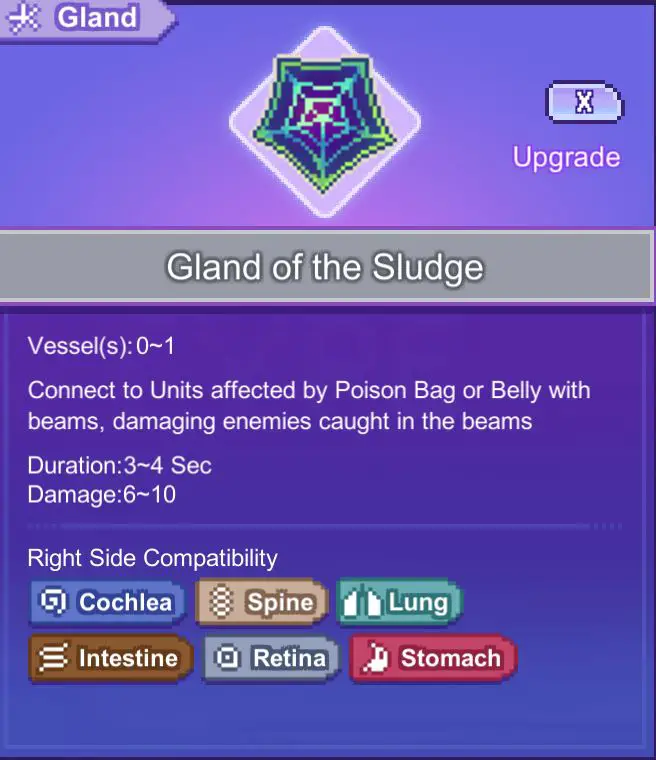
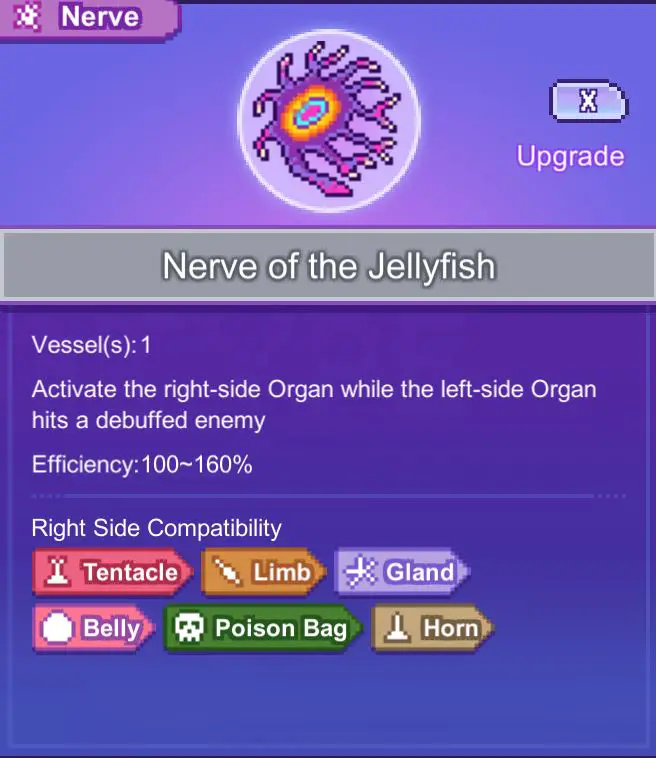
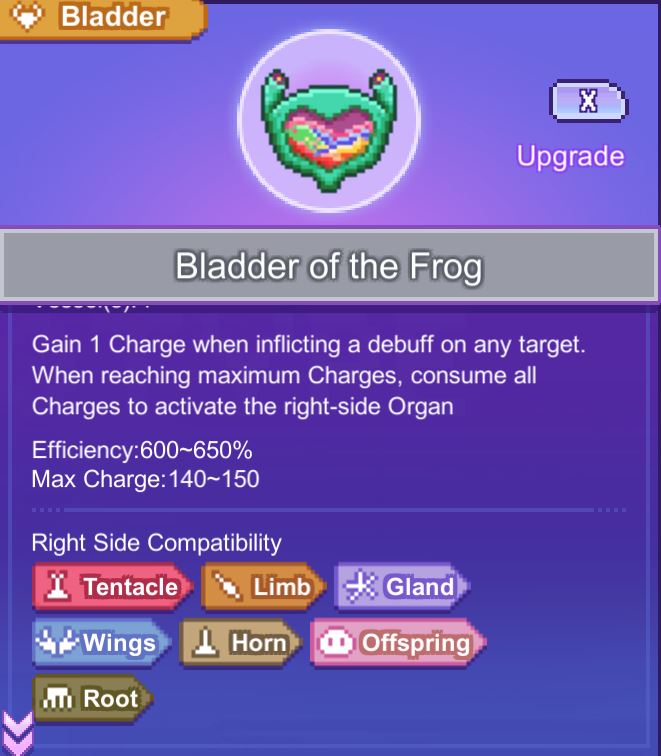
The Gland of the Sludge and Nerve of the Jellyfish can also form a powerful combination, but it requires the player to have a proper debuff build. The Gland of the Sludge will only target enemies under the effect of the Poison Bag or Belly, while the Nerve of the Jellyfish only activates when the left-side organ hits a debuffed enemy. By using these organs together, the player can deal massive damage to debuffed enemies. The Bladder of the Frog is another organ that works great with a debuff build, as it gains charge when inflicting a debuff on any target. This makes it a powerful tool for building up charge and unleashing devastating attacks on enemies. However, it’s important to have the proper debuff build in order to fully utilize the potential of this combination.
Bladder of the Turtle/Root of Magnut
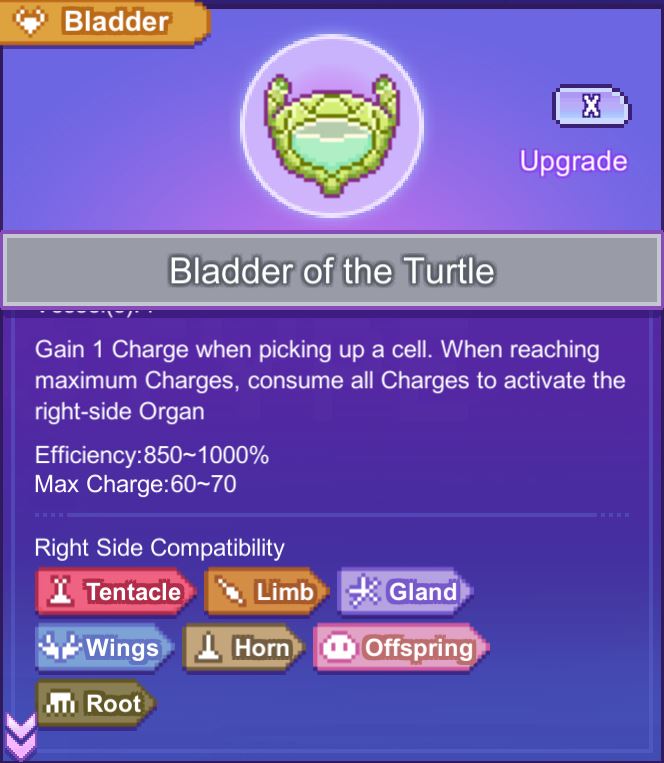
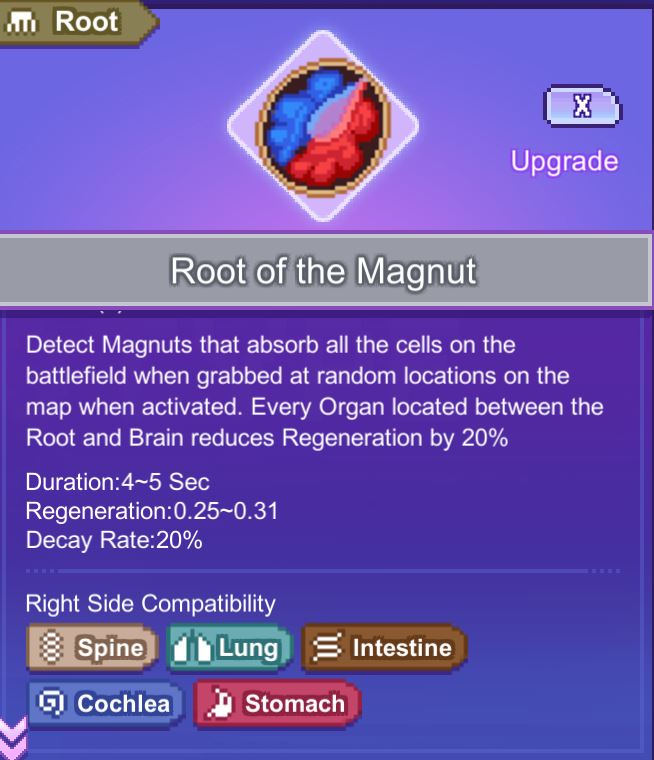
At first glance, the Bladder of the Turtle might seem like a very bad organ since it requires collecting up to 60-70 cells to activate once. However, when paired with the Root of Magnut, which has the effect of absorbing all cell drops on the field, the conditions for the Bladder of the Turtle become achievable. With an efficiency of 850-1000%, it is also a good idea to equip other root organs.
Useless Organs
Gland of the Snail
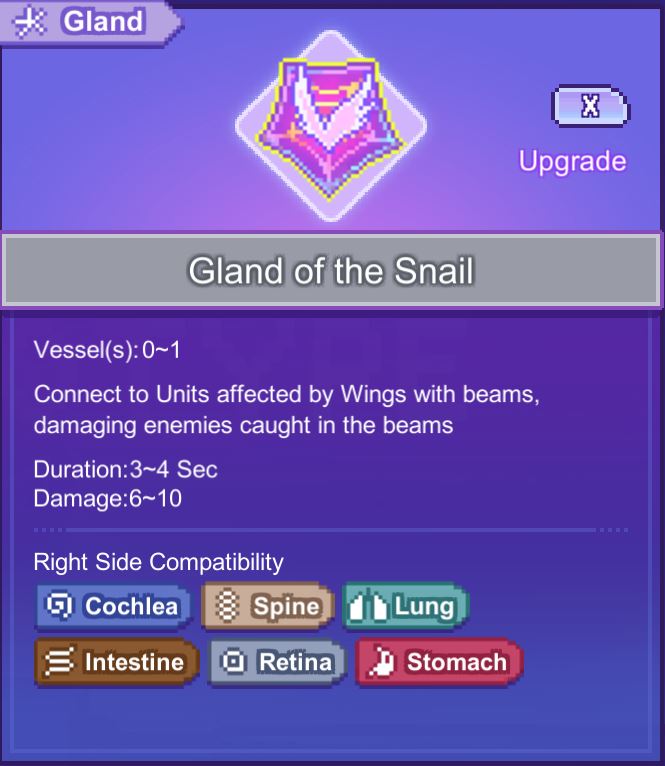
The beam will connect between the offspring and play under the effect of the Wing organ, which is highly conditional. Additionally, the beam will not directly target enemies, resulting in a low efficiency for this organ. While the beam can be a useful tool for controlling the battlefield, it’s important to keep in mind its limitations
Gland of the Black Goat
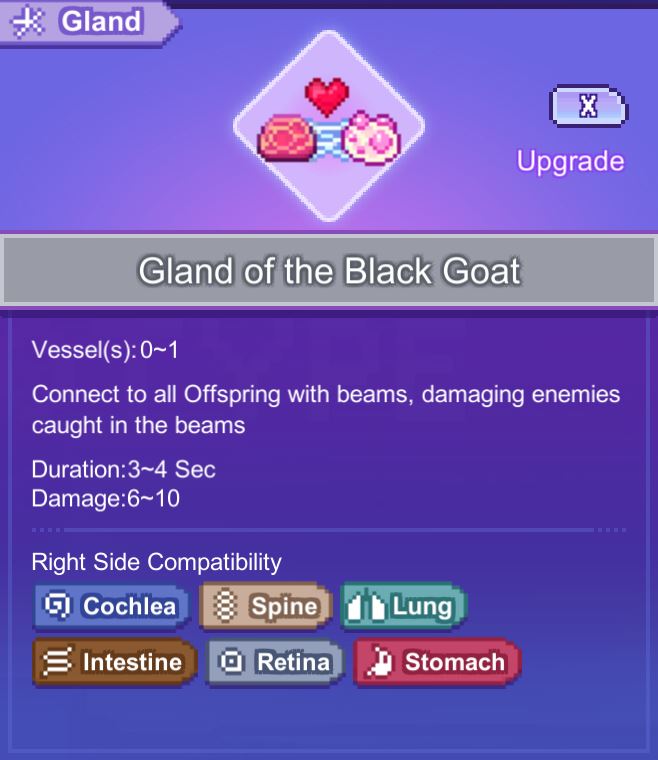
The beam organ will connect between the source and other offspring on the field, but most of the offspring are unmovable. This makes the beam organ another useless organ, as it has limited use in controlling the battlefield and dealing damage to enemies.
Wing of the Gargoyle
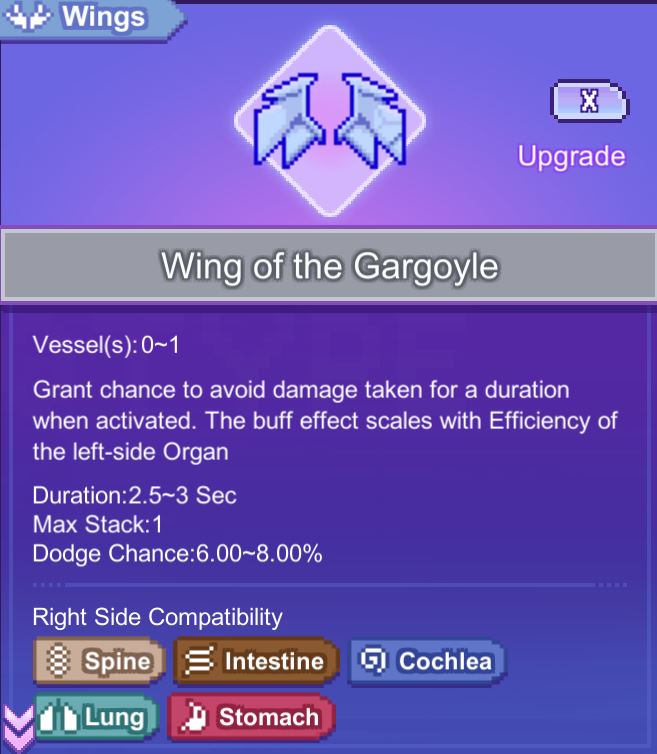
The Wing of the Gargoyle may seem like a good organ at first glance, but its dodge chance of 6-8% during activation is very limited. To make the most of this organ, it needs to be paired with a left-side organ that has very high efficiency, such as the Bladder of the Turtle with 800-1000% efficiency. Even with this pairing, the maximum dodge chance would only be 48-80%, which is still limited and requires a very specific activation condition. When compared to the Root of the Armor Fruit, which provides a one-time guard when picked up, the Wing of the Gargoyle seems less feasible as a useful organ in the game.