This guide is a look at how to unlock the Demonling Subclass of the Rogue Class in Card Quest. This Subclass requires only a single special monster to kill in order to gather a Trinket to unlock. Unlike my other two Rogue Subclass unlocking guides, I have only one encounter to explain in detail.
Facing the Demon in the Box
First, read through my Rogue Class Serial Killer build guide, which can be found by clicking below. Once you’ve done that, read further to see how unlocking the Demonling Subclass works, which requires you defeat the powerful Demon in the Box.
The Serial Killer build requires a special tweak in order to complete this battle as quickly as possible, otherwise, though you can do it, it will take you an extremely long time to pull it off. Here is the tweaking you need to do to make it simple and quick and receive the Demon Heart as your reward to finish the Demonling Subclass unlock.
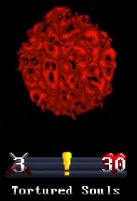
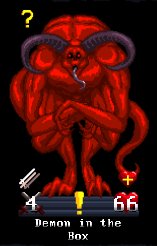
Note, first off, do not attack the Demon in the Box! This is a waste of time until the end. The essence of this battle is to let the Demon in the Box harm itself until he is below 100 HEALTH. Why? Each attack round for the enemy the Demon in the Box will drop 1 collection of “Tortured Souls.” Each Tortured Souls starts with 30 HEALTH, which are reduced every round by 2. Nice, but you cannot bank on them wasting away by themselves because it will take entirely too long and there is absolutely no way you will have enough defense to survive. Also note that if Tortured Souls fill the entire playing field, the Demon in the Box cannot summon any more until one dies. Since he regenerates 6 HEALTH every turn, you cannot let this happen! Thus, the real key is killing the Tortured Souls and keeping their numbers low because as long as the Demon in the Box can generate more, he loses 66 HEALTH each time he summons one. Since he regenerates 6 per turn, this means a loss of 60 HEALTH every turn. So you need to let the Demon in the Box harm itself until it reaches less than 100 HEALTH. When this happens he cannot summon any more Tortured Souls because it would eventually kill itself. Once it hits less than 100 then, and only then, can you attack him. But how? Pay attention to the tweaks below to make the Serial Killer build more effective for this battle.
Armor: Harpy Cloak
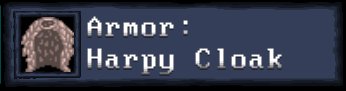
The Serial Killer build relies on UNAWARE status for monsters, but unfortunately the tortured Souls are immune to this. Therefore, it will do nothing for you other than make the Demon in the Box UNAWARE for a single turn, which he can break anyway when he says “you cannot hide.” The Harpy Cloak, by contrast, can STUN up to three enemies. The Demon in the Box is immune to this, but the Tortured Souls are not. Since they can net up to 3 damage per attack, it is critical to rely on STUN for this encounter. This gives you that extra edge and if there are 3 Tortured Souls in a row, you can STUN them for a full turn and avoid their attacks indirectly for the enemy’s turn.
Trinket: Spider Poison
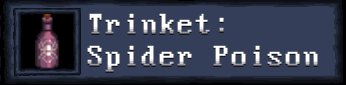
Like the Shadow Cloak, the Smoke Bomb is great for hiding, but as stated above, the Tortured Souls are immune to UNAWARE, so it is pointless to have it equipped for the encounter. Instead, using the same benefit of the Harpy Cloak, you should equip the Spider Poison. Like the Harpy Cloak it provides STUN effect on the torture Souls. Even better, however, is that it creates this effect for attacks and is not used for defense. When used, you arm your next attack for a single strike that provides POISON (2 damage) and STUN, both for 2 full turns. Not only does this give you breathing room as you deal with the tortured Souls to eliminate them, it can be used up to 3 times in a single encounter.
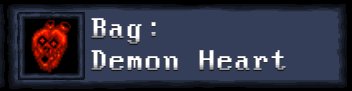
Bag: Cursed Box

Though you likely know this already from having attempted this battle, the Bag item you choose must be the Cursed Box in order to summon the Demon in the Box. Other than this, you cannot use it for anything else so note that your Bag slot is wasted. This makes the above two tweaks critical so the fight is as easy as possible. The Cursed Box is one of the items you can choose after completing the City of the Undead Level.
Beating the Demon in the Box
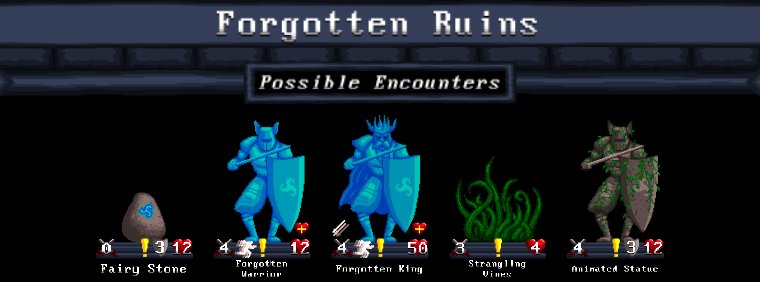
To summon the demon, I recommend choosing the “Forgotten Ruins” battle of The Enchanted Forest level. The reason for this is the Fairy Stones generate 5 souls upon destruction and this can lead to a very quick collection of 25 SOULS to summon the Demon in the Box and start the real battle. The Forgotten Ruins is also easy with low risk of damage in comparison to other levels. I will not be going over the monsters there because you’ve likely already faced them and they pose very little threat. Do not use the Forest Crown or Dragon Whistle. You can even start at the beginning of any level, if you like, raising a few levels before summoning, but you should find the extra perks you get at levels 7-10 to make it slightly easier. There is no reason to max level, at all, so do not worry about this. Level 7 is plenty and you should have 25 SOULS. But, trust me, with the Serial Killer build you can beat the Demon in the Box even at level 3. Here is how you do it.
The Serial Killer build remains the same other than the tweaks above. Do not change your style, primary, or secondary. I have seen other builds utilize items such as the Wolf Claw, but the battle becomes too long, so leave these as they are. The trick to winning is to ignore the Demon in the Box until he is below 100 HEALTH. With each summon of Tortured Souls he is harming himself far more than you will be capable of doing in a single turn. Thus, focus all of your energy on killing the Tortured Souls. The fast card draws of the Serial Killer build will provide you with effortless attack and defense. The usage of Cheap Trick and Plan Ahead, in particular, will keep your CHAIN effects active and generate more card draws so you have the edge for the likely the entire battle. Focus primarily on applying STUN to the Tortured Souls and then attack them. This is because the STUN status is not removed by striking. Always strike Tortured Souls with the most HEALTH remaining, unless you can eliminate one in a single hit or have no other option. As the encounter continues and when you see one is at 2 HEALTH, do not bother attacking unless you need to generate another card draw, because it will die on the next turn and you can likely take its hit if you are lacking defense. Otherwise you can kill it. Consider your chance of taking a hit from 1 Tortured Souls at times because the Demon in the Box can hit you 2 times if he is not UNAWARE so you should avoid this at all costs. It is best to have 2 Distraction cards ready because at times he uses a special attack where the game states “you feel despair” and he removes, randomly, one card from your hand. If it happens to be the Distraction card you needed, you may take more damage than you can handle (up to 8). Using one Distraction will make him UNAWARE and eliminate his second attack, which is the best approach. So, constantly STUN the Torture Souls, applying the Harpy Cloak for its single use as needed, and save the Spider Poison for moments when you have no other way to STUN. Once the Demon in the Box is below 100 HEALTH, it is then, and only then, that you can lay into him more consistently, being certain to have at least 1 Distraction card handy, but better 2, for his turn so you can avoid his attack. Vanish is largely useless in this encounter other than its two-card draw effect, but Killing Blow is especially useful. For the Tortured Souls, as a benefit, it applies 2 full turns of STUN. Once you kill the Demon in the Box you have the Demon Heart! Now go to the final section of this guide.
Using the Demon Heart to Unlock the Demonling Subclass
This is the easiest Subclass to unlock out of any Class in Card Quest once you have the necessary item, the Demon Heart, shown above, which you must have in your Bag. Of course, you saw how difficult the Demon in the Box encounter was to get it, but actually applying it is much simpler than facing a level boss with a special build. Keep the Siller Killer build as it is except for the Bag item being the Demon Heart and the following Trinket.

This is a good option, though not required, to complete the Demonling Subclass unlock. The Royal Elixir heals 2 HEALTH per use and has 3 uses total, recharging 1 use every two encounters. When you use the Demon Heart it reduces your HEALTH by 3 each time. If you don’t heal you’ll eventually kill yourself with it. With the Royal Exilir you can heal up to 6 HEALTH total, thus two uses of the Demon Heart when you use it 3 times. After 6 encounters it will be fully recharged. For the Demonling Subclass to unlock you need to use the Demon Heart a total of 12 times, and you must never get to 3 HEALTH because if you use it again you’ll die.

This is why I recommend the path shown above in the Dwarven Mountains level. Along the way you have various chances to get Healing Potions, which each heal 2 HEALTH. This makes the unlock occur faster. By starting from the very beginning, you can use the Demon Heart repeatedly, heal up, and do it again.
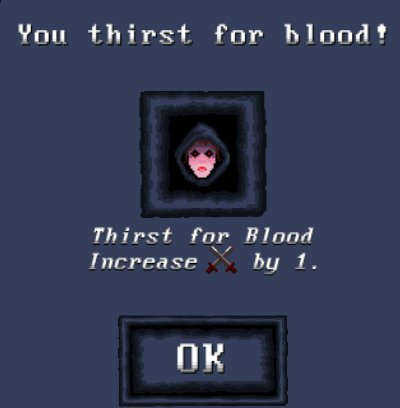
After using it 3 times you’ll see the screen above appear in the game. With your thirst for blood increased you now do +1 damage to all attacks. Pretty nice and it makes for finishing encounters faster.
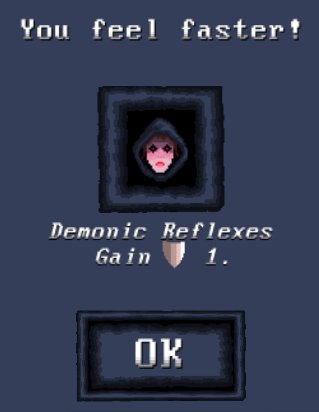
After using it 6 times you will see the screen above appear in the game. With your speed increased you now have +1 to your defense. We’ll take it. Make sure you have enough HEALTH as you continue along the Dwarven Mountains. By the time you reach the Dwarven City you will have unlocked the Subclass further or will be just about there.

When you have used the Demon Heart 9 times this screen will appear in the game as shown above. HUNGER only applies if you’re using the Cursed Dagger, which we are not. You’re almost there!
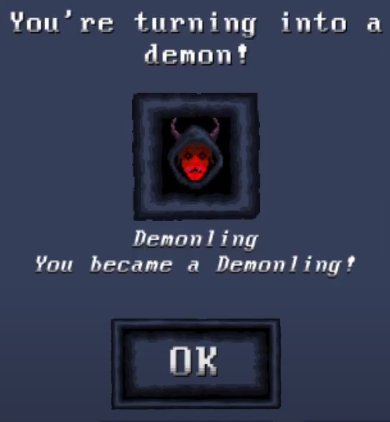
Finally! After you have used the Demon Heart 12 times the screen shown above has appeared and the Demonling Subclass is unlocked. After you complete the encounter you are on you’ll see a special screen explaining the perks of the Subclass, but this is the same information present at the start of the game, you’re just seeing a celebratory screen about it. Once you’ve gotten to this point it’s done!