This guide is composed of all the things I’ve learnt about Endless Endurance Extreme, including resource management, laws, tech and how to prolong (not prevent) your inevitable and untimely demise in this frigid wasteland.
Introduction
I originally started working on this guide to help a friend who was just starting out with Endurance Extreme so some of the information may seem overly specific for certain things but don’t worry, that’s intentional.
This guide won’t be a perfect masterclass in expert refinement of a strategy designed to survive every circumstance, I can’t provide that, this is just a Mediocre Guide to Endurance Extreme that will help you survive not guarantee it. Despite this, I hope this guide can provide some useful information in surviving the Frostland and eventually securing your position as a debauched dictator ruling over desperate doomsday survivors.
The guide will be broken up into the different Sections which are not specific amount of days but rather stages of your city, going from the first day and the prep to different important milestones that secure your survival. But the most important thing to remember throughout all of this; if you feel like you’re winning, something has gone horribly wrong and you need to find it FAST.
The guide will also be referring to various cities I have in the Endurance Extreme, some new setup specifically for this guide and others that made it very far to show what sort of things you should have. Although you don’t specifically need these, this is a guide not a lawbook, do what you enjoy and if you find something works better for you then go for it.
Endurance Extreme Difficulty
Endurance Extreme is the hardest possible challenge you can undertake in Frostpunk; your resources are significantly limited, your people are constantly depressed and trying to revolt and the weather is constantly trying to kill you. Don’t let this demotivate you, however, as embracing the necessary levels of masochism and suffering to complete this objective will prove to be a significant accomplishment if you don’t mind the human rights violations along the way.
There are a few key quirks and difficulty changes for Endurance Extreme that cause its infamous difficulty, some of which may seem unfair but are actually present in all other difficulties but were too small to notice. Some major differences are:
- Discontent has a major influence on your city besides the risk of revolt, it increases the risk of illness. Not just a small way like in normal difficulty but in a way that amplifies any health crisis you may have and drains your medical facilities when they’re functioning.
- Sickness is rampant, and you are guaranteed to have a certain amount of sick every day regardless of what you do. On top of this, the risk of illness from the cold goes up tremendously and people will die in droves if they spend time in Freezing environments rather than dying in a trickle.
- Hunger is significantly faster, as people progress through hunger stages daily rather than once every 3 days, mass death of starvation kicking in within the same time frame as people start getting hungry in the normal difficulty.
- Temperature is brutal, frequent descents into unbearable temperatures alongside a storm that comes every 12-15 days with the chance of dragging out to effectively more than a week.
- Public Opinion is terrible, discontent rises and hope falls at extremely enhanced rates, slight changes being the same size as great changes in normal difficulty and great changes sometimes spelling the end of a city all the while reductions to discontent and increases to hope increase it by a negligible amount.
- Frostland holds very little resources for you, tiny amounts per location and access to the Storm Shelters has been cut off, out here you’re almost all alone and resources are scarce.
Buildings and Heat
One of the most important things about planning your city is what buildings will function when it gets cold. Generally the cutoff point is that these buildings must be Chilly, Liveable or Comfortable to function. This means buildings such as Medical Facilities, Hothouses, Cookhouses and a few others must be included with your heating infrastructure when you plan your city. The counterpart to this is buildings that must be kept cold. As far as I can tell, this is only the Body Pit but it is pretty easy to handle. The structure will never naturally get too hot so you just need to make sure that they are kept away from Steam Hubs and the generator, preferably at the edge of the map.
Over time, temperature will drop considerably in Frostland but each one can be counteracted with various upgrades and infrastructure from -20 to -90:
- -20 is the least concerning temperature, as everything is at a baseline of Chilly, meaning anything with insulation (most structures) will be at Comfortable. The generator only needs to be on if you have homeless in the city at night.
- -30 is similar to -20 but everything is at a baseline of Cold, meaning insulated structures are at Chilly but more people will fall sick due to working out in the temperature. Despite this, the generator still only needs to be on if you have homeless in the city at night.
- -40 is where things start getting rough as early insulation isn’t enough to keep buildings at Chilly or higher, and it is better to keep the generator on to avoid people falling ill in the Very Cold temperatures. This is what limits you to 2 Medical Posts without steam hubs or heaters.
- -50 is very painful as everything is at a baseline of Freezing, meaning insulation and the generator only bring it to Cold, not to mention anyone gathering resources from piles without a gathering post are in extreme danger. You need overdrive, heaters or the first power upgrade for things to function
- -60 is as close as you can get to Storm temperatures before the first Storm. Everything is below Freezing and without proper heating your people will die very fast. You need multiple boosts to heat, steam hubs and multiple medical posts to stand a chance.
- -70 is the temperature of the first Storm and will prove to be the first of many stress tests your city will face. Without boosted generator power, overdrive and heaters then all workplaces will be below chilly, your medical infrastructure will stagnate and people will die far too fast for you to keep up with.
- -80 is even worse than the first Storm and comes later on, it’s the same as before but even worse as you need to find either an insulation upgrade or a new boost to heat (in a worst case scenario, Field Kitchens eat up your rations but provide warmth equivalent to 1 heat levels) to keep your city functioning.
- -90 is the temperatures that much later storms drop to, a brutal descent that will leave many critical functions of your city unable to work. You need multiple upgrades and Steam Hub infrastructure established if you want even a chance of surviving.
Day 1 – Temperature and Planning
Day 1, the beginning of everything and where the most rushing has to happen. The first thing you have to do is pause the game and assess the situation; check what resource piles are where, their proximity to a gathering post radius and, most importantly, what your starting temperature and forecast is.There are a few potential starting temperature layouts some of which are as follows (including some nicknames I use for them):
- Quick Drop – you begin at -20 and on day 4 will drop further down to -40
- Slow Descent – you begin at -20 but on day 3 will drop to -30 and on day 5 will drop to -50 but on day 7 return to -30
- Bounce and Drop – you begin at -30 but on day 3 will go up to -20 and on day 5 go down to -40
- Painful From the Start – you begin at -30 but on day 3 will drop to -50
This is one of the main factors that will determine your starting strategy, since temperature directly determines sickness rate, whether some workplaces can even function and how quickly people will die in poor temperature.

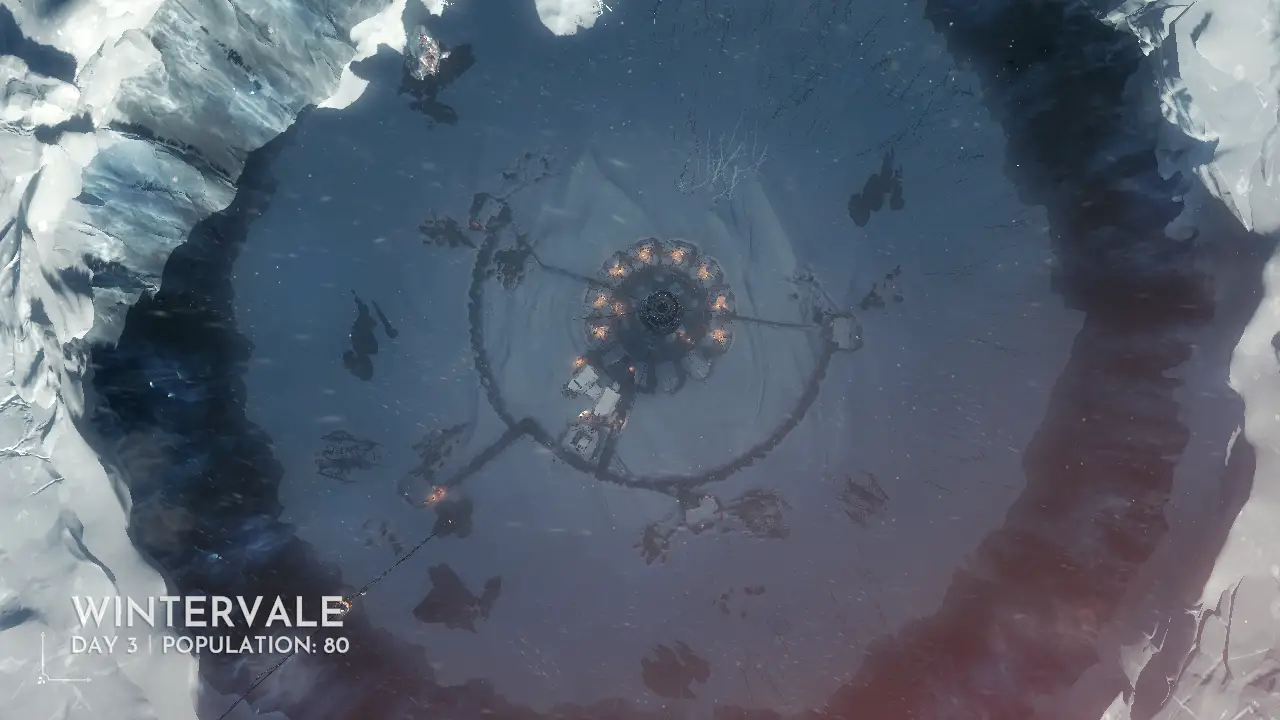
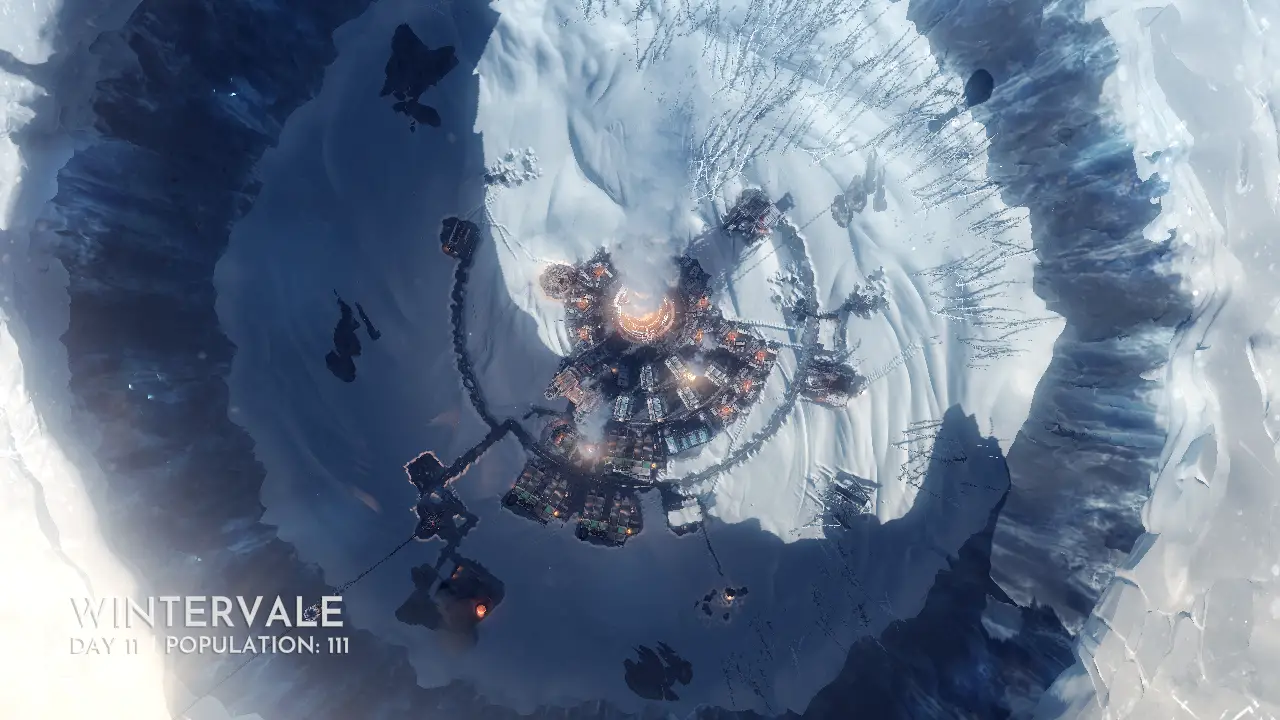
An example city is Wintervale, a city setup for this guild and that starts with a Slow Descent forecast. This means the city does not need to worry about medical posts, hothouses and cookhouses losing functionability quickly as they will only drop to chilly on day 3, leaving plenty of time to invest in heating by day 5. Although this means the city will have an easier time establishing infrastructure, it means the resources that would normally be invested in quicker heating would instead be put to use elsewhere, such as resources or gathering posts later on.
As for the first things a city should do, you need to sign Child Labour – Safe Jobs. It’s possible to succeed without Child Labour but I’m here to teach you how to survive not show off, so in the interest of not being wiped out, it is better to choose this option. Following this, you need to assign all of the children and workers to Wood Crates and the remaining 5 workers to a steel wreckage with the aid of 5 engineers. You should also build a street from the left of the stockpile to poke out away from the generator by one tile. Here, you will build two Workshops in line with the road. Now, you face the next branching path; Technology.
There are a few set paths of technology that I follow depending on the temperature forecast and what new strategy I want to try, and are the following:
- Tier 2 Technology > Hothouses > Beacon > Faster GatheringThis route is good for establishing food infrastructure early as you can staff functioning hothouses sooner but it significantly slows down your access to scouts.
- Beacon > Faster Gathering > Tier 2 Technology > HothousesThis route is good for very quickly getting to the Beacon but it has a big risk of leaving you without enough wood to get the scouts when the beacon finishes building, wasting time.
- Faster Gathering > Beacon > Tier 2 Technology > HothousesThis route is by far my favourite, as it boosts your resource collection before you get the beacons, meaning you can send scouts out with 13 days before the storm and still have enough resources for infrastructure.
For now, you just need to select your first research, monitor your resources and make sure everything goes according to plan. By the end of the day, you should have enough resources to build 2 Medical Posts (move the 5 engineers from the Steel Wreckage to the medical posts and split them 3-2 between them, they still function at max capacity), 8 tents (wait until you accept providing shelter for everyone to gain some extra hope) and a cookhouse (build a street coming up from the right of your workshops to align the cookhouse behind the workshops). You should also have some spare steel for later buildings. At 22:30 turn on the generator, it will turn itself off when your 50 coal runs out but prevent people from dying whilst tents are being built. Do not rely on the Heating is Off message, it will sometimes not appear and has been the cause of many embarrassing failures when I forget to turn on the generator and most people die.
Day 2 – Early Infrastructure
It’s important for you to enjoy Day 2; it’s one of the relaxed days you’re going to have…ever. The goal of this day is simply to let resources stack up and finalise your first preparations. Firstly, you should sign the Soup law as soon as you can sign another law (just after midnight of Day 1). Around midday the research for Faster Gathering should finish, meaning you need to immediately pause the game. From here, you should select the Beacon to research next, but before you unpause the game move 15 children from wood crates to coal and fully staff the Steel Wreckage that 5 workers had been gathering.
At the end of the day, you should have ~100 wood and ~50 steel, so now you need to assess where to place gathering posts. Ideally you should place them within range of 3 resource piles (if there’s only 2 coal piles in one radius, grab it anyway, these are what I call Coal Posts and form the backbone of early coal production). There should only be one Steel Wreckage outside of the range of these gathering posts, which should be manually staffed, whereas the other piles are cared for by the workers and 10 children, the other 5 of which should be set to work in the cookhouse.

If all of your work has come to fruition, your city should look like this, efficiently placed roads linking your gathering posts to the city to provide more productivity and to prepare for the incoming cold. These roads will also be useful later on for infrastructure such as industry, body pits and the beacon. Yes, you will be throwing your dead into the snow and yes those organs will still be viable weeks after they were left to get frostbite damage in the snow. By now, you should also have a new law available which needs to be used on Radical Treatment, reaching Overcrowding is the current objective and then you will move onto getting Extended Shifts.
Day 3 – The Beacon
Day 3 will primarily serve two purposes; resource acquisition and building the beacon. Around midday the research for the beacon should finish, and must be set to build immediately, which will dealt with by your spare 20 workers and form scouts as soon as its done. Today will also be the first temperature change of a few forecasts, so make sure to remember that.
In the meantime, however, you need to start researching Tier 2 Technology, which will bring you closer to raw food production. In the early game there isn’t too much stress around food, as production of soup should give you 200 food rations which will last you from day 3 to roughly day 5, leaving enough time to build and run the hothouses. The reason you need hothouses instead of hunters hut is, to be frank, non-upgraded hunter huts are terrible. You produce 11 raw food every day for 15 workers, compared to the ~2.7 food per hour (32.4 per standard workday and 43.2 per extended shift) for 10 children, engineers or workers in a hothouse.
By the end of the day, you should also have enough spare wood to build 2 medical posts, a necessary investment to keep the number of sick down due to contagion and preventing death. To position them better for later Steam Hubs to cover them, you should place them behind your current medical posts next to your workshops. To staff these, simply remove 4 engineers from your workshops and split them 2-2 between the new medical posts. If you wish, you can remove an engineer from the medical post with three of them to help patch the gap in your research capacity. Overnight, the construction should finish and your people will be ready for tomorrow.
Day 4 – Branching Cities
Day 4 is where this guide turns into less of a walkthrough and more of a handbook, directing you with advice rather than a clear cut progression. This is because temperature and scout exploration will vary wildly as cities could be 20-30 degrees apart from eachother and 60 people in difference. This doesn’t mean the guide will be useless from here on out as it will still cover certain milestones and goals your city needs to survive.
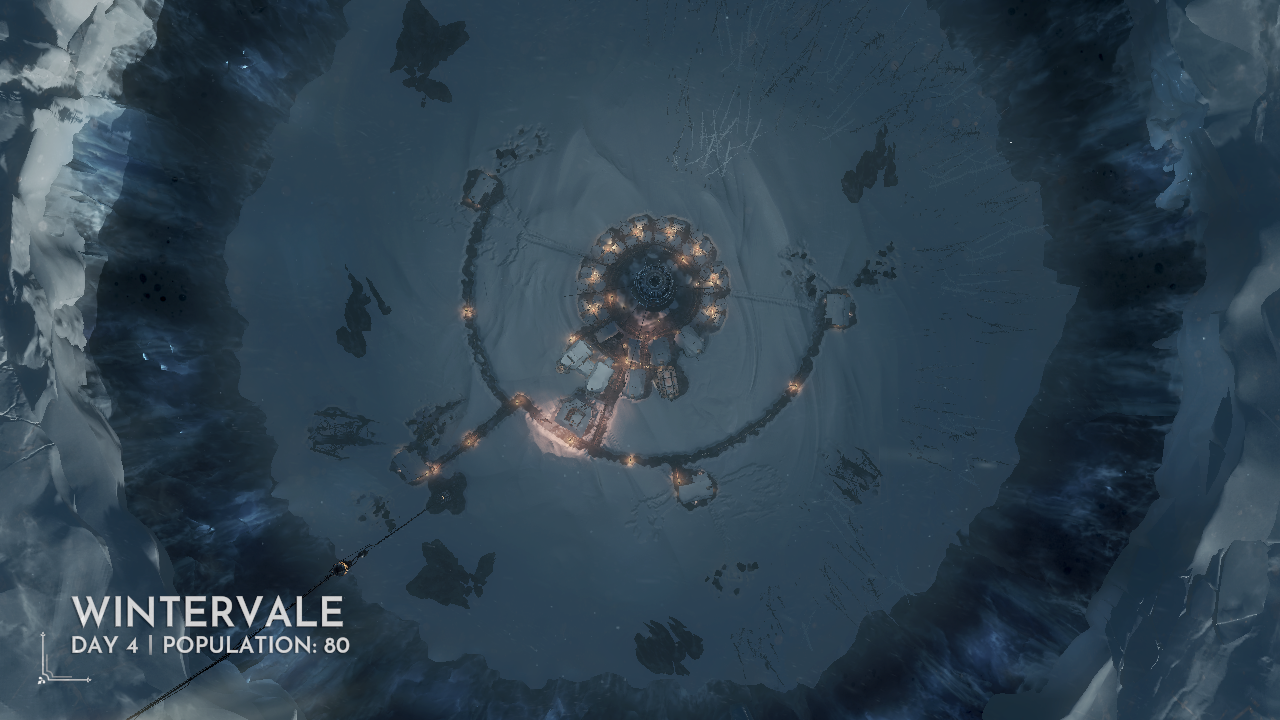
Now that you have scouts searching for resources and survivors, you can turn your research and resource focus to establishing necessary infrastructure. This will likely take the form of Hothouses, sawmills, steelworks and later on some coal mines. For now though, just slap down a sawmill or two and 3 Hothouses and you should be good to go for a few days. Bear in mind that temperature will be dropping so Hothouses and might not function without Steam Hubs or Heaters.
Ideally, your city should now be producing a decent amount of materials, food and coal to secure its future growth, but this doesn’t mean there isn’t more expansion you can do before the storm. For now, just focus on planning that gathering of more Steel and Wood to get bunkhouses and industry.
Before Storm 1
The buildup to the first Storm will be rough, as you need to secure power upgrades and enough food rations to survive. One small relief is that you only need enough food rations to feed people for the first night as you can grow food after the storm to prevent starvation deaths. I’d also advise waiting until just before or a day before the Storm hits to build Coal Mines, as you can temporarily dismantle your Hothouses to turn the Steam Cores into mines.
As for other preparations, it’s better to just focus on upgrading to bunkhouses, gathering people with your scout group (if you built it in the first few days you can get 2 groups of people before to storm, bring you up to ~125 people) and stockpiling enough materials to pull people out of sawmills and steelworks in the storm to conserve Steam Hub use.
Ideally by the Storm you should have the Extended Shifts, Overcrowding and Organ Transplants trees finished with a few optional laws such as Fighting Arenas and the early Faith Tree (I strongly advise taking Faith over Order, it is less effective but the low manpower use, massive ranges and Field Kitchens make it extremely worth it). One mistake you might make, however, is accepting to pay food rations for every emergency shift, which helps to prevent deaths but it will often result in an emergency preventing you from using the emergency power specifically for fixing the situation. Other than that, make sure to prepare for -70 temperatures for the storm, meaning you need Generator Power 2, overdrive and heaters to get Medical Posts working.
There’s also two main types of Storms, one that is normal and one that can very easily kill your city for no fair reason. The first type is where the Storm drops you down from -40 to -70 then lasts 2 days before suddenly jumping back up to -40 or -50. The other type makes a temperature graph look like an old, overused bed as the temperature slowly descends 2-3 days prior before the storm hits then lasts another 2-3 days after the storm before reaching normal temperatures.
Surviving the Storm
The first Storm is the first of many major tests for your city and is likely to bring the downfall of your early successes when practicing. Temperatures will drop to -70, hunting and growing food becomes impossible, medical posts will become difficult to heat, your coal consumption will need to be high and illness will grip your city like a slow death claiming the damned. Fret not, however, as your preparations are likely to aid your survival but, on their own, do not guarantee it. The storm requires very careful management of your infrastructure, industry and generator as you balance up the coal consumption of Steam Hubs with your need for resources and healthcare, attempt to keep people from falling ill in the cold as much and trying to slow the inevitable dead.
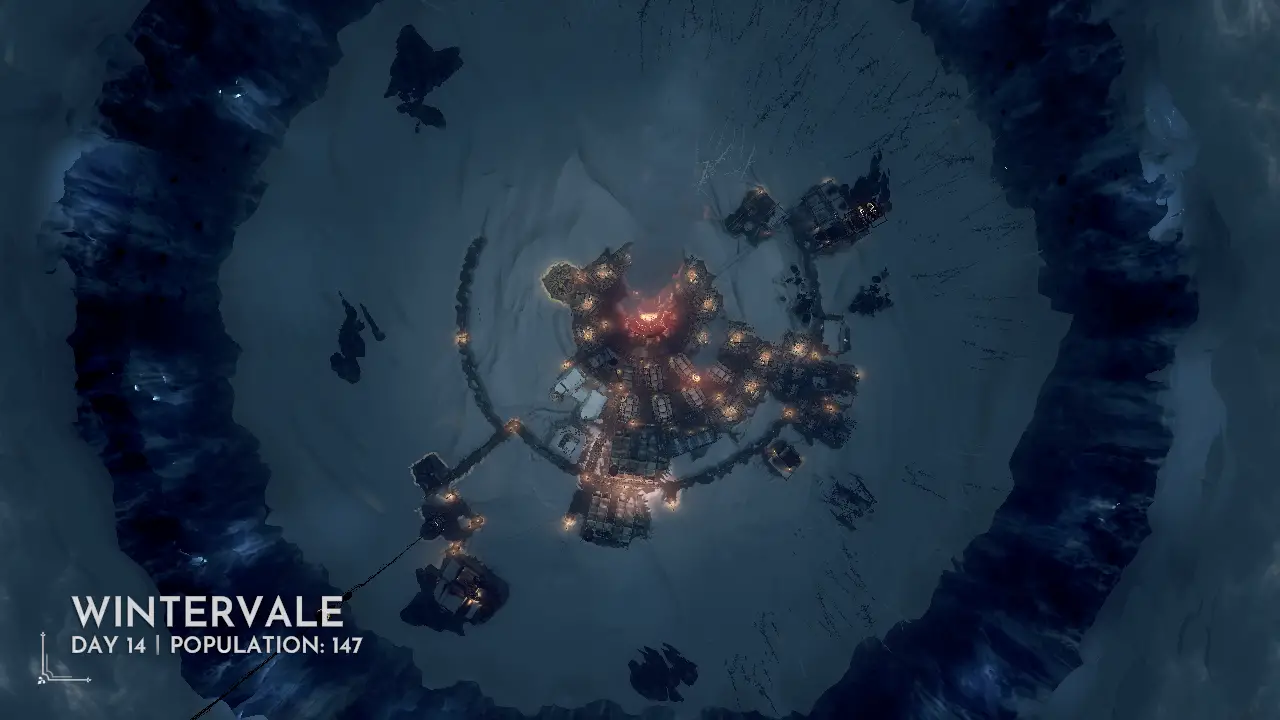
Although Wintervale would not live to see the end of the Storm, it was well prepared but succumbed to pre-existing issues caused by a food industry that had been hampered by wood shortages, deaths crumbling their hope and leading to an inevitable uprising. This, however, is not as likely to be a problem for your city if you handle it right as Faith boosts your hope with various abilities and careful use of Extended Shifts and overdrive before the Storm lets you delay the ultimatum to finish after the storm, allowing you to recover later on. As for surviving the storm itself, there isn’t much you can do except for filling your coal industry and hoping for the best. But, if there is any construction or upgrades, such as Bunkhouses you couldn’t afford before the storm, that you want to do then it is completely fine to do them during the night as the residents will upgrade them before it has a major impact on their health and the higher insulation has a net gain.
Post-Storm Recovery
Even if a city has been well prepared for a Storm, there is still the important matter of recovering from the harm it has caused. This includes production of food, sending scouts to find more people and hastily utilising your full medical capacity so your city doesn’t crash and burn.
The most important part is securing food production, as you probably wouldn’t have had enough to carry through the storm so people are getting hungry. The best way to do this is to convert some Coal Mines back into Hothouses and slap Extended Shift-Aid on them to patch up the food crisis. The other important part is to make sure you don’t stop researching, no matter how appealing fully staffed Medical Posts are, the next storm is coming and it’s going to be a lot tougher.
Another important goal is securing a larger population as your city needs to ramp up its industry and healthcare in preparation for the next storm and the only way to do that without automatons is to find survivors. Fortunately, you should have researched Extra Scouts in storm so you can secure 2-4 groups before the next storm, hopefully cementing your growth ready. A useful trick for housing these people in an emergency is to slap down some housing next to the Steam Hubs for industry so that they are at least in good temperature for most of the day.
Extra Advice
Although this guide covers most of the general tips and tricks of how to learn and survive Endurance Extreme, there are still a few little bits of advice that I can share for survival and general prosperity.
- Discontent can be pretty hard to manage but Extended Shifts and Faithkeepers act sort of like a Discontent bank, as each Extended Shift produced (and removes when disabled) 3% Discontent and Faithkeepers can easily knock out 25-30% if you suddenly full staff the building. This, combined with the massive reduction in Discontent (up to 50%, and only gaining 5-10% upon reversal) caused by homes going up to Liveable from Chilly which is easily triggered by overdrive, leads to Discontent Ultimatums being very easy to manipulate for free hope if you’re doing well and reduces danger of uprising when you’re not doing well.
- Always be scouting. The only way you will survive is with a constant influx of new residents, as you will inevitably lose some people and the only way for you to keep up with growing coal and resource demands is by having more people to staff workplaces and industry.
- Hope is more concerning than Discontent, simply because it is incredibly hard to raise Hope compared to reducing Discontent. Whereas there are ways to quickly bodge job a Discontent reduction in an emergency, there are little to no ways of significantly raising Hope. This means it is better to gain some hope and some discontent than plummet an already low hope to ultimatum level to avoid discontent. For this same reason, laws and decisions that raise hope with little to no cost are incredibly useful, such as some of the free abilities from the Purpose trees.
- Danger does not matter. It may seem better to hinder your city’s industry in a crisis to avoid people working in extremely low temperature workplaces or sending children into the mines than having the generator go down in -60 or have 3 quarters of your population die of mass starvation like Winterfield. Don’t be like Winterfield.
- Archives and Artifacts are late game dalliances. You may gain some bonuses from the Archives but don’t. Risking the lives of your scouts or consuming large amounts of resources to get a negligible prize is a terrible idea. If you want the Archives achievement, I’d advise going for a Serenity Easy run, building the infrastructure and then just managing the scouts whilst the game goes by on max speed.
Conclusion
Although this guide isn’t the unchallenged word of a supreme video game master, I hope it at least helps to provide some insight into ways and methods of starting off a city in Endurance Extreme, even if it can’t explain an exact method. I might come back later and expand upon it by explaining some late game stuff but for now I’m working on other things.