This guide is for those trying to gain super samples, medals, credits and xp. To get the most of your runs and to make the game overall simplified. This is not a “farming” guide as those are a waste of time, and do not help you in the overall lessons you will need on higher difficulty. We will go over best stratagems, best weapons, and overall mission approach to get you and your team in and out of missions with samples. Also going over hidden mechanics in the ping system, mission selection, and more.
Step 1: Picking your planet
First we need a planet that makes the most sense for more rewards. To find the ideal planet is very based on the current state of the game story, and community progression so do take that into account that this is not always going to be ideal 100% of the time.

You will notice when looking at each planet there is a modifier for the planet. Should look like a cloud with rain, snow, ect. We want to avoid these as much as possible. The reason this is vital is for your overall vision when you are physically on the planet. We will be looking for side objectives, the super sample rock, and avoiding patrols. The more vision the better. Crimsica is a good example of a planet to get supers from.

Once you have found the planet, check the modifiers.
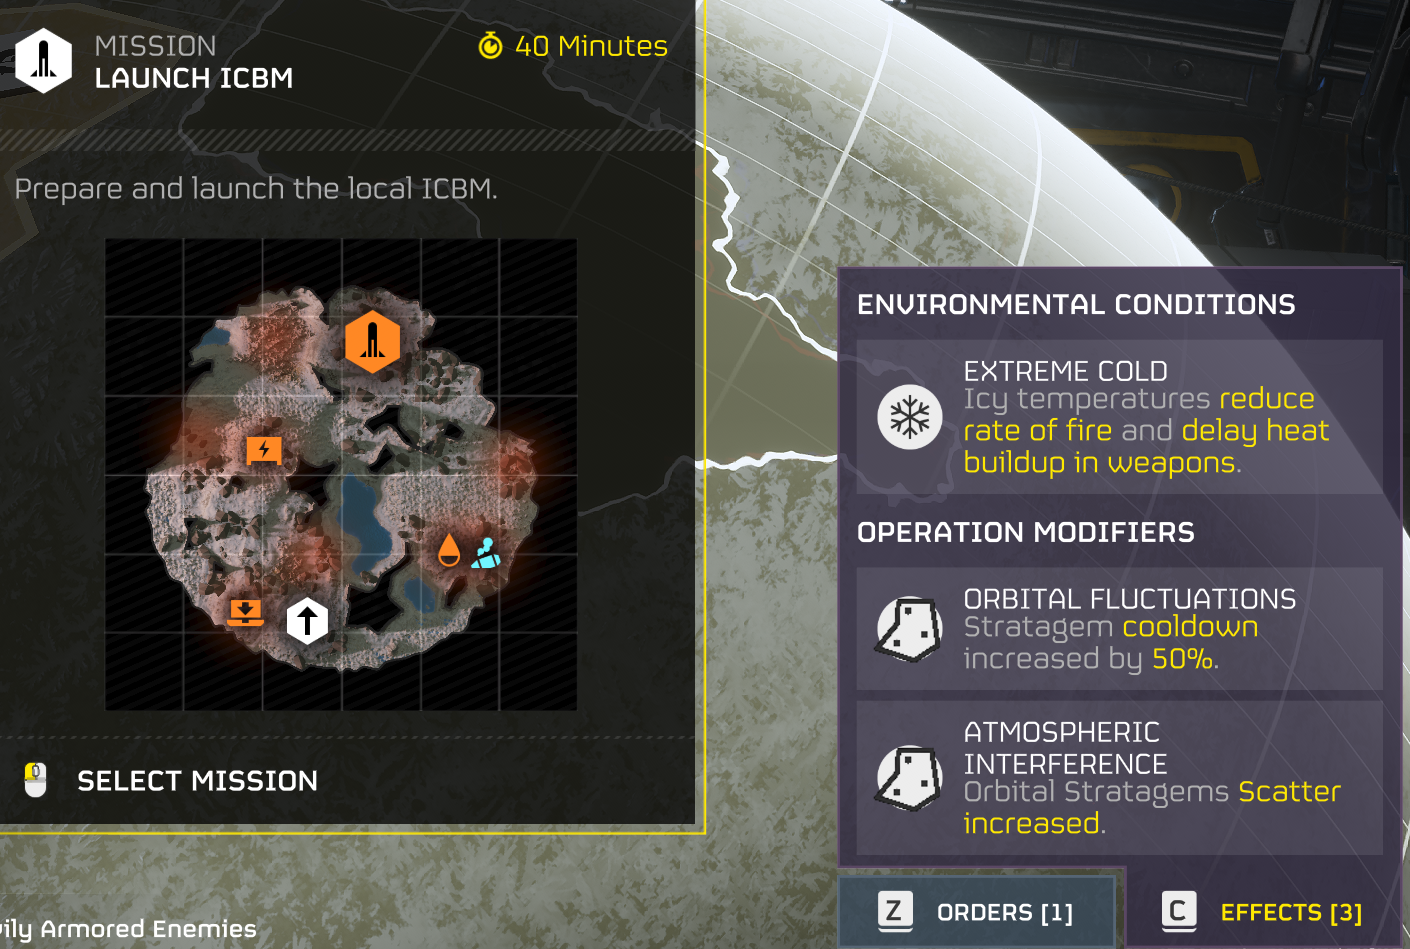
There is nothing worse then entering a mission and wondering WTF is going on. Go in knowing the debuffs you will have to face. This is unavoidable at high difficulty, so better prepare. For example, having stratagems that scramble will make every stratagem you call pick a random stratagem from your deck. Even having increased cool downs to orbitals, or guns. Keep these into account when you make your build.
Day and Night Missions
You can select a mission that is in day or night. This can be done simply but rotating the map to your desired location. You should see an icon that shows day or night.


Step 2: Creating a build
Below you will see a Tier List of stratagems that i made (as of Feb.2024) that are ranked from should use to don’t use. Keep in mind that all stratagems are ranked for Helldive Difficulty 9 against Terminids.
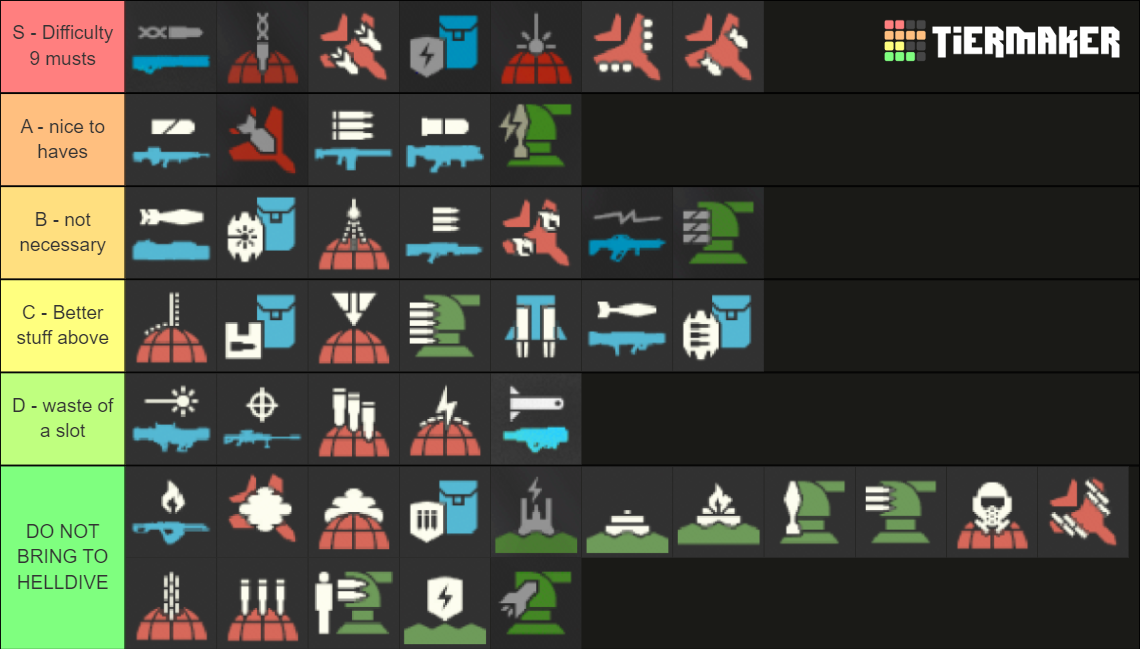
Some more details if you are not convinced | Skip to Primary if you trust me
Now with this list I want to touch on some things to keep in mind. This is for 7+ missions. You can use all of these in lower missions and have plenty of success and fun, however the current state of the game you will wanna start going to the most useful.
All the turrets are great however they get walked on by harder enemies. Buy the time they drop, get a couple shots off they instantly die to the swarm of bugs. Worst of all is the mortar. This will team kill like no other, due to the mass amounts of enemies that come swarming all over you. The mortar will target the closest enemy and if you are being attacked its land right on you. So do the team a favour an leave the turrets to the robots, much more useful there.
The support weapons
When it comes to breaking the armour of the Chargers and Bile Titans there is nothing better then the Railgun. this has 20 shots, safe mode can be turned off.To do this hold “R”, will explode if held to long . Anything with armour will die, especially the medium sized bugs.
The problem with Reconciles is it takes to long to reload when you are swarmed, and it takes a backpack slot away from you or a teammate. As for the auto-cannon, this is a all round useful support weapon. It can close holes, break spore spewers from anywhere you can see them, and has lots of rounds per clip. It doesn’t help that it take awhile to reload but when you can it’s very helpful. As for the spear, takes to long to lock on, not really viable in chaotic engagement.
Why Eagles?
You will see in my examples further into this guide that there are orbital debuffs. The last thing you need is to be waiting for a cool down for your orbital laser or railcannon. with the Eagle 110mm rocket pods you get max 3 shots before rearming. This is incredibly good, and it goes for the biggest target. This is by far the most underrated stratagem in the game. Plus with the Airstikes and Cluster Bombs you can clear wave after wave without firing a shot if you get a good throw in.
EAGLE TIP: make sure to Rearm when you have downtime! This timer is long so make use of the downtime between fights to have max amount of eagle rounds.
Primary
As for your primary, just bring the Breaker Shotgun, its overall the most consistent and will be more useful until they buff the rest of the guns in the game.
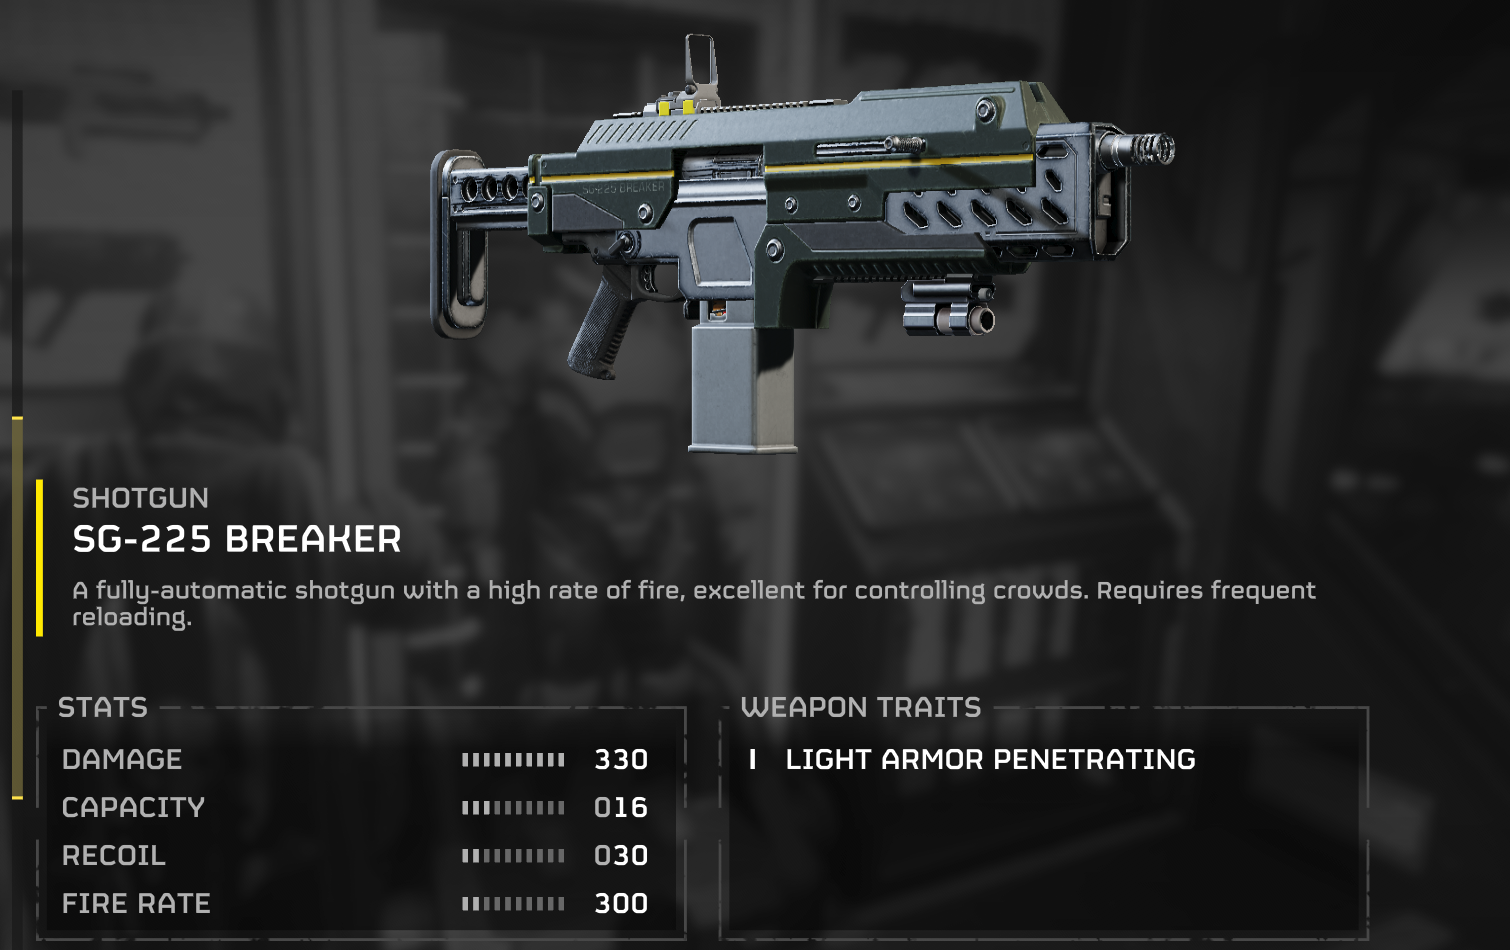
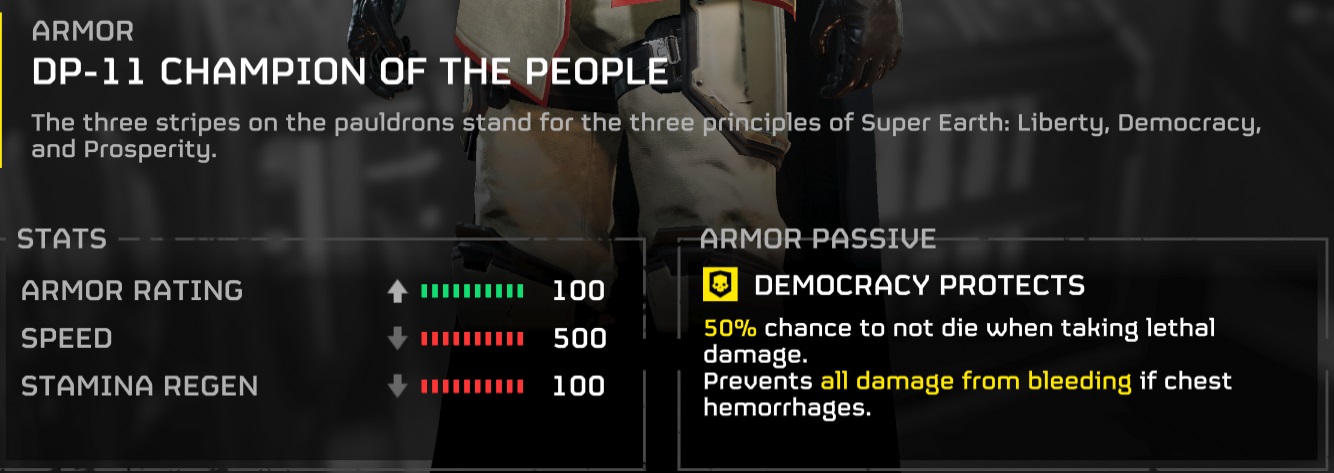
For armour, Bring a light since armour values are still broken. As for passives to go for, Grenades, Stims, or Democracy Protects are all good options.


When making your build you need to communicate to your team with what you are bringing so you don’t bring to much of the same thing. You need a balance between ARMOUR PEN and MOB CLEAR.
For someone looking to ARMOUR PEN:
Light armour – Passives mentioned above
Primary – Breaker
Sidearm – Default pistol or machine pistol
Stratagems:
MUST
Rail-gun
Shield backpack
Optional Choices:
110mm Rocket Pods
Orbital Railcannon
Orbital Laser
Eagle Airstrike
For someone looking to MOB CLEAR:
Light armour – Passives mentioned above
Primary – Breaker
Sidearm – Default pistol or machine pistol
Grenade launcher (requires a supply backpack to be stronger)
Shield backpack
Auto cannon (do not need someone to reload you)
machine gun (stalwart won’t kill medium enemy’s consistently)
Eagle Cluster Bombs
Orbital Air burst
Orbital Laser
Step 3: Completing the mission
Before the Drop
Now you are ready to drop, but what do you wanna focus? Well you do not by any mean wanna hot drop. This will bleed out reinforcements and waste time, so prioritise dropping on high ground with enough space to drop your weapons and backpacks down. This will inevitably result in the patrols going towards you, so better to have everything now to kill everything before a bug breach occurs.
Leadership
Designate a team leader. This could be someone who is hosting, or has the most knowledge. What ever the case, you need someone leading the helm making sure there is a clear objective. The result will be less patrols, less breaches and faster completion. DO NOT SPLIT UP. If you are to split up have a buddy system. Keep at least groups of 2. But when you are starting out stick together.
Ping Everything
Helldivers 2 has a very unique ping system, when you ping something like an objective it reveals it to everyone. So look for possible artillery, radar dishes, ect. This is extremely vital for not only getting the most XP but will aid in getting samples, medals, and the missions overall difficulty.
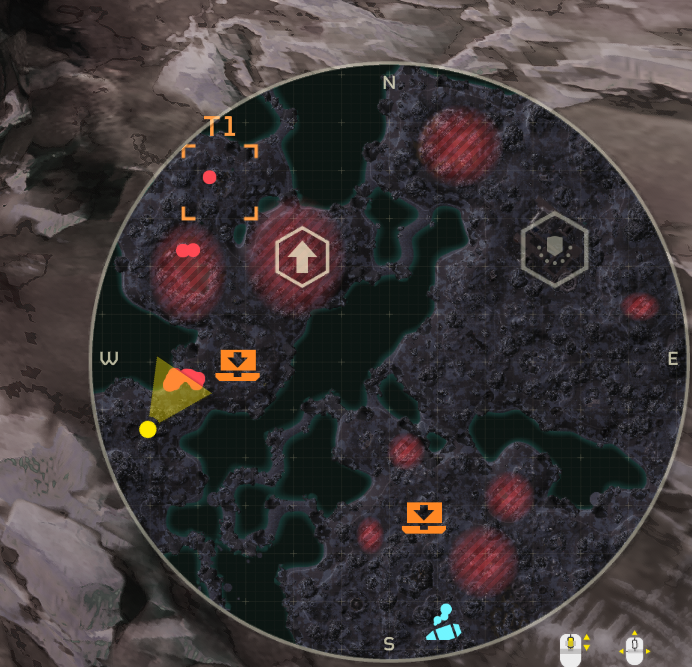
With a well placed Map Ping you can even spot things you haven’t visibly seen.

You know you did it correctly if you see the box icon around it. In the above example it should be “T1” in orange
Now if you are wondering what you pinged exactly look to your compass, in this example it is a spore spewer

Mission critical objectives
These are side missions that are must finishes to keep you from getting swarmed or missing super samples.
Stalker Lair
If you see stalkers, you are in trouble. This is arguably the most devastating enemy to encounter, and will ruin your run if you do not address them. To find them look where they are coming from, if they are coming from the north for example, call it and head over there. There will be no red marker so you must get close enough to see a “?”. If you are close, the chat box will tell you what you are near.
Once there there should be 1-2 holes to nade, this can also be done with a well placed Eagle Airstrike. This will stop the spawning and will only have the ones left on the map.
The above mentioned Map Ping will also discover them.
Here is the Compass view

Spore Spewers
These are easily mistakable with weather effects, however there are very easily destroyed from a distance. If you spot what looks like a tree with a glow effect, shoot it with the auto-cannon twice and it will kill it. Once down the fog should start clearing. They have common and rare samples under it so do make the trip to go to it.

Radar Station
This is the most useful to complete, as this will reveal everything. From stalker lairs and all points of interest, these will be a key to success when planning your route to the main objective and getting everything on the map.
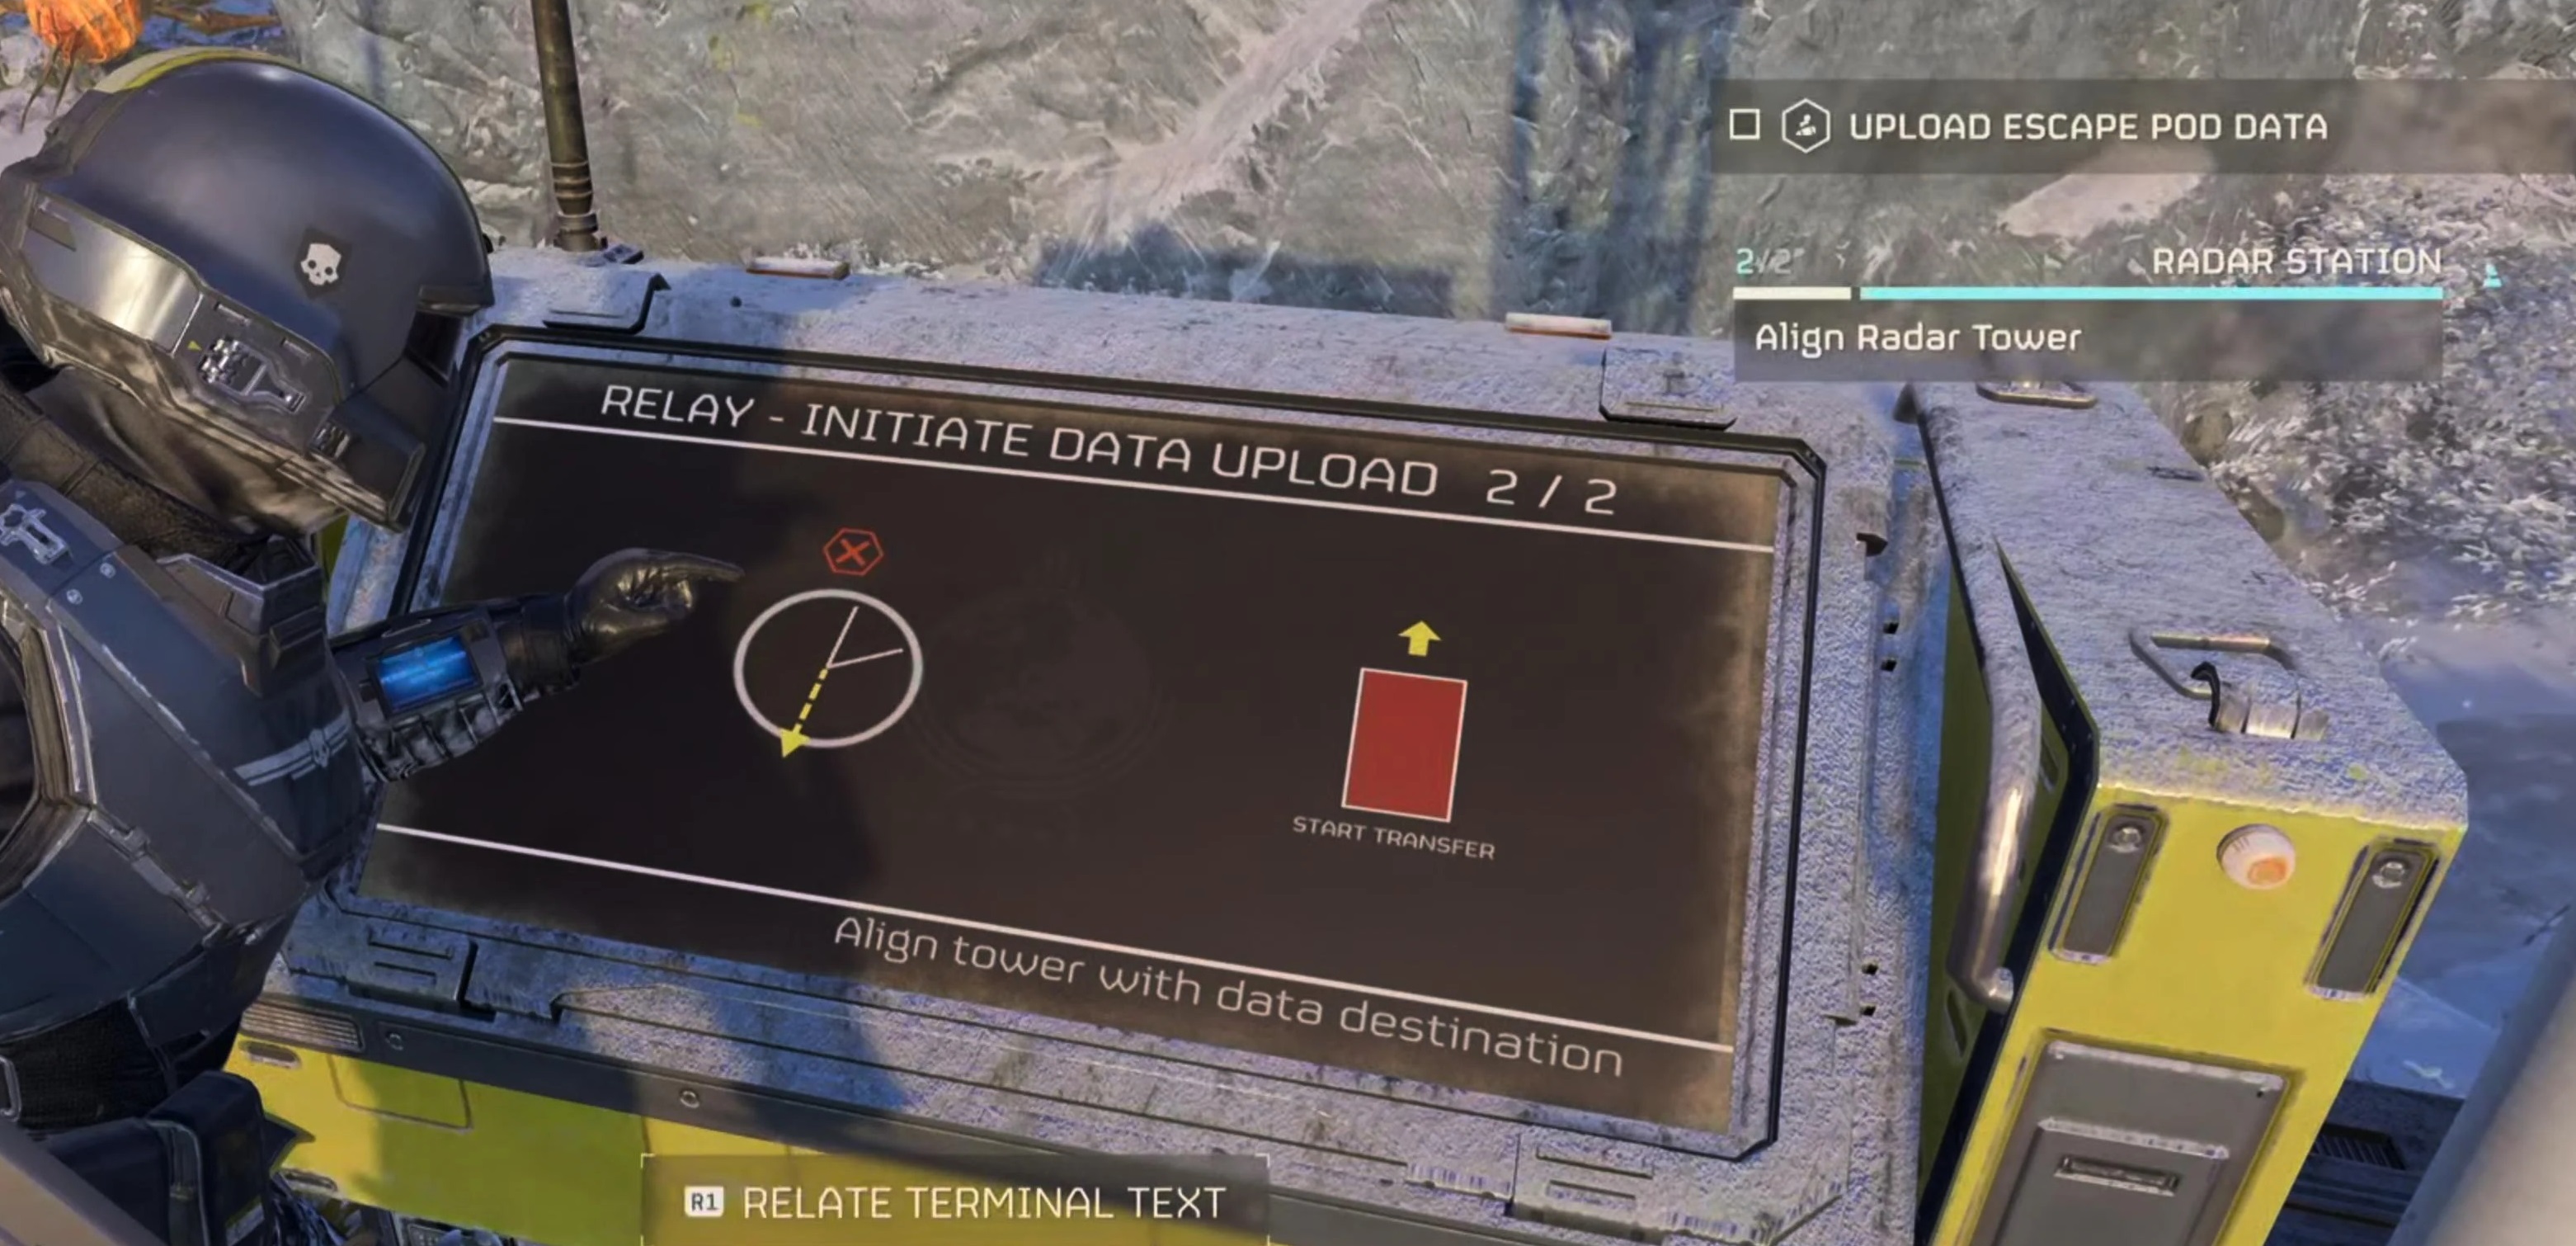
This is also very solo-able. I know I just said, “Stick together”, however sometimes you can’t with the chaos or bad teammates. Even with teammates who don’t use comms can make this task take much longer then it really needs to.
So this is how you do it. First just touch the terminal to turn it on. This may seam obvious but if you have a bug train behind, make sure to just get it going. Follow the prompts till you get to the Align the Satellite. Now if you are not in a hurry check which way is fastest to turn, and if you dont have time no worries just go to alignment. Once there start turning it in one direction and carefully listen. You should hear the sound from the terminal, should sound like a beep. This means its aligned and you can now activate it.
SEAF Artillery (Bonus tip)
This is not a necessary objective but its a nice to have. So I will mention a few tips.
1:To load the gun you need to pick up the rounds and they will fire in the order you put them in. So communicate what you a placing in them.
2: spamming “E” will make it faster to carry, you will also notice if you space out your “E” presses you can walk past the shell and pick it up.
3: Try to avoid non-lethal shells. Its important to look carefully for the mini nuke, high explosives. these can be very useful against big swarms and strong bugs. This is luck based so sometimes you will not have all of them, so best to have someone at the loader and everyone else drop the shells and they can quickly put the best ones in first.
Resources
This is the most important part of your mission besides the main mission. There is really no point going into Helldive without getting something out of it.
Understanding how resources work
I will quickly explain something that I have noticed a lot of people misunderstanding the system. All resources are shared with everyone. If you extract with samples everyone gets them, so if one person grabbed everything and they extract everyone gets it even if you didn’t make it.
As for medals and super credits, these go into your account the second you pick them up, and will go into everyone else’s. To see this simply hit “ESC” and look to the top right where medals and super credits appear.
Samples
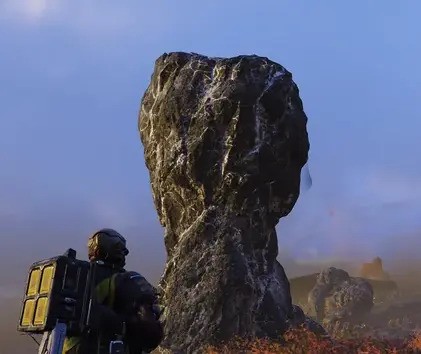
The big reason you are running helldive is for supers. So to find them you are looking for a rock. But not just any rock, it stands out. That is why we selected a mission with better visibility, and or got the Radar up. These will not be pingably confirmed so you must go to it to be sure. All super samples spawn around this one rock, so make sure you grabbed all of them. Hitting “TAB” at the top right will show how many there are.
Below is the rock…
Best way to get samples out
Once you have the super samples, you have 2 options. You can run with the team and make sure you stay alive or have someone pick up after you. Or you head straight to extract and drop them there. To do this, hold “X” on keyboard, and you can select to drop your samples. This will prevent it getting lost to the chaos. Then the last man alive can at least extract the samples.
Step 4: What now?
What to upgrade first
I will keep this easy, Eagles, Orbital. that should be the main focus. Note the max amount of resources are as follows
Common: 500
Rare: 250
Supers: TBD
Requisition points: 50,000
So be sure not max and not spend, most of the 2-3 upgades require alot of resources including supers so be sure to spend them in the right place, even if it mean waiting to get the max upgrade.
