You already know that the Marauder is the king of headshots. But why is it like that and how do you get it working in your games? This guide goes beyond the common prescription of “Get a Marauder with LosTech weapons” and goes into detail on how to set up the called shots, how to do the math, the best weapons to aim for, and the best mechs to include in a headshot lance.
Getting Started
So you’ve heard about headshots and the legendary Marauder from the forums or from other guides. But you’re a busy mercenary commander and want to give your mech techs something to do while you read the guide. Before going into too much detail, here’s a shopping list to work on so that you can get some of that headshot experience while you assimilate everything.
- Assemble 3x Marauder-3R using parts. Salvage them or buy from unaligned worlds.
- Buy MLaser++ from the Canopian faction store.
- Buy UAC2++ from the Davion faction store.
- Buy Inferno++ from the Liao faction store.
- Obtain an SLDF Griffin from the Criminal Minds flashpoint (or build a Jagermech-6A).
- Earn faction with Pirates, visit black markets, and buy more advanced items as you find them.
If you already know how to do a headshot and don’t care about the math, feel free to jump straight to another section:
- Headshot Weapons provides a review of weapon effectiveness.
- Headshot Lance discusses suitability of different mechs for different roles in a headshot lance.
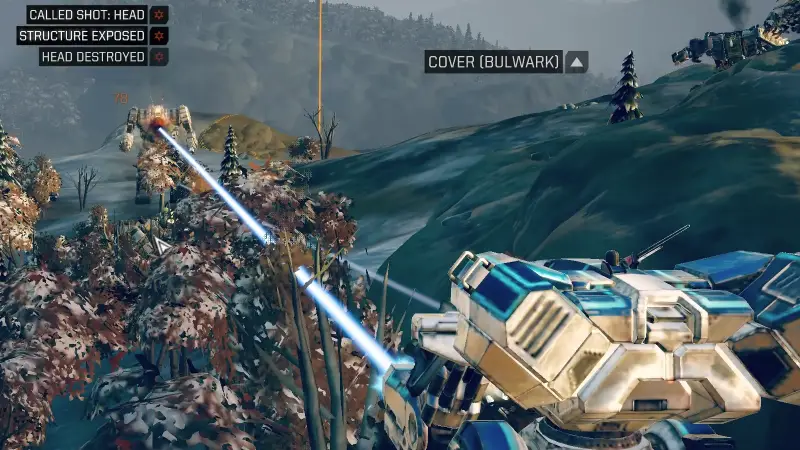
What are Headshots?
The path to success in most Battletech missions involve defeating enemy mechs. There are several ways to do this. You can destroy the center torso, destroy both legs, knock out the mechwarrior, or destroy the head. Simply adding more firepower in hopes of decreasing the time needed for a center torso kill is the least efficient use of time and resources. Tactics like flanking and called shots are effective at increasing the efficiency but they still lose effectiveness against heavier mechs with more armor and more structure. Headshots are especially effective because they completely bypass armor and structure, allowing you to easily defeat even the heaviest and most dangerous enemy mechs.
The head of a mech has at most 45 armor and 16 internal structure meaning that it takes 61 points of damage to destroy. Destroying the mech in this way results in 3 salvage parts and is therefore highly profitable as well. The headshot lances from my Ironman Kerensky careers could reliably complete hundreds of back-to-back 5-skull missions and pull in loads of assault mech salvage with little risk of failure using simple battlefield tactics. Since headshots are essentially a random phenomenon that has less to do with raw damage output and more to do with specific weapon characteristics, some background is required in order to build a lance that is optimized to do this.
Calling the Shot

The first part of any headshot method is to generate called shots that let you select a target location. The game provides four ways to do this.
1/ Precision Strike (PS). You can spend 30 resolve in combat to make a Precision Strike. This grants a 20% bonus chance to hit and allows you to select the target location. You should have enough resolve to take 1 PS on the first round of combat and at least 2 PS on every subsequent round. PS is good, use it whenever you can.
2/ Knockdown. If you deal enough stability damage to a mech that is already unstable, you will knock it down, allowing you to select the target location. Note that knockdown targets present a different called shot profile than other called shot methods. It takes a minimum of two turns to knock down one enemy so this is one of the weaker methods for generating called shots.
3/ Break a Leg. If you destroy a mech’s leg, you will knock it down, allowing you to select the target location. This is better than knockdown from stability damage because you can do this in 1 turn if you hit the leg with enough damage. However, it generally takes one PS to target the leg.
4/ Shutdown. If you force a mech to overheat (e.g. with Infernos and Flamers), you’ll cause it to shut down, enabling a 20% bonus chance to hit and removing all mechwarrior effects (including Guarded, Entrenched, and Bulwark) in addition to allowing you to select the target location. It takes only one turn from a suitably-equipped mech to shut down an enemy and you can also combine this with TAG to increase the threat level of your weapons.
The best way to generate called shots is with a combination of PS and shutdown. This gives the ability to kill or disable up to 3 mechs in one round. No mech is safe from shutdowns. Even special mechs that are immune to headshots can be shut down by infernos and killed with a CT called shot.
Headshot Math
Headshots are fundamentally a function of probability and using it effectively requires you to trust the game’s RNG. A full treatise on headshot math is out of scope for this guide. However, I can provide a brief foundation and some few useful tools for predicting the effectiveness of your headshot builds.
The default chance of a single-shot weapon hitting the head on a called shot is 2%. With Called Shot Expert from Tactics-6, the chance increases to 6%. With Called Shot Master from Tactics-9, the chance increases to 18%. The Marauder’s Lance Command Module further increases this chance to 35% for a Tactics-9 mechwarrior. The actual chance to hit the head also varies based on the attack facing. Flank and prone facings have a slightly reduced chance to hit the head while it’s not possible to target the head from a rear facing. For the purposes of this guide, we’ll assume front facing and tactics-9.
Multiple shot weapons such as MGs, SRMs, UACs, SPPCs, and LBXs have a reduced chance to hit the head for each successive attack.
Clustering weapons such as LRMs set the targeted part on the initial attack and every other attack has an improved chance to hit the same region. However, hits on the head are only possible if the head was the target of the initial hit. Subsequent hits on the head only have a 0.5% chance no matter the initial called shot bonus. This effectively renders LRMs useless as a headshot weapon.
Weapon damage is important to consider. It takes 61 damage to destroy the head. This can be dealt by a single big weapon or by multiple hits from smaller weapons. It is also important to consider damage reduction. A guarded unit or a unit in cover has 20% damage reduction. When both guarded and in cover, the unit has 40% damage reduction. Mechwarriors with Bulwark add 20% to any cover bonus. Furthermore, if there is a Marauder in the enemy force, all units gain an additional 10% damage reduction.
There are also ways to increase the amount of damage dealt to the enemy. One way is by hitting the enemy with TAG / TAG+ / TAG++ that provides a +10%, +15%, or +20% damage bonus. Another is by using a mech with a built-in damage bonus such as the Phoenix Hawk, Warhammer, or Annihilator.
Most mechs including the Marauder mount multiple weapons and the chance that you will score a headshot kill is equal to the chance that you will deal enough damage to destroy the head in a single alpha strike. In general, we can simplify the problem by classifying weapons by how many hits it takes to destroy the head. The 1-hit and 2-hit probabilities are easy to compute so here are some tables to help get a sense of how the probabilities work.
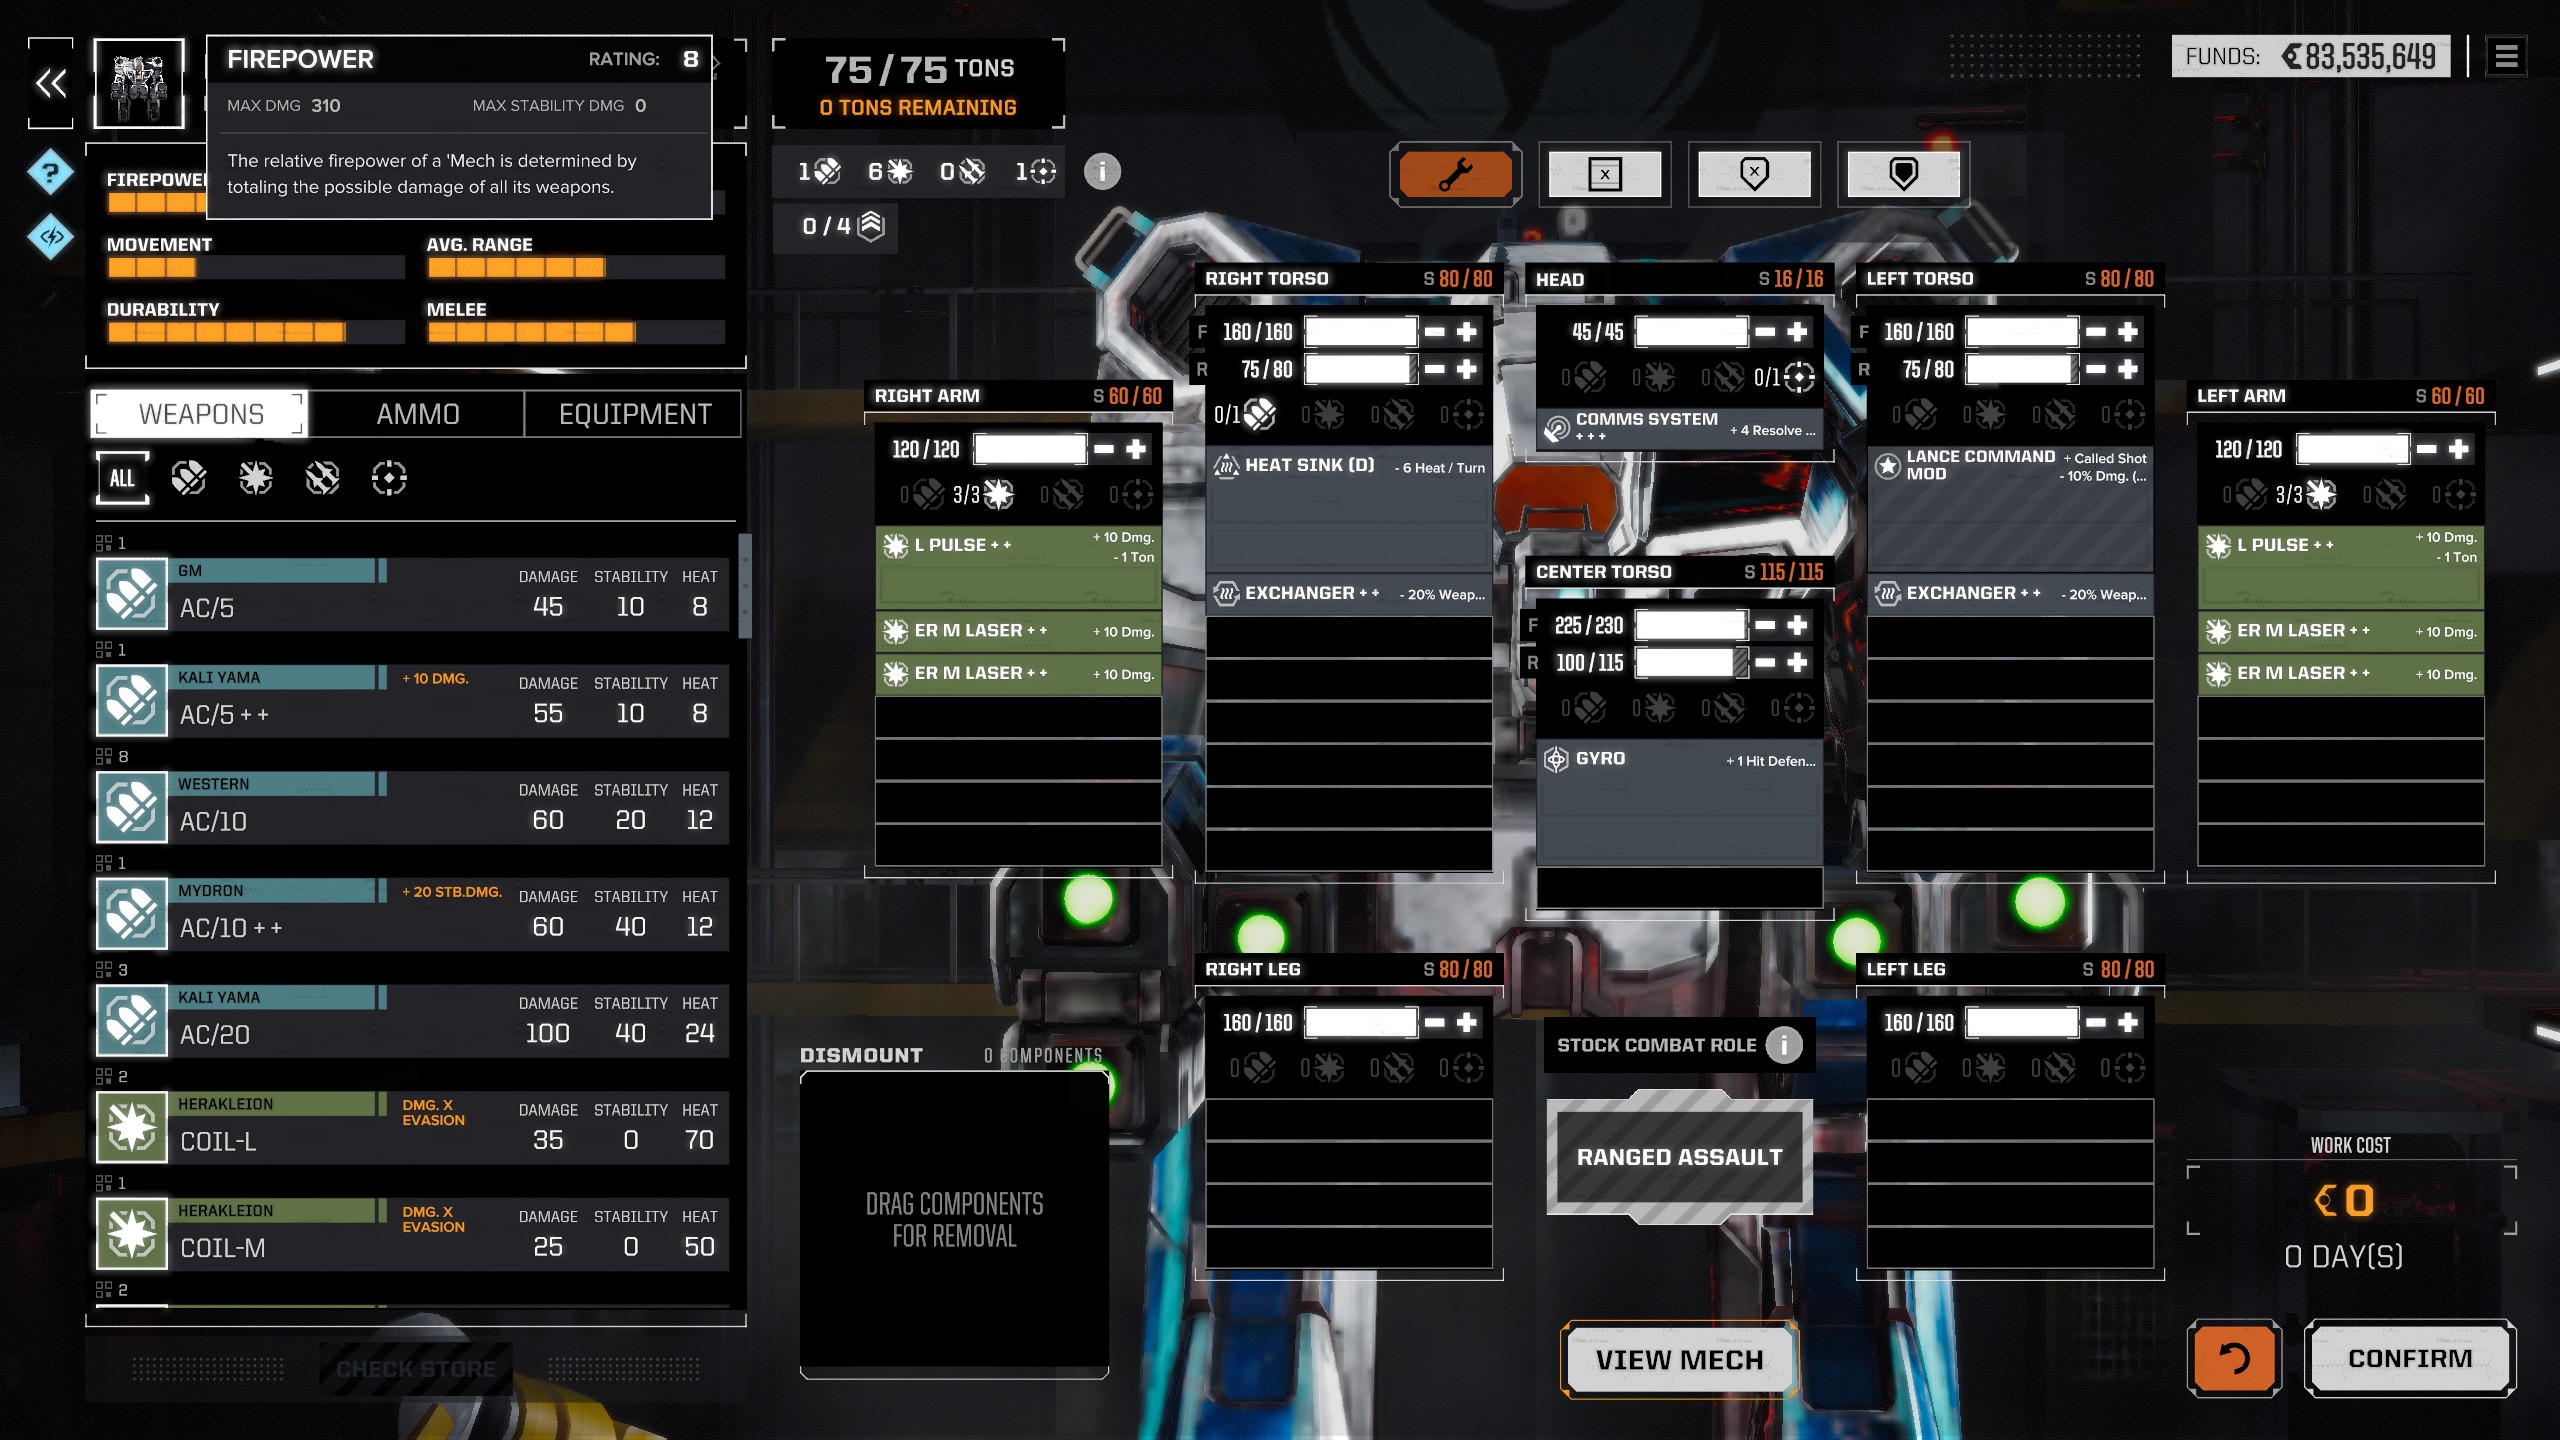
As an example, we’ll use a MAD-2R shooting 2x LPulse++ (1-hit) and 4x ERMLaser++ (2-hit). Against an undamaged target with 0 damage reduction, the chance for one of the two LPulse to hit the head and kill the target is 58%. The chance of two ERMLasers hitting the target is (100% – 58%) * 43% = 18%. Therefore this mech has a 76% chance to kill its target with an alpha strike. Against a target that has already taken one hit to the head, any of the 6 weapons hitting the head would result in a kill or 92.5%.
Headshot Weapons
Headshot efficiency is my primary criteria for determining how good a weapon is at generating headshots. I calculate this value based on the number of hits required, the number of shots fired, accuracy modifiers, weapon weight, 8 shots of ammo, and the number of double heatsinks to manage the heat.
For example, the ERMLaser++ serves as the benchmark against which I will compare other weapons. It is a 2-hit weapon that weighs 1-ton and generates 20 heat which requires 3.33 double heat sinks to neutralize. Therefore its efficiency comes out to 100 / (1 + 3.33) / 2 = 11.54.
The LPulse++ is a 1-hit weapon that weighs 6 tons and generates 30 heat. Its efficiency comes out to 100 / (6 + 5) = 9.09 which is 79% of the ERMLaser++. Despite being less efficient, its increased range and the extra value of being a 1-hit weapon puts it on the same level as the ERMLaser++.
While efficiency is important, so are other factors. Range is very important since headshot fights are fast and it is important to be able to engage an enemy from further away. Also, some weapons work better in specific situations or with specific mech quirks. Finally, it’s important to note that early game players will not have access to top-of-the-line gear and will have to work with the choices that are available.
Endgame Weapons
These are the best headshot weapons for the endgame, bringing the best combination of efficiency and range on advanced mechs kitted out with double heat sinks and/or exchangers.
UAC2++
2×35 damage | 5 tons | 8 heat | 720 / 480 / 120 range | 93%
The UAC2++ is totally overpowered as a headshot weapon. It has a ridiculous 720 range and works well even without double heat sinks. Even factoring in the multishot penalty, UAC2++ still posts a benchmark that far outclasses all other ballistic weapons. Ammunition tends to be a non-issue since headshot battles end quickly. You can buy unlimited quantities of this weapon in the Davion faction store. A Marauder 3R can mount 3 of these making it a deadly long-range sniper.
LPulse++
65 damage | 6 tons | 30 heat | 450 / 300 / 0 range | 79%
The LPulse++ is the best 1-hit kill weapon boasting good efficiency and range as well as an accuracy bonus. Its weaknesses are that it is expensive, difficult to find, and requires double heatsinks and/or exchangers. Needless to say, you’ll need to visit a lot of SLDF and black market worlds to find a pair of these for your Marauder 2R.
ERMLaser++
45 damage | 1 ton | 20 heat | 360 / 270 / 0 range | 100%
The ERMLaser++ strikes the best overall balance for a late-game headshot weapon. It has decent range, low weight, and fits on common energy hardpoints. The high heat generation can be offset with double heat sinks and exchangers. 45 damage allows it to remain a 2-hit-kill weapon against enemies with 20% damage reduction and to become a 1-hit-kill weapon when shot by a Phoenix Hawk or Warhammer against a target debuffed by TAG. It can be hard to find enough of these since they are only rarely available on SLDF worlds and the Black Market. Fortunately, you can also obtain 4 of these from one of the mechs you get as a reward in the Heavy Metal flashpoints.
Situational Weapons
These weapons are situationally useful, whether it is at close range, with specific mech quirks, or as a replacement for something harder to get.
MLaser++
35 damage | 1 ton | 12 heat | 270 / 180 / 0 range | 144%
The MLaser++ is a very efficient but 2-hit headshot weapon hampered only by its short range. It is very good on SLDF mechs equipped with double heat sinks. Its advantages are that it’s lightweight and energy hardpoints are common. You can buy unlimited quantities of this weapon in the Canopian faction store.
ERSLaser++
40 damage | 0.5 tons | 10 heat | 150 / 150 / 0 range | 208%
The ERSLaser is the most efficient headshot weapon in the game but suffers from a very short range. If you have extra support hardpoints and can get the mech into range, it will improve your chances of scoring a kill. Since it is a support weapon, its accuracy is not affected by evasion making it an ideal weapon against light mechs. You can only find these in SLDF and Black Market shops and they are very useful for many applications so hoard them when they show up. This is an especially good weapon for fast mechs like the Phoenix Hawk.
ERPPC++
70 damage | 6 tons | 45 heat | 690 / 510 / 0 range | 64%
Though less efficient than the LPulse++, the ERPPC++ holds its own as a 1-hit headshot weapon. Its range is comparable to the UAC2++ and the extra damage lets it remain a 1-hit kill weapon against a Marauder’s 10% damage reduction. Even the sensor impairment can be useful by disrupting return attacks if you get unlucky and fail to secure the kill. The main weakness is the enormous amounts of heat it generates and the huge price tag. It can work well on a Marauder 2R if you’re having trouble getting LPulse++.
UAC5++
2×45 damage | 7 tons | 16 heat | 540 / 360 / 90 range | 61%
The UAC5++ is usually worse in every way than the UAC2++. The only exception is when it’s equipped on an Annihilator due to its ballistics damage bonus. Against an enemy debuffed by TAG, an Annihilator with 5x UAC5++ has 10 chances to destroy the head – 5 at full accuracy and 5 at reduced accuracy. Even if the enemy were to somehow survive, it would have taken a huge amount of damage and lighter mechs are likely to be outright destroyed.
MPulse++
50 damage | 2 tons | 16 heat | 270 / 180 / 0 range | 93%
The MPulse++ is inferior to the ERMLaser++ in both efficiency and range. However, it is a suitable replacement for when you don’t have enough ERMLasers to go around. This works well on mechs like the Phoenix Hawk that are not impacted by its shorter range and can make use of the improved accuracy and damage for called shots against other parts. Note that MPulse on a Phoenix Hawk will 1-shot a target debuffed by TAG.
SRM2+++
2×12 damage | 1 tons | 4 heat | 270 / 180 / 0 range | 100%
It may take 6-hits on its own to score a kill but the SRM2+++ has a niche use as a finisher when it delivers just enough damage to finish off what other weapons started. It is also the only headshot weapon for missile hardpoints and therefore good on mechs like the Warhammer 7A that carry a mix of weapons.
Early Game Weapons
This is the early game tier consisting of weapons that do not perform as well but get a pass because they are easy to obtain and use without endgame heat management like double heatsinks or exchangers.
AC2++
35 damage | 6 tons | 4 heat | 720 / 480 / 120 range | 60%
A 2-hit kill autocannon with very long range. It’s not as good as a UAC2++ but it is easy to find and works without double heatsinks. This is a great choice to put in the ballistic slots on your first Marauder.
AC10++
70 damage | 12 tons | 12 heat | 450 / 300 / 0 range | 52%
The first one-hit kill weapon a new player is likely to come across. The AC10++ is pretty inefficient but it does the job. I’d recommend passing this one up in favor of AC2++ since early Marauder 3Rs have plenty of ballistic hardpoints.
PPC++
60 damage | 7 tons | 35 heat | 540 / 360 / 90 range | 34%
The best non-LosTech energy weapon can do 1-hit headshots if equipped on a Phoenix Hawk or Warhammer or if used against an enemy debuffed by TAG.
Large Laser
40 damage | 5 tons | 18 heat | 450 / 300 / 0 range | 54%
Large Lasers are 2-hit kill weapons with good range that are available immediately. This makes it a good choice for those who obtain a Marauder early in their campaign or career. You’ll replace this with better weapons as you get them. There’s no difference between the LLaser and LLaser+++ for headshot purposes other than a slight damage increase to overcome damage reduction.
Medium Laser
25 damage | 1 tons | 12 heat | 270 / 180 / 0 range | 96%
This ubiquitous weapon can score a headshot kill in 3 hits and has short range. The only thing that recommends it is its relative efficiency and usefulness compared to other early game weapons. Load these up on your mechs and replace them with better weapons as you get them.
Overrated Weapons
This is the trap tier consisting of weapons that are often recommended but fail to live up to their promise. I’m including them here because I don’t want to discount them entirely. However, I haven’t found any good reasons to use these weapons yet.
Gauss Rifle++
80 damage | 13 tons | 5 heat | 660 / 360 / 180 range | 58%
Gauss Rifle is a trap. It is roughly tied with AC2++ in terms of efficiency but is far harder to acquire. By the time you see a Gauss Rifle++ and can afford one, you should already have access to the superior UAC2++. The ERPPC++ also becomes available at around the same time and is a better choice if you’re looking for something that can 1-hit at extra long range.
UAC20++
2×120 damage | 12 tons | 48 heat | 270 / 180 / 0 range | 39%
UAC20 is a trap. The recoil seriously impedes its second shot to the extent that there is no substantial gain over an AC20+++. It also has a very short range and is not that easy to obtain. You’re seriously better off with AC2++ or even an AC10++.
Headshot Lance
It is not helpful to rate headshot mechs without first understanding how they operate in a lance. If we take 4 headshot-optimized mechs into a battle, we quickly discover that we only have enough resolve for 2 to 3 PS headshots per round. To make up for this, we switch out one shooter for a support mech whose role is to generate knockdowns or shutdowns so that we can consistently get 3 headshots per round. The next thing to note is that headshots are highly susceptible to RNG and miss streaks do happen. Headshot optimized mechs tend to have weaknesses in areas such as scouting and raw damage output. Therefore, we reserve another slot for a mech that can contribute headshots but also brings another unique capability to the table. This set us up for 2 shooters, 1 support, and 1 wildcard in each lance.
Shooter Mechs
These are the mechs you want to optimize for raw headshot probability. We can categorize shooters into two subcategories: Marauder and non-Marauder. Marauders are clean shooters that excel at long-range front-quarter shots that cleanly decapitate enemies without too much risk of destroying the CT. Non-Marauders are messy shooters that work better for the mech surgery technique described by revenantsknight and prefer side-quarter shots that will destroy components with less risk of destroying the CT.
Marauder 3R
The gold standard in headshots is also easy to obtain via salvage and stores. The standard Marauder is best used with 3x UAC2 and as many ERMLaser and jump jets as you are comfortable with. Upgraded MLaser is a decent substitute before you get ERMLasers.
Marauder 2R
Harder to obtain than the 3R, the SLDF Marauder is best used with a full energy-based loadout consisting of 2x LPulse and as many ERMLaser and jump jets as you are comfortable with. It can dissipate 60 heat by default which helps a lot when running heavy energy-weapon loads. This is an ideal use case for Exchangers since it will always run hot.
Marauder 3D
Not as good as the other Marauders since it lacks the hardpoints for UAC2 or heat sinks for 1-shot energy weapons. At the end of the day, the Marauder headshot bonus makes up for its limited loadout options. Use it like a MAD-2R that has to pay more attention to heat.
Warhammer 7A
Optimized capacitors turn ERMLaser into a 1-hit headshot weapon against a tagged enemy. Armed with a mix of 7 ERMLaser, 2 ERSLaser, and 2 SRM2, this mech is a beast at close range and its lack of headshot accuracy ensures that arms and torsos will take plenty of damage on a flanking headshot. If things aren’t working out so well, it also has great damage output and you always retain the option to finish off the enemy with a CT shot instead.
Annihilator
Ballistic siege compensators turn the 5 UAC5s on this mech into 1-hit weapons against a tagged enemy generating an incredible 10 chances to get a 1-shot kill. This mech is extraordinarily messy and will splash damage across the entire target facing. It is slow so the best way to set up a flank is by using a scout to provoke the enemy into turning away from the Annihilator.
Wildcard Mechs
These mechs can do headshots but are not optimized for it. Instead, they bring some other useful functionality to the lance and give you more options on the battlefield.
Phoenix Hawk 1B
Best headshot for the tonnage. The Phoenix Hawk’s vectored thrust kit turns MPulse and ERMLaser into 1-hit headshot weapons against a tagged enemy. Its mobility allows it to make good use of short range weapons and is great at backstabbing enemies when you don’t feel like taking a chance on the headshot. Even though it’s not a Marauder, its mobility, versatility, and firepower makes the Phoenix Hawk a great wildcard to fill the fourth spot in a headshot lance.
Cyclops 1Z
This mech is mainly brought for the initiative bonus but it sometimes finds itself contributing to headshots. Armed mainly with 2-hit kill weapons like MLasers, SRM2s, and a UAC2, it is unlikely to kill an undamaged opponent. However, if the enemy has already been hit, the Cyclops can bring enough shots to finish the job. It’s also fairly messy and pairs well with assault mechs so is a good choice for the aspiring mech surgeon.
Support Mechs
Support mechs enable a condition that allows shooter mechs to do called shots without expending resolve. There are two kinds of support mechs: inferno and knockdown. Inferno mechs aim to deal 100 points of heat damage to an enemy in order to induce the shutdown state. Knockdown mechs aim to deal enough stability damage such that the next PS from a shooter will knock it down. That is a minimum of 324 stab to knock down an Entrenched assault mech. I personally consider inferno supports to be superior to knockdown supports but I can see how not every player may be comfortable with the idea of dedicating an entire drop slot to 8 inferno volleys.
Griffin 2N
Can carry 4 infernos, 2 flamers, and 2 TAGs. It is fast and has high initiative. This is ideal for players who like to move fast, have longer-range weapons on their Marauders, and run with a Phoenix Hawk. It’s easy to obtain in career mode from the Criminal Minds flashpoint. Since you need to hit with 7 out of 8 infernos to shut down a mech, consider getting closer to bring the flamers into play. Since it is on the frontline, this mech will frequently be the focus of enemy attacks so don’t hesitate to use Vigilance when outnumbered and prioritize killing any assault mechs in range that can defeat it with a lucky headshot punch.
Jagermech 6A
Can carry 4 infernos, 2 flamers, and 2 TAGs. This is a good starting inferno support for players who like to close in with their Marauders because they don’t have long range weapons yet. If you’re playing campaign mode, this will probably be your first inferno mech. Though it is slower and has slightly more armor, use the same tactics as you would with a Griffin inferno support.
Battlemaster 1S
Can carry 5 infernos and 2 TAGs. Unlike the Griffin or Jagermech, the Battlemaster inferno support does not use backup flamers and can engage evasive targets reliably from further away. It also has a lot more armor and is more durable. However, this comes at the cost of low initiative and it requires both Master Tactican and a Cyclops Z to stay at initiative 3. Despite being a non-SLDF design, this variant is hard to find. Totally worth it though.
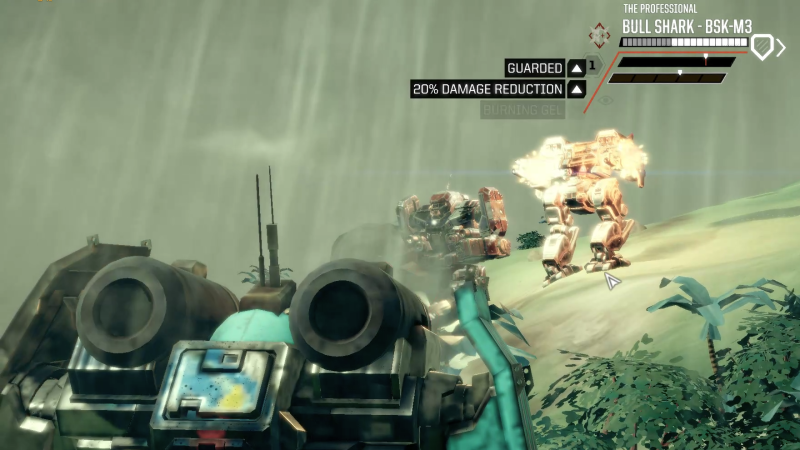
Bull Shark M3
I’m not a big fan of knockdown supports so I’m still ironing out details on how to build the best one. The Bull Shark can support multiple configurations but the one I am currently working with is 4x LRM15+++ and 2x LB5X++. 4x LRM20+++ sounds tempting but it doesn’t have the 324 stab to destabilize entrenched assault mechs. The configuration above provides 360 stab which should be just about enough while still letting you knock down non-entrenched enemies using LRMs only.
Example Lances
Early Inferno
Jagermech 6A, Marauder 3R, Marauder 3R, Warhammer 6D
This is the easiest way to put together a competent headshot lance and can be done entirely without the black market. I replaced a 3rd Marauder with a Warhammer 6D as an example of how to escort the Jagermech with a close-range bruiser that can finish off damaged enemies.
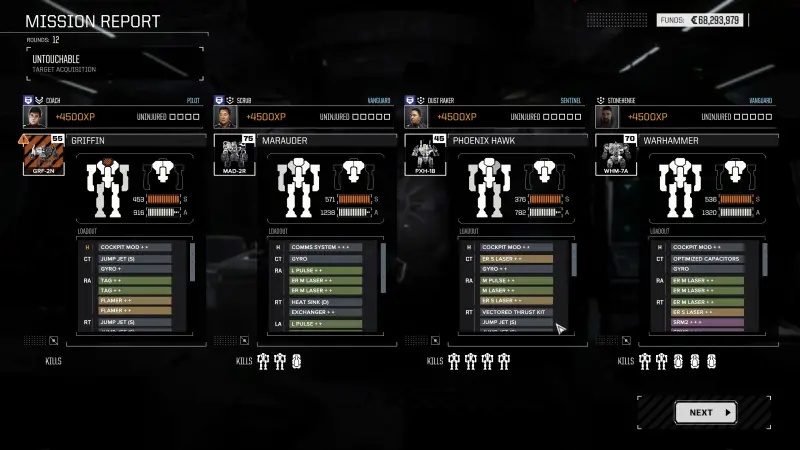
Fast Inferno
Griffin 2N, Marauder 2R, Marauder 3R, Phoenix Hawk 1B
Despite the low tonnage, this lance is surprisingly effective at quickly taking out assault mechs. The Griffin’s extra speed lets it easily make use of its flamers and the Phoenix Hawk can finish off enemies with a PS RCT when you don’t feel like taking any more chances.
Heavy Inferno
Battlemaster 1S, Marauder 3R, Warhammer 7A, Cyclops 1Z
This is my attempt at putting together a mech surgery lance. I swapped out my usual Marauder 2R for a Warhammer 7A that will deal more collateral damage due to its higher damage and messier shot distribution.
Long Range Knockdown
Bull Shark M3, Marauder 3R, Annihilator, Cyclops 1Z
This is my attempt at putting together a long-range knockdown lance. Both shooters and the wildcard can deal stability damage to complete the knockdown.