The main issue in dives (or one of them) has been resolved. Here are some fundamental tactics and strategies to achieve an easy win.
Most common situations of dying
As you may be aware, Dreadnoughts are massive adversaries that require considerable effort to defeat. They boast the highest HP among all enemies, making them formidable foes that require time and strategy to vanquish. Complicating matters further is the mechanic wherein alien aggression escalates with each Dreadnought kill, often resulting in encounters spiraling into chaos if not properly prepared to contend with both the Dreadnoughts and the swarms of accompanying bugs.
Many runs come to an abrupt end due to unexpected Dreadnought ambushes while mining through rocks or navigating treacherous bug-infested terrain.
Less common but equally perilous scenarios include being trapped in a corner of the map or being caught off guard while replenishing health from red sugar, a process that requires time and attention.
It’s crucial not to underestimate the threat posed by bugs. Each Dreadnought spawn not only presents the formidable creature itself but also leads to the summoning or heightened spawn rate of various bugs. Dreadnoughts themselves pose a significant danger, capable of halving your health with just two strikes. While individual bugs may not seem overly problematic, groups or specialized variants such as Acid Spewers, Praetorians, Detonators (the subject of both ire and admiration), Elite Bugs, and Macteras can quickly escalate the challenge level.
Dealing with pre-phase
Let’s assess the situation before embarking on the run –
First off, let’s talk about classes, but not in terms of tiers. Every class and subclass is meticulously balanced, offering players equal freedom and potential for different builds. Experiment with each class and explore various build possibilities to find what suits your playstyle best.
Now, onto essential considerations – prioritize health and/or movement speed. Being excessively tanky isn’t advisable as swarms can overwhelm you swiftly. However, having too little maximum HP can also be risky since bugs scale in both damage and health over time or layers. Aim for around 220 max HP by Stage 5, along with a +25% boost to movement speed, or even more if possible.
As Stage 5 begins, if you’re struggling with HP, focus on mining resources to bolster your health. Don’t waste time on gold or nitra unless you’re completely depleted. However, if you’re lacking gold, it’s worth mining some as you can trade it for upgrades on level-up or potentially enhance your stats with golden bullets. If you come across minerals, try to mine them, although many require significant effort to break, necessitating either improved mining speed or the use of the Driller class. While spending time gathering resources to level your starting stats is beneficial, the onslaught of bugs and hordes in Stage 5 leaves little time for this.
Once you’re satisfied with your build, prioritize eliminating elites before they hatch from eggs. While they may not pose a significant threat, gaining extra experience can alleviate potential difficulties.
Lastly, as mentioned earlier, strive to level up as much as possible. The longer you prolong the final fight, the more formidable and numerous the Dreadnought and accompanying bugs become. Dealing significant damage early on will only empower you further in the long run.
Dreadnoughts deadliest problem
… is its hitbox and dashes.
Initially, it rushes towards you aggressively, but its speed decreases as it nears the player.
Dashes, on the other hand, pose a significant challenge. To evade its swift attacks, which often catch players off guard, you’ll need to move in the direction it’s dashing, attempting to outrun its dash range. Alternatively, you can wait momentarily before sidestepping, causing it to dash forward while you move to the side. In my opinion, this is the safest and easiest method to avoid taking damage, but there are some issues with both approaches.
Let’s delve into the problems of each method with the help of some illustrations:
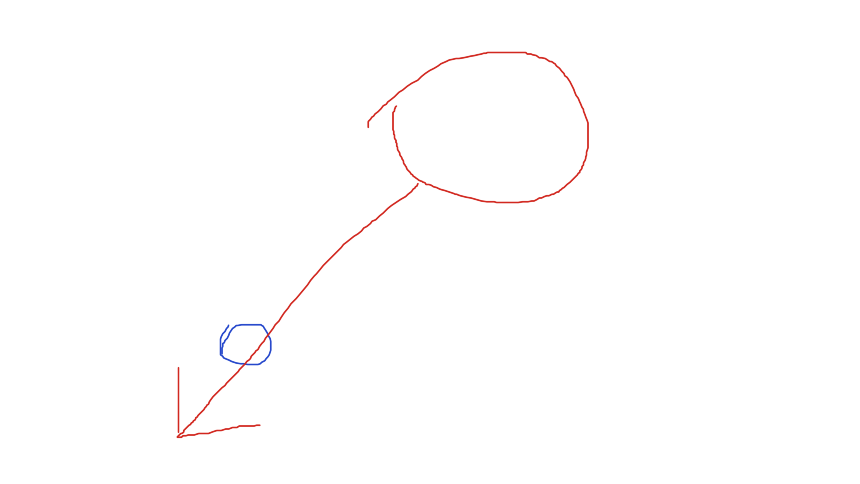
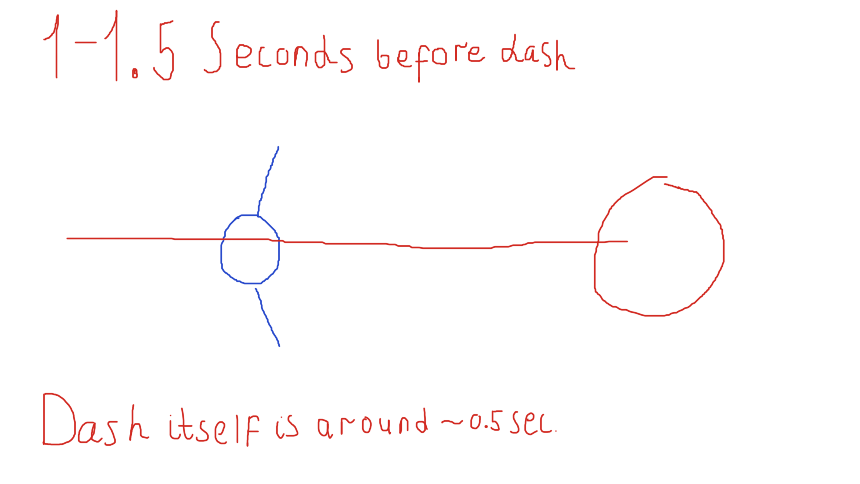
Here’s a depiction of how the Dreadnought dashes. During this phase, it pauses momentarily before lunging forward – a warning sign that you’re about to face its formidable attack.
On one hand, you can opt to move to the end of its dash path, creating a small gap between you and the Dreadnought. However, this approach presents its own challenges, especially if you’re equipped with weapons that are effective from behind or at close range.
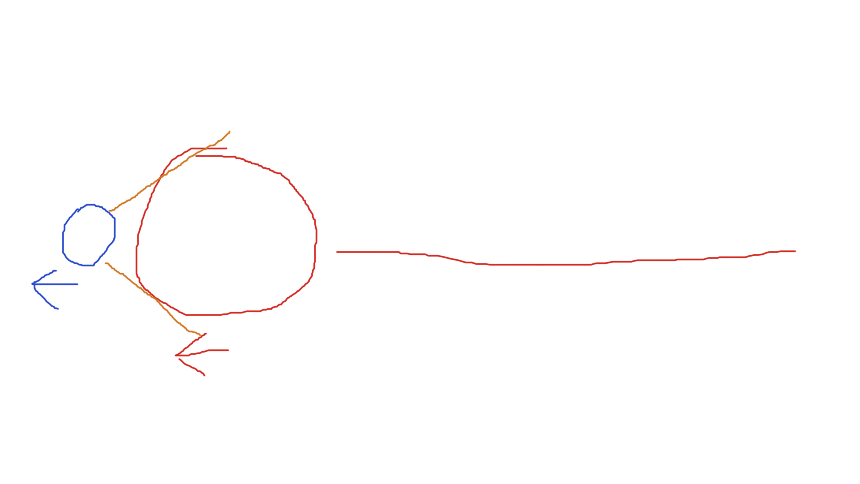
On the other hand, you can completely evade its dash by sidestepping with precise timing, granting you ample space to maneuver and either deal damage or access resources such as health pickups or mining spots.
It’s important to note that the Dreadnought will rotate its angle before dashing, underscoring the necessity of timing your lateral movement to avoid being cornered or hindered by bugs or environmental obstacles. Constant awareness of your surroundings and potential threats is crucial, as illustrated in the image depicting possible scenarios.
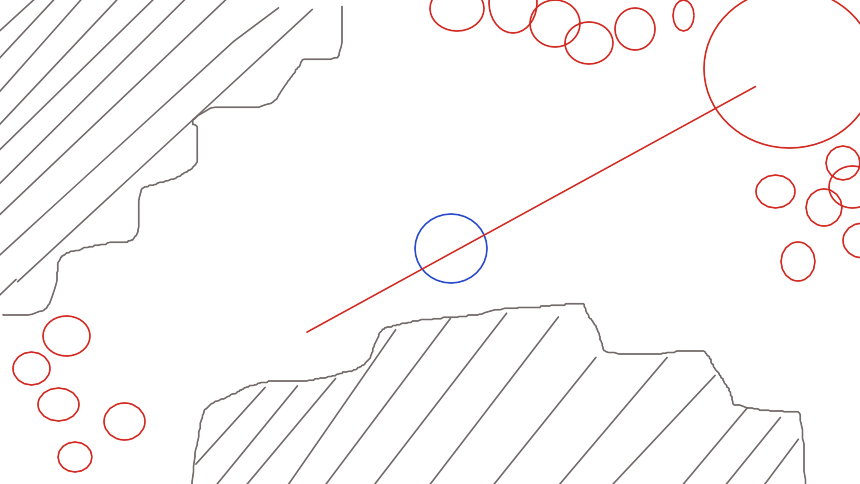
If you’re inclined to take on the challenge, envision how you would navigate this situation and devise a solution. Personally, I would opt to ascend to the upper portion to avoid being caught in the Dreadnought’s charging path. Subsequently, I’d prioritize mining the rocks on the top left to mitigate the risk of encountering bugs in the bottom left section of the screen.
Unfortunately, I can’t include images directly, but you can access them via the provided links.
And that’s all
Absolutely, dealing damage efficiently within a short timeframe is crucial to prevent escalating alien aggression. However, it’s essential to recognize that this challenge stems more from the effectiveness of your build rather than the Dreadnought itself. If you find yourself unable to defeat the Dreadnought within five minutes of its spawn, it might be indicative of shortcomings in your chosen loadout or strategy.
Experiment with various solutions and tactics to find what works best for you. It’s possible that future updates from the developers may introduce additional content that makes dodging and defeating Dreadnoughts easier. But for now, adapting and refining your approach is the best course of action.