
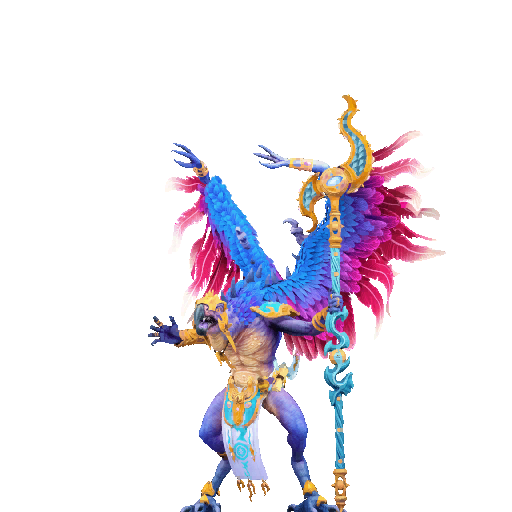
In this guide, we will explore the various attacks employed by the Lord of Change and provide effective strategies for dealing with both the boss and its attacks. Many players encounter difficulties when facing this miniboss, but with the right approach, the fight can be managed regardless of the difficulty setting. The main challenge lies in understanding the mechanics behind its attacks.
Introduction
This guide aims to familiarize players with the different attacks utilized by the Lord of Change and offer strategies for effectively countering them.
The Lord of Change follows a predetermined pattern of attacks, which are indicated beforehand, allowing for predictability. There seems to be a standard priority and cooldown system in place, enabling players to manipulate its behavior to some extent. While the attack telegraphs are somewhat subtle, it would greatly improve the experience if audio cues were incorporated. This small adjustment would make these encounters considerably more manageable.
The accompanying video provides examples of successful kills using the mentioned strategies. All recorded fights take place on the Exterminatus difficulty level. With the exception of the Vortex Grenade method, the additional enemies are eliminated first to enhance speed and simplicity. Dispatching them is relatively straightforward since the Lord of Change does not actively pursue the player when out of its line of sight. Therefore, utilizing the side areas to bottleneck and clear enemies beforehand is recommended.
Lord of Change Attack List
These attacks are listed from high to low priority.

Teleport: The Lord of Change teleports to a different location on the battlefield. It’s important to note that this attack triggers only if the Lord of Change has line of sight to the player. The teleportation ability has a random cooldown between uses, with a minimum duration that ensures it will go through at least one rotation of abilities. Using cover effectively can prompt the Lord of Change to initiate a teleport as its first action upon spotting the player, making it a useful reset for its behavior.

Staff Fireburst: The Lord of Change raises its staff and launches slow-moving fireballs in all directions, causing minor splash damage. Breaking line of sight does not cancel this attack. It is the least dangerous attack and leaves the boss vulnerable to a burst of damage. One effective strategy to defeat the Lord of Change without taking damage is to trigger a teleport, locate the boss during the Staff Fireburst attack, deal damage, and then take cover for a duration that ensures its subsequent move will be another teleport.

Pink Hellfire: The Lord of Change sheathes its sword, extends its arm forward, raises it, and inflicts continuous unavoidable damage on the player over time. Breaking line of sight will cancel the casting of this attack or stop its ongoing effect. However, it’s important to note that breaking line of sight must occur precisely when a damage tick would happen in order to cancel the effect successfully.
There is a decision to be made here: canceling the cast will not put this ability on cooldown, resulting in the Lord of Change repeatedly attempting this attack until Staff Fireburst or Teleport become available again. Alternatively, if you wait until the pink aura appears on the boss’s hand, you will endure at least one tick of damage. However, by doing so, this ability will be put on cooldown, causing the Lord of Change to perform up to 2 dodgeable Blue Fireball attacks (explained below) before Staff Fireburst becomes available once more.
Blue Fireball: The Lord of Change sheathes its sword, extends its arm forward, and throws a faster-moving blue fireball at the player, causing some splash damage. Line of sight does not cancel this attack or interrupt its casting. However, it is not recommended to break line of sight, as this dodgeable attack presents an opportunity to inflict damage on the Lord of Change. The wind-up animation for this attack is almost identical to Pink Hellfire until the final moment, so careful observation is necessary to differentiate between them. Alternatively, briefly breaking line of sight during the casting animation will interrupt the attack, but only if it is Pink Hellfire being cast.
Movement: When the Lord of Change is outside the player’s line of sight, it will shuffle briefly and then stop to face the player. This behavior may repeat until line of sight is established, although sometimes the Lord of Change will cease moving. If it stops moving, the boss’s hitbox is wide enough that the player can damage it without technically having line of sight, providing an opportunity for a damage-free kill.
Please note that these strategies and attack descriptions are based on observations and may vary depending on specific game versions or updates.
Lord of Change Rotations and Strategy
Here are several different methods you can employ to combat the Lord of Change, along with the sequence of attacks you can expect during each method. Please note that the timing of the teleportation attack appears random, but it ensures that each ability is iterated through at least once.
Method A: One Tick Cancel
- Teleport -> Staff Fireburst -> Pink Hellfire -> Blue Fireball -> Blue Fireball -> Staff Fireburst -> …
This approach is the most straightforward way to handle the Lord of Change. The sequence of two Blue Fireballs followed by a Staff Fireburst provides a significant window for the player to inflict damage on the boss. Simply wait for the pink aura to appear and endure one tick of damage before breaking line of sight. The only downside is that it involves taking one tick of damage, which can remove around 50 armor on the highest difficulty setting.
Method B: Peekaboo
- Teleport -> Staff Fireburst -> Pink Hellfire (Repeated)
This strategy is a more challenging no-damage method, requiring focused attention on the Lord of Change when not facing it alone. Instead of waiting for the pink glow on the boss’s hand, break line of sight during the casting animation and remain out of the line of sight for approximately one second. The main risk here is accidentally taking one tick of Pink Hellfire damage just before a teleport, which limits the window to damage the Lord of Change.
Method C: Hide to Reset Teleport
- Teleport -> Staff Fireburst
This method works well when dealing with additional enemies alongside the Lord of Change. Spend time clearing the additional enemies, periodically coming out of cover to shoot the Lord of Change during its teleportation. Once located, continue damaging the boss as it performs its Staff Fireburst attack, and then retreat to cover to resume clearing the additional enemies.
Method D: Line of Sight Cheese
- None
In the initial fight, if you prioritize eliminating the additional enemies first, you will often find the Lord of Change alone and stationary. This allows you to eliminate it without entering its line of sight. It may seem cheap, but it technically works.
Alternatively, you can clear the additional enemies first and then engage the Lord of Change conventionally. The passivity of the Lord of Change provides ample opportunities to isolate it, at least until later fights introduce infinitely respawning additional enemies.
Method E: Vortex Grenade Burndown
- None
If you possess a Vortex Grenade, you can throw it at the Lord of Change right away and immediately break line of sight. Since the boss does not teleport without line of sight, it will sustain the full extent of the damage from the grenade. Combining this with a burst from a Machine Spirit Plasmagun enables you to eliminate the Lord of Change before it can inflict any damage upon you. You don’t even need to clear the additional enemies first, as the engagement only lasts for around 10 seconds.
Please note that these methods and their respective attack sequences are based on observations and may vary depending on specific game versions or updates.