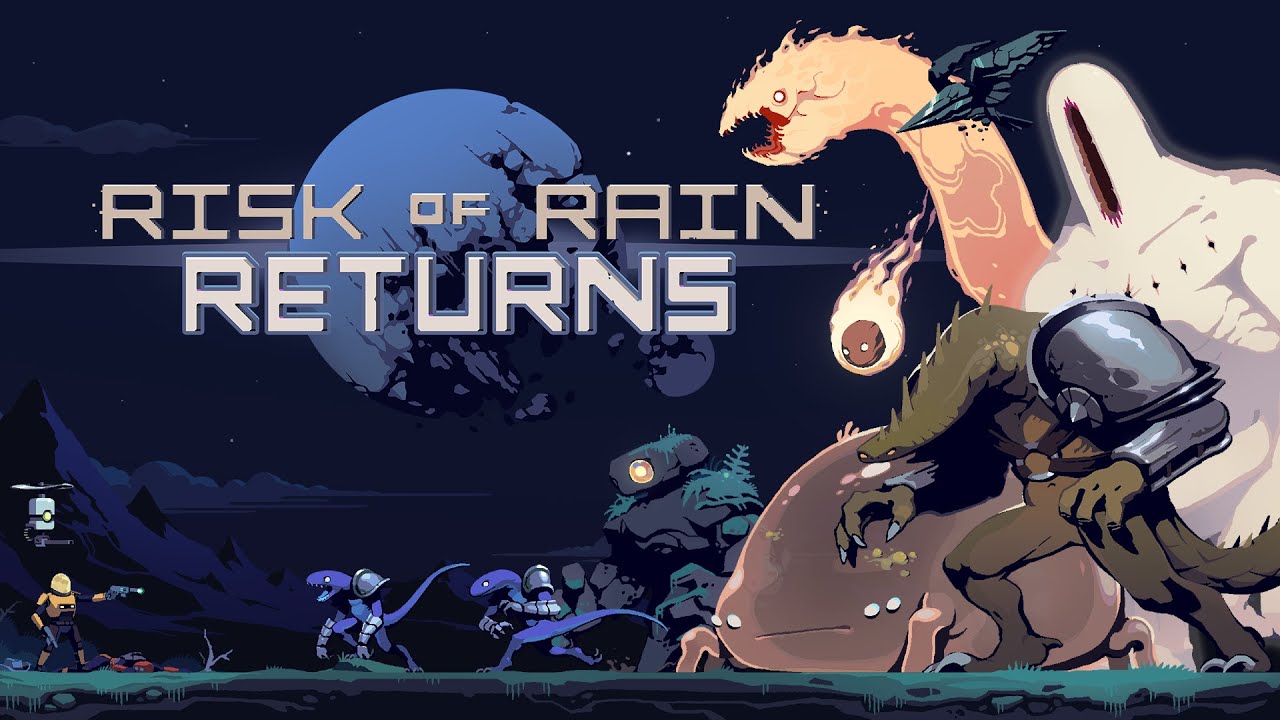
The Trial of Judgement is a static gauntlet consisting of ten arenas filled with gradually spawning enemy waves culminating in a fight with Providence. Players receive static item choices between each of the stages, and have five health replenishes to be rationed across their journey.
There is an achievement and unique outfit unlock for completing the trial with each of the main fifteen cast members. Thus players looking to acquire every achievement in the game must complete the trial fifteen times, once as each character.
Everything about the trial is exactly the same for each character, resulting in an imbalance where some characters have a more or less easier time with this challenge than others.
So. You. Had. Better. Hope. Your. Main. Is. Not. One. Of. The. Hard. Ones.
Unless you are planning to complete all of them in which case… buckle up.
The Basics
This challenge features four types of enemy variants who are responsible for much of its difficulty, all of these variants having increased stagger resistance in comparison to regular foes:
1. The green variants that heal their allies are generally irrelevant and seldom represented in the challenge, but are still inconvenient to face due to their aforementioned stagger resistance.
2. The orange variants that fire missiles will punish the player for being too lethargic while fighting, adding an extra layer of persistent threat to the current encounter. A white circle telegraphs where the missile will land as it flies, although the explosion is slightly larger than it. Be prepared to stay limber when these foes are in play, and if possible avoid using attacks that restrict mobility.
3. The red variants that leave fire trails will punish the player for remaining in the area or doubling back over said area as the flames chip away at their health. Although hopping through the fire can mitigate its damage the threat can be entirely avoided by simply keeping a distance from these enemies entirely and whittling them down from afar.
4. The yellow variants that randomly teleport after the player are also more aggressive and may rush the player abruptly, producing an extremely immediate danger in the middle of combat. Keeping a distance, stunning them on attack, anticipating their teleports and rushing them at calculated moments can mitigate their lethality.
The common theme among facing these special enemy variants is to know the limits of your character and go all in on dealing damage when you know it is safe to do so, otherwise chipping away at enemies when necessary. There is no pressing time limit on the challenge and so enemies can be carefully whittled down with fleeting strikes if facing them directly feels unsafe.
Learning the wave sequences and attack patterns of the featured enemies will also be a heavy contributing factor in succeeding. Many non-airborne enemy attacks can be dodged by simply jumping, and most player attacks allow the user to jump while performing said ability; giving players a near constant source of damage avoidance. However it should be noted that certain enemies such as Parents and Sand Crabs can seemingly hit the player even while they are in the air, thus special attention should be paid to these kinds of foes. Especially their empowered variants.
Many enemies can be defeated by simply shutting them down with repetitious basic attacks which will stagger them perpetually, although it should be noted that the full stagger potential of a character may not manifest until the end of the first arena due to the levelling up process. Paying close attention to the stagger potential and attack pattern of your character is crucial for learning how and when to juggle enemies effectively if possible.
Ordinary health regeneration is disabled in the Trial of Judgement. The only universal sources of passive health regeneration available are from levelling up or acquiring the Harvester’s Scythe and Bustling Fungus later in the challenge. The player has five health replenishes available across the challenge in-between each stage, thus completing multiple stages without using any is necessary to ration them across the gauntlet.
I recommend taking every single Guardian Heart that appears in this challenge, as the shield they provide adds a massive amount of survivability to the player and allows them to absorb superficial amounts of damage when unloading their abilities. If enough time passes without the player getting hit their shield regenerates automatically, further increasing the value of this item. When combined with the Unstable Watch players can pause time to both unload damage on enemies and regain their shield during the period of safety.
It should be noted that ability and equipment cooldowns reset between stages, and thus can be used without concern for the immediate future if the end is near.
The Characters (Part One)
Henceforth whenever taking the Ancient Sceptre or Gigantic Amethyst is mentioned it is in reference to the second time these items are available to acquire. Although they are both available for the first time at the start of this challenge, I recommend taking the Guardian Heart instead.
Characters who lack a form of damage avoidance may wish to take the Hopoo Feather to improve their mobility, while characters that struggle to consistently trigger Ifrit’s Horn with their attacks may prefer the passive damage from the Imp Overload’s Tentacle instead. Characters who spend much of their time at close range with enemies may choose the Tesla Coil over the Brilliant Behemoth, and characters who get less value from the Gigantic Amethyst may prefer the Unstable Watch.
I have ranked the characters into categories from very easy to very hard based on how intricate their style of gameplay felt; and thus how difficult it was to learn, optimize and succeed with.
Drifter: Very Easy
This character has a strong basic attack sequence for staggering enemies, and may become absurdly empowered by using their fourth ability to generate temporary items. By taking both the Gigantic Amethyst and Ancient Sceptre this character can recharge their fourth ability constantly to produce massive amounts of temporary items and completely trivialize the challenge.
I would not recommend the Alien Head, Backup Magazine or Hardlight Afterburner on this character.
Engineer: Very Easy
By taking both the Gigantic Amethyst and Ancient Sceptre this character can release three turrets simultaneously, and recharge those turrets at an extremely accelerated rate to distract and mow down most enemy groups with ease. They can also stand on their turrets to slightly elevate themselves and avoid instances of danger that are low to the ground.
I would not recommend the Backup Magazine or Hardlight Afterburner on this character.
Huntress: Easy
Maintaining unhindered mobility while shooting allows this character to deal consistent damage while seldom making themselves vulnerable in the process. Their second and fourth abilities are effective against groups and may be empowered by taking a Backup Magazine and Ancient Sceptre, while their third ability can be used to avoid threats. By taking the Hardlight Afterburner this character can evade even more often to escape danger or gain distance as well.
Commando: Medium
With the reliable ranged damage from their first, second and fourth abilities along with the evasion from their third ability this character has a decent amount of inherent assets for dealing with threats. Their second ability can puncture crowds and delay the approach of enemies, while their fourth can be used to stun dangerous foes. Once again the Backup Magazine, Ancient Sceptre and Hardlight Afterburner all enhance the base kit of this character quite well; and the Gigantic Amethyst may be used to further chain successive attacks. Decreasing their ability cooldowns with the Alien Head is quite effective too, due to all three abilities being quite useful.
Loader: Medium
Their basic attack sequence offers a decent amount of stagger, and may be combined with their second ability to strike enemies outright while invulnerable. Taking Backup Magazines will allow this character to store and chain successive uses of their second ability to retain that invulnerability longer, and thus attack safely longer. There is enough time to approach a nearby enemy and perform the basic three hit attack chain twice before the invulnerability wears off, which acts as a reliable way to time successive activations of the invulnerability. Meanwhile the third ability may be used to stun individual enemies before they attack, and the fourth may be used while repositioning to conveniently generate additional damage.
I would not recommend the Alien Head, Ancient Sceptre, Amethyst Crystal or Hardlight Afterburner on this character.
HAN-D: Medium
The first and fourth ability of this character can reliably batter crowds, while the attack speed increase from their third ability will decrease the likelihood of enemies having a chance to retaliate. The Ancient Sceptre may be preferable for empowering this character’s fourth ability. This is the only character with a means of self-healing, via their second ability, which grants a significant amount of slack when it comes to receiving damage. Note that any charges stored in the second ability will be lost when exiting a stage, and with only a limited amount of ways to charge that ability in the final fight its effectiveness will be reduced at times.
I would not recommend the Alien Head, Backup Magazine or Amethyst Crystal on this character.
Pilot: Medium
This character has access to a decent ranged attack as their primary ability, and may evade damage using their fourth ability. By launching themselves in the air with their third ability they can avoid danger entirely while raining down damage with the second and fourth. By playing safely while on the ground until the option to go airborne emerges, this character can survive by biding their time in-between airborne assaults. Take note of how high the ceiling is in the current arena as this will factor into the effectiveness of flying about. Enemies being launched upwards by the fourth ability, and enemies that can strike the player in the air both complicate airborne combat; thus paying attention to potential threats while descending is crucial. By taking the Backup Magazine, Gigantic Amethyst and Alien Head this character can store and regain their abilities faster in order to go airborne sooner and longer. With enough decreases to the cooldown of these abilities this character may eventually stay in the air perpetually during the final fight.
The Characters (Part Two)
Sniper: Hard
With their first, second and fourth abilities this character can deal massive amounts of ranged damage, using their third ability to evade danger and distance themselves from enemies before charging up their second ability. However constantly stopping to reload and anchoring themselves in place when charging that second ability renders this character more vulnerable than many others. Taking the time to set up safe attacks may reduce that danger, and this character may jump while charging their second ability to dodge incoming threats. The Hardlight Afterburner could be chosen to chain backflips and gain more distance before shooting, or to more consistently evade enemy attacks. Backup Magazines and the Alien Head may also improve the combat options of this character as all of their unique abilities are quite useful.
The Unstable Watch is especially beneficial on this character as it can be used to set up powerful charged attacks. I would not recommend the Amethyst Crystal on this character.
Miner: Hard
After the first arena this character’s main attack acquires a decent amount of stagger, their primary attack becoming much stronger once their Scorching meter fills. The range of this character’s primary attack is larger than it may appear, and many enemies can be successfully juggled with it once the character is strong enough. Their second and third abilities may be used for evasion or even crowd control, and the fourth ability can chip away at crowds while safely hopping over them. Maxing out their Scorching meter to wipe out enemies with the empowered basic attack is effective but also risky, and so whittling down crowds with the other abilities may be preferable to less confident players. The Ancient Sceptre can be taken in particular to make the fourth ability even more powerful.
The Unstable Watch is especially useful on this character as it can be used to freeze time and strike a bunch of enemies to safely generate Scorching progress. I would not recommend the Hardlight Afterburner on this character.
Chef: Hard
This character can strike crowds at a decent range using their basic attack, repositioning when necessary using their third ability and pushing enemies back with the second. Against large enemies this character can use their fourth ability to empower the first and unleash a spread of projectiles while positioned directly inside their foe, hitting them with every projectile simultaneously. With no explicit means of damage avoidance this character is highly vulnerable and reliant on distance to stay safe. With the Backup Magazine and Alien Head they can push enemies back more often, and may take the Ancient Sceptre which doubles the effect of their fourth ability as well.
I would not recommend the Amethyst Crystal or Hardlight Afterburner on this character.
Acrid: Hard
The quick simplicity of this character’s basic attack allows them to more easily hop about while whittling enemies down with it. Damage and stuns can be applied with the second ability, using the third to reposition and spread damage across crowds. The fourth ability may also be used from a distance to safely damage enemies. With the Backup Magazine this character can repeatedly spit to safely damage stunned enemies, and decrease the cooldowns on all three special abilities with the Alien Head. With no form of damage avoidance this character is distinctly vulnerable but is capable of dealing a significant amount of damage while running or hopping around, putting themselves in less danger compared to others.
I would not recommend the Ancient Sceptre on this character.
Artificer: Hard
Much of this character’s damage stems from charging their second ability and channelling their fourth, both of which limits their mobility and renders them vulnerable to harm. Using their third ability to block and distract enemies is useful for setting up safe attacks but the danger of being struck remains. The fourth ability can be used more safely by jumping and triggering it while in the air, hovering above the reach of many enemies while still dealing damage to them. However it may take time to determine the exact range limits on this ability, and various foes can still hit the player in that state. Careful consideration must be made in regards to the spacing and timing of attacks with this character, who lacks any means of explicit damage avoidance. The Backup Magazine, Alien Head and Amethyst Crystal all empower this character fairly well.
The Unstable Watch is especially useful on this character as it can be used to set up powerful charged or channelled attacks. I would not recommend the Ancient Sceptre or Hardlight Afterburner on this character.
Mercenary: Hard
After the first arena this character’s main attack chain acquires a decent amount of stagger, chipping away at crowds with their third and fourth abilities when convenient. The fourth ability leaves this character vulnerable as they exit it, so activating it while at a distance from enemies and jumping right before the ability ends may help them avoid being hit. With the Ancient Sceptre that fourth ability becomes even stronger, further allowing this character to safely deal damage to enemies while running away. By taking Backup Magazines this character can chain their second attack multiple times to glide through the air while still dealing damage.
I would not recommend the Hardlight Afterburner on this character.
Bandit: Hard
This character has access to decent amounts of damage, stuns and stagger via their abilities; but is also somewhat less mobile than other characters as they do so. Using their third ability this character may become invulnerable and quickly reposition to a safer place before unloading their damage all over again, but is forced to constantly juggle this process to survive against severe threats. With the Hardlight Afterburner they can store multiple activations of their third ability to more easily reposition back to back when put in danger, using the Backup Magazine to chain successive explosions that stun and damage foes repetitiously. This character will constantly need to be mindful of their current situation and spacing.
I would not recommend the Ancient Sceptre on this character.
Enforcer: Very Hard
This character is reliant on their third ability to increase the damage rate of their primary attack and protect them from harm, using the second and fourth abilities to delay the encroachment of enemies. Activating the third ability also pushes nearby enemies back as an additional function. Unfortunately enemies such as Parents and Sand Crabs can bypass this character’s shield if positioned correctly, enemies will randomly flank this character to strike at them from behind and missiles or fire trails also bypass the shield. When using their shield this character must constantly back-peddle and reposition to prevent enemies from overtaking their guard which introduces a massive amount of awkward precariousness to combat. With the Ancient Sceptre the fourth ability applies Fear to enemies, which further delays their approach at least; and the Backup Magazine can be taken to store multiple activations of the second ability for knocking enemies away.
I would not recommend the Hardlight Afterburner on this character.
The Final Fight
By managing crowds, bursting down more dangerous foes, anticipating threats and learning the strengths of each character much of this challenge can become fairly routine. However the final fight with Providence is a defining moment for most characters, who will not be strong enough to completely obliterate Providence during this final battle. The lack of consistent healing in particular makes this encounter far more grave than its regular, main game counterpart can be.
Furthermore, many characters lack any form of invulnerability. This can result in situations where the multitude of area effects and summoned enemies present during the battle drive the player into a corner to guarantee they get hit. Thus it is important for player’s to keep track of their current position and have an escape route in mind when pressure begins to build.
Once again the Unstable Watch becomes a paramount asset for any character not using the Gigantic Amethyst as their equipment instead, as the Unstable Watch can be used to pause time until the Guardian Heart shields regenerate if the player gets severely damaged. Taking Rapid Mitosis will decrease the cooldown on the Unstable Watch, allowing it to be used more times during the fight.
The final battle with Providence is identical to the regular fight with them in the main game mode, however the arena is now smaller. Thus the area effects that Providence generates are more intrusive in the later phases. Beyond that, in addition to the regular enemies that Providence summons, four new enemies may also periodically manifest:
1. A blue enemy with the outline of the Bandit. This enemy will attack by charging up a simple whip strike.
2. A green enemy with the outline of HAN-D. This enemy will attack by charging up a simple punch, and leaves behind proximity mines. Fortunately these mines no longer function once the enemy is defeated.
3. An orange enemy with the outline of the Sniper and Engineer, this enemy will either attack by charging a powerful shot or unleashing a homing missile barrage.
4. A red enemy with the outline of the Miner and Enforcer, this enemy will either attack by charging up a close range blast or performing a shield rush that stuns the player.
The blue and green foes are relatively inconsequential but may still be a nuisance in the middle of combat, it is the orange and red enemies that are a concern. The orange foe’s charged shot can deal a massive amount of damage and may go unnoticed amidst the fight, while the red foe’s shield rush will stun the player for a significant duration and prevent them from avoiding other hits. If possible both of these enemies should be immediately defeated to stop them from interfering with the fight, the same goes for the regular enemies that Providence spawns too.
The basic slash and ground blast attacks that Providence uses can be avoided by simply jumping, while their diving slashes can be evaded by moving horizontally away. The floating projectiles and beams that Providence spawns further complicate the player’s positioning, along with the gradual appearance of additional enemies. Providence will randomly teleport directly to the player for a sudden attack as well, thus even when Providence is at a distance the player must be cautious. Take note that Providence will periodically gain a temporary defensive buff once enough damage is dealt to them, which can spoil the player’s onslaught if they attack too recklessly.
In the later phases large sections of the arena will be threatened by beams, periodic circular explosions and the smaller sequences of circular explosions that Providence sends after the player. These are the key moments when the player must be mindful of their positioning to avoid getting cornered into an unavoidable hit, especially if their character has no access to invulnerability.
Picking and choosing when to actually press in for an attack, when to deal with the summoned enemies, and when to simply avoid Providence until the situation feels safer can be crucial for going the distance with them. There are enough threats in this fight that simply mashing in hopes of rushing Providence down can be fatal if enough incoming attacks coincide all at once.
Conclusion
Despite its frustrations this is perhaps the most sincere and coherent combat challenge present in the game, as the deliberately constructed waves of enemies form a very calculated and unforgiving threat; unlike the more randomized and erratic swarms found in the regular mode. Although the static design of this challenge does render it blatantly imbalanced to an extent, as certain characters more or less excel within its confines.
The gauntlet will potentially get easier as the player memorizes the spawn patterns of each stage, thus I would recommend playing as the easier characters first so that such information can be gathered more easily at first.
I certainly struggled to imagine completing this mode with quite a few characters, who seemed far too limited to ever handle such a task. But after learning how the challenge itself operates and growing more familiar with each character under its strict limitations I eventually found the strengths of each one, and used them to succeed.


