
The Outbreak side-quest in Jagged Alliance 3 is one of the longest and most complicated. It involves your group of mercenaries attempting to quell a real zombie outbreak. The course of this quest unfolds in a variety of ways that are heavily influenced by the decisions and actions you take, ultimately leading to different outcomes. For comprehensive instructions on how to successfully complete this side-quest, all the necessary information can be found here.
Disclaimer
It is imperative to note that this guide contains explicit spoilers regarding the story of Jagged Alliance 3. The following walkthrough thoroughly explains the process of solving the Outbreak questline, including all possible consequences.
If you intend to take on the challenge of solving this quest and discovering the cure for yourself, you are strongly advised to refrain from further perusal and instead engage in the gameplay itself. This warning is given in recognition of the fact that the information provided here is based on my personal playthrough and is presented to the best of my ability. Nevertheless, there may be inaccuracies or omissions.
Prerequisites
In order to successfully complete the entire questline and achieve the most favorable outcome, several prerequisites must be met before you begin:
- Assemble a complete party of highly skilled mercenaries equipped with formidable weapons and armor. Ideally, you will want to include snipers and/or shotgunners, as well as those skilled in the use of explosives. Such a composition proves vital as you will often be confronted with a large number of highly resilient enemies, often mixed in with innocent civilians, requiring strategic and precise combat techniques. (Unless, of course, civilian casualties are of no concern to you, in which case it is advisable to arm yourself with the most powerful firearms available!)
- Possessing multiple squads of mercenaries can greatly ease the challenges of this quest, especially if your choices result in the imposition of time limits, which may require extensive searches in various parts of the map.
- A mercenary with a Medical skill of at least 80 is essential, as the nature of the zombie outbreak requires extensive medical examination. Having a highly skilled doctor on your team is essential to successfully navigating all of the skill checks. While M.D. serves as an economical choice, those with ample resources may choose to enlist the services of Dr. Q, who is also a skilled melee combatant.
- While not required, a mercenary with a Mechanics skill of at least 80 can prove invaluable during a mission.
- The Loner perk possessed by one of your mercenaries can bypass one of the bloodiest and most time-consuming parts of the quest.
The Sanatorium – Part 1
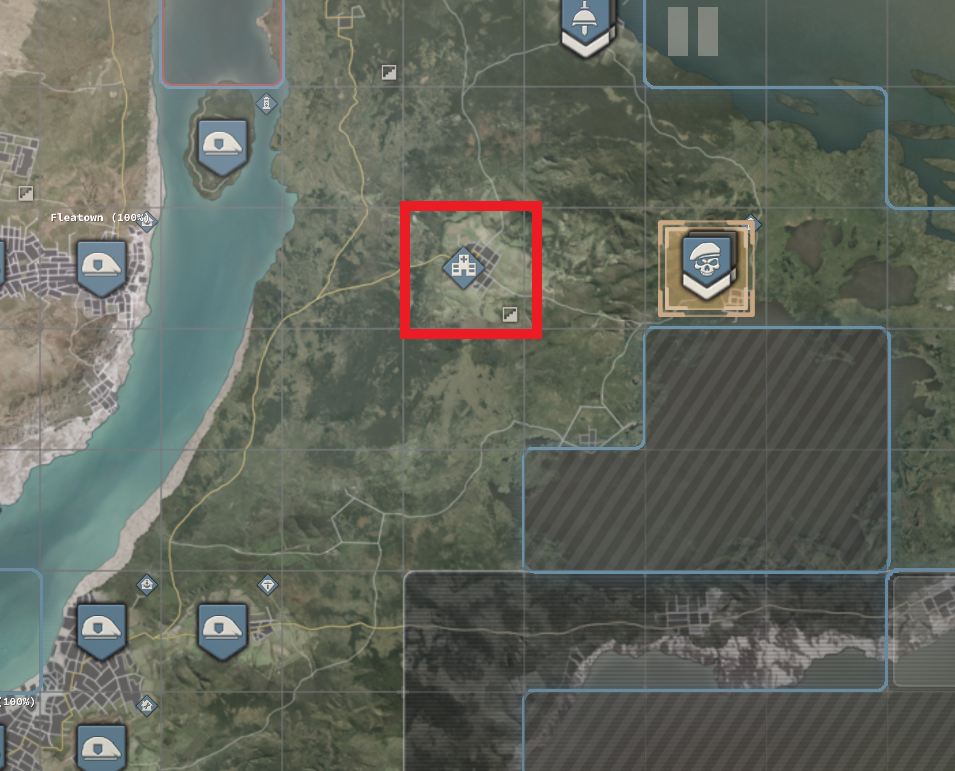
The questline starts smack in the middle of the map at The Sanatorium (H12).
Upon your arrival, it is highly likely that you have already heard speculations concerning the Outbreak or perhaps even witnessed some zombies or their aftermath. This is especially true if you passed through Pantagruel Outskirts (D6), where the inn owner laments about an unruly guest locked in one of the rooms.
At the Sanatorium, depending on your point of entry, several scenarios may unfold. If you approach through the front gate, you will witness a cutscene where a few sick individuals waiting in line transform into zombies and begin attacking people. In response, the Sanatorium Guards ruthlessly eliminate everyone, including those who are still uninfected. Certainly not the most hospitable welcome.
Be cautious! If you have not encountered zombies before arriving here, these are not the feeble shambler types you might be accustomed to! Unlike the Legion adversaries you have encountered thus far, the zombies lack the ability to shoot, but compensate with remarkable speed and endurance. Although they lack traditional armor, they possess significant resilience. Dealing with them is best accomplished with single-shot, high-damage weapons, such as sniper rifles and shotguns, preferably loaded with hollow point ammunition. Targeting their legs can significantly slow them down, and maintaining a safe distance can mitigate their considerable melee damage potential. Their movement patterns are predictable, and they tend to cluster together, making explosives a viable option (particularly Barry’s shaped charges). Nevertheless, one must be cautious of potential collateral damage. (It is worth noting that being hit by them will not cause infection.)
You have the choice to either assist in exterminating the zombies or step back and allow the guards to handle the situation. Regardless of your decision, once the dust settles, the guards will make it clear that you cannot enter the Sanatorium without explicit permission from Dr. Kronenberg. (If you were already inside, you will be given a 30-second timer to vacate the premises, or they will resort to force.)
Entering the Sanatorium without facing obstacles is impossible, leaving you with two options:
- Eliminate all the Sanatorium Guards. This approach grants you unrestricted access to explore the facility. However, be aware that your reputation will suffer significantly, and there will be no one left to control the infected, not to mention the ethical implications of murdering civilians and individuals simply carrying out their duties. If you disregard these concerns, you may storm in with guns blazing.
- Opt for a stealthier approach. The easiest method involves sneaking around to the back of the compound, where the truck is located.
Once inside, you must begin gathering clues to confront the morally ambiguous “good” doctor downstairs. This involves:
- Observing the events at the front gate.
- Hacking the radio near the tents.
- Inspecting the truck filled with corpses at the back of the compound.
- Examining the bodies next to the furnace.
For the latter tasks, you will require the expertise of a highly skilled mercenary with exceptional Medical abilities. Once you have completed these tasks, proceed to the basement either via the stairs behind the front desk or, if you are sneaking, through the door at the back of the building near the corpse truck.
Confronting Dr. Kronenberg
Upon descending to the basement, you will face an imminent onslaught of zombies. These creatures exhibit remarkable speed and aggression, leaving little space for maneuvering. Handle this perilous situation to the best of your abilities.
As you proceed, you’ll discover Dr. Kronenberg’s office adjacent to the staircase. Confronting her with the evidence you’ve collected unveils a horrifying truth—she has been conducting gruesome experiments not only on animals but also on human subjects. Her rationale behind these actions is to find a cure for the Red Rabies, the disease responsible for turning individuals into zombies outside. Additionally, she reveals that she herself is infected and requires the blood of recently infected individuals to prevent her own transformation into a zombie. Thus, she actively infects people, draining their blood, and killing them just before they turn. In her perspective, the desired outcome justifies these means, as she believes sacrificing hundreds could save millions.
Contemplating the moral implications of the situation is inevitable. Nonetheless, time is running out for Dr. Kronenberg. The pivotal moment in this questline demands a critical decision:
- Opt to terminate her life. While this might initially provide a fleeting sense of moral superiority, it comes with dire consequences—the potential doom of millions and the birth of a genuine zombie apocalypse. Without the doctor’s knowledge, the questline comes to an end, but the repercussions of this choice will manifest later on.
- Urge her to cease the experiments immediately. By doing so, numerous lives can be saved. However, this action imposes a strict time constraint on the entire mission, as Dr. Kronenberg can no longer prolong her own life.
- Permit her to continue with the experiments. This path will perpetuate countless innocent deaths in the name of science. Nevertheless, this choice affords you an absence of time constraints, although you will have to grapple with the burden of having indirectly sanctioned mass murder—all in the name of science, of course.
The Cure
In order for Dr. Kronenberg to create a cure, she needs a number of blood samples from different parts of the map. This is where the fun really starts!
If you have chosen to stop the experiments, you’ll have less than 10 days to gather the samples or you’ll fail the questline! If you have chosen to let her continue the experiments, there will be no time limit.
There are six possible locations to gather blood samples from.
- Chalet de la Paix (F13)
- The Burial Grounds (J11)
- Factory Ruins (K14)
- The Twin Manors (L18)
- Grimmer Hamlet (I19)
- Wetlands (H16)
To successfully develop the cure, a minimum of four out of the six potential blood samples must be acquired. However, it’s essential to be aware that three of these locations entail intricate tasks that must be completed before obtaining the blood samples. Thus, adequate preparation is crucial (further details can be found in the “What you’ll need” section).
While the order of visiting these locations is flexible, conversing with Dr. Kronenberg before doing so is advisable. Doing this allows the blood sample interactables and relevant conversation options to become visible. This tactical approach presents a valuable opportunity.
In case a time limit has been imposed, swift action is necessary. One can proactively visit all the locations beforehand, clearing them of enemies and fulfilling the required tasks to acquire the eventual blood samples even before reaching the Sanatorium. This way, once the timer starts, one only needs to collect the samples and promptly deliver them to the doctor for the completion of the cure. To optimize efficiency, multiple squads can be positioned around the locations in advance. When the mission commences, each squad can procure a sample and swiftly transport it to the Sanatorium.
Regarding the locations, it’s preferable to proceed from simpler to more complex ones…
The Burial Grounds (J11)
Head to the altar in the middle and inspect the buckets with high Medical skill to get the blood sample. Yes, that’s it.
Wetlands (H16)
Be forewarned of the prevalence of animal cruelty in the area.
The region is heavily overrun by both hyenas and crocodiles. Hyenas are known for their agility, while crocodiles have formidable defenses that require proper preparation. Fortunately, there are no civilians in the area, making explosives a viable option.
After dealing with the zoo threat, locate the case near the plane wreckage. It is important to have a Mechanic skill level of at least 80 to unlock it. Inside the case you will find the blood sample.
A small hint for future reference: in this particular area, there is a tunnel entrance leading into the fortress at K16.
Factory Ruins (K14)
When you arrive in the zone, you’ll find looters already fighting some zombies.
My advice: Hide. Let them sort it out, and you can deal with the survivors.
Once the dust settles, explore the area. Watch out, the place is absolutely full of traps and mines. A merc with high Explosives skill is essential if you don’t want your team to end up as red stains on the ground. There’s some reasonably good loot here, and you can get quite a few Parts and Explosives XP by defusing all the traps.
The blood sample is on the upper floor in the small building with the collapsed walkway. Inspect the body with a merc with high Medical skill.
Grimmer Hamlet (I19)
Upon entering the designated zone, be prepared to confront a considerable horde of incoming zombies. Managing these adversaries can be quite challenging on its own. However, this time, you must exercise utmost caution as there are numerous civilians in the vicinity. It is crucial to be mindful of your actions to avoid harming innocent bystanders. The decision on whether or not to take certain shots lies in your hands.
Upon successfully dealing with the initial wave of zombies, the next task entails systematically clearing out the remaining structures in the settlement. This undertaking requires the assistance of a robust mercenary equipped with a crowbar, eliminating the need for lockpicks. Each house must be opened individually and searched for any lurking threats.
When a door is opened, two possible scenarios may unfold: Firstly, a group of zombies may burst forth, necessitating swift action to neutralize them. Secondly, a group of civilians might escape, and simultaneous zombie spawns may occur nearby.
Strategically position your mercenaries and strive to minimize any inadvertent harm to innocent individuals and property.
Once all the houses have been thoroughly cleared, make your way to the campfire where a drunken individual awaits. Engage in conversation with him, and he will request assistance in dealing with a situation involving Bella and her companions. Prepare for a formidable encounter at the manor, as Bella and her harem have transformed into formidable zombies.
Additionally, you are tasked with repairing the still located near the drunk individual in the village.
Upon completing all assigned tasks, the aforementioned individual will provide you with the blood sample.
The Twin Manors (L18)
Enter the village and talk to Dr. L’enfer in his clinic near the gate. Note that he tends to be rather cynical and dislikes interruptions. Mentioning Dr. Kronenberg will likely cause him to dismiss you immediately due to their ongoing professional disagreements, which are quite significant. However, he may be able to give you some information about a murder mystery in the village, and solving that case could earn you his favor.
If you happen to have a mercenary with the Loner perk, convincing Dr. L’enfer to hand over the sample will be much easier, making the rest of the side quest unnecessary.
Now it’s time to start gathering evidence. Go outside and talk to the locals, who will give you details about the recent murders. Interestingly, the victims were either shot or poisoned, but never both at the same time. Two feuding families, the Le Domas and the Van Tassels, live on opposite sides of the compound. They have a long history of feuding, and the death of two actors under mysterious circumstances during a performance of Romeo and Juliet adds to the intrigue. While some speculate that vengeful spirits are involved, the investigation should lead you to the crime scene.
Head to the stage at the back of the grounds and carefully examine the two bodies. You’ll find that one of the corpses had a prop gun loaded with real 9mm Hollow Point bullets, while the other victim appears to have consumed a prop “poison” bottle containing real strychnine. This certainly adds to the complexity of the case.
Investigate Dr. L’enfer’s clinic, where you’ll find a cabinet of cyanide and boxes of 9mm bullets. Questioning the doctor will reveal that he has no alibi for the time of the murders and that he has a rather dim view of the locals. Despite these suspicious elements, astute observation will reveal that they are mere distractions or red herrings. (The poison found is the wrong kind, and the bullet boxes are regular and unopened!)
Continue to search both mansions thoroughly. You will find boxes of 9mm Hollow Point bullets in the Van Tassel mansion and strychnine in the La Domas mansion. This evidence points to the solution of the mystery.
(As an aside: A visit to the Old Cemetery (L17) west of the Twin Manors may lead to the discovery of more bodies shot and poisoned, providing additional evidence. However, this step is not absolutely necessary to solve the case).
Instruct Dr. L’enfer to gather everyone for an announcement, and position your mercenaries strategically around the stage to ensure they have ample cover. Choose one of your mercenaries to speak to the doctor and reveal the verdict that both families are responsible for the crimes. This revelation will trigger an all-out war between the feuding families, with immediate gunfire directed at each other and at you. While most of the enemies will be busy shooting each other, be careful not to attract their attention, as they will retaliate fiercely.
My suggestion is to find a safe place to hide. Take cover and allow the families to work out their differences, then deal with the surviving members. If possible, try to avoid civilian casualties, as there are civilians mixed in with the fighters. Note that your reputation will suffer for every civilian death, regardless of whether you were responsible for it.
Once the chaos has subsided, talk to Dr. L’enfer, who will praise your investigative skills (and violent problem-solving) and give you the blood sample.
Chalet de la Paix (F13)
After clearing out the Legion goons, go talk to some of the locals and “Painless” Doc Robert. It turns out a lot of people have been dying from a mysterious plague. Doc Robert blames the voodoo cult operating in the village and a guy named Roger Wilcox who might’ve brought the plague upon the Chalet.
If you want to question Roger Wilcox, unfortunately you just missed him. Because he is dead. You can find his body on the table inside. Inspecting him with a high enough Medical skill will show signs that he wasn’t exactly dead during the autopsy. Ouch!
Looking around Wilcox’s room you’ll find a letter addressed to Xavier, in which he hints at the location of his diary. Talking to Xavier you’ll get locations Roger frequented in the village where you can find more clues. Also talk to the Hog Lady and Wanda, the voodoo priestess.
After gathering all the clues, you can surmise that the diary is somewhere to the west with three eyes looking at it. Head out to neighboring sector to the west (F12) and look for a formation of three statues under a tree towards the south-east corner of the area. Investigate the rock in the center to find the diary!
But wait! There’s more!
Head up to the disheveled camp (watch out for traps!) and snoop around. You’ll notice the campfire is still warm, someone has been here recently! Investigate the cave to find a whole secret operation and a wealth of new information. It looks like someone has been working together with Sigfried from Landsbach to take over the Chalet for some nefarious purposes!
Go back to Chalet de la Paix and realize the diary has nothing significant in it. Talk to Wanda and she’ll tell you that a page is missing! Talk to Hog Lady and investigate the hog statue to find the last page.
Well, well, well, looks like the good “painless” Doc Robert is not so painless after all! It turns out Roger Wilcox was silenced after he discovered, that Doc Roberts is actually working for Dr. Kronenberg and he was deliberately spreading a new strain of the Red Rabies virus in town!
Before you confront Doc Roberts with all the evidence, make sure to position your mercs strategically around the area, and definitely in cover (or what stands for it in a village made of sticks)! When you talk to Doc Roberts he will readily admit to working for Dr. Kronenberg and he will not deny any of the accusations leveled against him. And that’s when a large group of heavily armed enemies rush in from all directions. Looks like Doc Roberts had help! There is no time to waste, dispatch the enemies however you can and give Doc Roberts what’s coming to him! (Try to minimize collateral damage! You’ll get a reputation hit for every dead civilian, even if you weren’t ones who killed them!)
After the dust clears, head inside and inspect Roger Wilcox’s corpse with 80+ Medical skill to finally get your blood sample.
The Sanatorium – Part 2 (The End)
With at least 4 blood samples in hand, leg it back to the Sanatorium. You’ll find Dr. Kronenberg in her office as usual.
Before handing in the samples, make sure to strategically place your mercs around the area, with good visibility in the corridors and equip some hard hitting weapons. If you have them, place some remote or proximity charges towards the back entrance and the animal kennels.
Talk to Dr. Kronenberg one last time. You can confront her about the events in Chalet de la Paix and Doc Robert, but she will basically deny everything. Hand her the samples and she will successfully synthesize the cure for the Red Rabies! Unfortunately, it’s too late for her, she doesn’t have enough healthy tissue left for the cure to work. (No, you cannot change this, no matter how fast you were!) She’ll succumb to the disease and turn into a zombie herself. Great loss or poetic justice? You decide.
In any case, aside from what’s left of the doctor, you’ll have a bunch of zombies, hyenas and crocodiles to fight in the basement. Just like the first fight here, there is not much room to maneuver so make your shots count! You can make good use of the planted charges or any other explosives if you have some. Otherwise, dispatch the enemies any way you can.
Once the fighting is over, the quest is finished. You have helped cure the Red Plague, prevent an apocalyptic zombie outbreak and saved countless lives. Good job!
This marks the end of the Outbreak questline.
Epilogue
Once Dr. Kronenberg is dead, the quest is over, and you actions and choices will affect the ending.
Good Ending
If you’ve managed to collect the samples in time and cure the plague, Dr. Kronenberg will be posthumously awarded the Grand Chien Medallion of Merit for creating the cure and saving countless lives. A vaccine for the disease will be produced and many of her peers vow to continue her work and find ways to combat the disease in her honor. (I guess, for better or worse, what actually happened at the Sanatorium and the surrounding area will mercifully remain a mystery.)
Bad Ending
If you do not deliver the samples in time or Dr. Kronenberg dies before creating the cure, the questline will fail and the ending will change accordingly: Thanks to your efforts the plague will be partially contained, and there is talk about a possible vaccine, but since Dr. Kronenberg’s work remains unfinished, it will still take time. Meanwhile, the disease is still spreading at an alarming rate…