A hard challenge in the game is to get 20.000 enemies killed in one run. There are two routes, with lots of overlap, to get there that I know.
Build at the Dock
Three things are important; weapons, loot and crew member skills.
There are two ways to 20.000 kills I know, one is with one weapon, the cannon or harpoon.
The other is with multiple weapons, which I find a bit easier.
With both ways one element is important, that is speed, the speed of the weapon (not the ship’s speed), which determines the range, also called ballistics. We will come back to that later.
This part is about before sailing off.
Very helpful crew:
level two:
– ballistics affinity !!
– reckless
– discipline affinity
level three:
– merchant !
– smuggler/blacksmith
Weapon:
one weapon run: cannon or harpoon
multiple weapon run: harpoon
My first assumption is that you have all the upgrades which you can buy at the shipwright at the dock.
It’s very helpful. (I don’t know if it’s possible without).
Then you go to the tavern. Under status you check who’s on your ship. I like to have one lifeguard, so your crew survives when it goes wrong. Others you fire, except when they have ballistics affinity. Then you search under Skill for Ballistics affinity and try to hire as many as you can.
If you don’t have three members with ballistics affinity, reckless pirates are helpful, as are Discipline affinity. Then try to have (besides the lifeguard) a merchant. Smugglers or blacksmiths are also helpful. If you go with one weapon, a blacksmith is helpful, the smuggler not at all. With multiple weapons, smugglers are great, blacksmiths less.
Then click on the ship.
If you go for one weapon, choose cannon or harpoon
If you go for multiple weapons, choose harpoon
Sailing and Loot Advice
Treasure advice:
red (merchant) boxes:
important
– envelope
– cross
– hook
– metal hull
– pegleg in one weapon run!
less important
– salt
– lute
(- lantern)
normal boxes:
Important
– ballistics
– citrus
– efficiency (those cannonballs)
– precision (skull)
– rum
less important
– ham
– bounce
(-fresh water)
(-hard tack)
((-spread))
With this you may already play, with less straight instructions.
Tip: try to get citrus and ballistics besides the cross. For one weapon only: cross and pegleg
When you start, hopefully you have a merchant. Choose envelope. This gives you more chances to get all the other good red merchant boxes. If there isn’t envelope to choose, start again, until there is.
This one hasn’t to be connected to the weapon.
Then sail to 50, -90, there is the closest merchant wreck. Any normal loot, choose from the list, ignore others. (maybe one quick sailing is helpful)
At the merchant wreck, take one of the named loots. If there isn’t, you may want to start again, or wait with that until the first merchant ship. If in these three options less than two are mentioned loot, you better start again.
Tips:
– Try to get the range/speed above 300. Then you shoot almost everything at the point of spawning
– keep a hexagon cleared for the cross and only fill in the 6 surrounding tiles with very important loot. (citrus, 1 or 2 ballistics, metal hull and/or hook, pegleg in solo weapon run, rum or critical damage)
– The other guide in steam is a map. That’s very useful.
– Try to go to as many weapon islands, and at least two merchant wrecks.
– In case of one weapon, the two merchant wrecks are important
– metal hull is at -60, -210. If you already have metal hull, this is a merchant wreck as well !
– Tip with one weapon; you can take the ram from Rammstein, as long as you don’t connect it to the other loot. (keep the neighboring three? slots empty)
– For the multiple weapon run, I like the combo harpoon, lightning (2x), cannon and cannonback (turtle). Lightning with the second upgrade and fire destroys a lot if you get the damage a bit higher
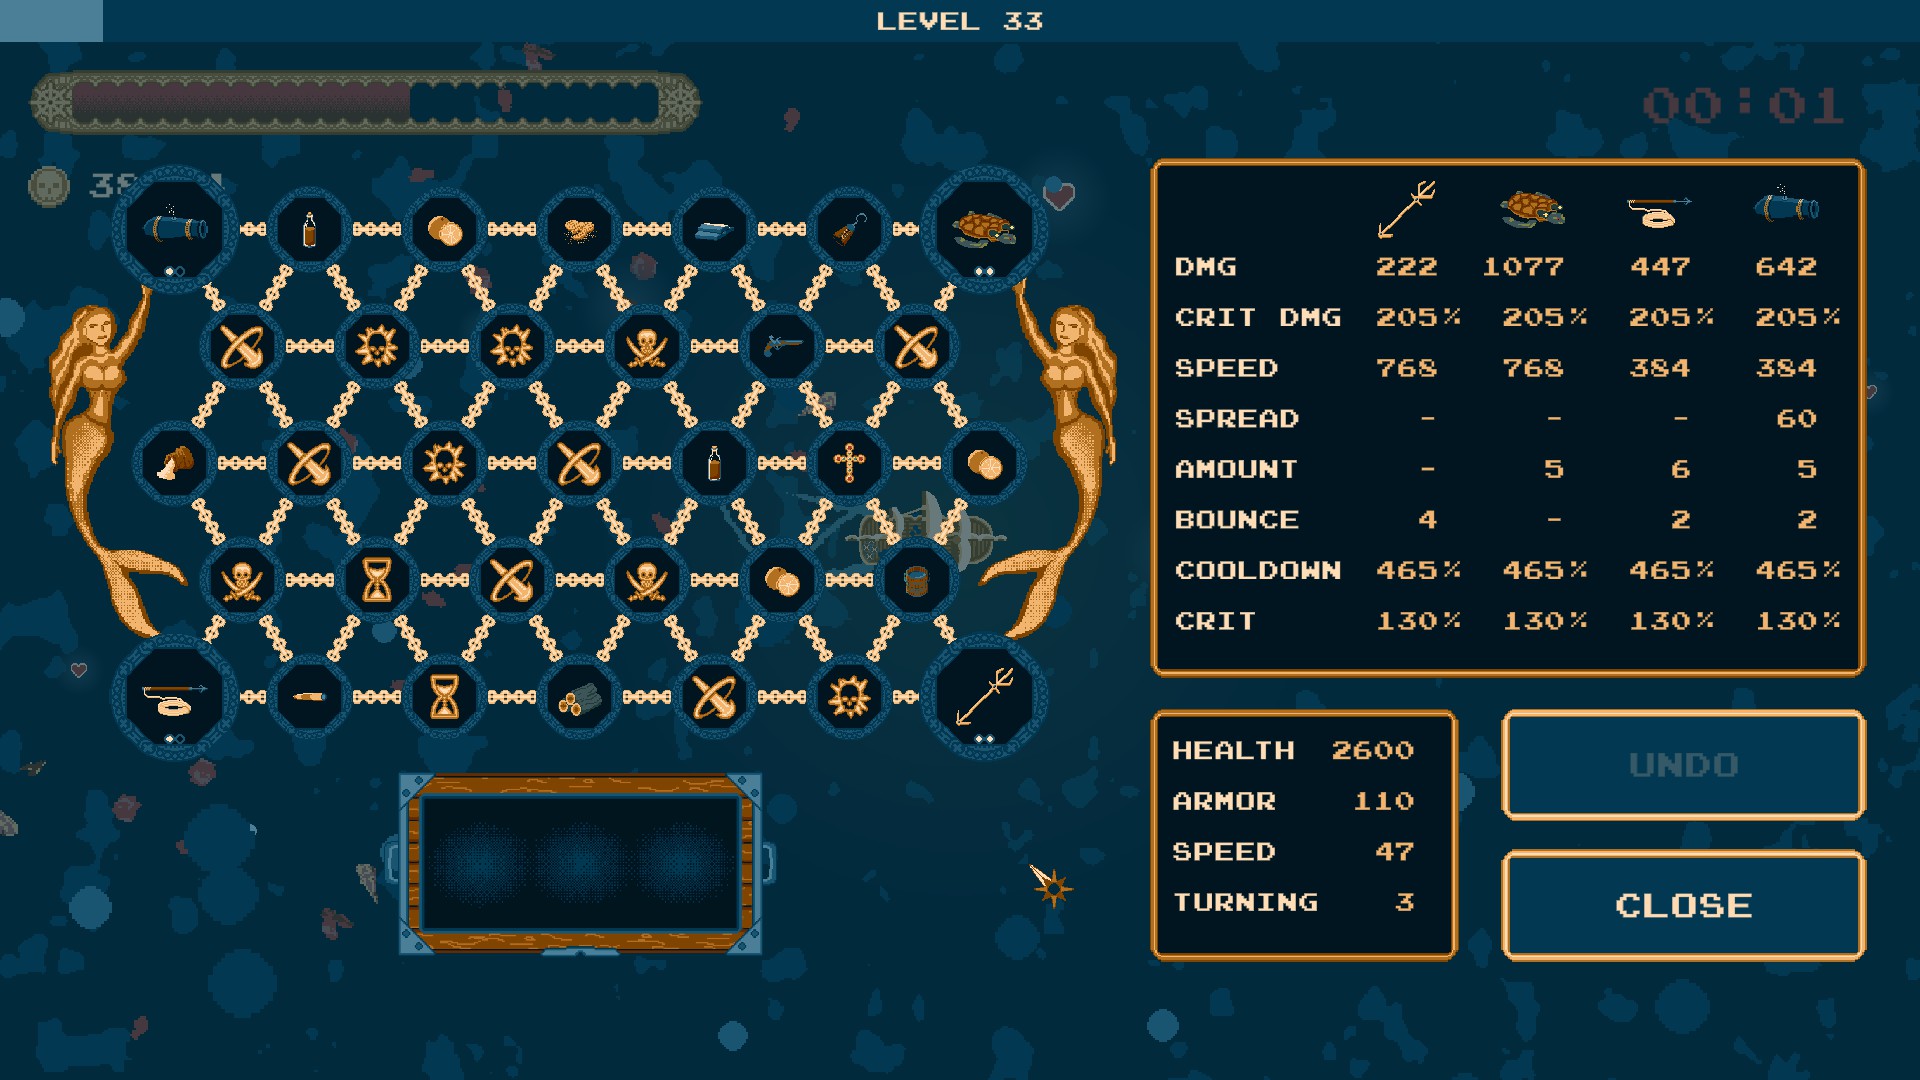
– The combo cross, metal hull and hook gives a very high cooldown. Metal hull gives double health, and when you lower it (by ramming into ships and islands) to a still acceptable amount, hook turns missing health into cooldown.
( I didn’t even connect the metal hull and hook to the cross in the screenshot run)
– A bit of critical damage is nice, it quickly gives extra damage. 3 or 4 is good, more is unneeded overkill
– feast items are often great. I also like spread, especially in the cannon only run, because you have to maneuver less, although close together gives more focused damage