This guide covers all of the essentials of rigging from basics to advanced tactics.
Introduction
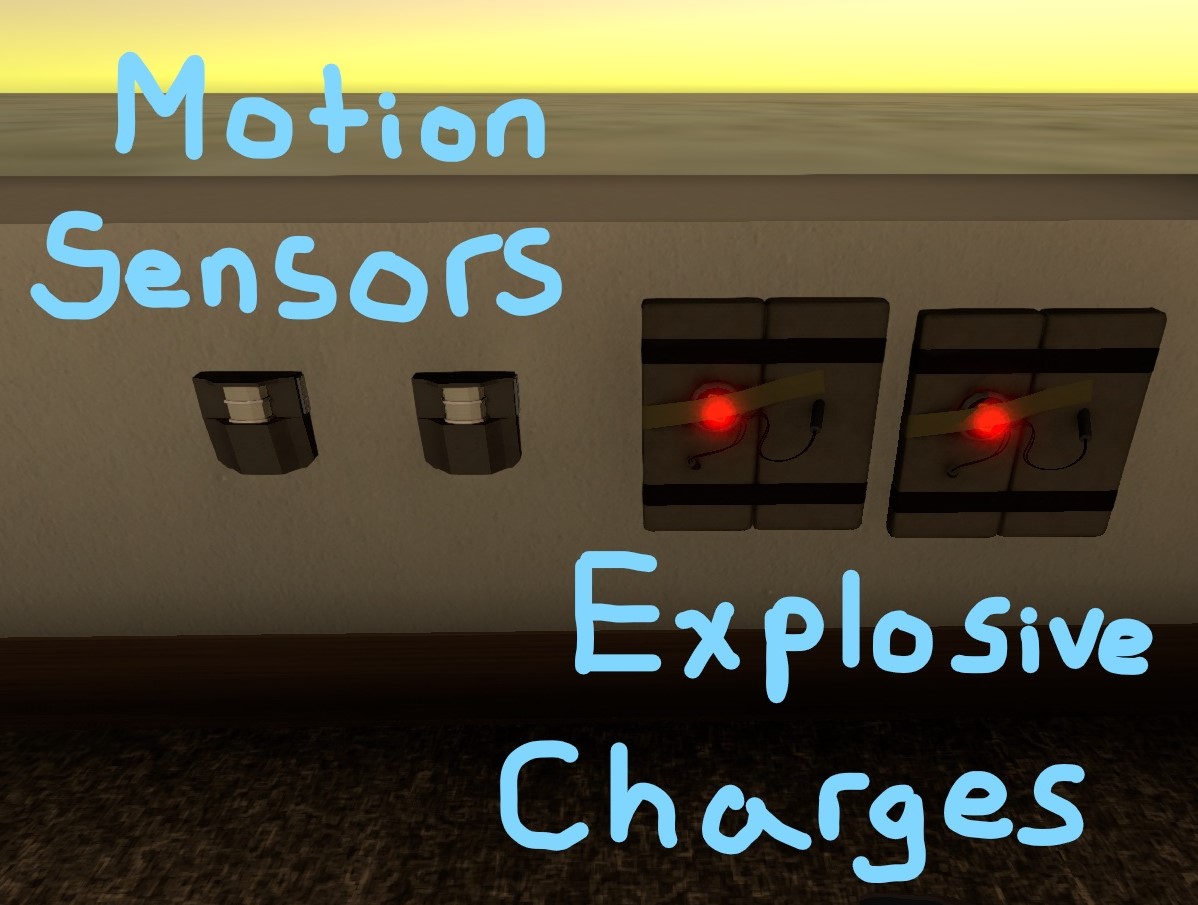
Rigging is the use of motion sensors & explosive charges. There are a variety of applications for both teams to use these gadgets, but it’s important to remember to use them in the first place. In my time playing, I notice that most new players only rig as guards when defending. While rigging is a key part of defending, there are loads of other different ways to use these gadgets.
Mechanics of Rigging
When setting up motion sensors or explosive charges, your character will toss them. If you’re close enough to the surface you want to put them on, they should be placed exactly where you’re looking more or less. If you’re far away from the surface you want to rig, you must angle your view so you can toss them in an arc. This has practical applications when trying to rig places high up, down low, or when trying to rig something without exposing yourself.
Motion sensors will beep when players, objects, or doors move within their sensing range. Players from either team will trigger motion sensors, so communicate with your teammates to let them know where you’ve rigged. False alarms can be the difference between winning and losing a match. When doors open or close within the sensing range they will trigger. Objects like chairs, computers, and phones will make sensors beep when moved in front of motion sensors. It’s important to remember the objects part, as explosions can send objects flying which can in turn trigger your sensors when someone isn’t actually there. Grenades can also set off motion sensors, so consider popular strategies or grenade throws from your opponents and plan accordingly.
Explosive charges when placed have an arming time of 2-3 seconds. During the arming period, a sound will be audible to anyone near the charge. When armed, the light on the charges will turn red. To detonate the charges, you must be holding either the charges or the camera stick and right click. They will detonate in the order that you placed them. While they are mostly non-lethal, like grenades if they explode and the recipient is standing in the wrong place at the wrong time it may kill them instantly. If you’re standing directly on top or under a charge it has a good chance it may kill you. Sometimes the explosion may send you flying into some object and it will break your neck. It depends on the situation. With experience you will learn when and where this stuff is likely to happen.
Sensors and charges may both be disarmed by going up to them and picking them up with your use key (default ‘V’). When picked up they will disappear. They will not go into your inventory.
Rigging as Guards
As a guard your priorities depend on what kind of objective you’re defending. People have different preferences as to how and what they rig, here are a couple of different ways of thinking. If you’re guarding a package it’s best to rig in a way that will delay the Intruders from getting away with the package, while allowing time for you to sprint to the package and deal with the issue. Some people prefer to rig in a way that will catch them before they even get to the objectives, while some prefer to rig directly on or around the objectives. Whatever the case may be, it’s imperative that you notify your teammates where you’ve rigged. Miscommunication in general is one of the top ways Guards will fumble and lose the match, so remember your teammates!
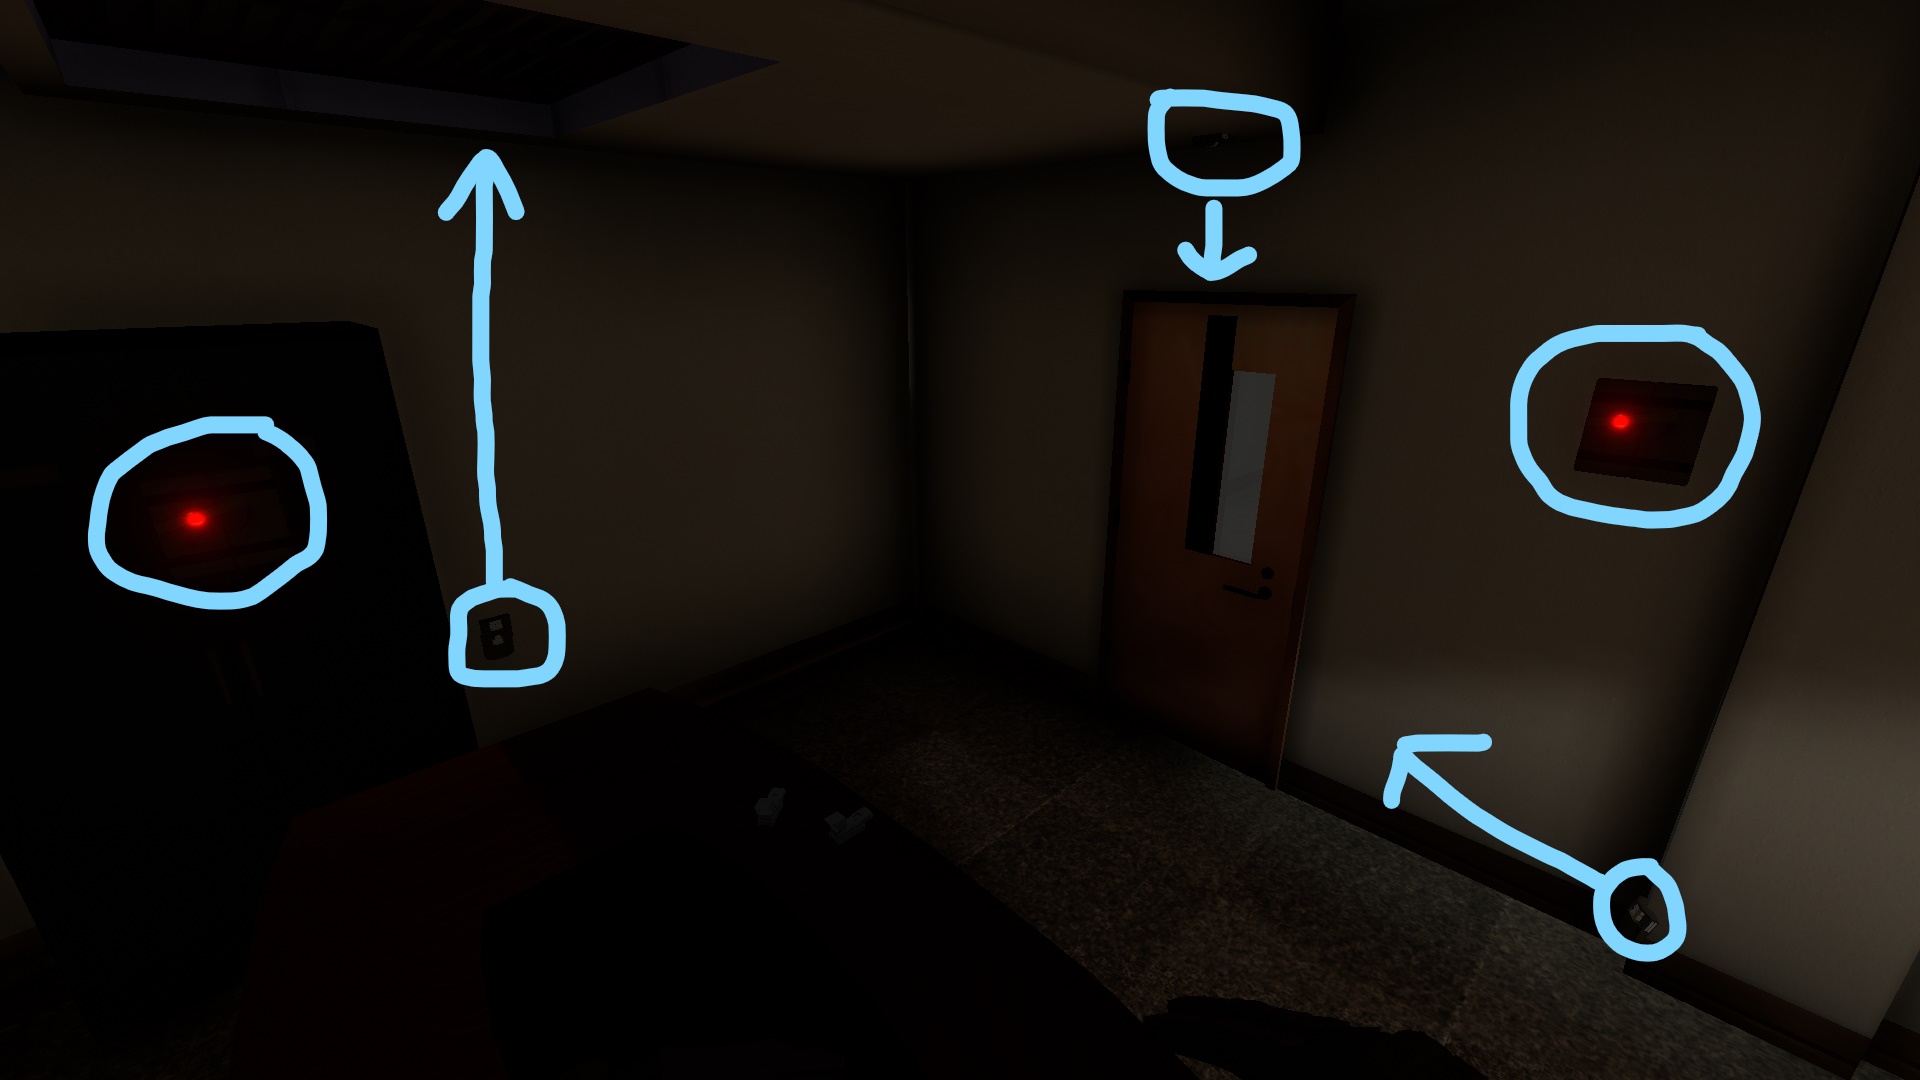
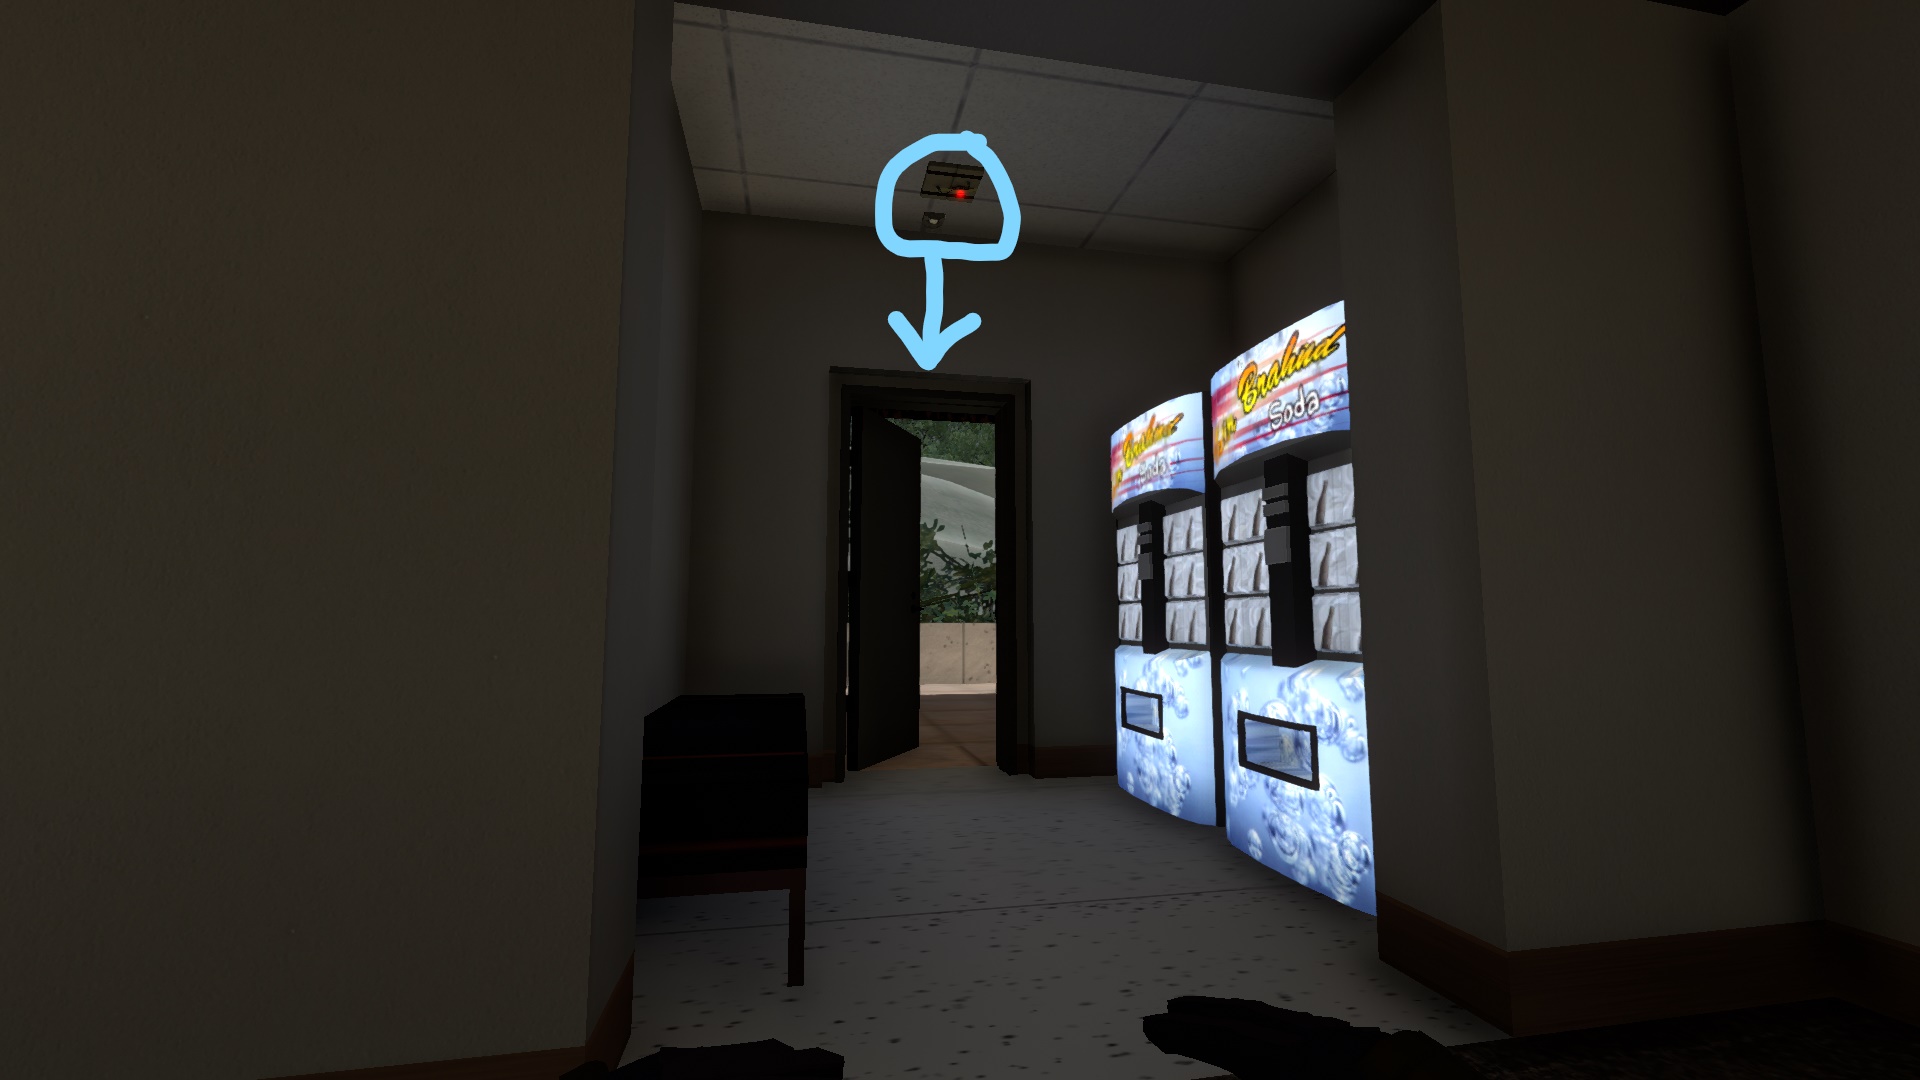
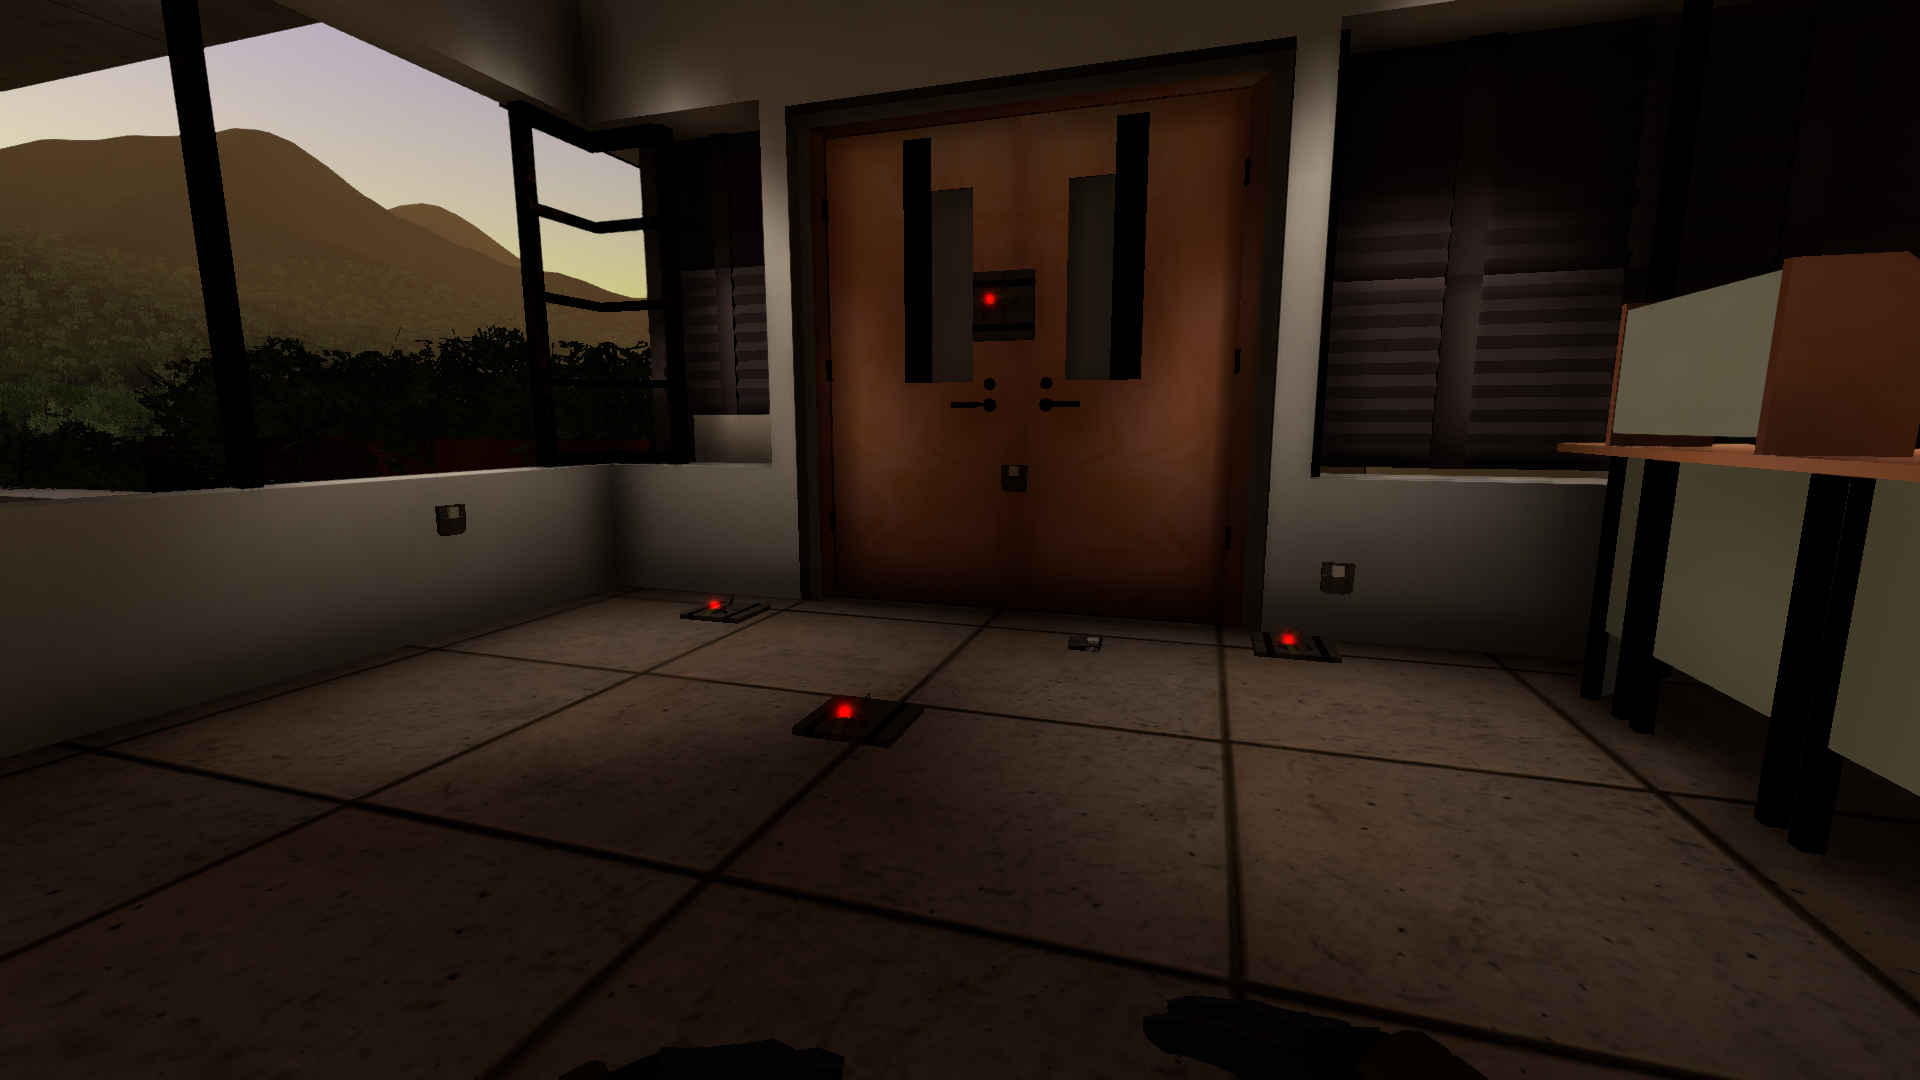
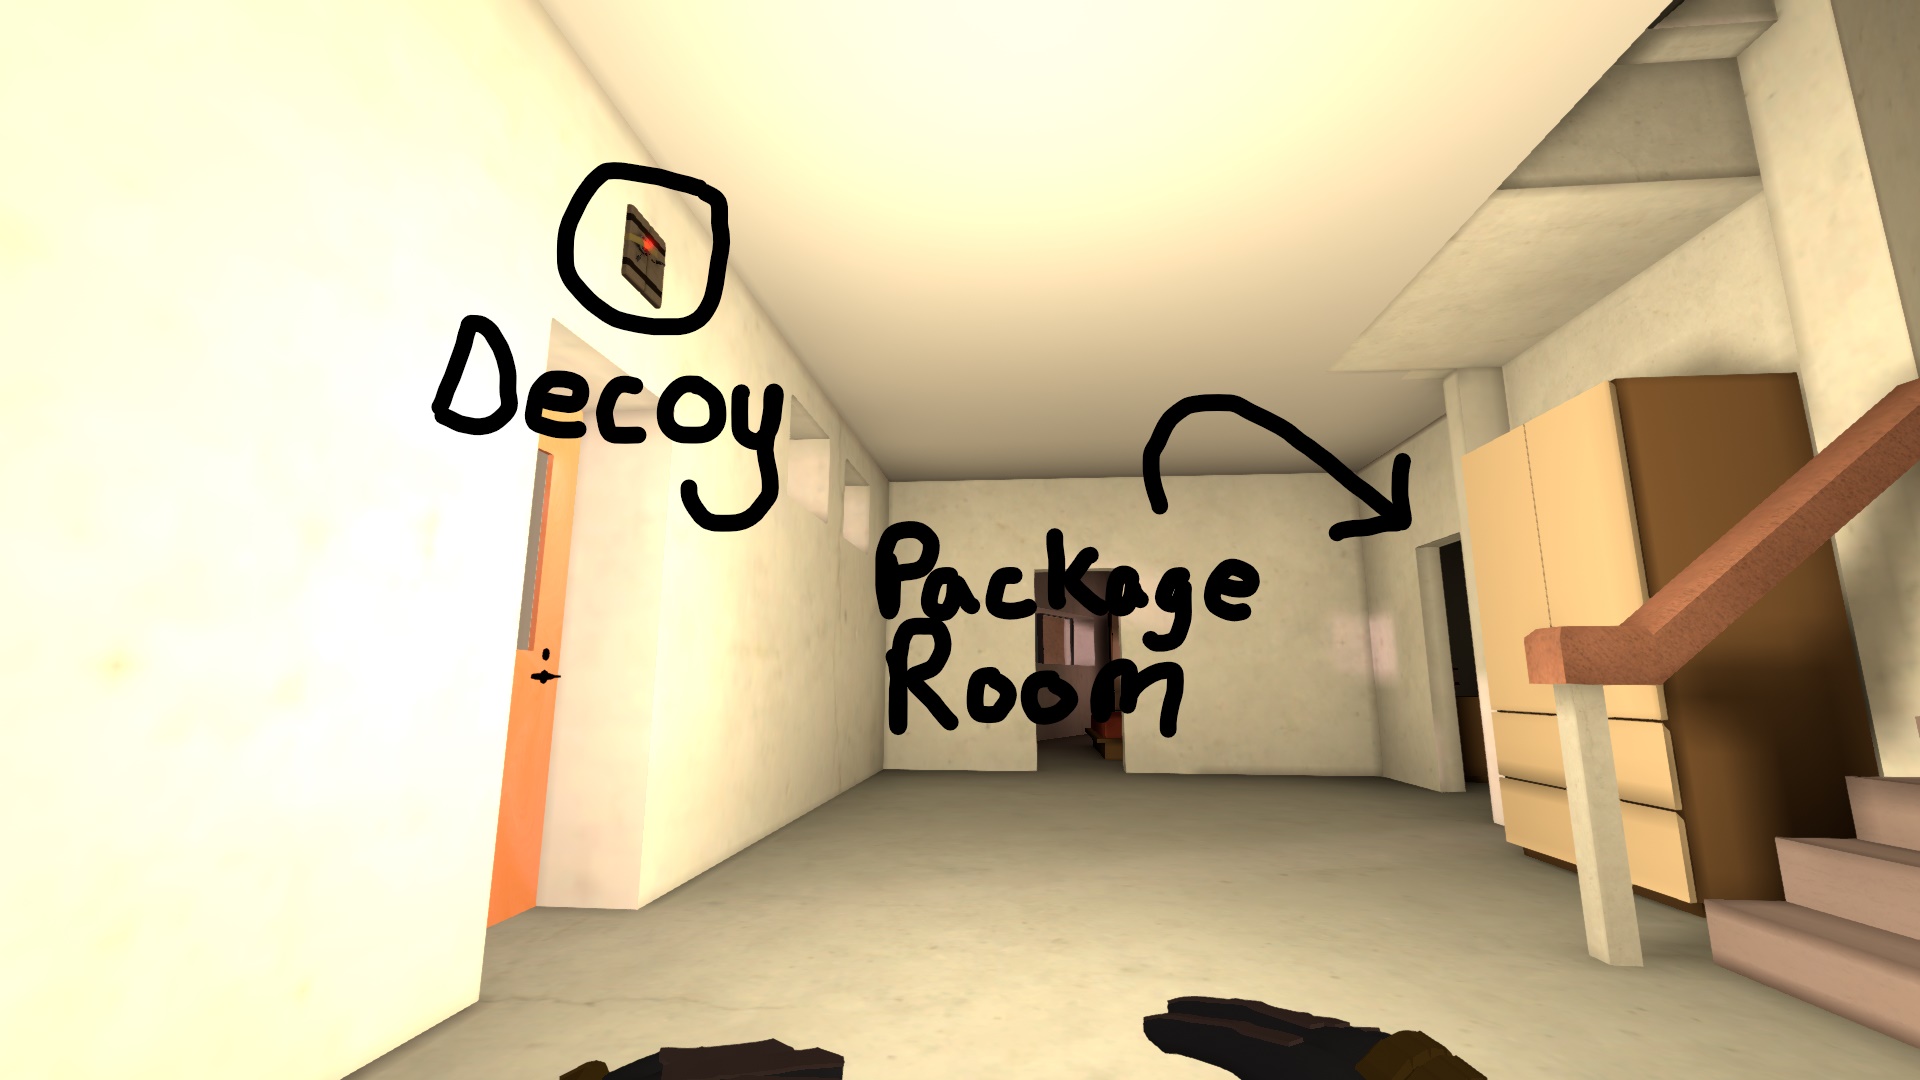
An example of directly rigging an objective room. (Server Room, Riverside B2 Raid)
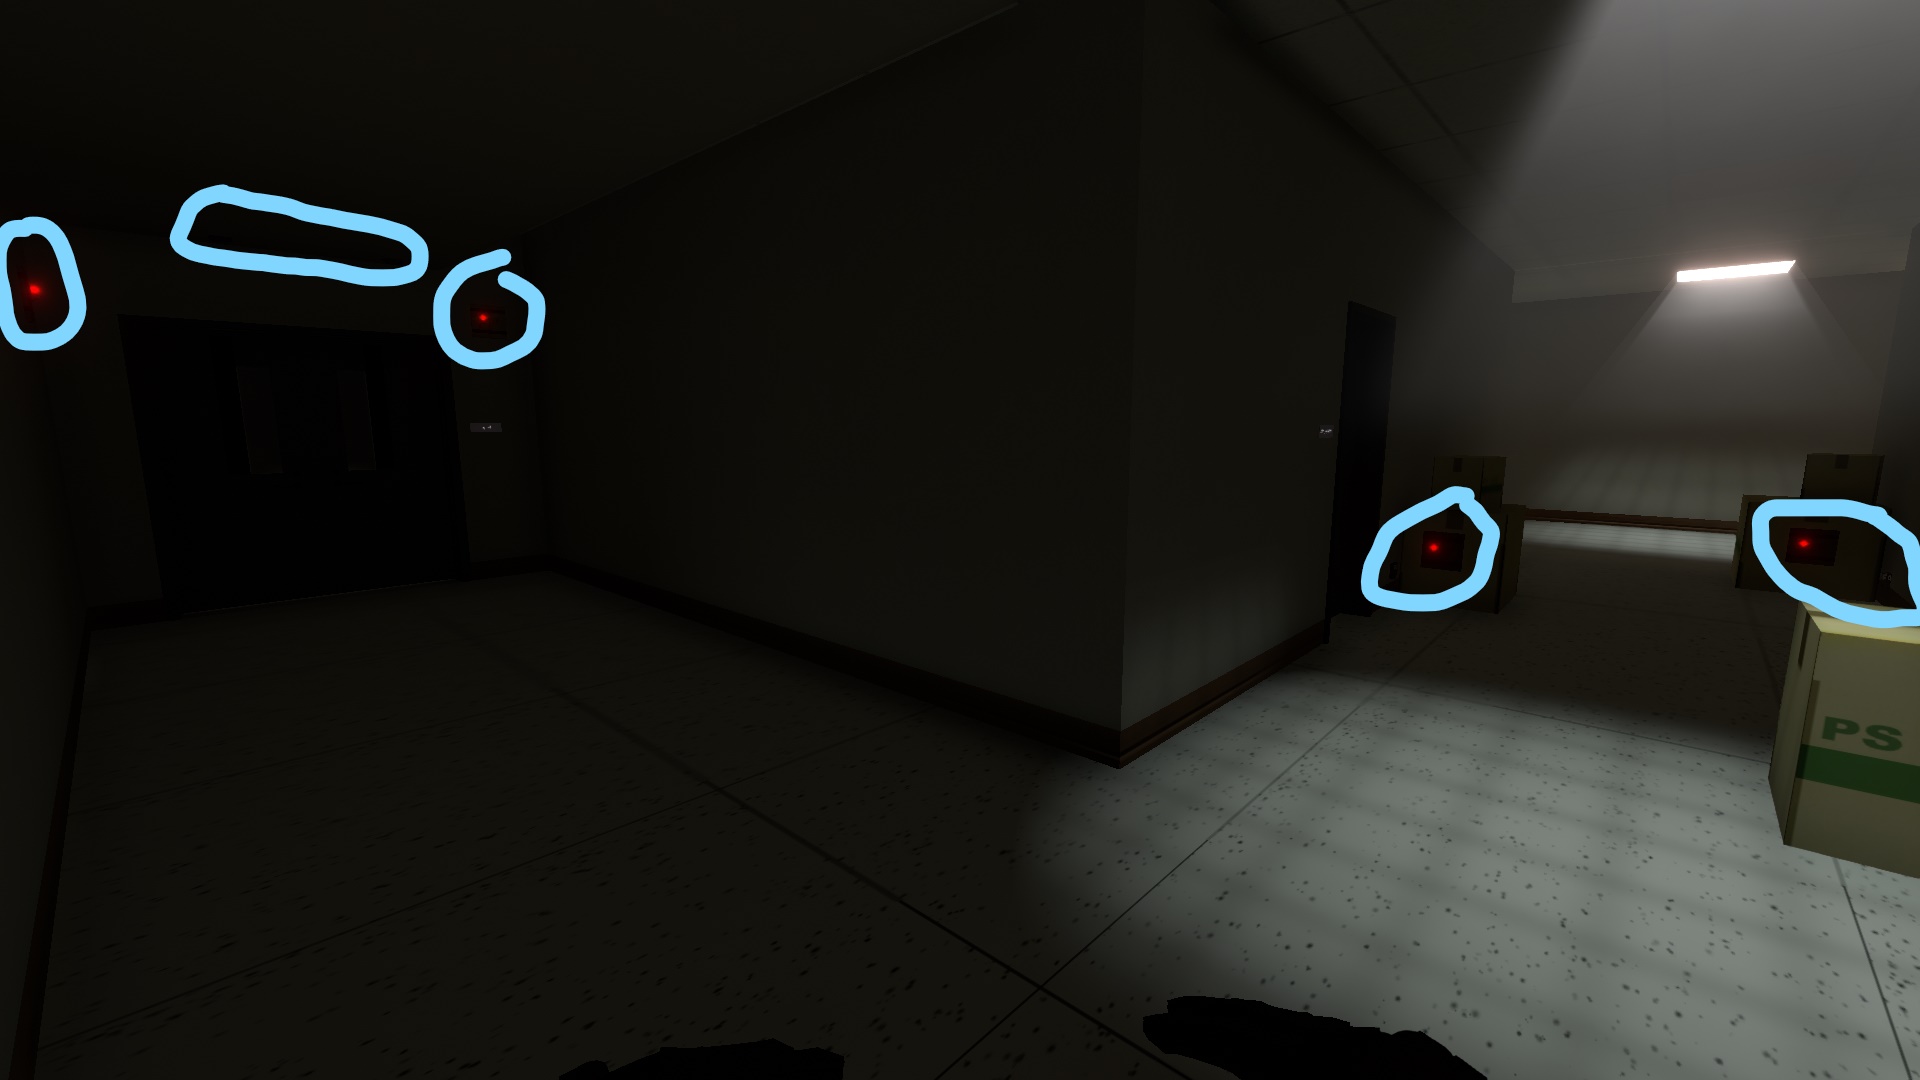
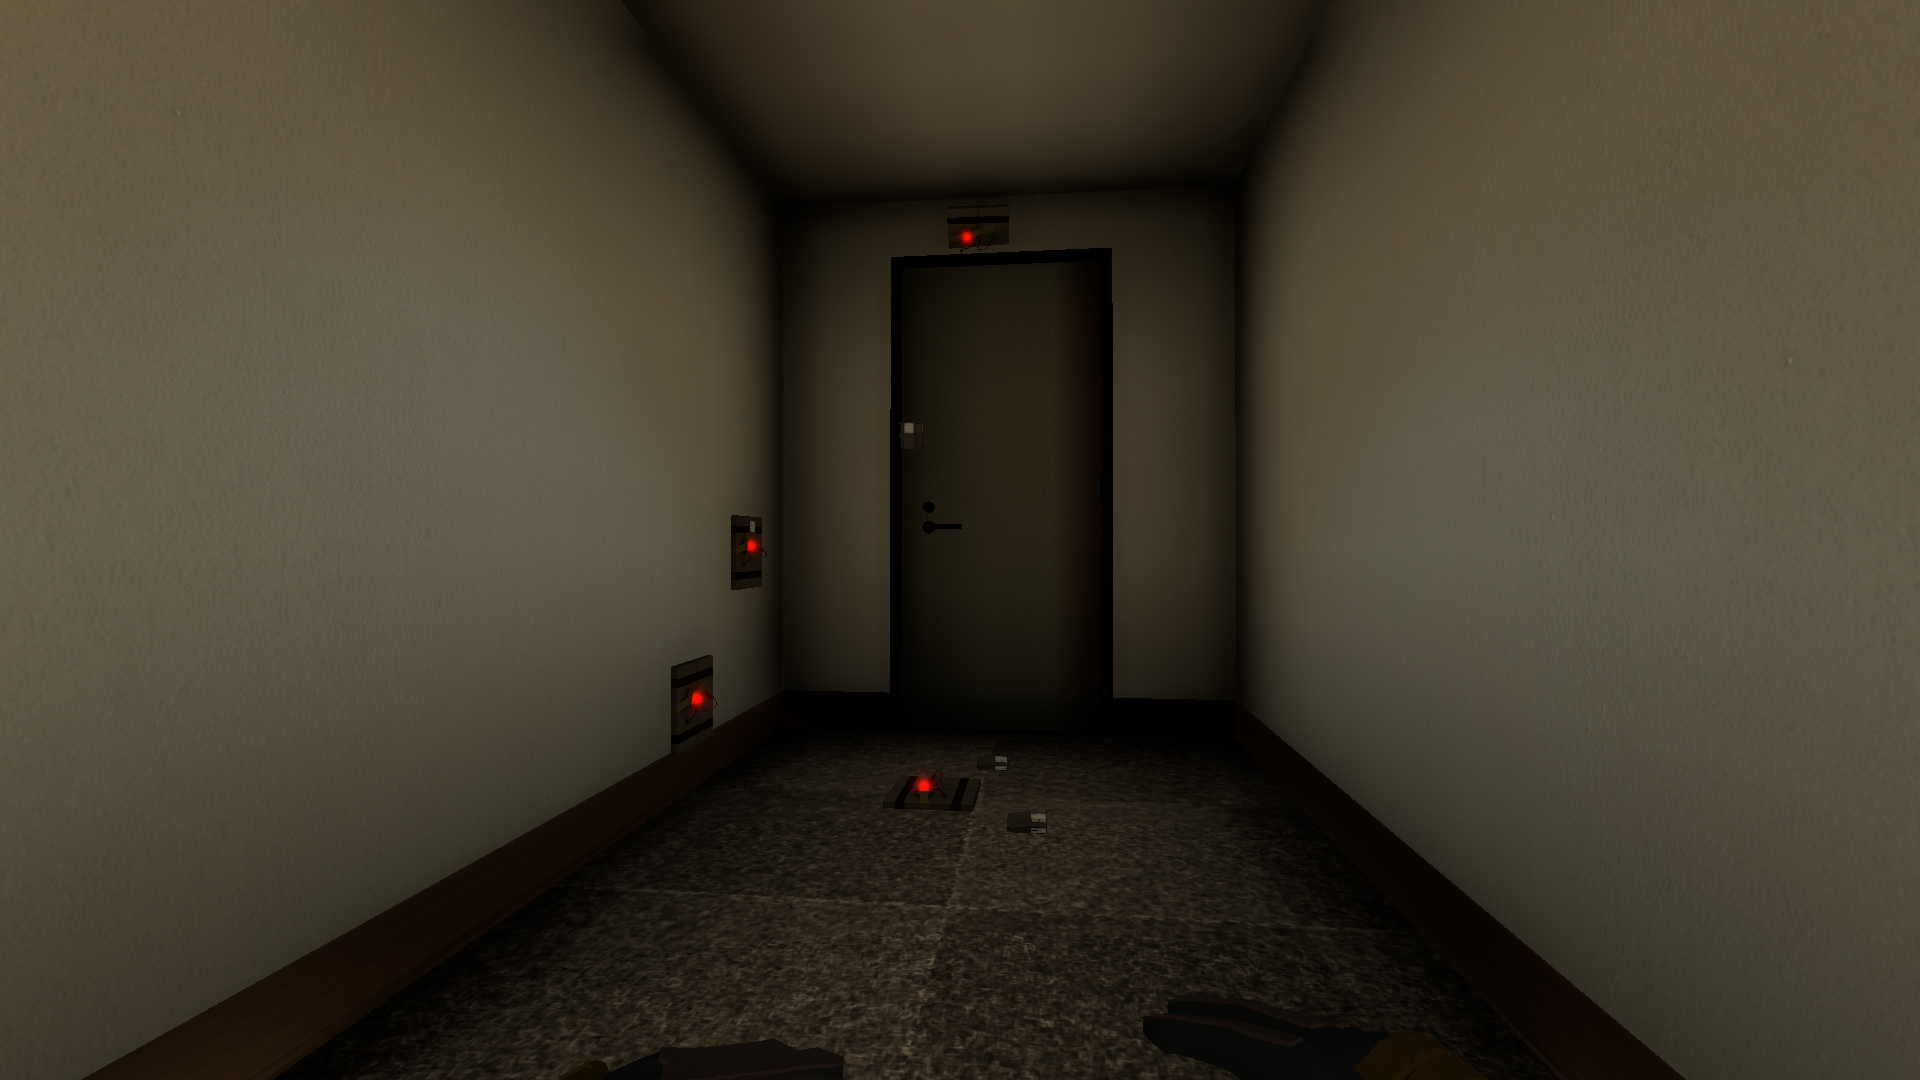
An example of rigging outside the objective. (Hallway outside of Server Room, Riverside B2 Raid)
Consider the following example: On a map like Riverside, some people like to block off entrances to the building entirely. By adequately spreading out your resources, you can be alerted to enemy presence on a specific floor, or a specific side of the building. On B2 raid, one person can accomplish various simple but effective rigs to be alerted of Intruders from Garden.
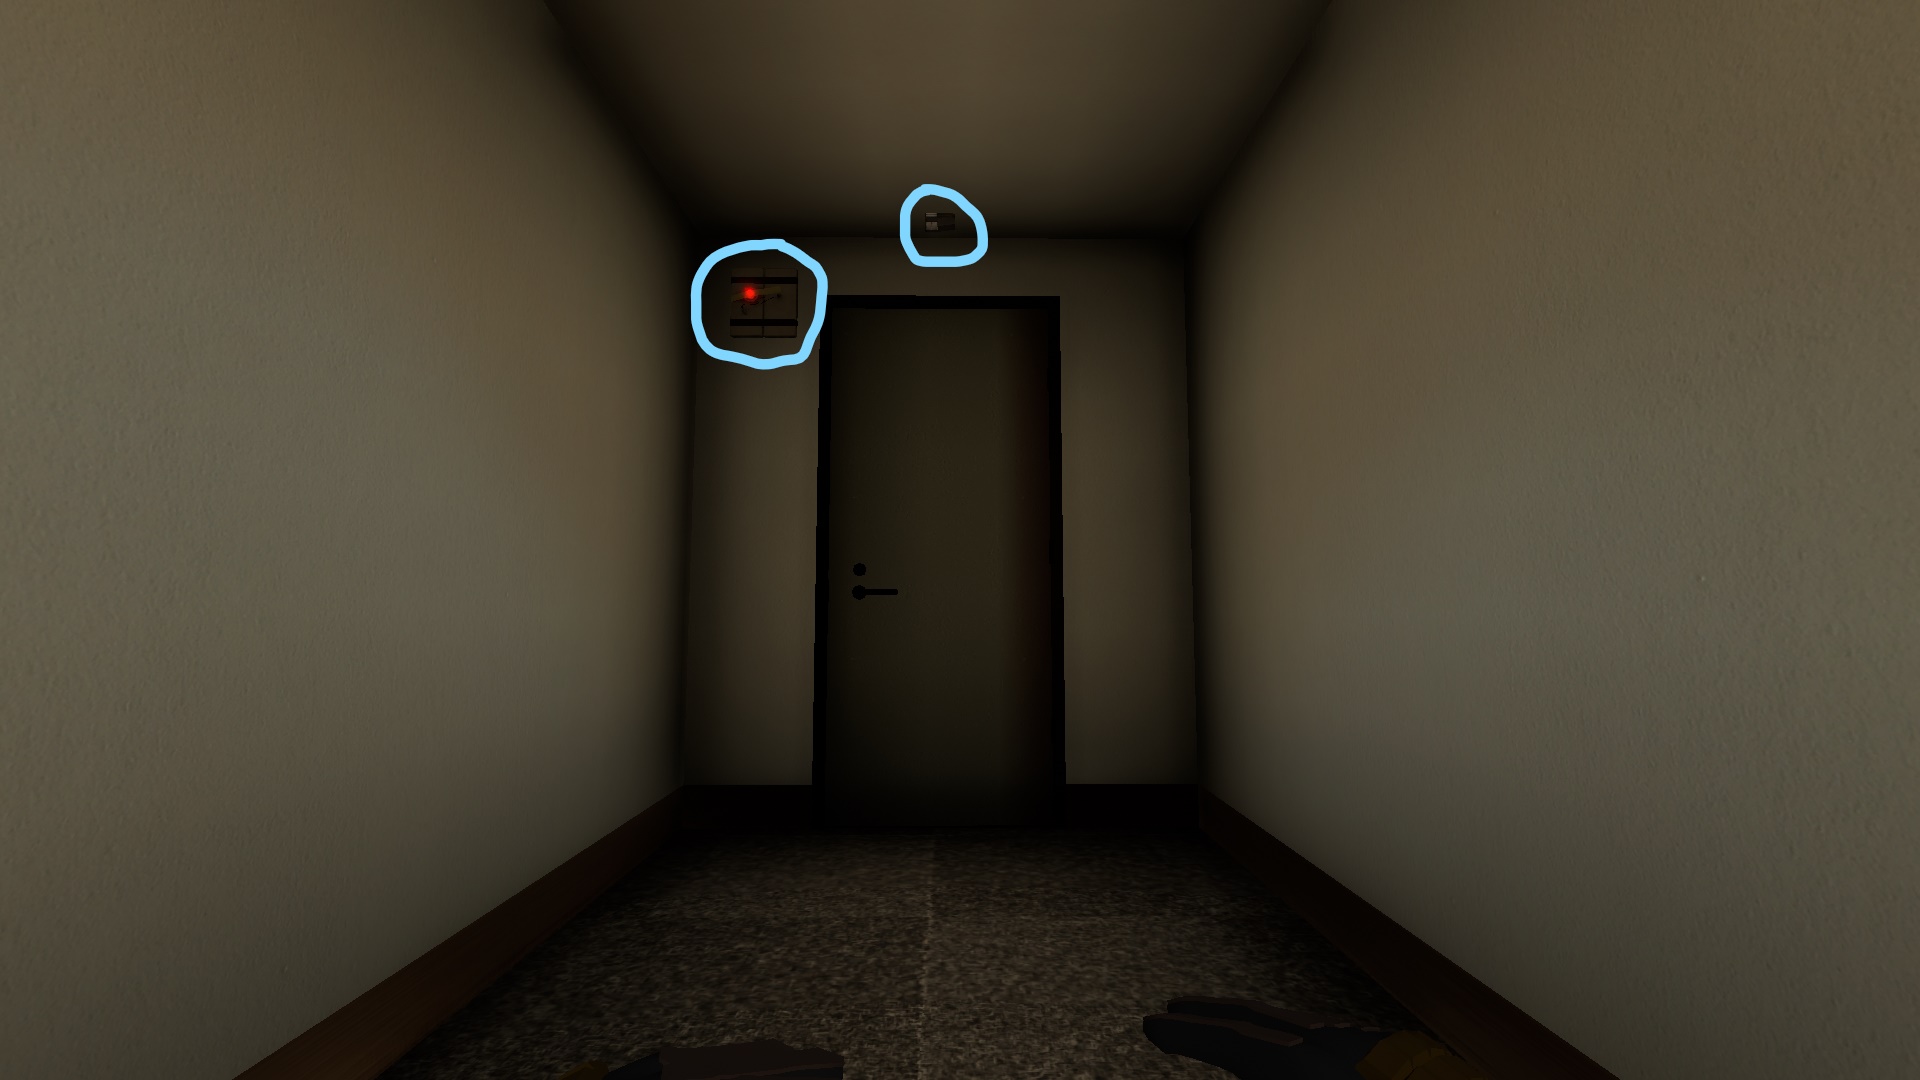
Break Room entrance simple rig.
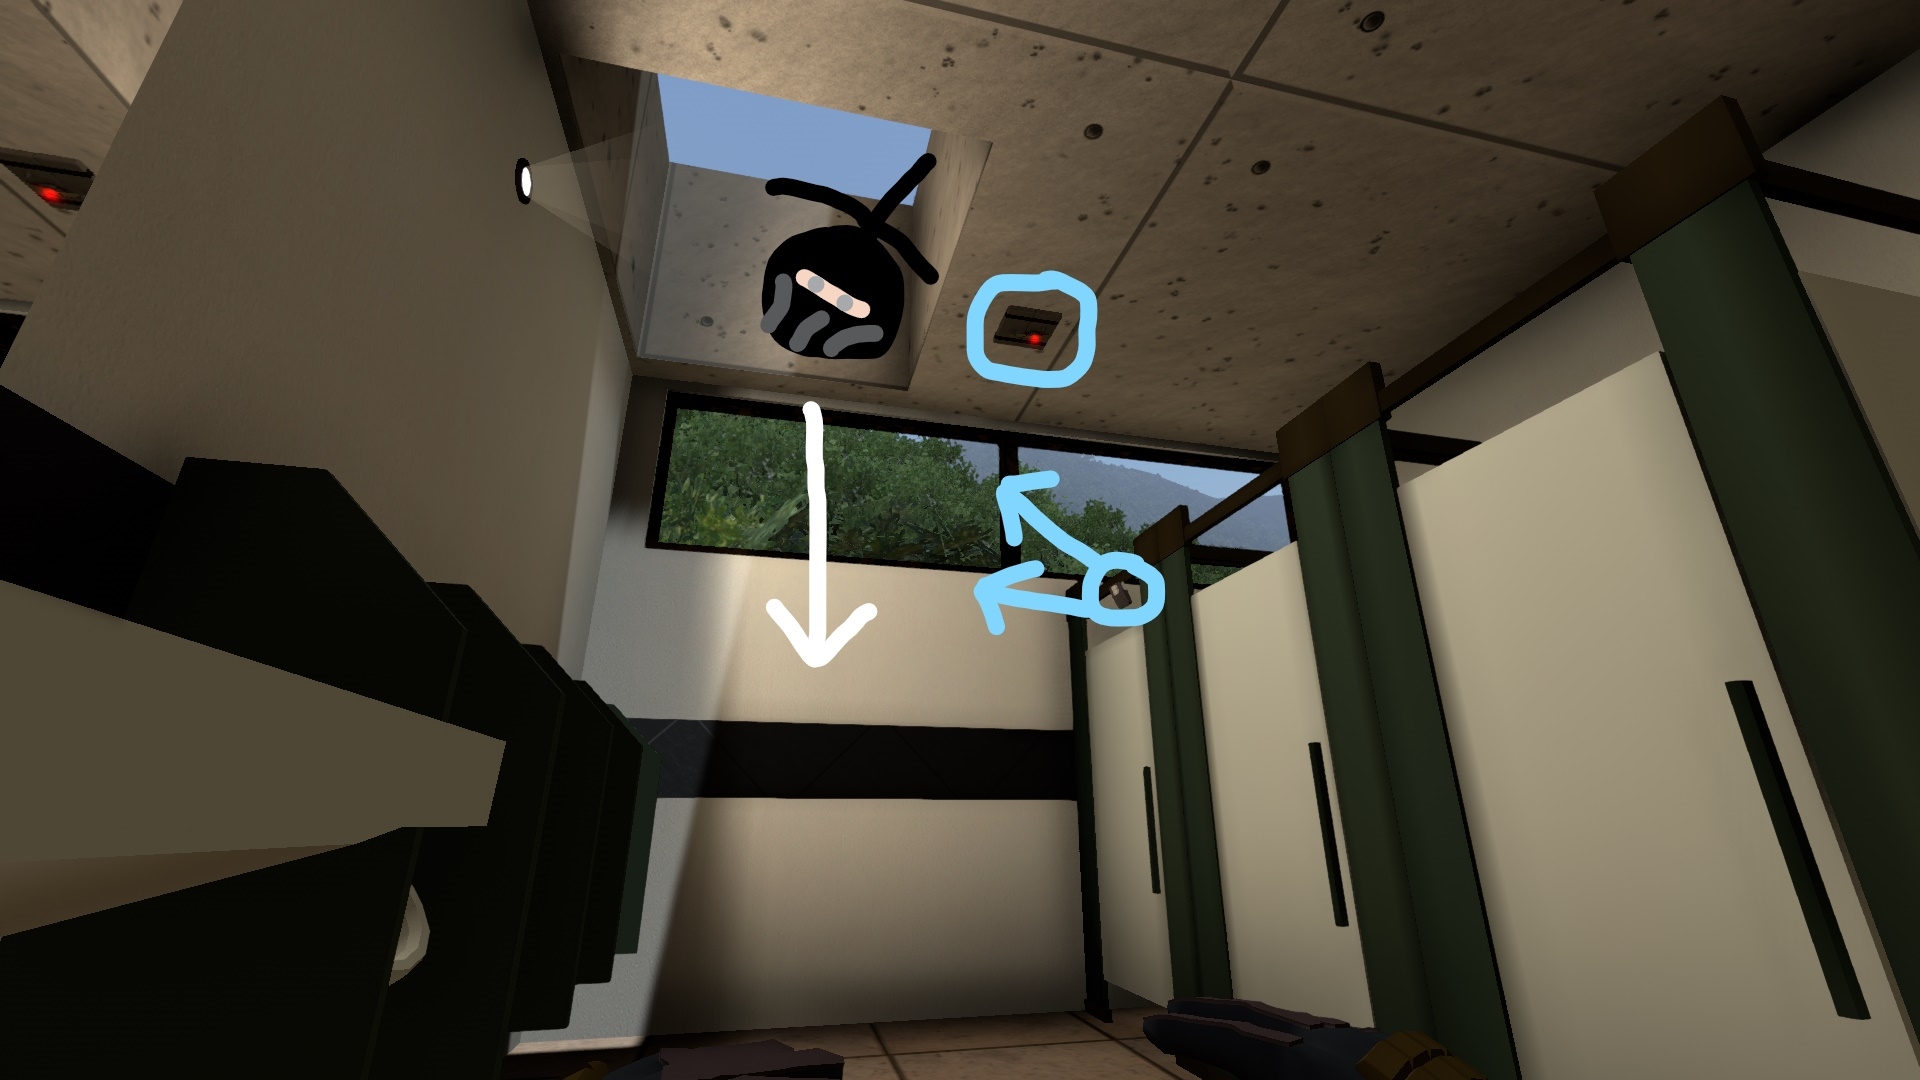
Men’s Bathroom simple skylight rig.

Women’s Bathroom simple skylight rig.
Garage simple rig.
With the following rig, all of the most common routes from Garden are covered. The sensors are either not able to be defused, or are very difficult to do so. However, the following diagrams illustrate that it’s not foolproof.

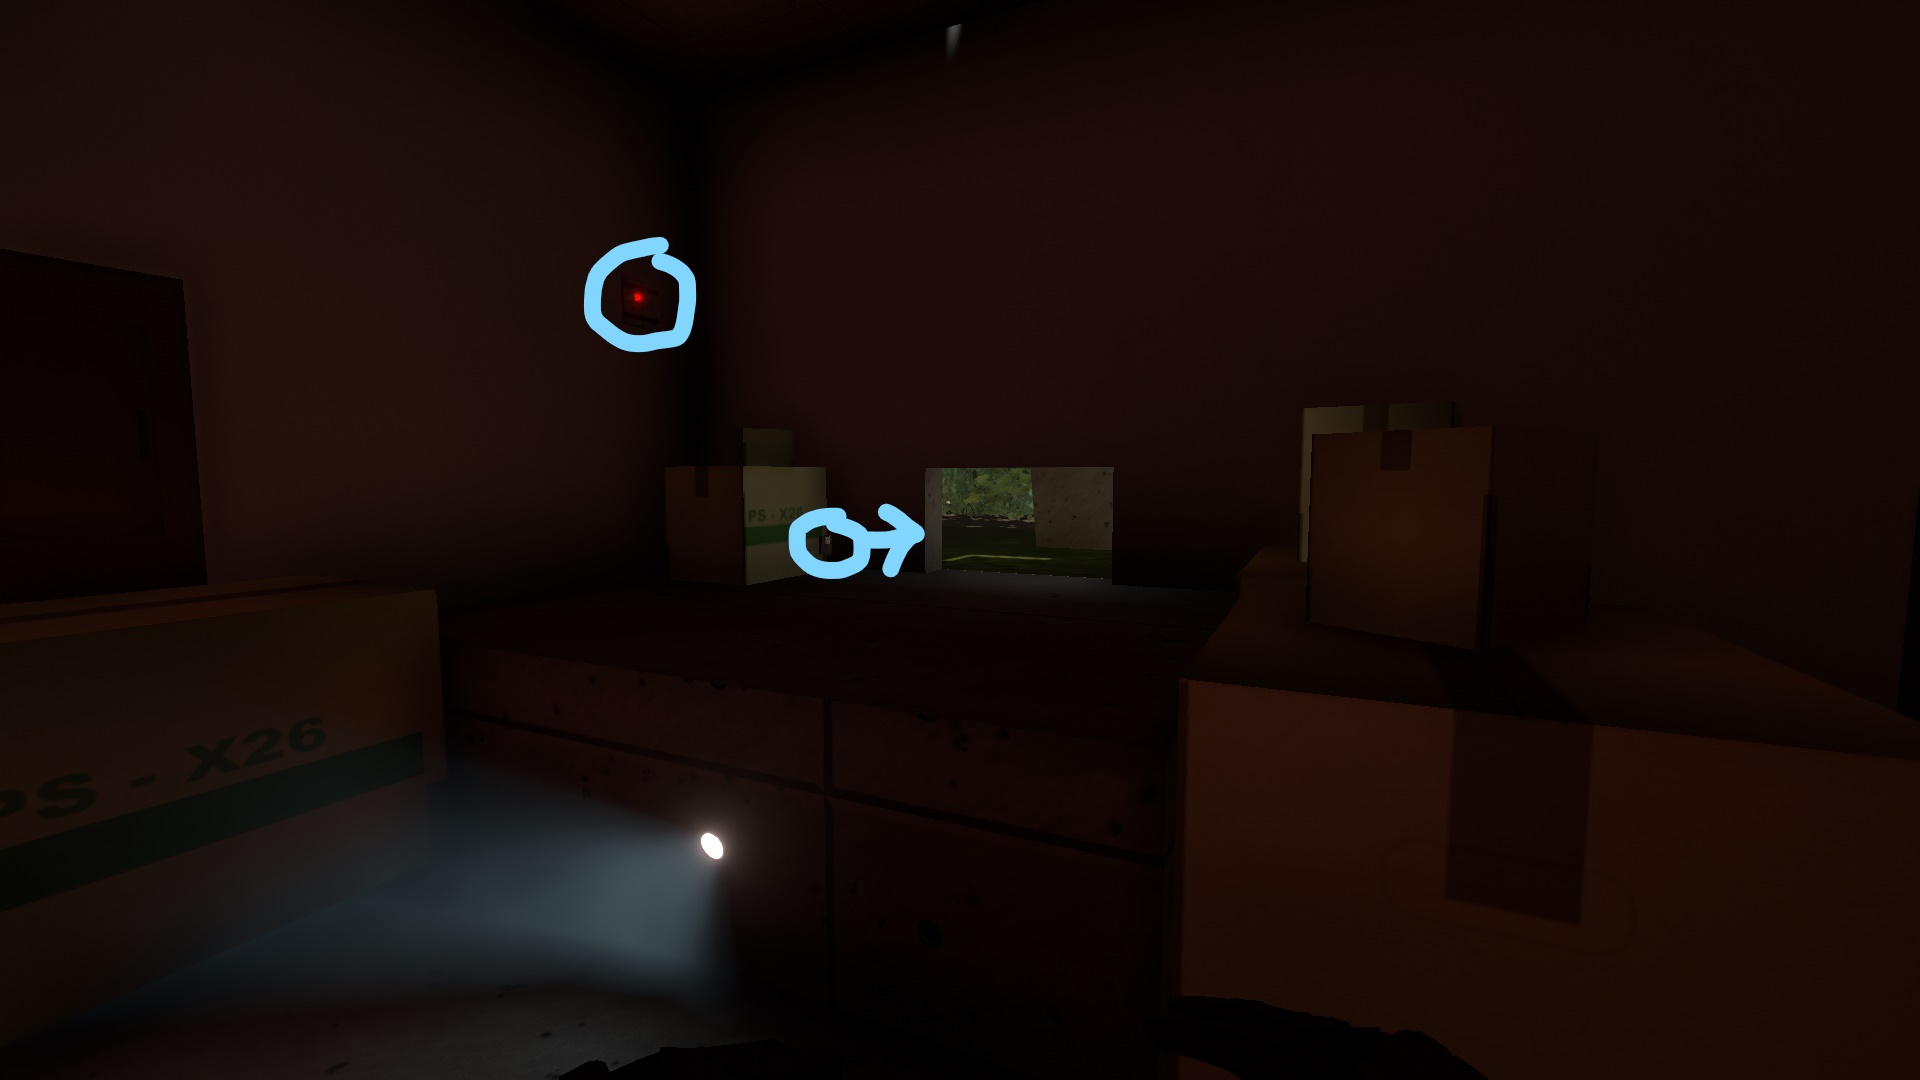
B2 Gallery possible window entrance.

Building 2 window and balcony entrances.
The windows with arrows on them can be broken into, or if already broken can allow an Intruder to enter stealthily. If any of those windows aren’t broken, the Intruder can either jump down onto the balcony next to bridge, or continue over to the end of the ledge to the windowless room or back stairwell without making a sound. This is why it can be important when guarding to keep tabs on who is breaking what windows. The effectiveness of these rigs can be increased with more teammates pitching in to help section off a side of a building, whether each person has a section or single entrance rigged.
Rigging as Intruders
As an Intruder, your priorities involving rigging are different. Since you’re not defending any set point, there’s more free reign as to where you can rig, and the purpose of the rig. A popular mind game some players like to use against Guard are errant explosions. Placing down an explosive charge in an area and exploding it can catch the attention of Guards and lead them to that area, creating new open paths for yourself and your teammates. These paths can be used to get by unnoticed, or will lead you right to the Guards so you can ambush them.
Alternatively, when close to an objective you can rig a route to the objective so that if you are discovered you are better equipped to deal with the incoming threat.
This may allow you to catch any Guards with their pants down and kill them, or will open up a path of escape.
It’s especially important to know your enemy. By knowing your enemy and understanding their play style, you can adjust your tactics accordingly. Don’t forget to communicate to your teammates beforehand of your plans if applicable before going ahead with them.
Additional Notes
Though this video is old, as far as I’m aware the basics of how explosives work haven’t been changed too much from this dev log.
Cover and walls is extremely important in determining placement of explosives. Consider how walls or any other obstructions will sway how well the rig will work. Depending on how your resources are stretched and your game plan, consider whether you want a charge that is less likely to be seen or more likely to be effective.
One big problem I have noticed over the years are sloppy rigs. What I mean by that, is rigging in a way that will compromise the effectiveness of the rig. If you stick motion sensors everywhere out in the open, and place explosive charges in obscured areas there’s a good chance the rig will fail period. Your opponents will notice them and disarm them, or will avoid them completely. If they do trigger a sloppy rig, those obscured charges can be the difference between gaining valuable time knocking them over or having them get away. Keep rigs as neat and as out of sight as possible.
If you’re rigging a doorway, keep the sensors as close to the doorway as possible. Make note of which way the enemy will approach, and which way the door will open. Remember that sensors will always trigger when in range of a door moving. If the door is opening inwards towards the sensor, the rig is very reliable and will always let you when that door moves. You won’t know if anyone passes through the doorway however. People who have caught wind of your strategies may bait you into blowing your charges by opening and closing the door quickly. When that happens, either wait to blow your charges to get the jump on them or change up your rig. When applicable, an advantage of placing a sensor on the ceiling where the door opens up is that you’ll be notified when the door opens and when any objects pass through.

If you’re attempting to rig a hallway or corridor, place the sensors and charges behind any objects where the opponents are most likely to cross paths. If there are no objects, try rigging close to corners.
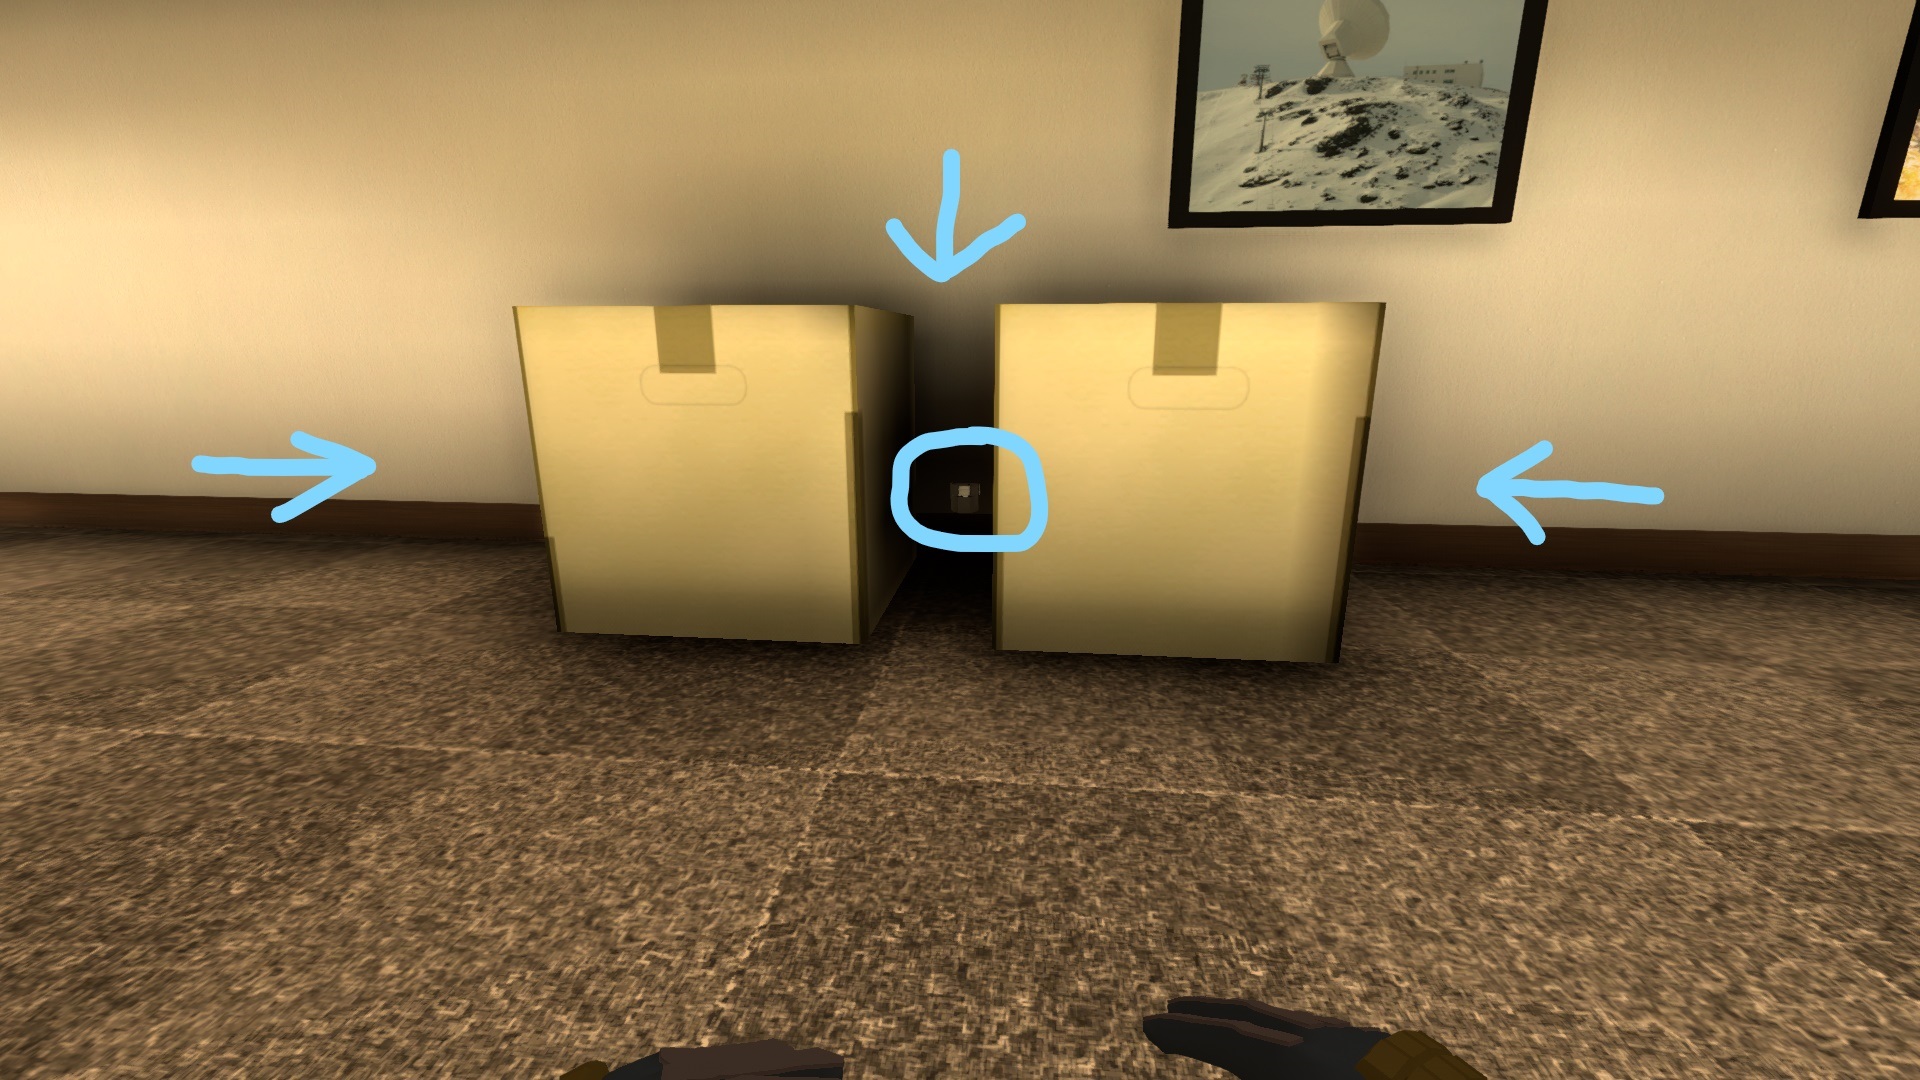
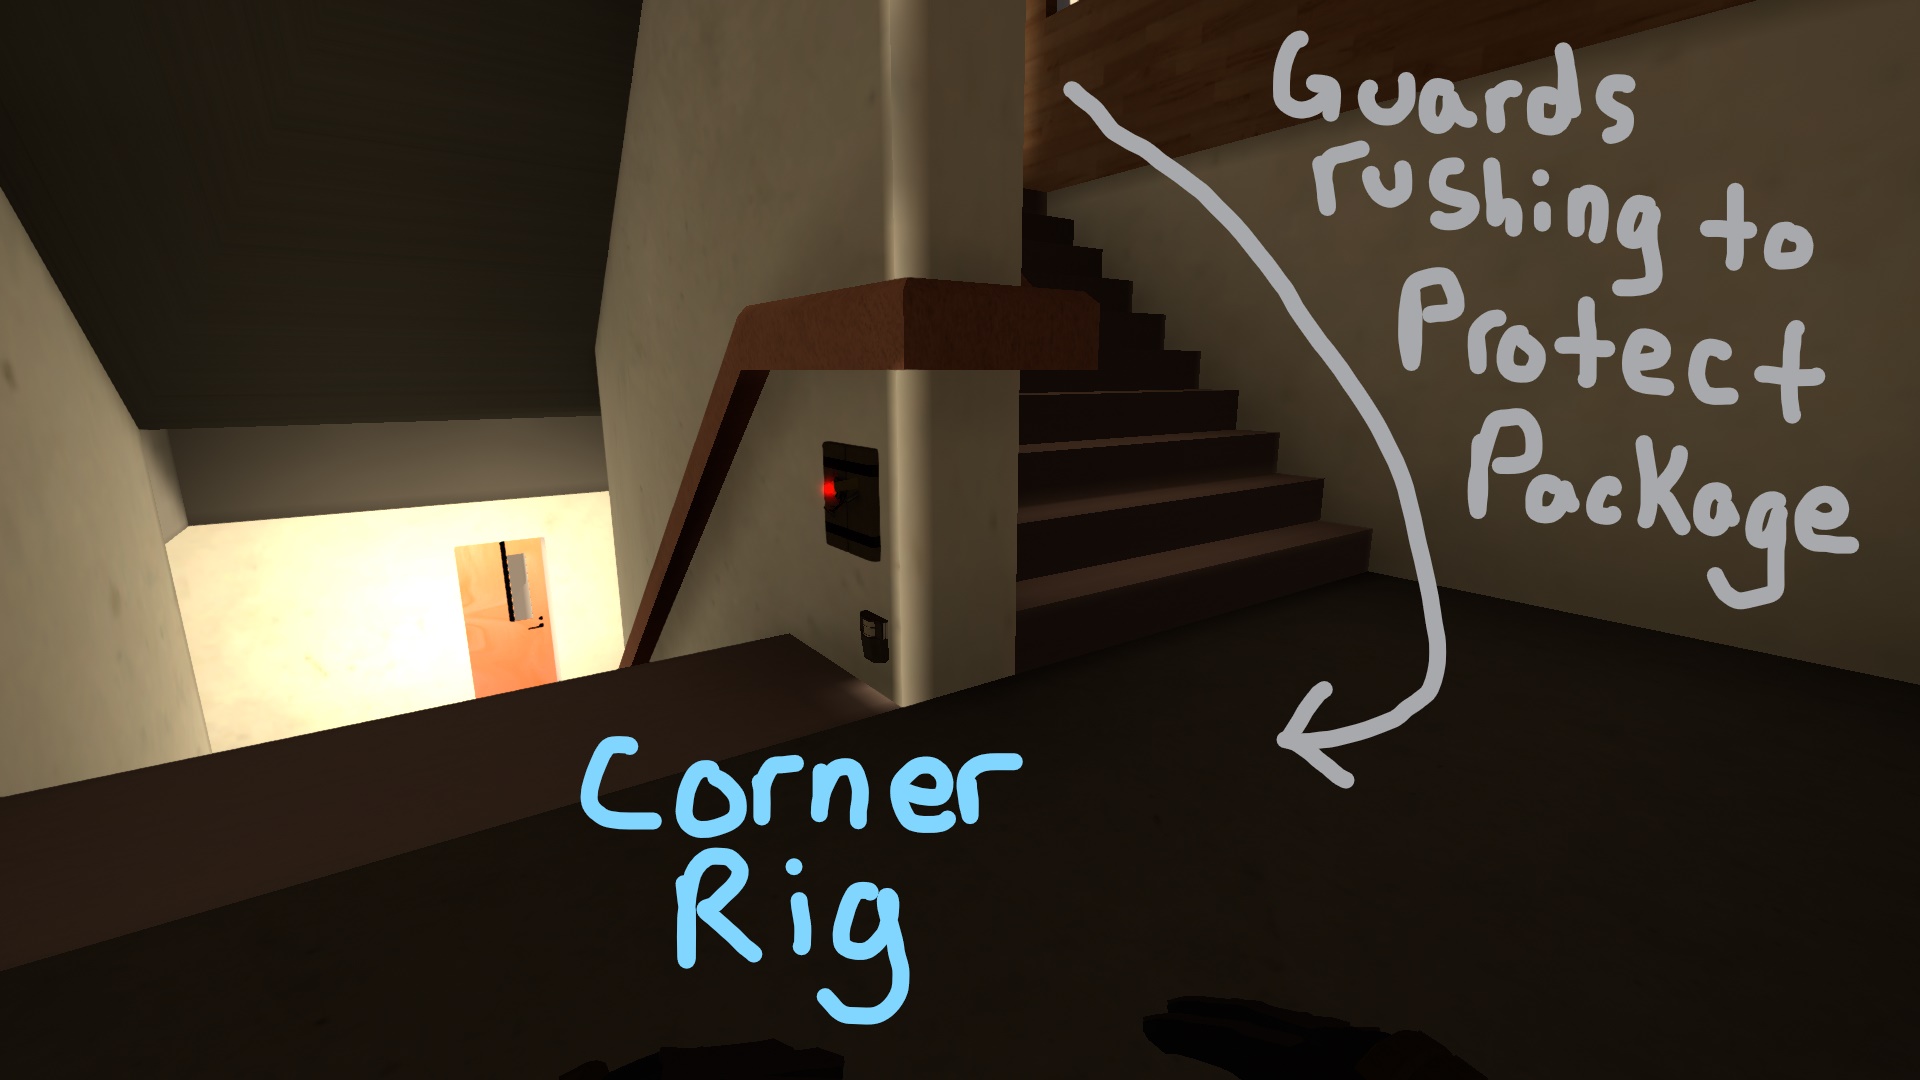
Concealed corridor rig. (Cliffside)

Corner stairwell rig. (Cliffside) My thinking for this specific rig in placing the charge on the wall is that people are less likely to notice the smaller motion sensor on the box than if I stacked both the charge and the sensor there. If they’ve not noticed the sensor, after waiting a moment they’re free to be blasted.
A good habit to get into when rigging certain areas is to leave a motion sensor or charge in an obvious area. That charge or sensor can be used as a reference to find out if any opponents have crossed through the area. Personally, I like to leave a charge out in the open, as if no one picks it up it can still be effective in use depending on the map and placement.
Most all rigs are prone to false alarms in some shape or form. A false alarm can happen when an opponent triggers your motion sensors in an effort to get you to prematurely detonate your rig in order for them to pass. Alternatively, it could be an unsuspecting teammate who was unaware of the rig, which emphasizes the importance of communication. Sometimes some wack stuff can happen and it’s just that – a false alarm. It’s important to be aware of the factors involved and what actions players are likely to take against particular rigs.
Consider the following example: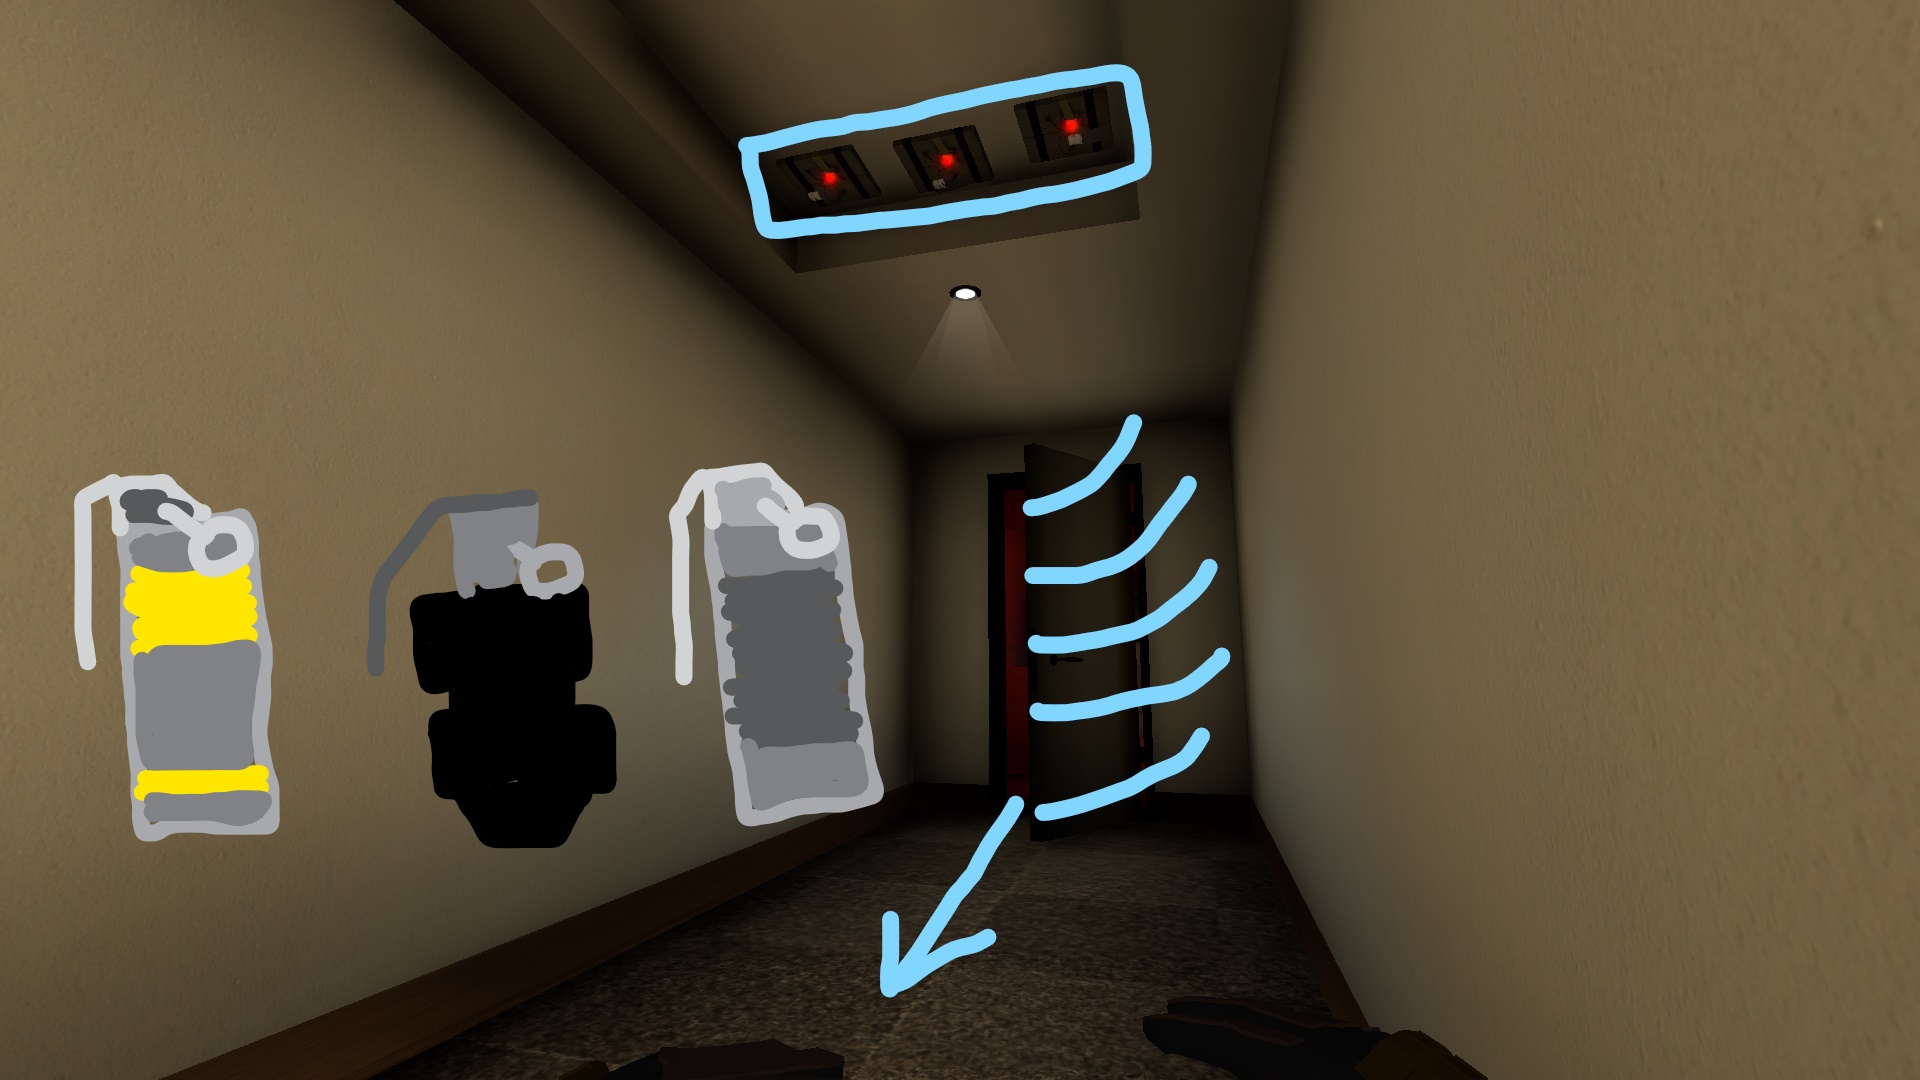
This is a garage rig for Guards on Cliffside. When playing against inexperienced players or people not paying close attention, this rig is excellent. However, due to the popularity of the route it’s commonplace for players to chuck various grenades down the hall. These grenades will trigger the sensors, and if the Guard is not aware of a fake out or incoming push the charges can be detonated prematurely.
When your sensors are triggered consider the following:
What time in the round is it? Can teammates clearly see the sensors? Is it a route likely to have grenades thrown down it, with the sensors in range? Could an opponent be attempting to trigger the sensors with a cardboard cutout? Could an opponent be trying to defuse the rig? Did any explosions cause objects to move and trigger my sensors?These aren’t all of the things to consider, but they are some of the most important. Through knowing your enemy, and having experience in various situations and maps you can act accordingly.