Useful Tips and Tricks for the Game: After finishing the tutorial, you should also read this guide to firmly grasp the mechanics and operational principles that will help you through battles, win runs, and defeat bosses.
Character Generation
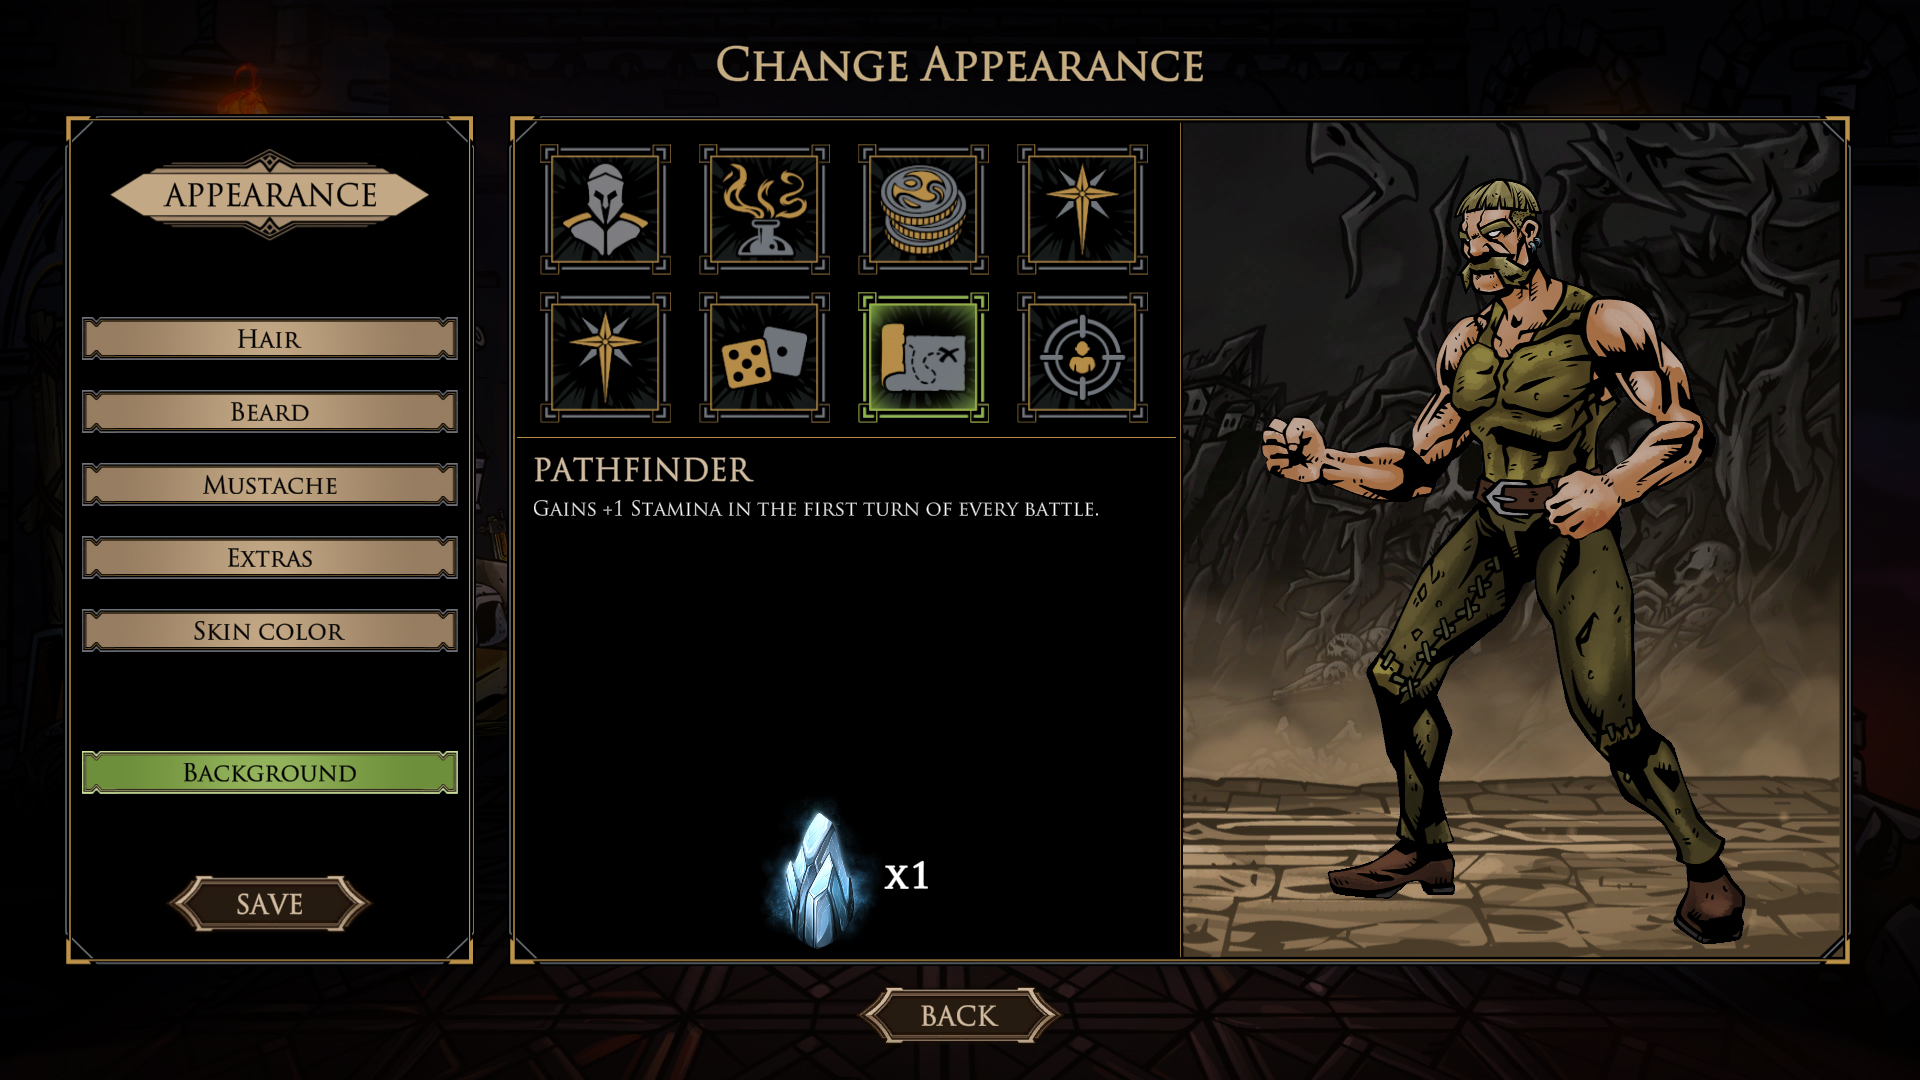
You can modify the appearance of your character anytime, but you can only change their Background after defeating all 3 bosses in an area. Think carefully about the gameplay style you wish to adopt.
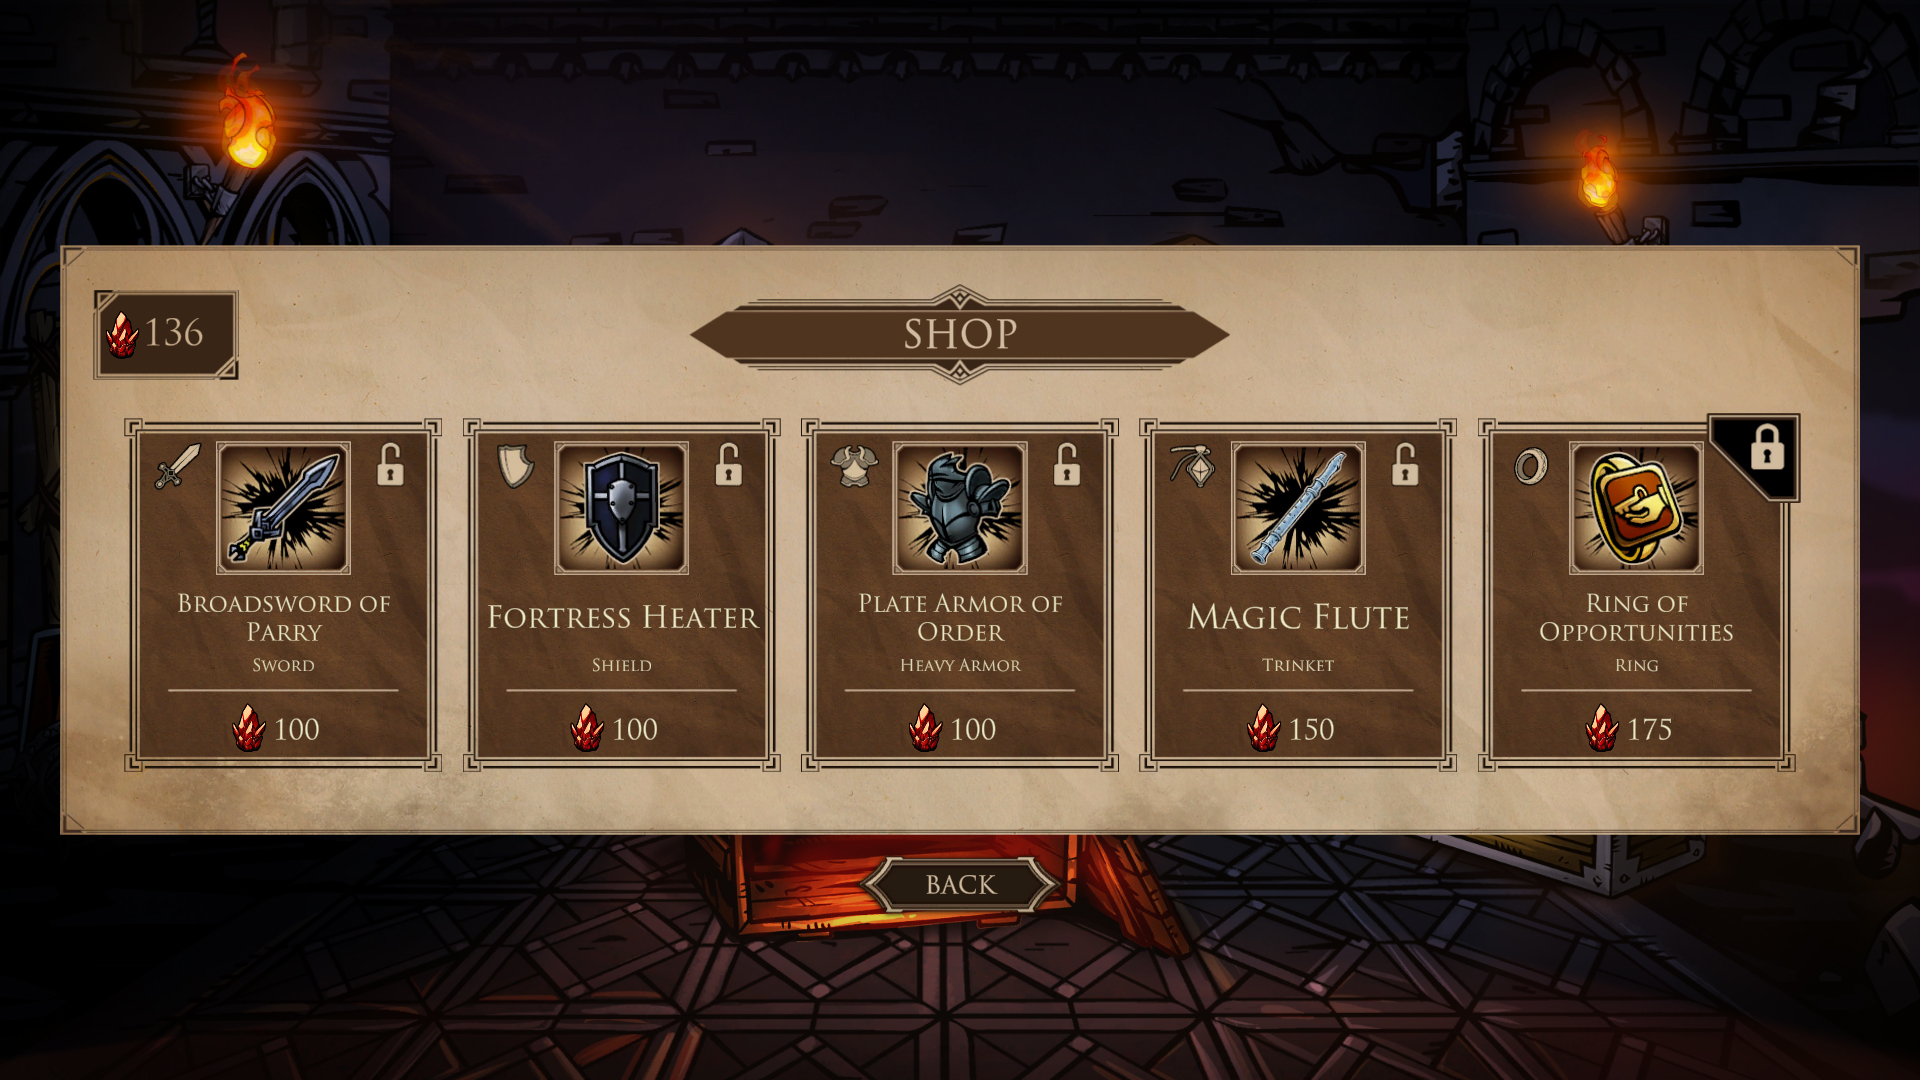
Shop
You will earn Bloodshards at the end of runs. If you complete them, you will get more; if you fail, you’ll get fewer. In the beginning, it’s advisable to collect these and decide what new equipment to buy after getting the hang of the game.
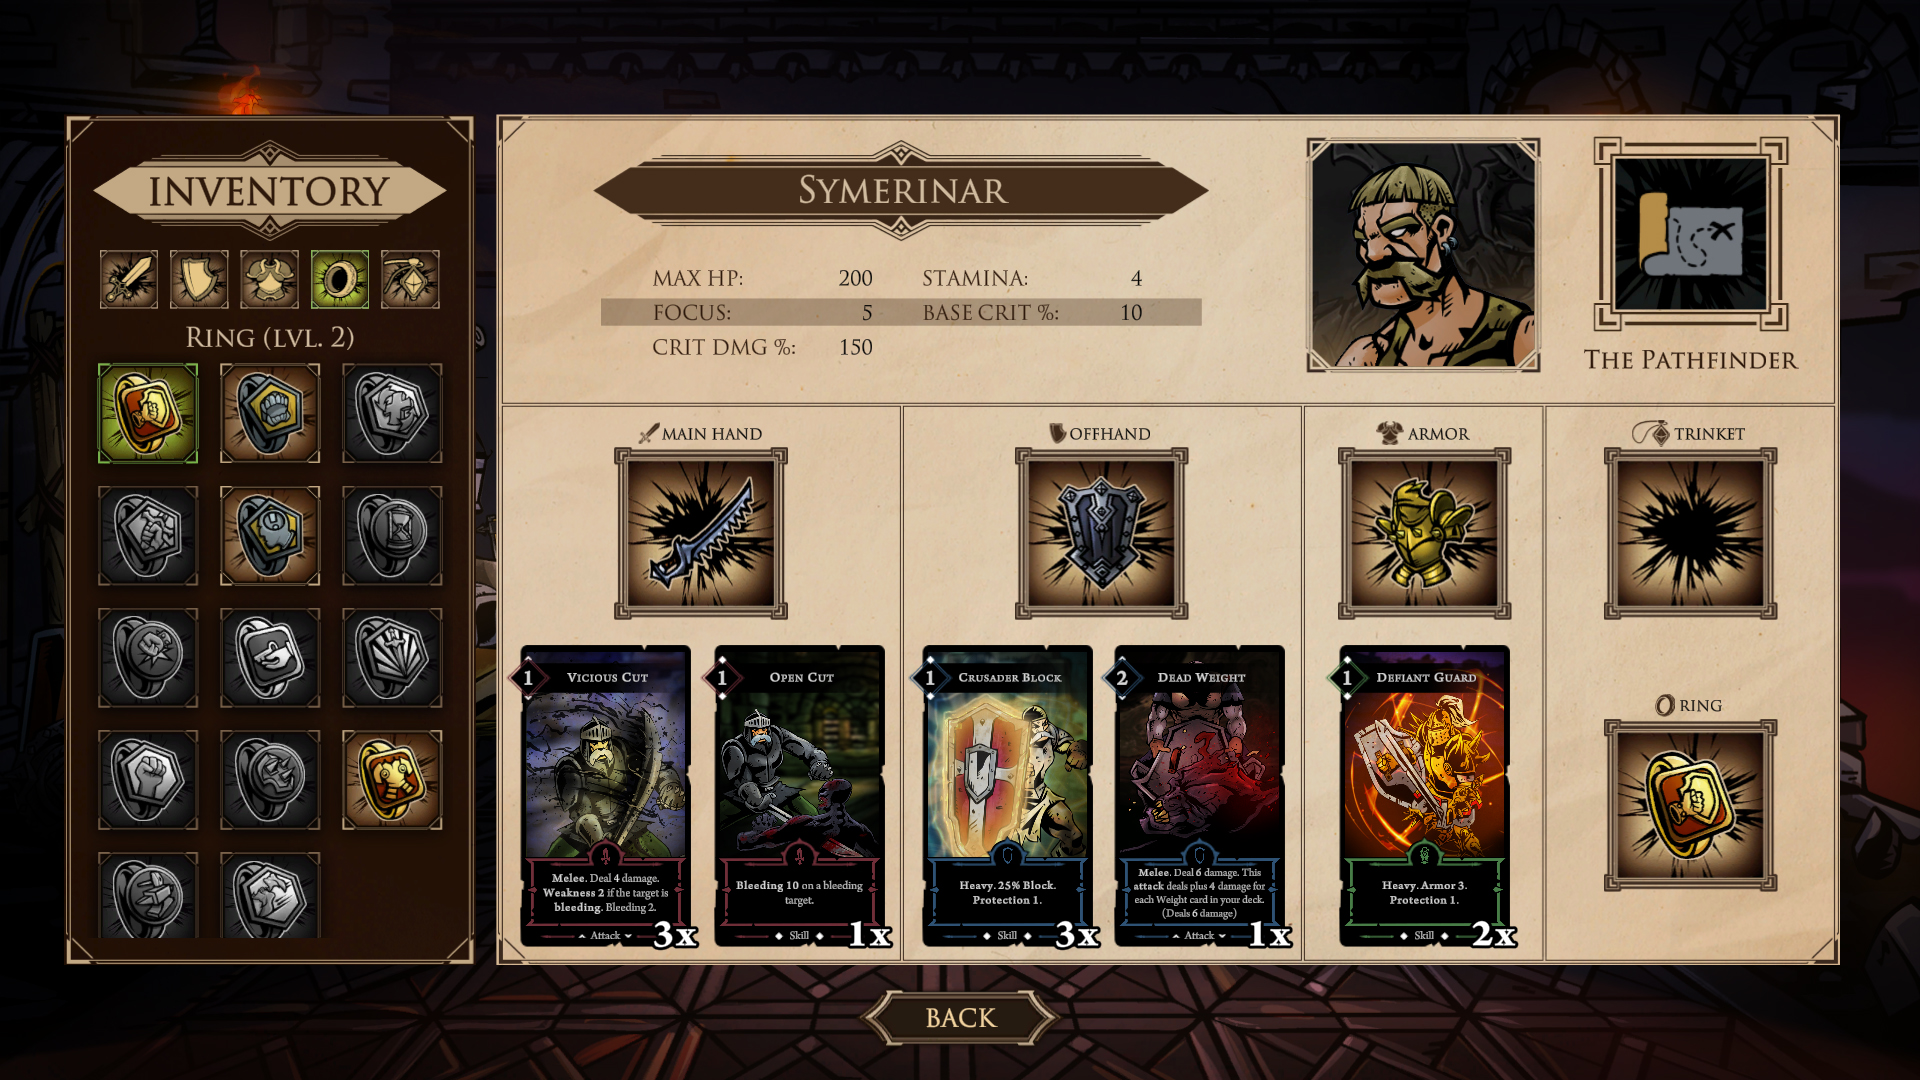
Inventory
This is where you can swap out items you have purchased or earned at the end of boss fights before runs. Every sword, shield, and armor has its own cards, known as starter cards. Rings add a small bonus to every battle, which can be increased by owning more rings. Trinkets assist in selecting card rewards but need to be charged. They charge by one after each successful run, and not just the ones you took with you but all your trinkets.
Mastery
Whether you win or lose runs, your skill in your equipment improves. Points are granted based on which cards of your equipment you had more of. However, you only gain mastery points in a specific subtype (e.g., sword / cutlass) if you win. These points are important as they allow you to unlock new cards that you can select as rewards during runs, thus strengthening your deck.
Boons come in various types. General ones are round-shaped, those related to swords are diamond-shaped, those for shields are square, and those for armor are pentagon-shaped. Each has a constant effect, although some are conditional, such as requiring your health to be below 50%. During battles, you’ll be able to see these on the top menu bar of the screen.

Start Run
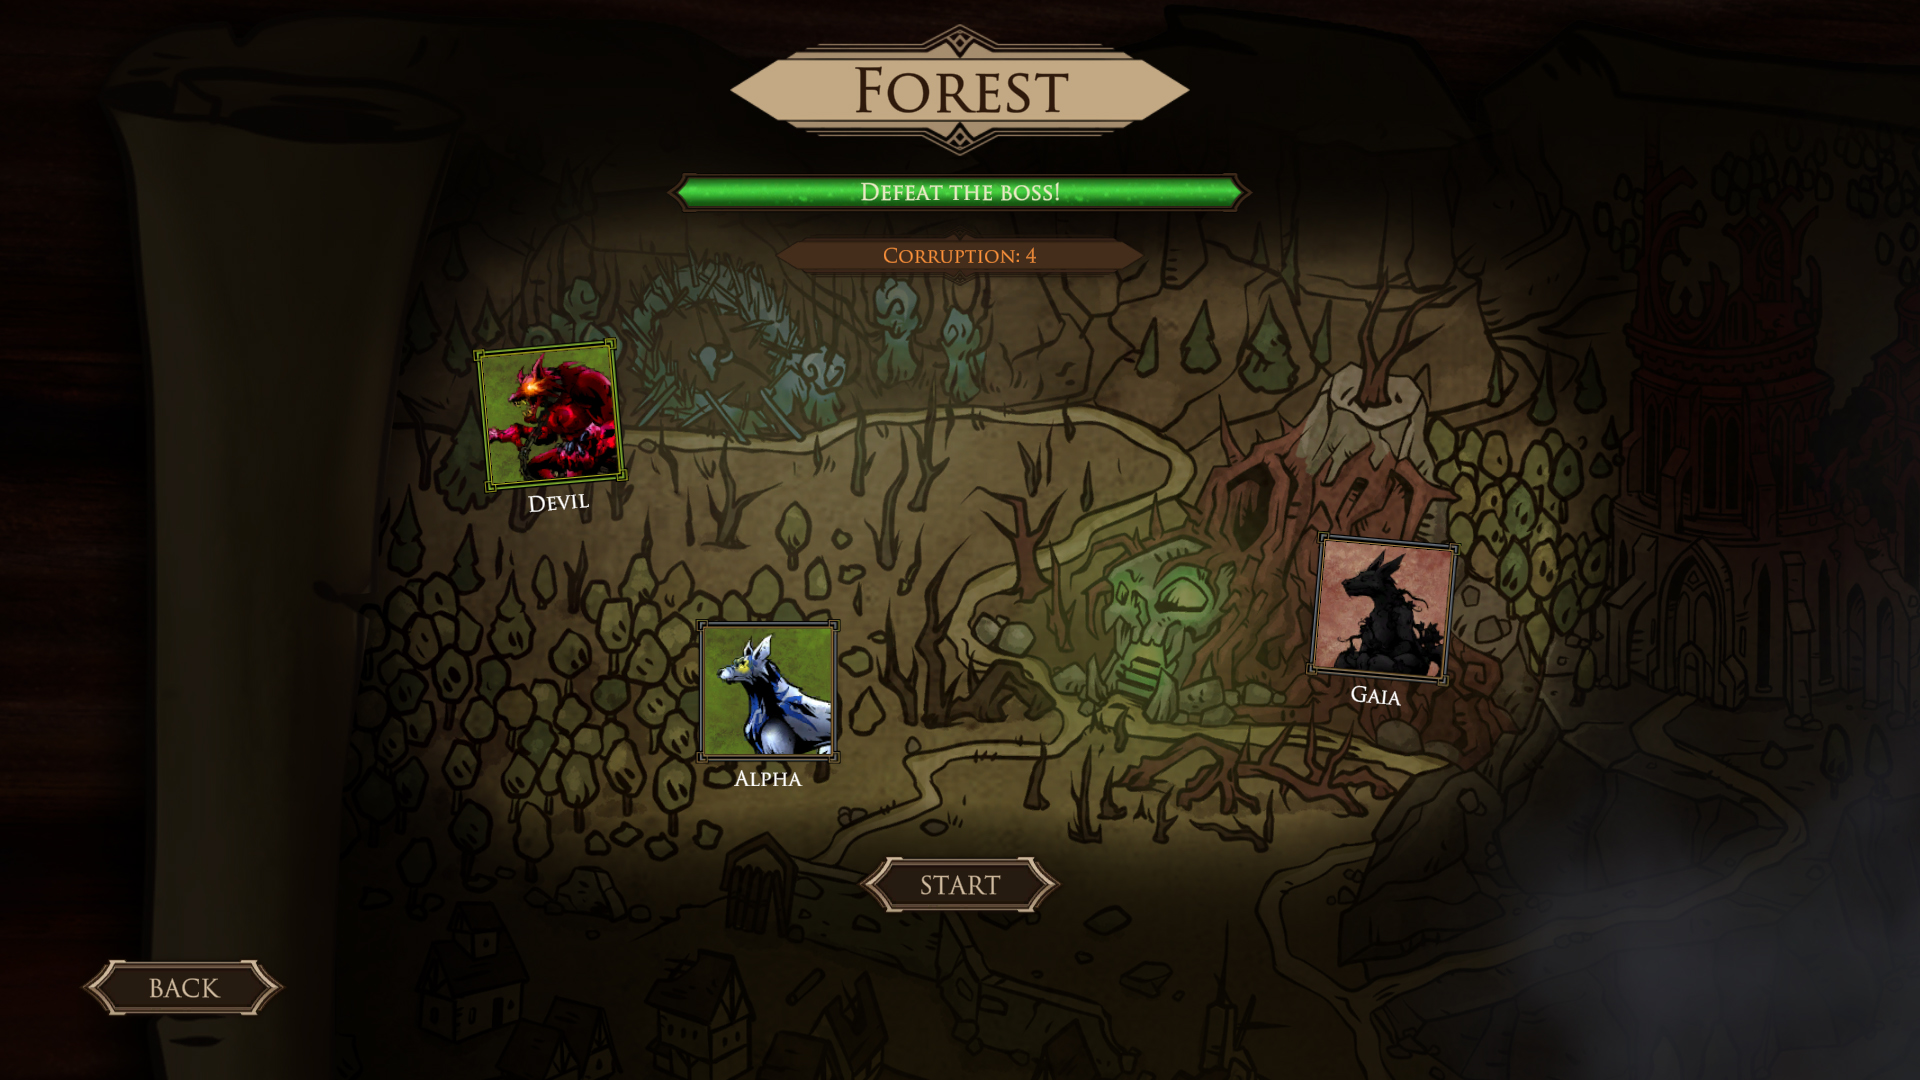
Currently, you can choose between two areas: The Ruins, where you will primarily face ghouls, and the Forest, populated by werewolves. I would recommend the Ruins first as the enemies are weaker, making it easier to progress and level up your character.
After choosing an area, you’ll see a boss progression meter at the top. This meter fills up after three successful runs, at which point you’ll be able to face the boss. Currently, there are three bosses to be found in each of the two areas.
At the start of battles, you immediately receive some help, which could be cards, torches, or boon tokens, depending on how well you performed in the previous run.
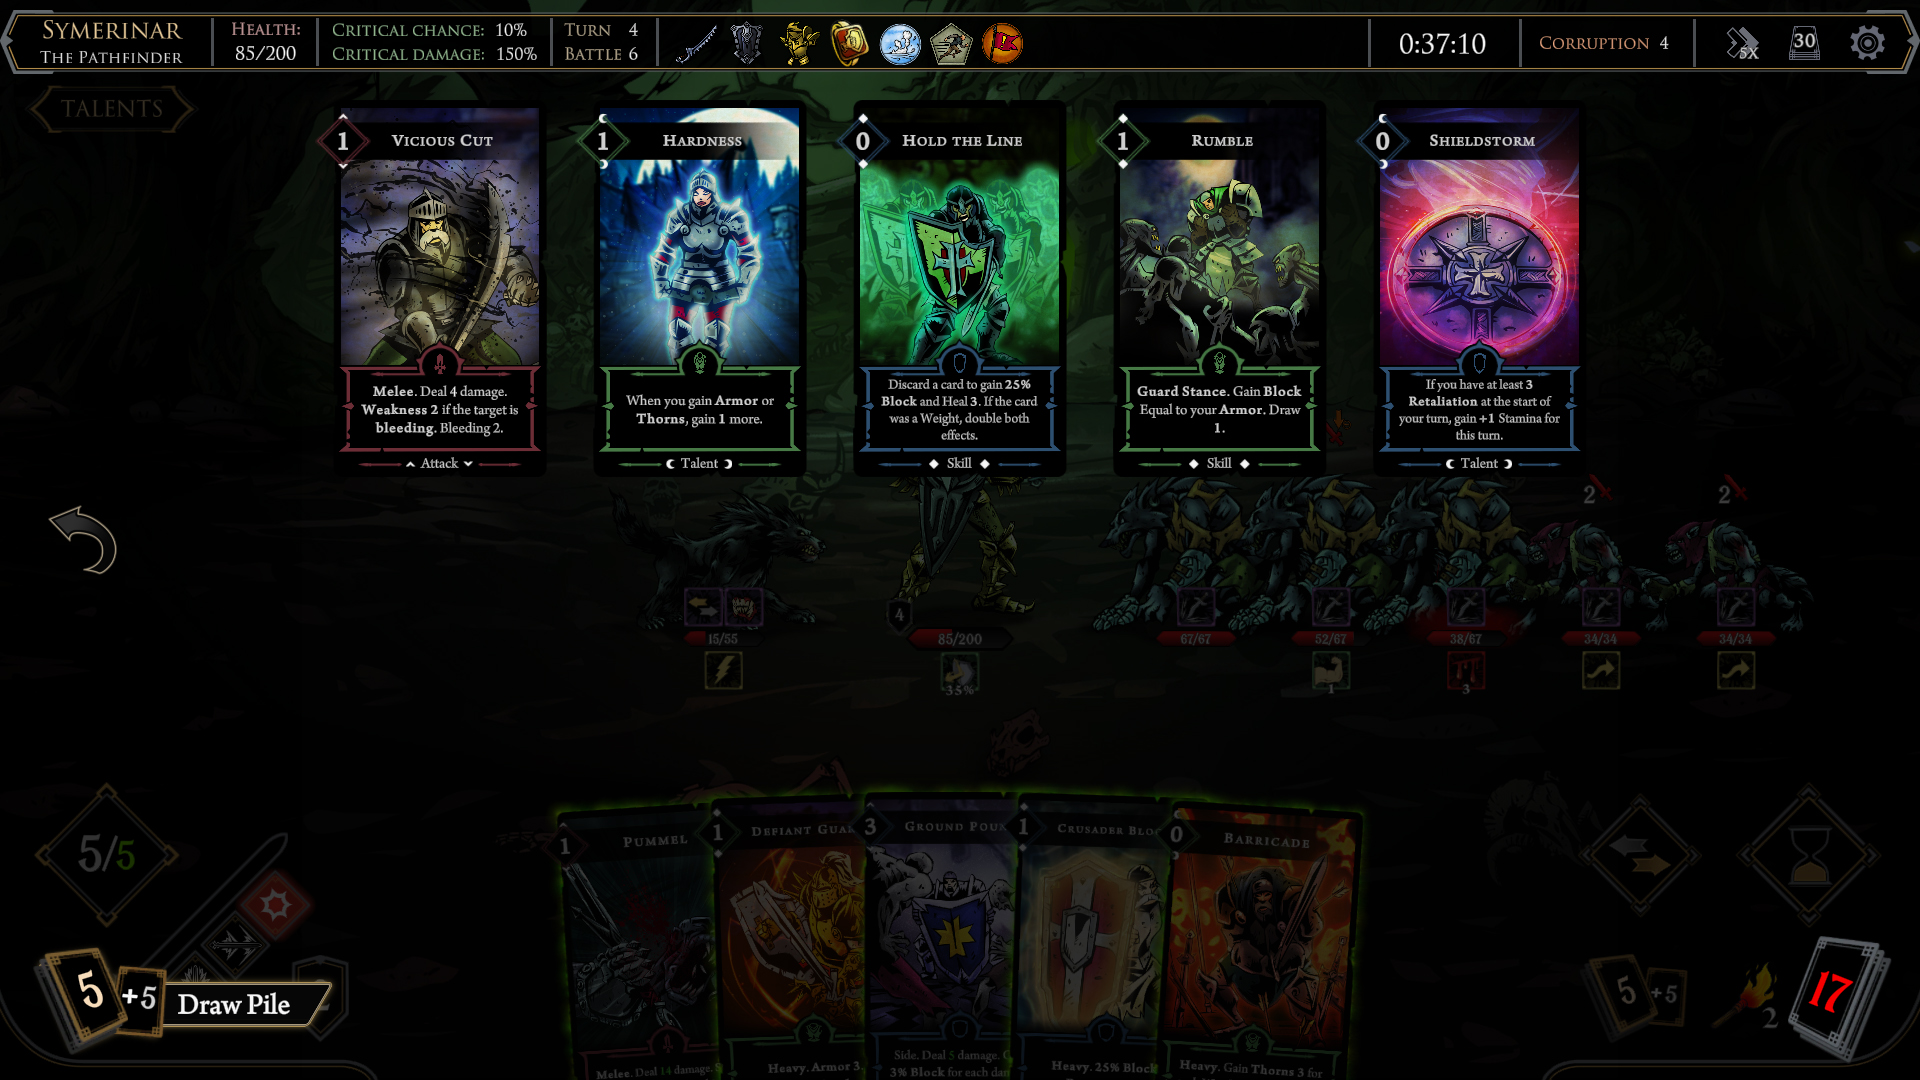
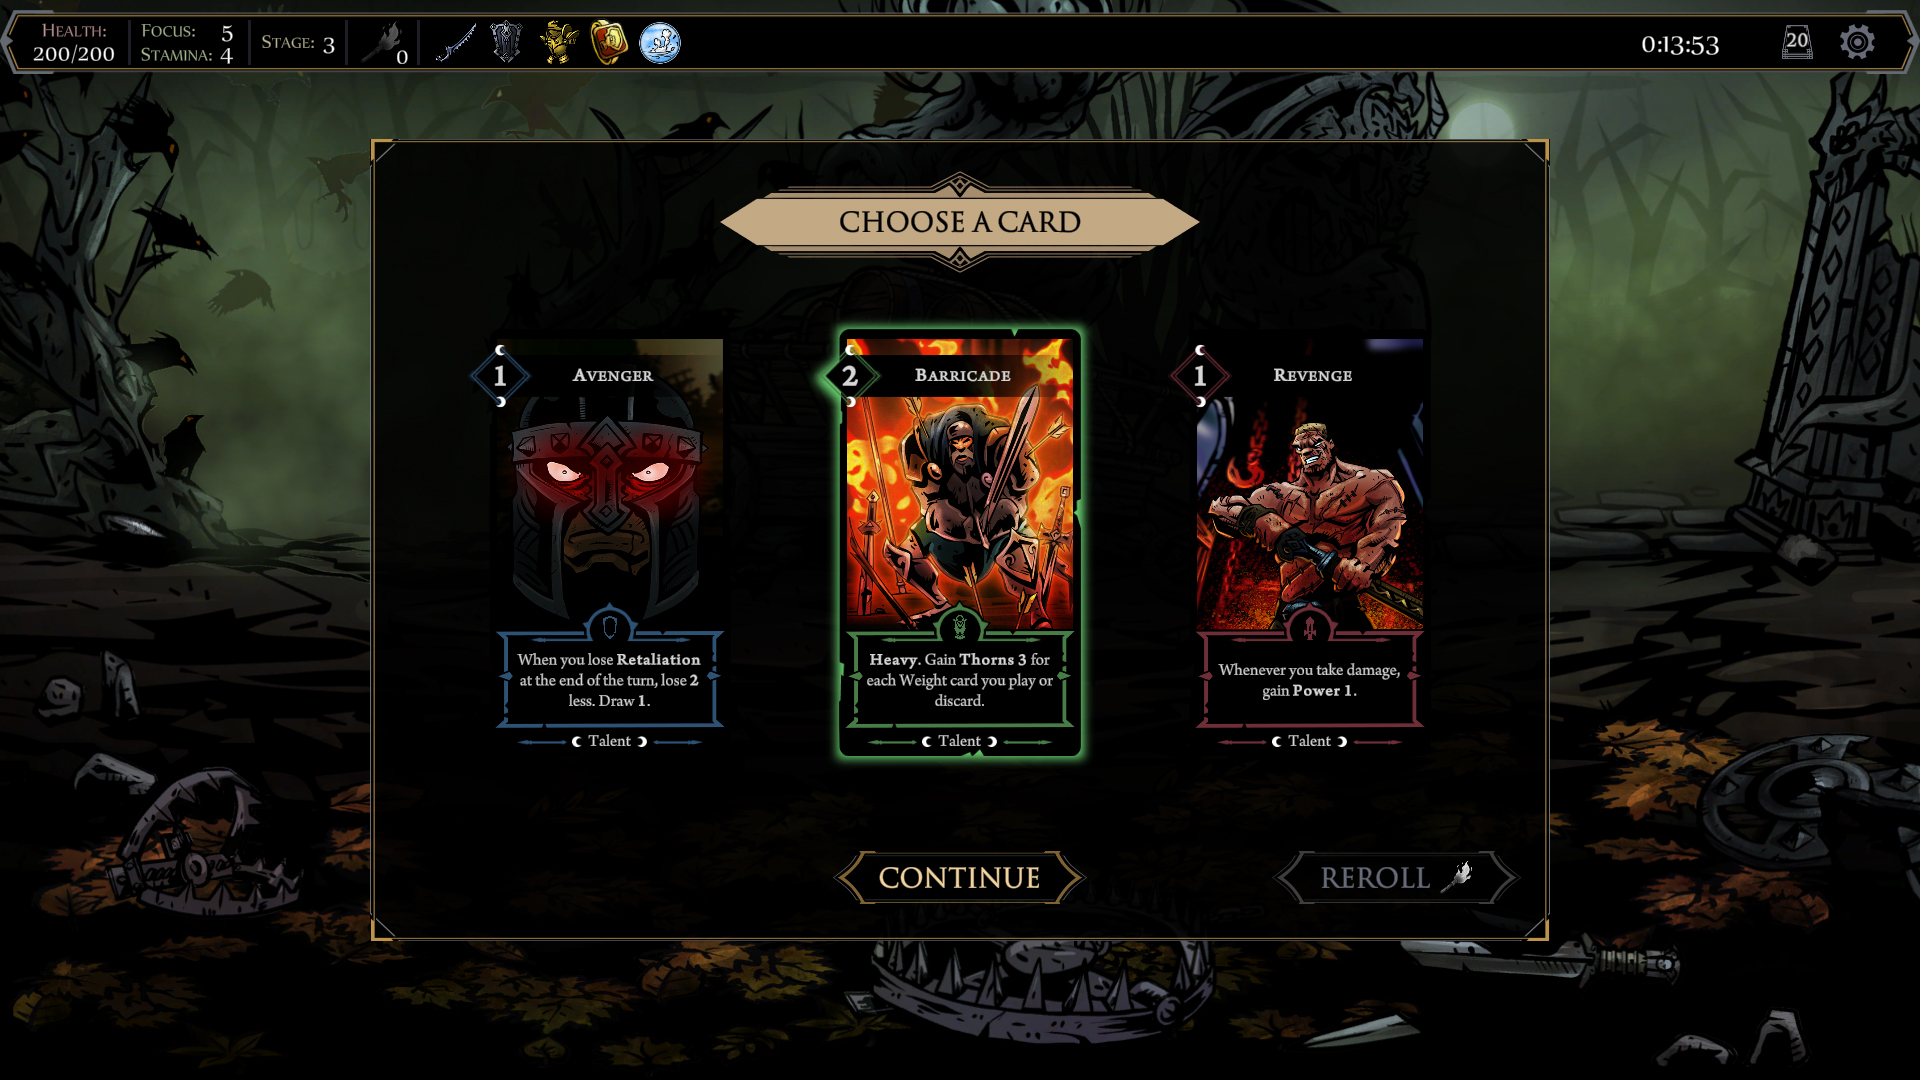
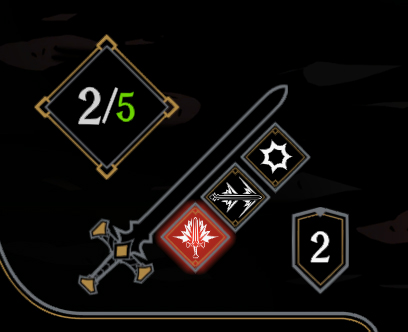
Cards: Let’s talk a bit about the deck-building mechanic. Initially, your deck consists of 10 starter cards. You can expand this during the run from rewards. Additionally, you will have the opportunity to add new copies of certain cards or remove cards from your deck. This is crucial because if your deck runs out during battle, the system automatically shuffles it, so you will draw the same card multiple times. The more you draw cards that synergize with each other, the more effective combos you can create. At the beginning of each of your turns, you naturally draw 5 cards (Focus), which can be influenced by various factors throughout the game. If a card glows green, it can be played, for the stamina cost located in the top-left corner. Any unused stamina points are lost at the end of the turn, although some boons allow you to carry them over to the next turn. Unused cards, on the other hand, are always discarded.

Boon Tokens: A complete boon is composed of two pieces.

Torches: With a torch, you can do three things:
- 1, During in-battle path selection, you can use a torch to scout both paths to see what rewards are available.
- 2, At the end of battles when you receive a reward, be it a card or boon selection, you can use a torch to request new options (but only once).
- 3, During battles, you can use a torch to check the top 3 cards of your deck and pick one into your hand. It’s good to first click on the deck icon to see which cards you haven’t yet drawn, so you can find out whether the card you are looking for is still in there or was discarded in a previous turn.
About Cards
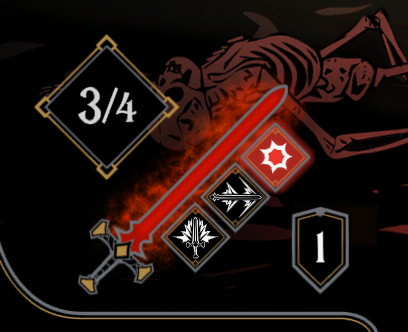
Each piece of equipment has its own set of cards. By color: Shields have blue cards, armors have green cards, and weapons have red cards. Within these, there are three types, distinguishable by their stamina cost and symbols at the bottom of the cards.
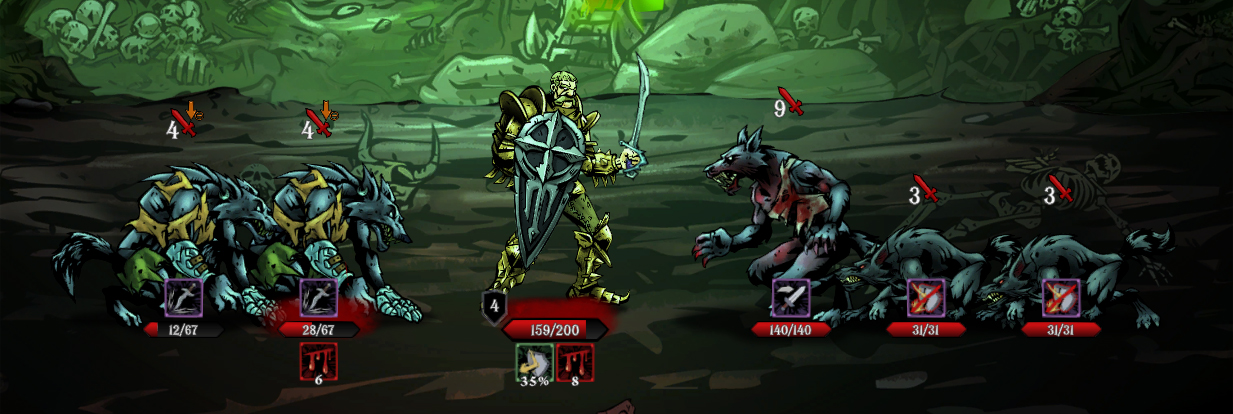
Attack Cards: Keywords in bold on the cards become readable when hovered over with the cursor. Focus on high-damage enemies first and avoid spreading damage. Normally, attacks reach two spaces, but ranged cards can target anyone. If an enemy has an exclamation mark under it, it must be targeted first while active and in the front row. This can be negated by the stun ability, found on certain cards or the Heroic Strike ability located at the bottom left of the screen. Every fourth attack gets the selected bonus from here!
Skill Cards: These mostly provide block or armor, or assist in enhancing your damage. Since healing is rare and usually occurs only at crossroads, proper blocking and armoring are crucial. Blocking is also essential because every successful block grants you one retaliation (small shield icon at bottom left), which boosts your damage and is referred to by certain cards.
Talent Cards: These cards need to be played only once and won’t return to your deck in that battle. They can be viewed by clicking the Talent button at the top left of the screen. Their effects last throughout the battle; they are like the engine of your deck. It’s good to start your turn by playing these cards.

Enemies
Creatures arrive in different waves. By hovering the cursor over them, you can see their abilities and strength. This is important because, for example, Elite enemies cannot be stunned, and they have various methods to threaten your life, indicated by colored icons underneath them. A symbol over an enemy’s head will show what they’ll do on their turn, be it attacking (red icon), gathering power or healing (green icon), or summoning or moving (blue icon). This is vital for planning your turn, deciding where to stun enemies, and where to face at the end of your turn for maximum damage mitigation.
Summary
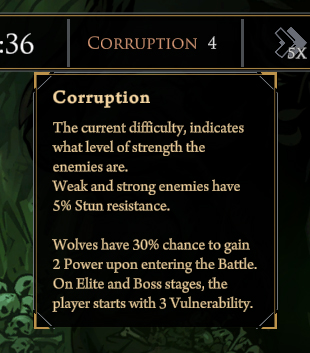
Initially, it will be challenging to win a run. You’ll fail multiple times, but each attempt improves your gear. If you’ve collected enough Bloodshards, you can even purchase new items, thus unlocking more cards and boons to strengthen your deck. As you become more proficient, completing challenges will become easier. The game grows with you, so there’s no risk of becoming invincible. The corruption level also increases, visible at the top right during battles. Hovering over it will show you how the enemies have been empowered.
If you manage to hunt down all bosses, there are still challenges waiting for you in the Monastery. The combination of various equipment offers countless opportunities for building new and exciting decks. There will be plenty of items that you haven’t yet tried or purchased, and the Steam achievements still hold many challenges!
Onward to Ghoul Hunting!