Frustrated with the laser puzzles? This guide gives you all the solutions and ways to easily remember them!
This guide is up to date with v0.75.2.
Basics
A map is what you select from the lobby and determines the exterior of the tomb and tomb variation.
A tomb variation is what determines the unique appearance and features of the interior of the tomb.
A laser puzzle is a type of Ushabti puzzle found in the lower tomb, which is opened after pulling the blue lever. These puzzles are always exactly the same per tomb variation and always contain 10 crystals.
To learn more about maps, see our Forwarned map guide!
Some seem complex at first glance, but these puzzles are actually set up to mostly be solved by just rotating crystals to point at the first one it connects to. Some have multiple solutions, but this guide has the simplest versions.
Tomb Variation 1 – Vanilla Tomb
Tomb variation 1 covers the maps: Cursed Sand Ruins and Crypt of the Great Pyramid.
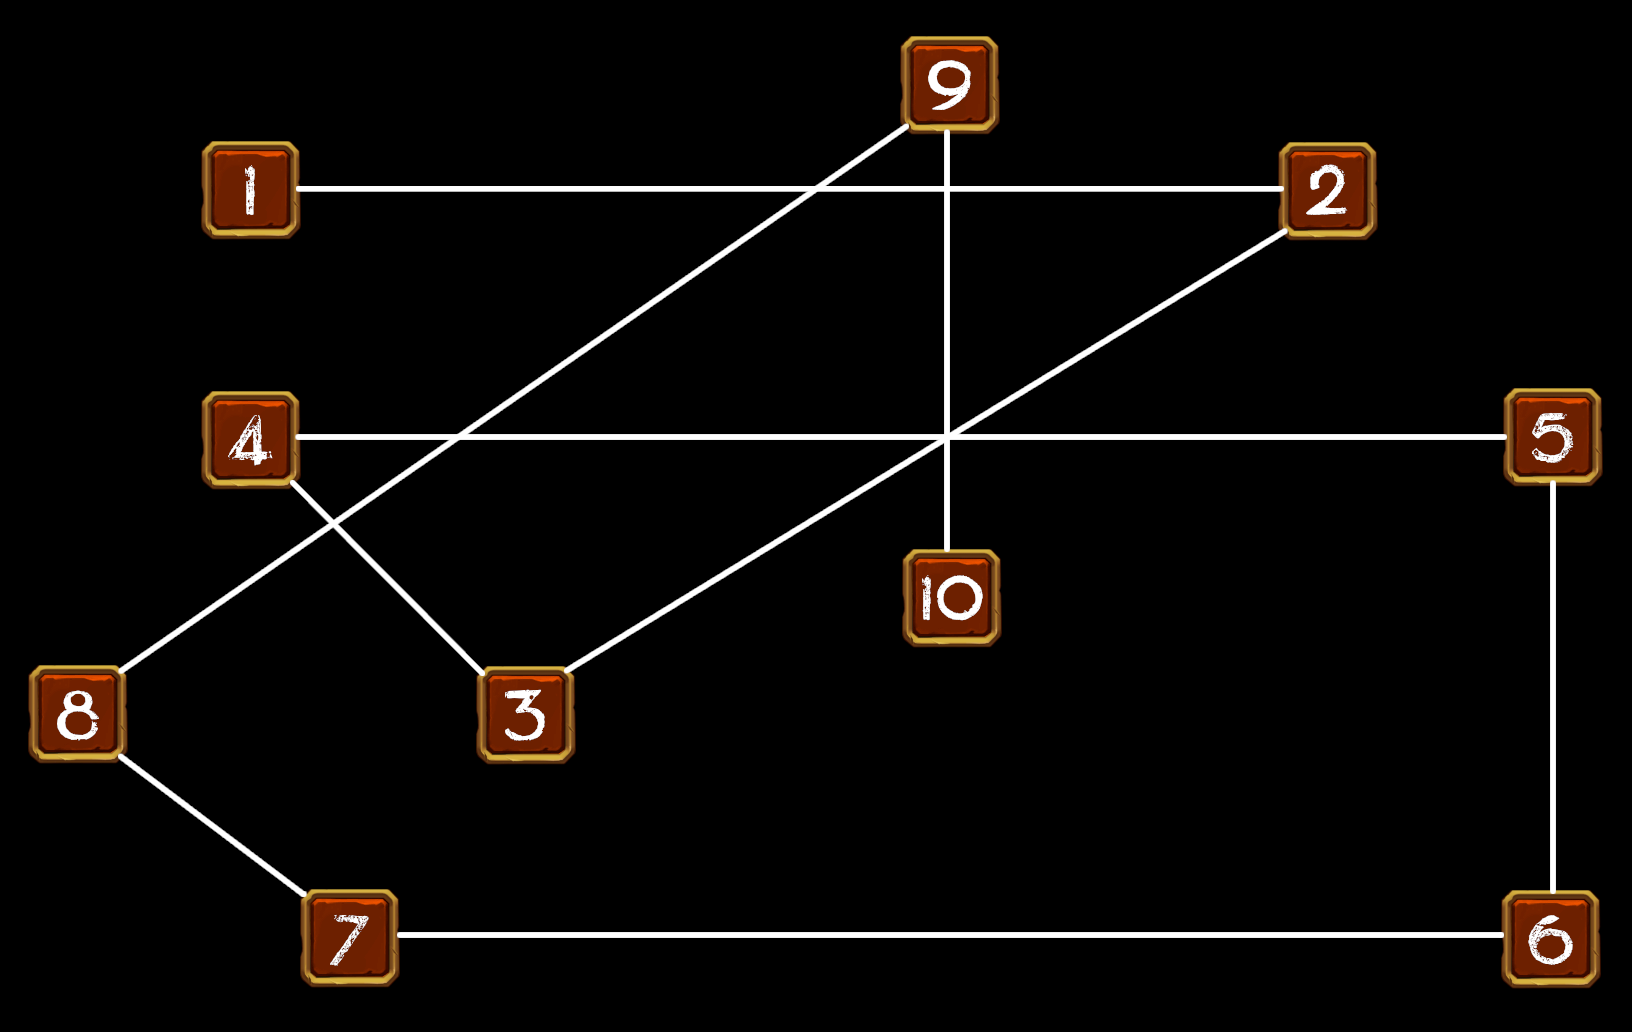
You solve this laser puzzle by rotating crystal #1 until you get to the second crystal the laser connects to. The rest are set up to be solved on the first crystal the laser connects to.
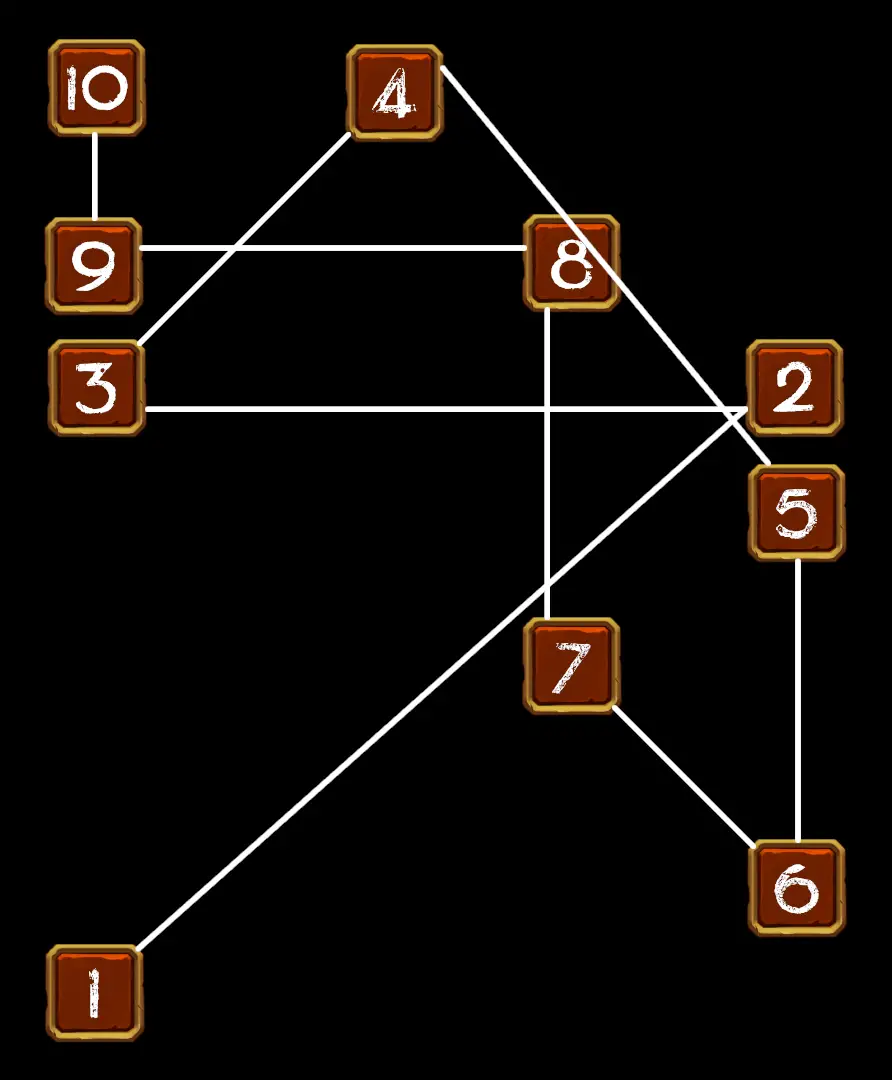
(Click to zoom!)
Tomb Variation 2 – Snake Tomb
Tomb variation 2 covers the maps: Temple of the Pharaoh and Undercroft of Akar.
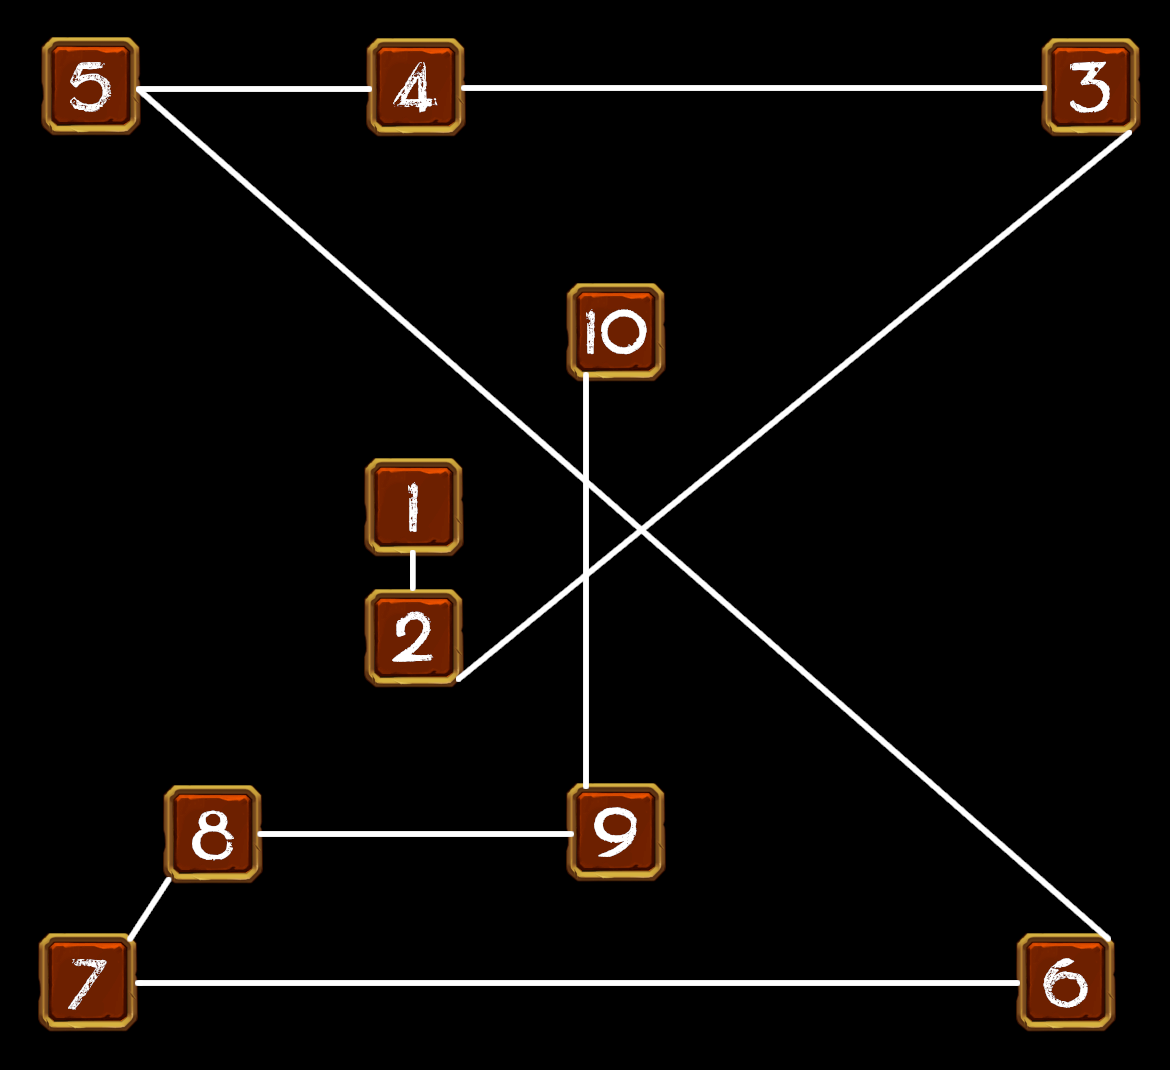
You solve this laser puzzle by rotating crystals until you get to the first crystal the laser connects to, minus crystal #3, which needs to skip a crystal.
You can remember this solution by thinking of the completed puzzle as a clockwise spiral, like a snake that is the theme of this tomb variation.
(Click to zoom!)
Tomb Variation 3 – Sand-Spider Tomb
Tomb variation 3 covers the maps: Sunken Dune Shrine and Hidden City of the Sahara.
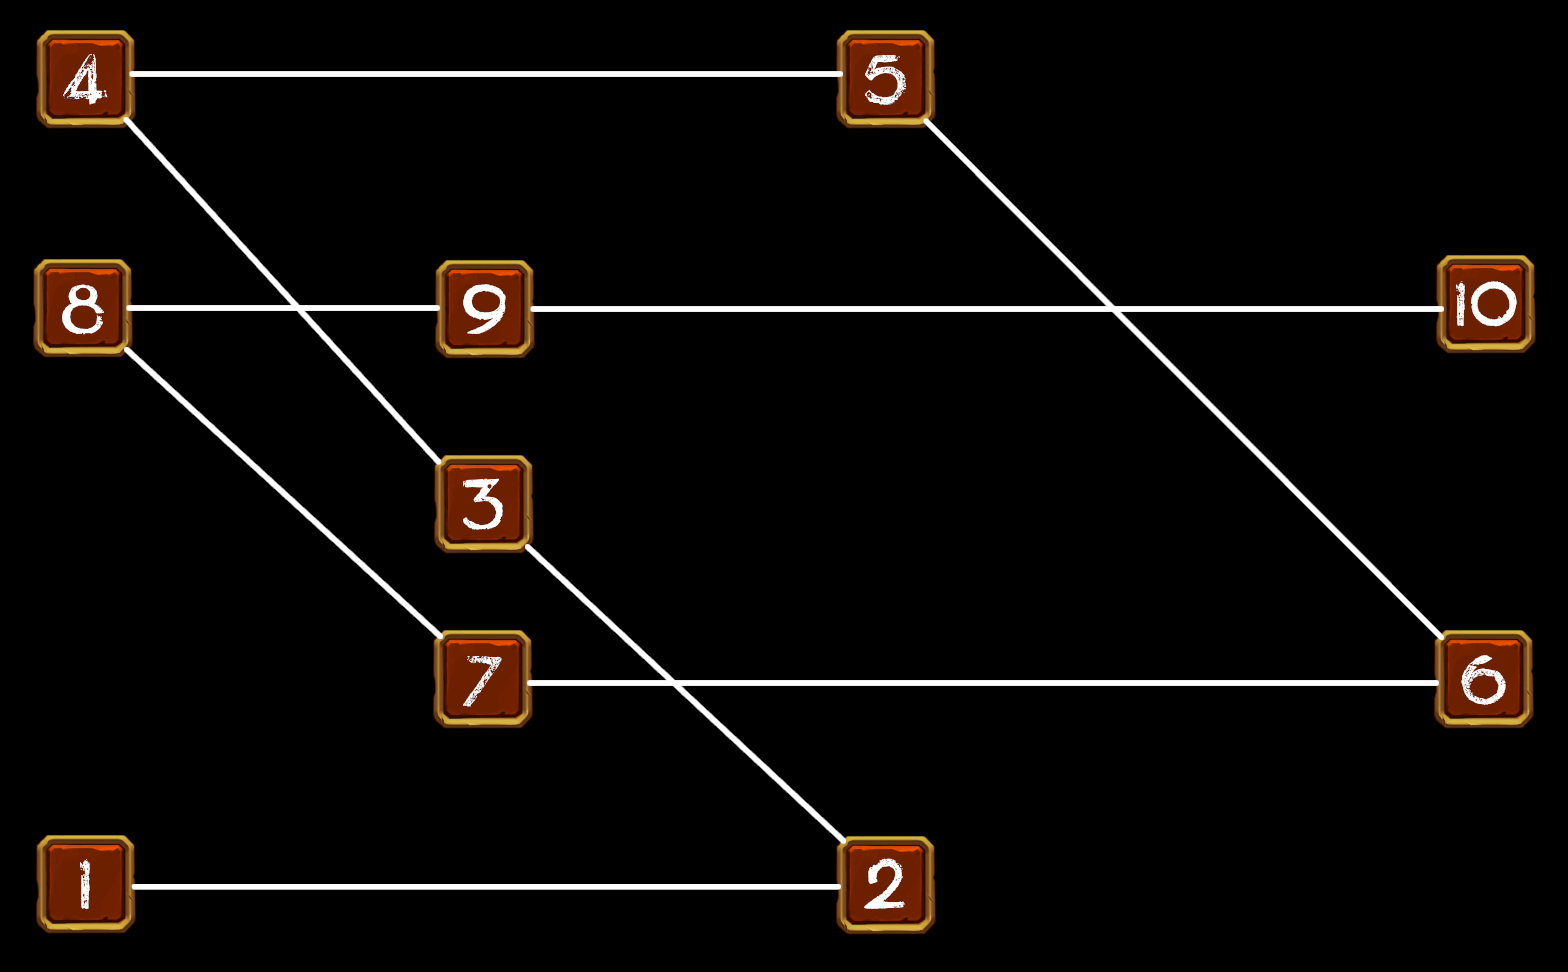
You solve this laser puzzle by rotating crystals until you get to the first crystal the laser connects to, minus crystal #1 and crystal #3, which need to skip a crystal.
To remember this solution, you can think of the finished puzzle as an hourglass, holding sand that is the theme of this tomb variation.
(Click to zoom!)
Tomb Variation 4 – Oasis
Tomb variation 4 covers the maps: Sobek Oasis (Night) and Sobek Oasis (Day).
You solve this laser puzzle by rotating the first three crystals until they each connect to the second available crystal. From then on, each crystal connects to the first available crystal the laser reaches.
To remember this solution, just remember that the laser must go through the righthand waterfall, and the rest are set up to be solved by rotating to the first available crystal.
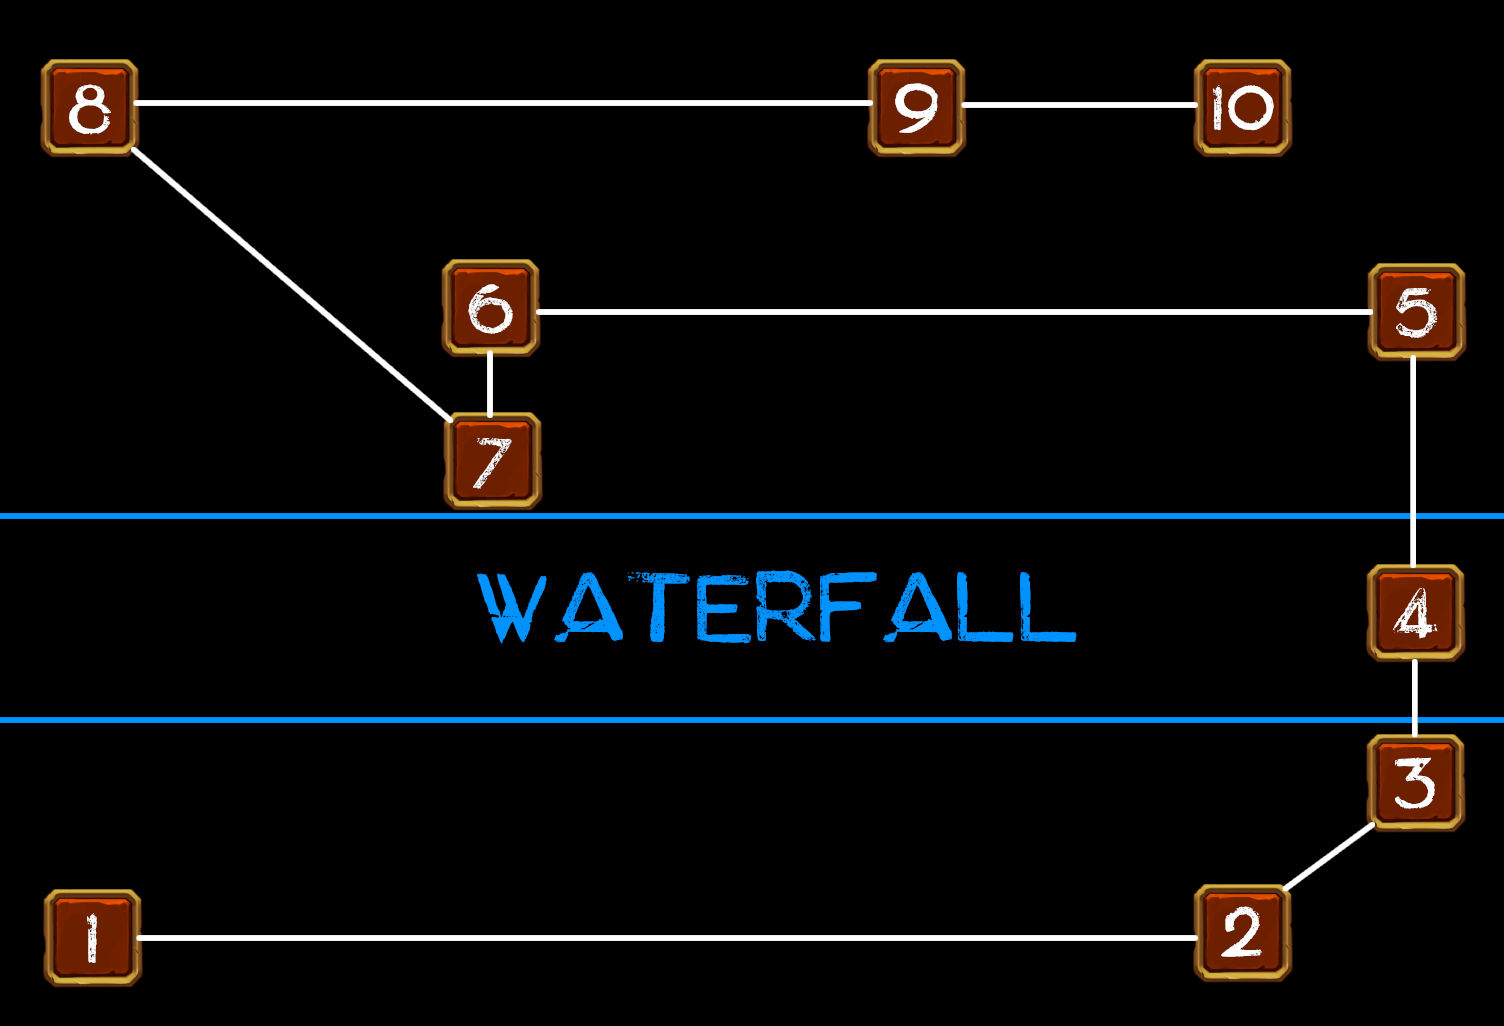
(Click to zoom!)
Tomb Variation 5 – Underground Palace
Tomb variation 5 covers the maps: Dread Valley and Nekhbet Chasm.
The solution is identical to tomb variation 1:
You solve this laser puzzle by rotating crystal #1 until you get to the second crystal the laser connects to. The rest are set up to be solved on the first crystal the laser connects to.
(Click to zoom!)