
An in-depth guide to all achievements in System Shock (2023). Explanations provided for each achievement. The guide also includes all Station Maps.
You can use Control + F to find a specific achievement.
Points of No Return Info
There are a few points of no return in System Shock. It is worth trying to find all collectibles/weapons/cameras/nodes/skulls before progressing past these points.
Beta Grove cannot be explored once you have proceeded to jettison it from the station.
Reactor level through to the Engineering level can be freely explored before proceeding to Security level. I would recommend doing everything before causing the reactor meltdown.
The Security level should be finished before progressing to the Bridge.
Story Achievements
This section is left vague because the story is best experienced on your own but some tips are provided.

Through The Looking Glass
Exit the Medical Healing Suites
Unlocked early in the game after the opening.

Shields Up!
Deploy Isotope X-22 and enable the Radiation Shields
Unlocked upon placing Isotope X-22 (from Research Labs level) into the slot and activating the shields inside the room labelled Radiation Shield Controls in the Reactor level.

Override Superposition
Disable the Safety Override for the Mining Laser
Unlocked upon pulling the switch in the Safety Override room in the Reactor level. It requires the random code from the Research Labs level that is located in the library after the hacking mini-game sequence.

Thermal BOOMing
Destroy the Mining Laser
After completing the two above achievements you can continue back to the Central controls in the Research Lab level and destroy the Mining laser.

Jargon Cypher
Replace the Interface Demodulator and fix Subsystem Relay 428
Unlocked after replacing the broken Demodulator in Maintenance level. You must activate the jettison switches in the Groves to be able to access the areas for this. Both the replacement part and Relay 428 can be found in Beta Maintenance.

Anti-Virus
Jettison Beta Grove on the Executive level
This is unlocked upon the Jettison of Beta Grove in the Beta Grove Control room. You must first activate all three grove override switches and replace the above relay part. Then pull the Master Switch where you defeated Diego before and then proceed to jettison the grove from it’s control room.

No Reception
Destroy the Antenna Relays on the Systems Engineering level
Unlocked for destroying all 4 antennas in the Engineering level. They are unlocked by performing a hacking exercise at the only hacking terminal in this level and destroying the 4 nodes inside it. You need explosives to destroy them from Storage level. You need 4.

Can’t Turn Back Now
Start the Reactor Self-Destruct Countdown
You can activate the reactor self-destruct from Reactor level by using the 6 numbers generated on the CPU screens in each of the levels CPU node rooms. The code is random every playthrough.
Each levels number on the Status screen corresponds to it’s order in the sequence and the Engineering Node room does not have a number.
The screens look like this:


The Key To Vector Sigma
Use the Isolinear Chipset
The Isolinear Chipset is obtained in the south upon defeating a Cortex Reaver. Use it after removing the three shields blocking access to the panel.

It’s Over.
Defeat SHODAN
Unlocked after defeating SHODAN at the end of the game.
Currently bugged!

Look At You, Hacker
Complete the game
Unlocked upon defeating SHODAN and beating the game!
Edward Diego Achievements


I’ll Be Back
Defeat Edward Diego
Your first encounter with Edward Diego will be in an area of the
Executive level. This achievement is awarded for defeating him. Required for story progression.

Déjà Vu
Defeat Edward Diego while en route to the Life Pods
You can fight Diego again after activating the reactor self-destruct as part of the story. He will be in the Flight Deck level waiting for you, just defeat him again for this achievement.

Edward DIEgo
Kill Edward Diego
This is story related and unmissable. He is located on Security level.

Finish Him!
Kill Edward Diego with the Laser Rapier
You cannot earn this achievement on any of the fights prior to the final one (has to be the Security encounter) as it must be used for the killing blow, not defeating him. I recommend using a Berserk Combat Booster Dermal Patch to assist with this achievement as it increases melee damage and melee speed.
Cortex Reaver Achievement

Get Ahead
Defeat all of the Cortex Reavers on Citadel Station
There are three Cortex Reavers on the Station. You must kill all three in a single playthrough. The first one is located on the Flight Deck level and the other two are both found on theBridg e level towards the end of the game.
Combat Achievements

Asunder The Influence
Kill 10 enemies while under the effects of the Berserk Combat Booster
Use the Berserk Combat Dermal patch and kill 10 enemies of any type. It does not need to be in a single usage of the patch, you can do it across an entire playthrough. It is the pink Dermal Patch with the same icon as the achievement on it.

Remote Control
Hack 20 enemies which have been acquired by the Target ID Hardware
You need the V.2 Target ID Hardware upgrade for this achievement. You can find this only as early as the Storage level. Once acquired you need to hold ‘Left Alt’ by default to hack robots enemies. You can actually hack the same enemy twenty times if you want as the hacking duration is short and so is the cooldown – you just need the energy to do it so stockpile batteries.
The robot must be out of combat for this to work. You will know a successful hack is performed if energy is consumed from your meter.

Zapper
Kill two or more enemies with a single Railgun Projectile
The Railgun can first be found inside of the Executive level on a bench in a room inside Delta and Gamma Quadrant. There are plenty of Gold Serv-Bots in this room that you can use the weapon on to kill 2 with a single shot.
Once you have the weapon you can kill any two grouped enemies for the achievement. Here is a map location of the weapons first spawn location:

Goldberg’s Ricochet
Kill an enemy by bouncing a shot from the Ion Rifle
The Ion Pulse Rifle can be obtained within the Alpha Grove module inside an interior room. Once acquired you must press ‘T’ by default to swap the shooting mode to charged ricochet.
Once done so, deflect a shot off a wall or floor and have it kill an enemy. This can be easily done by shooting the floor in-front of an enemies position.

Neon Annihilation
Kill two or more enemies with a single Plasma Core
You need to kill 2 or more enemies with the same usage of a Plasma Core (a unique and rare type of ammo for this gun). The Plasma Rifle is the gun and it is found in Security level here:

The gun is only accessible after pressing the adjacent button which becomes active below 25% security level. The robots in the recharging room are numerous so I recommend getting this gun before exploring too much of the level. To use a Plasma Core shot press ‘T’.

Somebody Set Up Us The Bomb
Kill three or more enemies with a single explosive weapon
Use a Fragmentation grenade or other explosive weapon and kill three or more grouped up enemies at once with it. Lots of places with plenty of enemies grouped you can obtain this.
Collectable & Weapon Achieves

This Is My Boomstick!
Discover all firearms
You must pick up one of each weapon in the game. As it specifies Firearms I am not going to list grenades, but I will list melee weapons in case they count.
- Lead Pipe – Starting melee weapon.
- KE-41 Minipistol – Found very commonly throughout all levels of the station.
- TB-05 SPARQBeam Sidearm – Found very commonly throughout all levels of the station.
- JW-76 MAG-Pule Rifle – Found in the Medical Armory or later in the game.
- Monkey Wrench – See Gut Wrenching Achievement.
- DG-04 Laser Rapier – See En Garde! Achievement.
- SK-27 Shotgun – Found occasionally around the station on many levels.
- Magnum 2100 Pistol – Found occasionally from Maintenance level on-wards.
- KE-18 Skorpion – Found in Storage level or later around the station.
- EM-83 Grenade Launcher – Only found in Storage Room #1 on the Storage level.
- Mark III Assault Rifle – Found after the first encounter with the Cortex Reaver or later.
- MK-84 Accelerator Railgun – Found firstly in Executive level. See Zapper! Achievement.
- RW-45 Ion Pulse Rifle – Inside Alpha Grove in an interior room. Only found here!
- LG-XX Plasma Rifle – Inside the Security level behind a shielded case that can be opened with an adjacent button below Security level of 25%. See Neon Annihilation achievement for more.

Not Even My Final Form
Find and install every Weapon Modkit
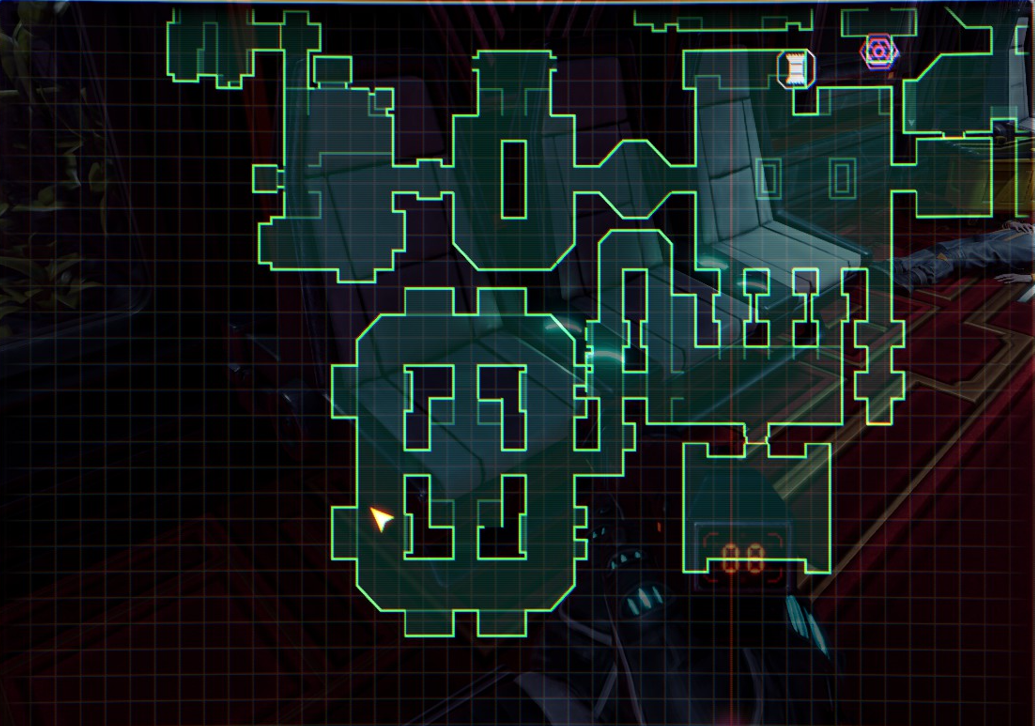
For this achievement you must find all of the Mod-Kit stations, purchase the upgrade and equip them to the corresponding weapons. Mod-kits usually cost 25 Tri-credits. Here is a list of the Mod-kit locations and the corresponding weapons.
Please refer to the map screenshots at end of guide for direct locations (they are white icons with the same image as the achievement).
- Medical – Minipistol Capacity (20 credits)
- Research Labs – SQARQBeam Cooling (20 credits)
- Reactor – Minipistol damage (25 credits)
- Storage #1 – Shotgun Choke/Spread (25 credits)
- Storage #2 – Magnum Pistol Damage (25 credits)
- Flight Deck #1 – Grenade Launcher Damage (25 credits)
- Flight Deck #2 – SQARQBeam Damage (25 credits)
- Flight Deck #3 – Skorpion Damage (25 credits)
- Executive #1 – Mark III Rifle Full Auto (25 credits)
- Executive #2 – Magnum Capacity (25 credits)
- Beta Grove – Mag Pulse Damage (25 credits)
- Engineering #1 – Skorpion Capactiy (25 credits)
- Engineering #2 – Ion Pulse Rifle Effciency (25 credits)
- Security – Railgun Recharge Speed (25 credits)
- Bridge – Plasma Rifle Efficiency (20 credits)
Note:the last time you have access to a recycling station is on Engineering level.

The Inside Scoop
Find all Audio Logs and Data Sticks on Citadel Station
For this achievement you must find all of the Audio logs and Data sticks. There is a bug in current patch that sometimes assigns them to an incorrect level, the list provided is just how mine turned out. That is X amount. The Groves do not contain Audio Logs or Data Sticks.
Audio logs look like blue discs and data sticks are green glowing USBs. You can use the
Sensaround Radar Unitto get them to appear on the mini-map but at the expense of energy usage.
I believe this achievement carries across all save files and is thus cumulative of all playthroughs. Number per level of station (Emails are tied to story progression and unmissable, might not count for achievement):
- Medical – 17 Audio Logs & 3 Data Sticks (+ 3 Emails)
- Reactor – 10 Audio Logs & 1 Data Stick (+ 1 Email)
- Research Labs – 19 Audio Logs & 5 Data Sticks (+ 1 Email)
- Maintenance – 11 Audio Logs & 0 Data Sticks
- Storage – 13 Audio Logs & 0 Data Sticks
- Flight Deck – 13 Audio Logs & 0 Data Sticks (+ 4 Emails)
- Executive – 13 Audio Logs & 4 Data Stick (+ 1 Email)
- System Engineering – 10 Audio Logs & 0 Data Sticks (+ 4 Email)
- Security – 13 Audio Logs & 0 Data Stick (+ 3 Emails)
- Bridge – 0 Audio Logs & 0 Data Sticks (1 Email)
LIST NOT DEFINITIVE AS THIS DID NOT UNLOCK THE ACHIEVEMENT.There is an audio log that can spawn outside the map in the first room of the Security level. Here is a video to help if this happens to you:


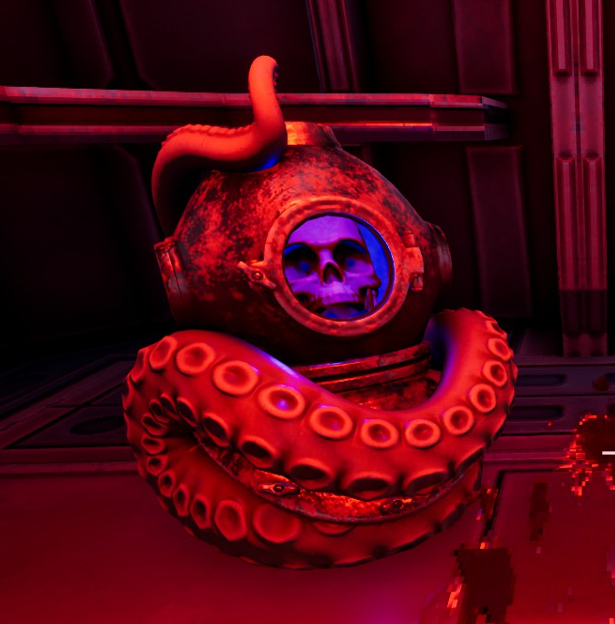
Head Hunter
Find Skully, the Nightdive skull, on every level
There is a Nightdive Skull hidden on every level of the station (Reactor to the Bridge). There are no Skulls in any of the Groves. You must find them all for this achievement and interact with each.
Most of these Skulls require the Version 3 Boots to hover to them. These are found in Engineering level.
Hacking & Hardware Achieves

Maxed Out
Find the final version of all Hardware Attachments
The max levels for the various hardware attachments are as follows:
- Head-Mounted Vision Unit V2
- Energy/Projectile Shield V3
- Sensaround Radar Unit V3
- Environmental Protection Pack V2
- Navigation and Mapping Unit V3
- Target Identifier V3
- Biological Systems Monitor V2
- Turbo-Motion Boots V3
You can max these by the end of
Engineering level if you search very thoroughly on your playthrough. The most easily missed are the ones like the Sensaround Radar Unit V3 which are found on the body of a defeated enemy in Engineering. The rest are mostly just scattered about.

Hacker? You Hardly Know’er!
Destroy the Cyber Core in each Cyberspace level
Cyberspace levels are the parts where you control a hacking drone and have to shoot your way through the colourful levels. The point of these sections is to destroy Cyber Cores to unlock doors and areas within the Station. You must complete all of these Cyberspace levels in a single playthrough.
I recommend not doing this on Hacking level 3 for difficulty as if you die hacking on that difficulty your character dies too.
This is fairly straightforward if you explore thoroughly and will unlock upon the completion of the hacking section on Security level if all prior ones completed.
The bottom section of the guide contains maps and they are shown as the pink hexagons if you wish to consult them.
The final Hack against SHODAN is not required!
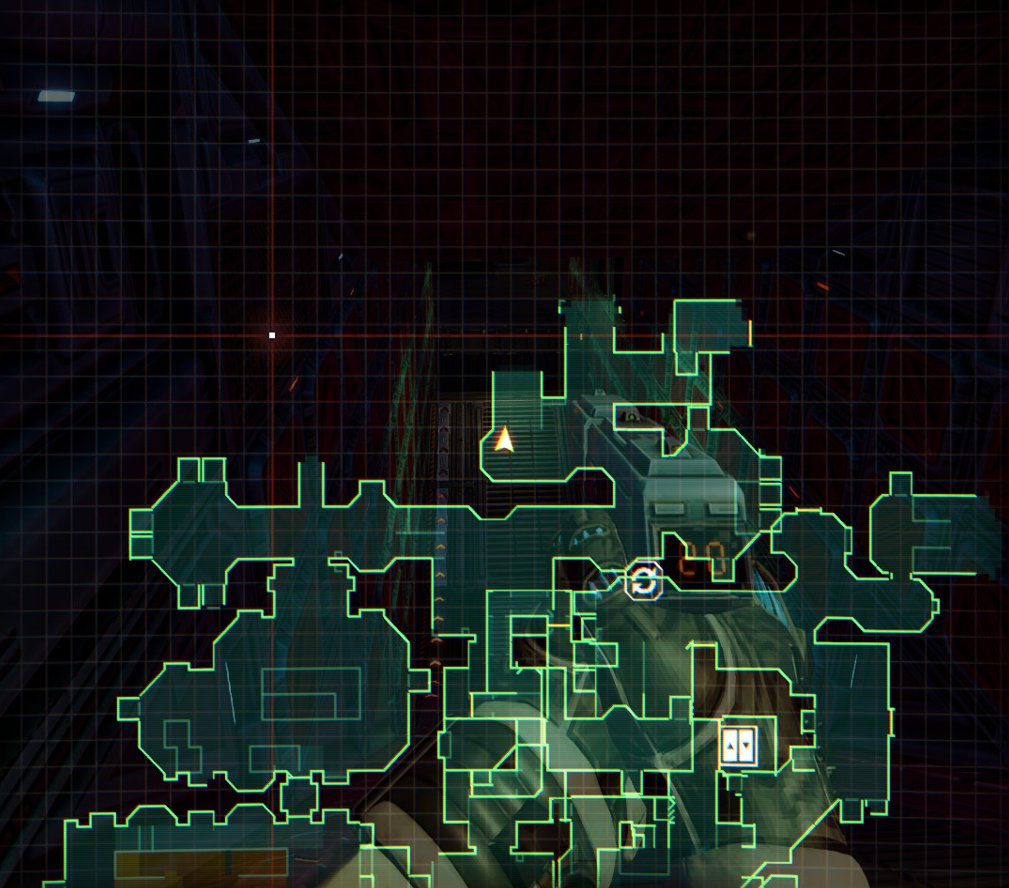
Camera & CPU Node Achieves

Off The Grid
Destroy all of SHODAN’s cameras and CPU Nodes
Cameras are marked as orange on the map if you go near them and are the black orbs on the roof with red lights. They make a noise when they spot you. CPU Nodes are found on some levels of the station and must be destroyed as well.
If you are not playing under the time constraints of the hardest difficulty you can likely get this by methodically mapping out the station and tackling them when you find them. Make sure to do these on your first visit to each level if possible as this will avoid accidental triggering any of the points of no return.
Make sure to destroy all cameras in the Groves before Jettison.
Hitting 0% Security level in a location means you have found every camera/CPU Node on that level.


Decrypted
Destroy the Medical CPU Nodes
Unlocked for destroying the CPU Nodes in the Medical level of the station. You just damage them to destroy them. They are located here in Alpha Quadrant:

Misc. Achievements

Garbage Collection
Salvage 100 Junk Items at Salvage Stations
This achievement can be earned by using a Recycler to dismantle 100 Junk items into Tri-credits. Junk items are identified by the looking at them and at the top of the screen it will end in (Junk). The first recycler can be found in Medical – Maintenance Tunnels if you want to knock this out early although others exist.


All Patched Up
Use every type of Dermal Patch
There are 6 types of Dermal Patch (the capsule buff items you can find). You need to use all of them once for this achievement. You can get this as early as the Research level.


Hacking Skillz
Solve 15 Circuit or Wire Panels without using a Logic Probe
For this achievement you must solve 15 of the Junction box puzzles without using an item called the Logic Probe which solves the puzzle automatically.
There are two types of puzzles. One you must connect the two red points by powering orange wires and the other you must divert energy to the correct level (indicated by yellow flashing lights).


Load ‘em Up!
Buy 10 Ammo Items from Ammo Depots
You can purchase Ammo from Ammo Depots found in armories using Tri-credits. If you recycle lots of junk/scrap you will have no trouble affording these. They usually cost 5-15 credits depending on ammo. If you purchase all the Ammo possible you can unlock this by reaching the third armory in the Reactor level.


En Garde!
Acquire a Laser Rapier
The first Laser Rapier can be found in the Maintenance level of the station here from the elevator (blue):

Picking it up will unlock the achievement.

Supersleuth
Discover a Hidden Door
This achievement is unlocked upon finding one of the many Hidden doors around the station. This is done by interacting (Right click) on any of the panels that is a hidden door. You will likely find one on your playthrough but if you are struggling there is one in the Central Hub of the Medical level.

System Shocked
Recharge 20 times at a Power Station
Use the Recharging stations (Blue Lightning Bolt icon on map) to recharge your energy 20 times. Will come naturally on a playthrough.

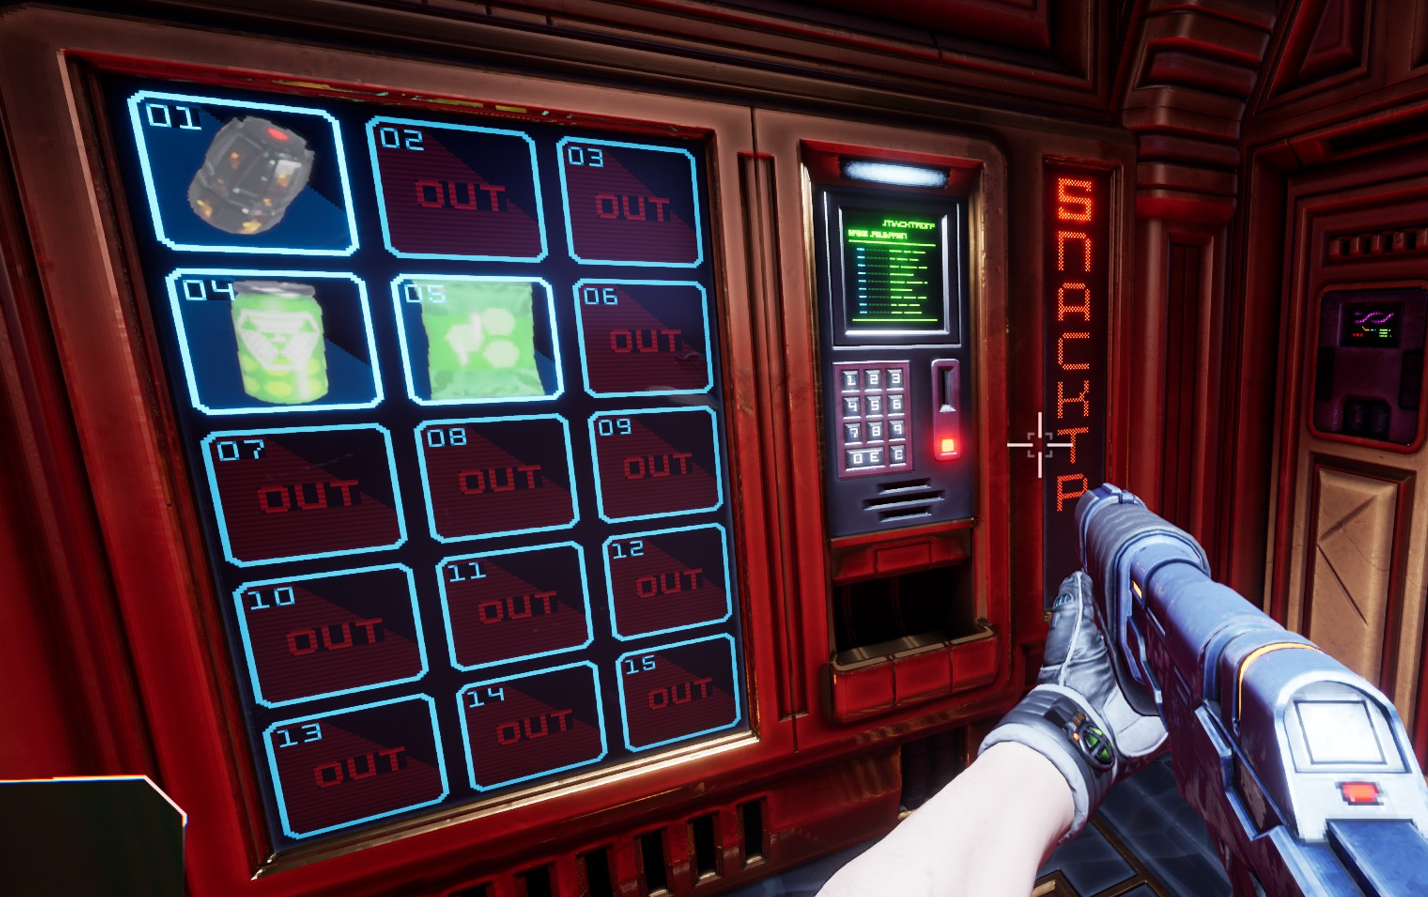
Look At You, Snacker
Consume 30 Food and Drink items
Food items can be found throughout the station, on dead enemies or inside vending machines. You need to eat (use) 30 for the achievement. This should come naturally on a playthrough.
Examples include soda cans, chip packets, etc.
Medical Level Specific

Gut-Wrenching
Find the hidden Wrench. This looks familiar…
The wrench is a unique melee weapon that can be found in the Medical level here on the map (orange marker in yellow box):

Pick it up for the achievement.

TV Dinner
Kill an enemy with an Overhead Monitor
TV Monitors can be seen on the roof all over the Medical level corridors. Upon being shot they will fall and damage enemies they land on. The easiest way to earn the achievement, however, is to lower your own health and drop the TV upon your self and this will still earn the achievement if you die to it.

Storage Level Specific

The Longest Jump
Jump across the big ramp in the Storage level
In the Storage level you can find the Turbo-Motion Boots upgrade. These can be used to launch your self across a gap by running down a slope and up a ramp. Here is the location of the boots followed by the location of the ramp where you can earn the achievement.

Executive Level Specific

Enjoy Your Purchase
Buy a Grenade from a Vending Machine
In the Executive level vending machine there is a grenade that you can purchase for Tri-credits. You must buy this grenade for an achievement.
Here is the location:


In the Not Too Distant Future
Find the hidden Audio Log
You need to use the V.3 Boots for this. It is located in Executive level in the theatre room up above on the viewing balcony.
Here are some screenshots:


Delta Grove Chess

En Passant
Solve the Chess Puzzle in Delta Grove
This achievement can be accessed in the Delta Grove from Executive level. You must successfully defeat the opponent. Your opponent plays the Black pieces and you play the White pieces. You must win the game of chess for the achievement.
Or alternatively, if you are not good at chess or don’t understand the rules, fear not cause there are plenty of chess bots out there that can assist. If you set a bot such as the one on 365chess to play as White then you can input the moves made by the game and the chess bot will inform you how to best play your turn in the game by following it’s moves exactly.
It is a lot simpler than it sounds, just experiment around with a bot!
Hard Difficulty

Don’t Forget To Salt The Fries
Complete the game on the highest difficulties
When starting a game/new game you are given the option of tailoring the difficulty of four areas. Namely:
Combat, Mission, Cyber and Puzzle. You must complete the game with all 4 set to level 3 (max setting).
Level 3 Combat means enemies will be more aggressive, more numerous, more alert and inflict higher damage.
Level 3 Mission means the game needs to be beaten in under a 10 hour limitation and you must enable the Regeneration Bays on each level you are on or it is game over upon death.
Level 3 Cyber means if you die during a hacking mini-game you die in the game, as well as generally harder hacking.
Level 3 Puzzle means the puzzles encountered on the Station will be the hardest iterations affecting puzzles such as the panel boxes.
If you are having trouble getting this achievement to pop try saving right before the SHODAN boss fight on your 3333 game, finish it, start a new game and play a little bit. Then reload the last save of 3333 and finish once more and it should unlock. MORE COMING SOON!
I’ll See You Again, Hacker

I’ll See You Again, Hacker
Collect all other Achievements
Unlock every other System Shock Remake achievement to get this final achievement!
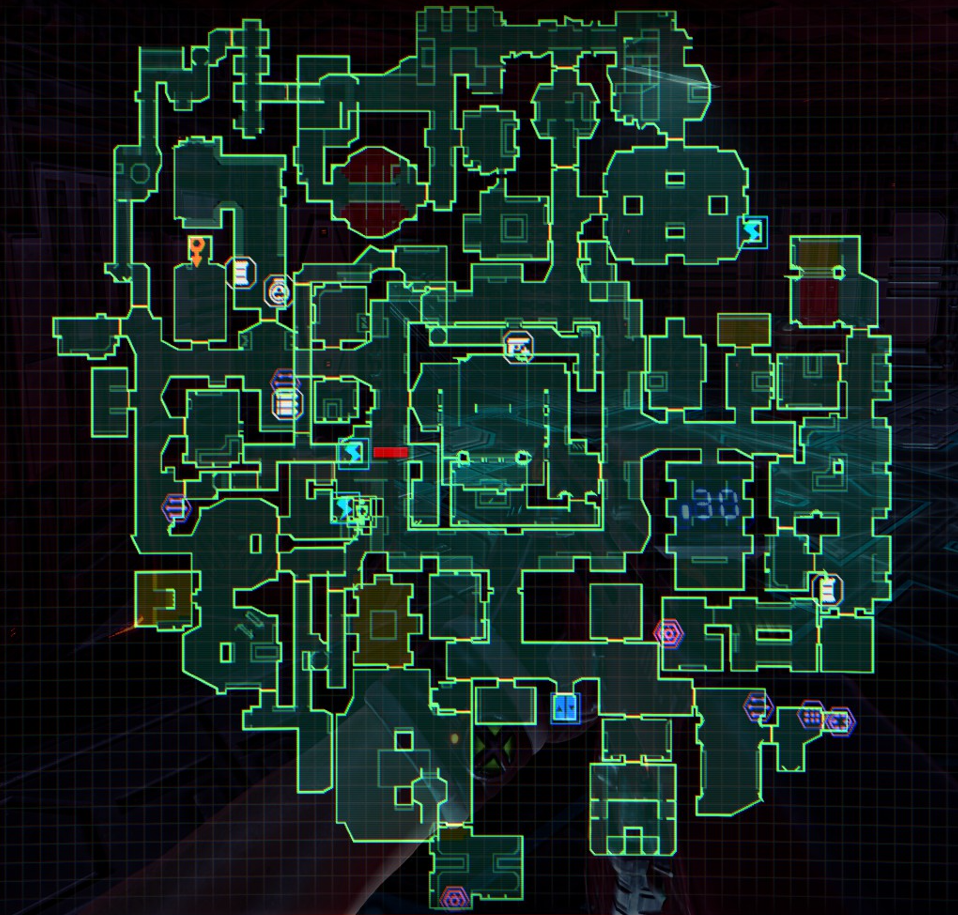
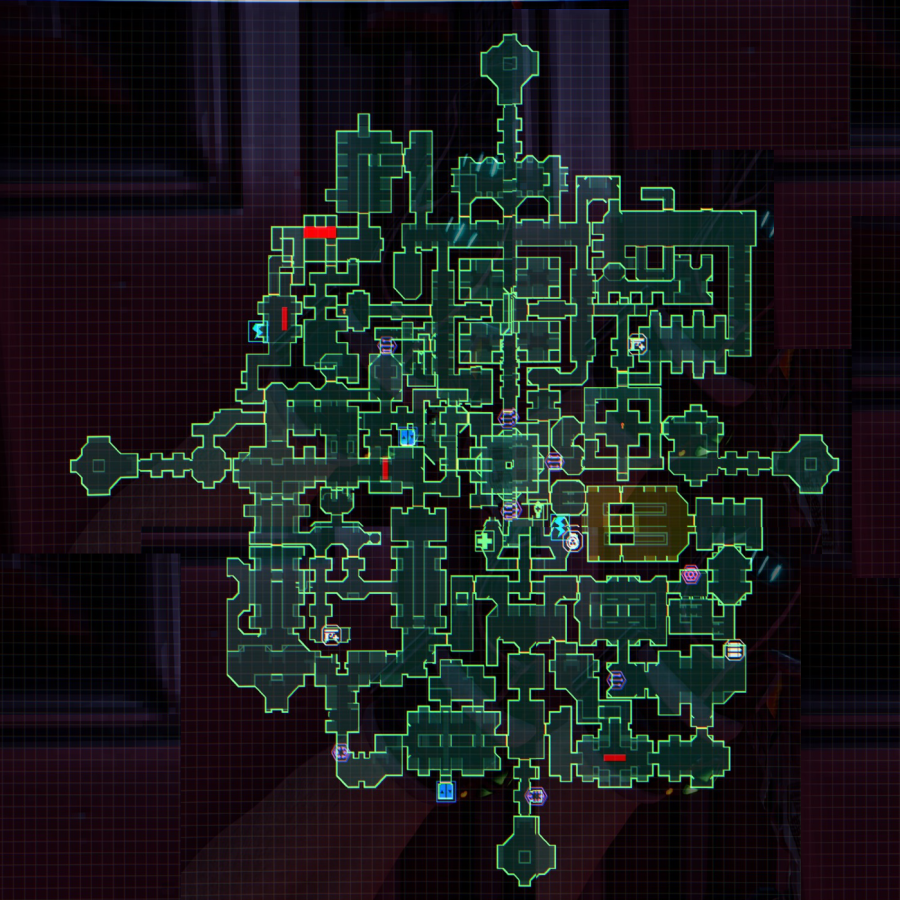
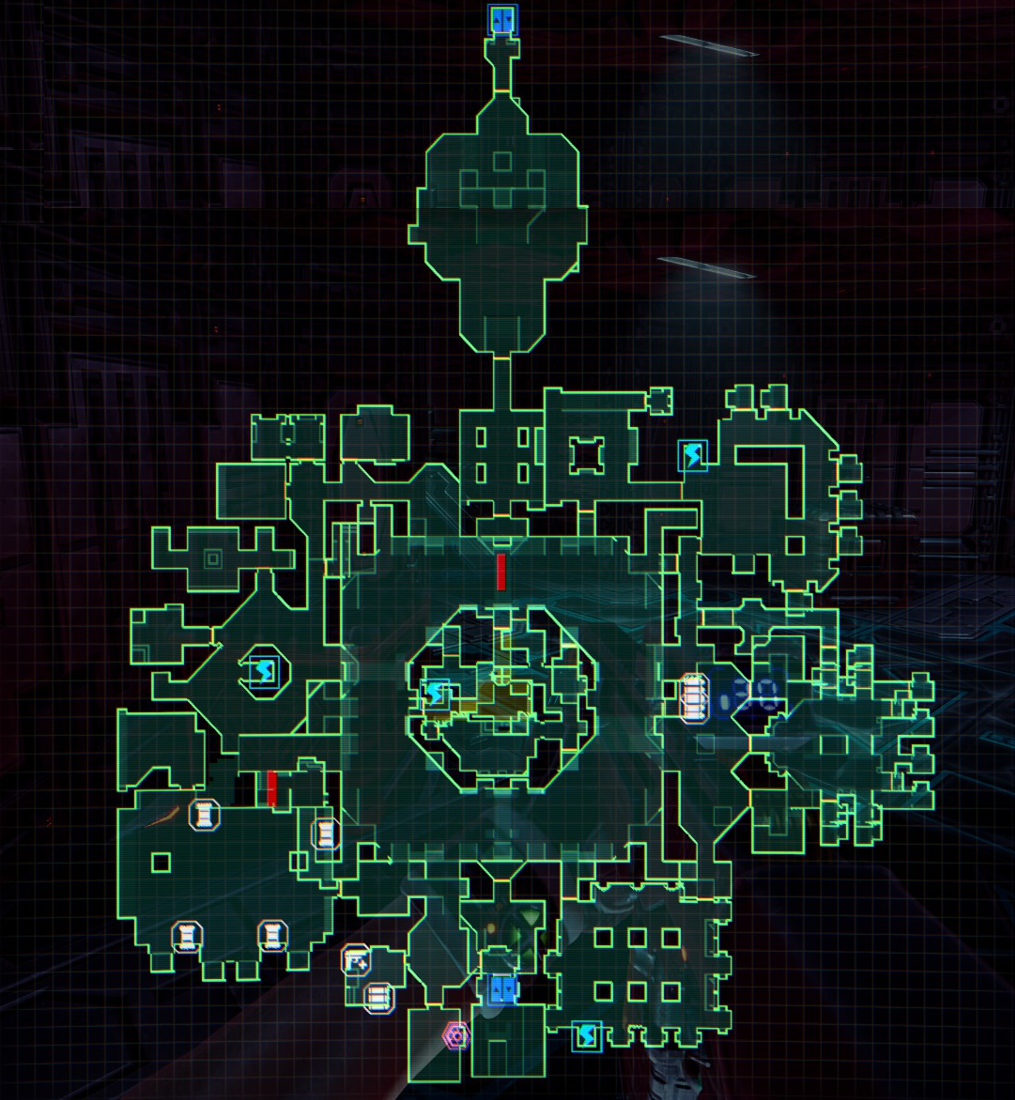
Station Maps
These maps may not be 100% complete but they where enough to get me 43 out of the 45 achievements on that playthrough including: All hacking places, all Hardware, all Cameras and Nodes, all Skulls and All Weapons + Mods.
Medical

Reactor

Research Labs
Maintenance

Storage

Flight Deck

Executive

Alpha Grove

Beta Grove

Delta Grove

Systems Engineering
Security
Bridge