This walkthrough will help you to finish the game.
Walkthrough
Exit the house and head north to access the town. One of the people here will say that Flora is at the lookout point, so head there. You can access it by following the path to the northeast exit.
Once you finished with the cutscene, you’ll be in a cave. There is a red door in front and two paths to the west and east. Save and head east. Your task here is to navigate the terrain and avoid the darker path. From the entrance, follow this path at each intersection: head down, right, up, right, up, up, left, left, right, right, and follow the path all the way to the northeast. Take the Caverns Key.
Save again and head west until you find a room with 4 colored tiles. If you examine all of the inscriptions and the glittering pillar (diamond), you’ll notice that you have to make a diamond. Pick up the jar.
Here’s what you have to do to clear the puzzle: fill the jar with mud (southeast pillar), then head to the south exit. Fill the jar with the body of water and return to the 4 colored tiles room. Fill the jar with ice (northwest pillar), then heat it up by interacting with the middle pillar. Cool it again by interacting with the ice in the northwest pillar.
Once you have a diamond, use it on the diamond (northeast pillar) to get Caverns Key. Use it on the red door 2 screens back.
You’ll return to the town. Enter the cemetery to the northwest corner and attempt to exit. Reach the lamp for your next cutscene.
In the next area, head south twice, then switch back north and south. You’ll see a black ghost following you from the north and south side. Try not to get caught until you reach a building. Hide. The safe place is on the curtain to the northwest.
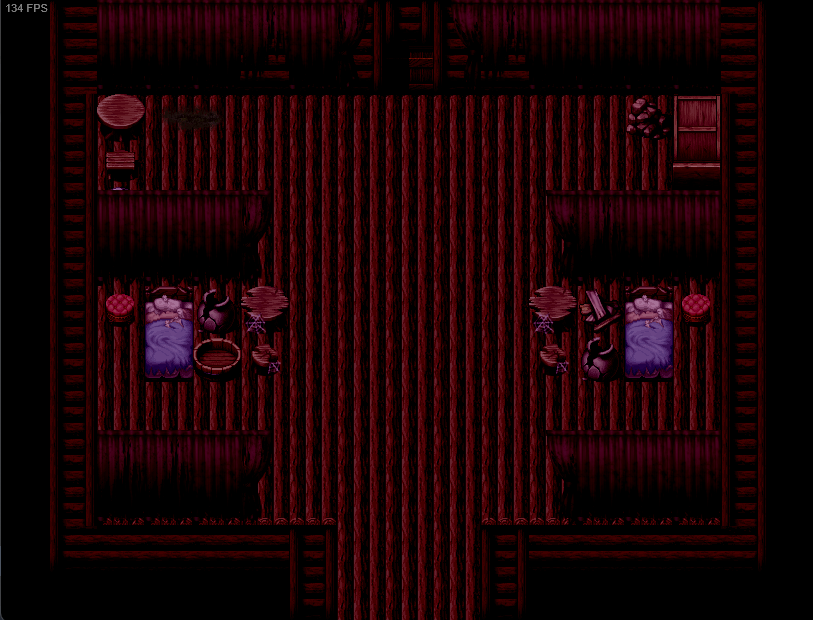
Next is another puzzle room. Interact with everything to find hints on what you are supposed to do.
- Hint1: the opposite of a lie is the truth
- Hint2: both points in the same direction
Solution: turn both coffins to the right, then interact with the skull in the middle to turn on the melody.
Once you finished the condition, head to the north exit. There will be ghosts killing you if you answer it wrong. If you answer it right, you’ll safely arrive to the next area. Save and head to the next area for another cutscene.
The school only has one classroom that you can enter. Enter the door inside it and find a place to hide. The safe place is on the curtain to the northwest.
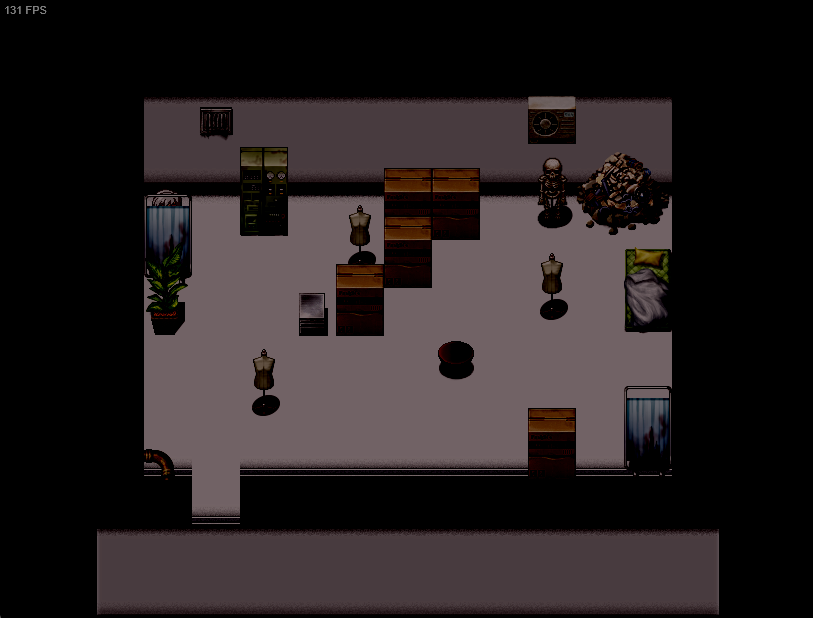
Exit the room and run until you reach a cutscene.
If you have played Close Your Eyes [Old Version], you must be familiar with this area. Head downstairs and interact with the colored sign to the far east. Fight the train with everything you got and board the train afterward through the red door. Another cutscene will ensue. Choose whatever you like and you’ll be teleported to another room.
Head to the north exit and interact with the window.
There is another puzzle in the next room. Interact with everything to find the clues.
Hint: pay attention to the sound
Solution: silver ox, bear, bear 2x, golden ox, shadow
Note that you need to interact with the 4 frames on the wall (there are switches beneath them) and the yellow artifact to submit your answers. The passage to the north will open once you’re done. Enter it.
Keep on exploring the area until you reach a room with many doors. The rest of the rooms are dead ends, so you can only explore the northeast room. There will be a big room there. The exit is to the northwest. Avoid the white creature while you are at it. Past the small room will be another big room, with the exit at the center top. Avoid the white creature again while you reach it and you will be transported somewhere else.
Surprise! No, don’t load your save yet. It’s fine. Explore the town and talk to the man with the red cap, Kaito, and the bunny girl. Head to the cemetery afterward and attempt to exit it. Proceed to the look-up point and keep on heading north, to the edge of the cliff.
Head north. Pick either Kaito, the bunny girl, or none and head to the next room. Save and use the chute.
Follow the path until you reach rooms with chemical. It’s puzzle time! Interact with the desk near the north exit to obtain Beaker of Chemicals.
Here’s the note if you need it:
- To apply coolant to the room and get rid of any wild fires, simply take the coolant chemical and apply it to the Main Distributor.
- Once the coolant is supplied, go to the Wireframe Terminal and distribute the chemicals into Sector 6D.
- Then release the security lock at the Security Terminal, and activate the Cooling Chemical at the Cooling Unit
- We hope to make your day full of doom and gloom with our haphazardly complex mechanism designs, courtesy of your local Demontrich Inc.
Solution: simply follow the note to finish the puzzle. The Main Distributor is the machine with the big tube, the Wireframe Terminal is the machine next to the desk where you got the chemicals, and the Security Terminal is the machine south of the Wireframe Terminal.
If you need help with the riddle, here are the answers:
- Umhn… Red?
- I am not a robot
- Demontrich Inc
The Cooling Unit is the triangle near the north exit.
If you need guidance on the next area, head these ways on the intersections: right, right, north, right, south, north.
In the room with 2 red creatures (Sloppy Joe) and 2 branching paths at the beginning, stick to the right side.
Just take your time and don’t step on the lava tiles and you’ll eventually reach the next room.
There is a switch on the guns on the right side. Flip it. Exit the room.
Drag the stool to the door and peep the hole. There will be a shiny thing nearby. Pick up the Bathroom Key. Save. Now, head to the west exit and enter the room with a rug. You’ll reach the bathroom.
Pull the shower curtain to get Cross Key. Exit the bathroom and enter the other room. Talk to both girls. Enter the next room.
Oof. Here we go again. Enter the cemetery to get a cutscene, then exit the area. Go to the lookout point. Talk to Flora.
Congrats on finishing the game! Don’t forget to load your save just like what the game asked for more mysteries.
