Everything you need to know for making levels in A Better Place. If you came here, you’re probably looking for some help in one part of the editor for Cats are Liquid A Better Place, or maybe you just don’t know how to use it at all and are extremely lost. Either way, this guide will teach you the basics of working in the Editor, including:
- How to create and delete objects
- Connecting rooms together
- Giving and using powerups
- Using prophets to make cutscenes
- Very basic tech with buttons
In the future I may create guides for every item in the editor and advanced prophet or button tech, but for now this is an easy tutorial to follow along with, whether you’re on mobile or PC.
So let’s begin!
Starting Up
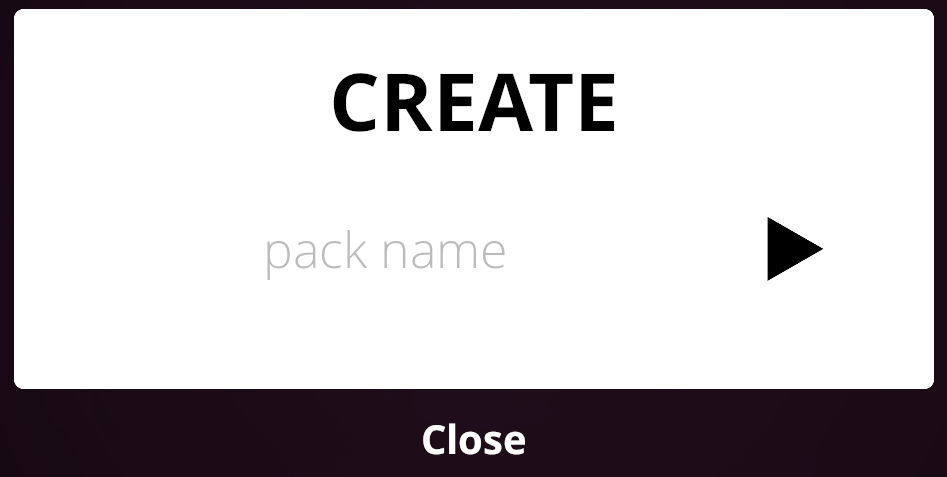
For this tutorial, we’ll be making our own worldpack. Feel free to follow along!
To start, open up the game (A Better Place) and click “Edit” on the side.

Since we’re making a new pack, click “Create new.” You’ll be prompted to enter in a name for your pack. I just entered “Example Pack” but you can name yours whatever you want.
Huh, that was easy enough! Now onto the actual editor.
Knowing the Editor
The editor can be a little overwhelming at first, but don’t worry! It’s easy to understand once you know what you’re doing.

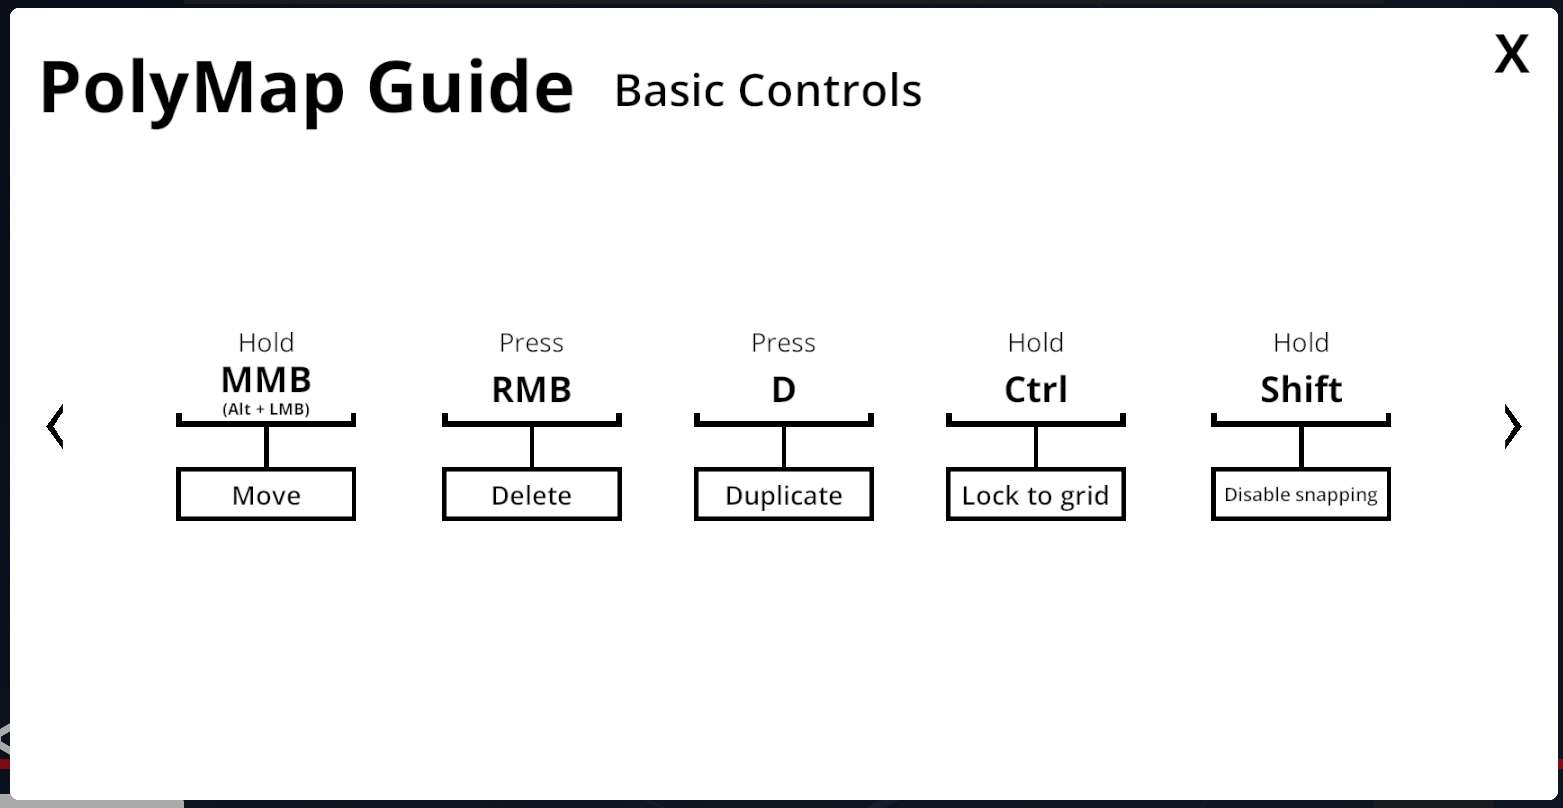
To start off, here are the basic controls for the editor:
- Click items on the Dock to add them in.
- Hold and drag items in the room to move them around.
- Hold two fingers to move the camera. On PC, hold Alt and click to move.
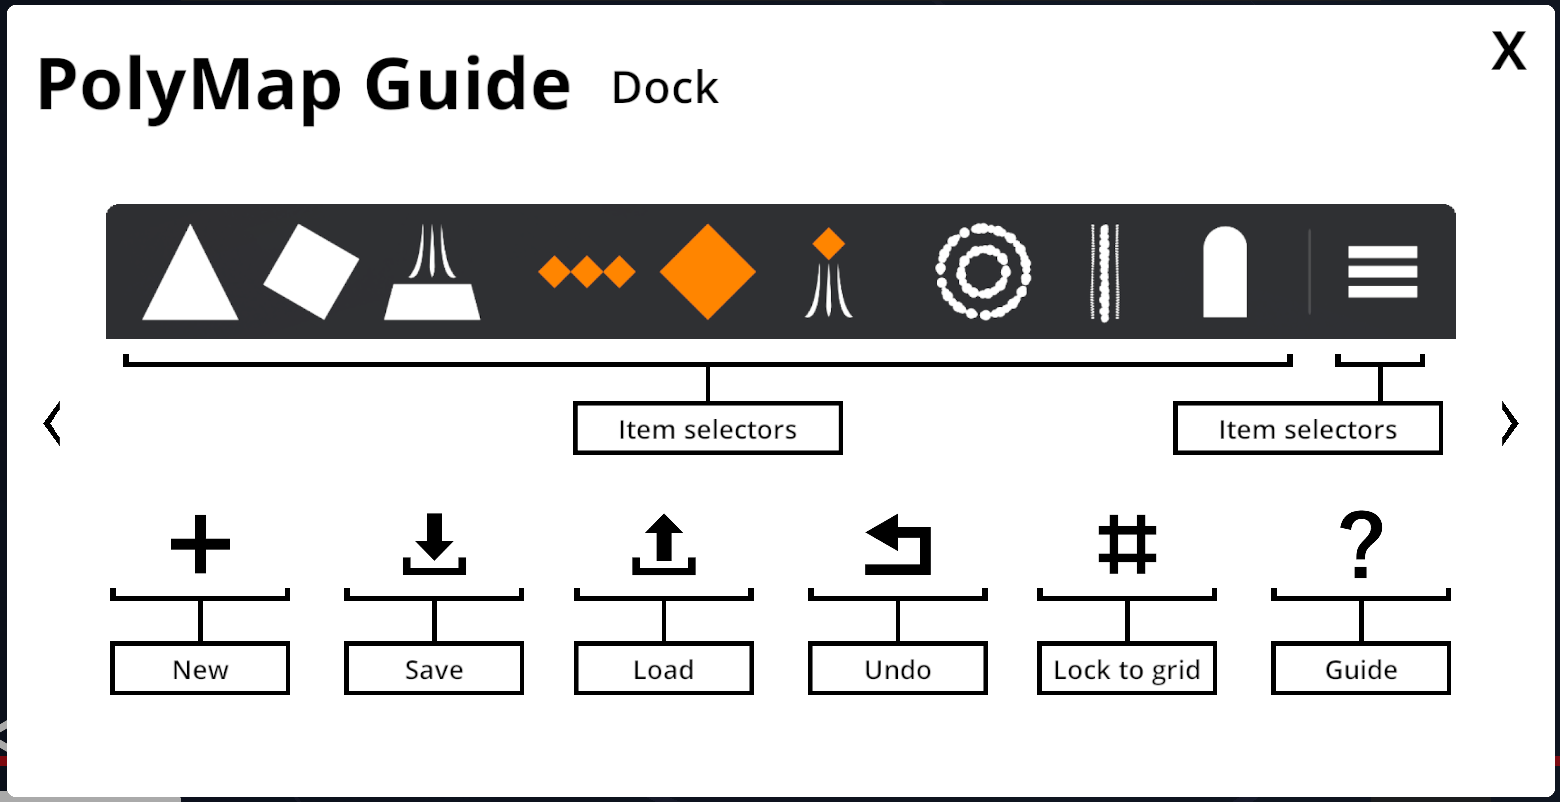
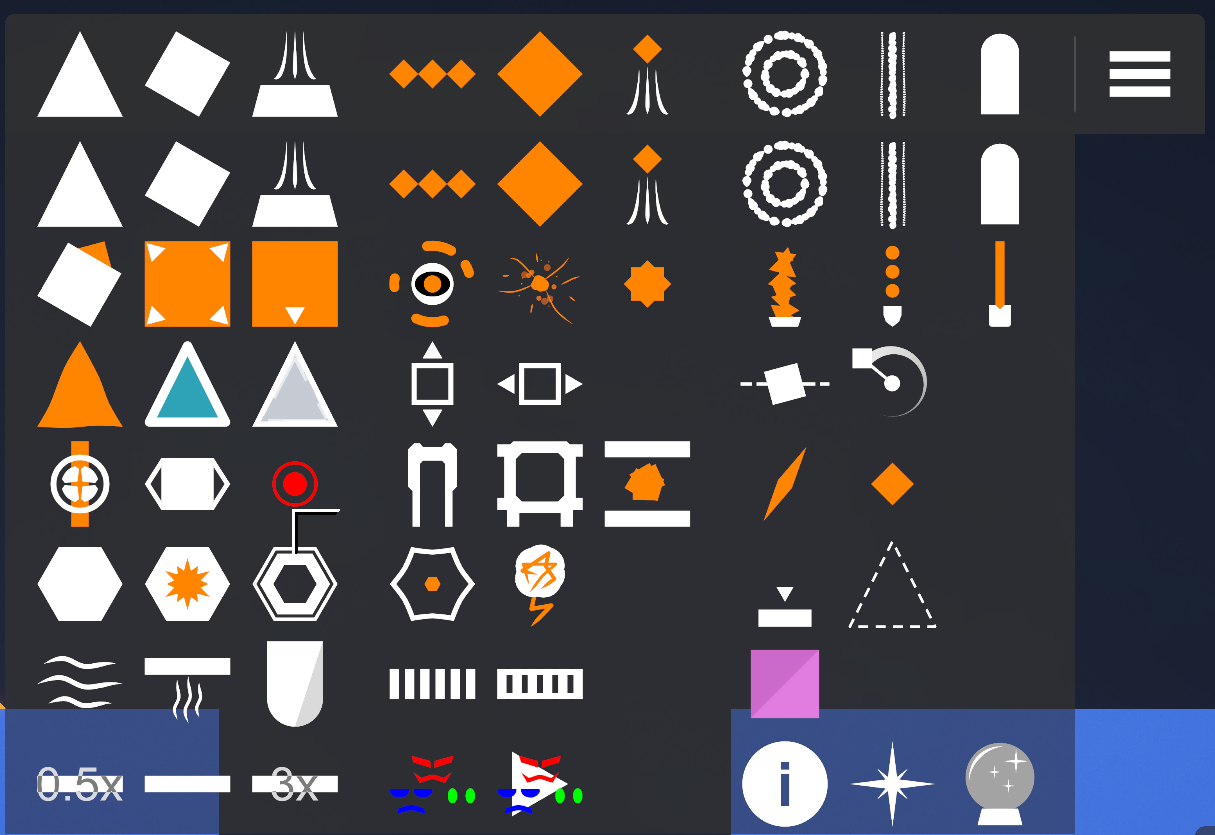
The Dock holds the items for making rooms – every item in the base game can be added into your room somehow, because the game itself was made in the same editor.
Click the three lines on the right of the Dock to open up the full item selection:

If you’re editing on a mobile device, you’ll see a pencil icon to the right of the Dock. This is a drop-down with three options: a pencil (to edit), a trash can (to delete), and two boxes with a plus sign (to duplicate). To use the editor on mobile, you’ll have to get used to switching between these three options constantly.

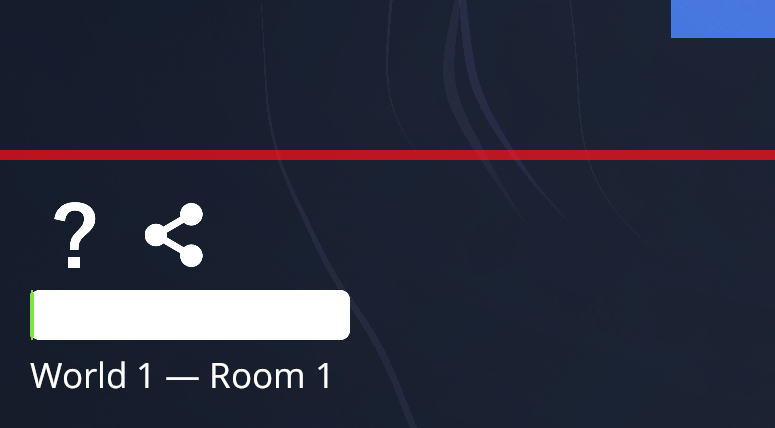
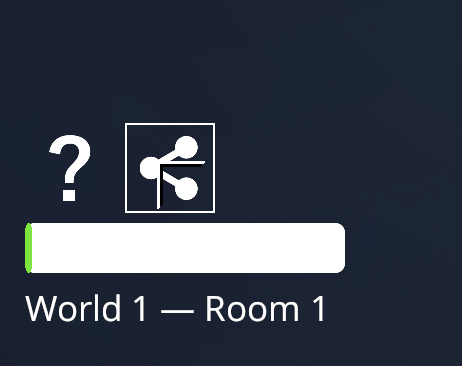
In the bottom left is the general room information – it displays the world and room you’re currently editing, as well as the object limit bar – this bar shows how close you are to the object limit. Once you reach the object limit, you’re not able to add any more items to the room.
There are also two buttons in the bottom left – the question mark button, in case you want to see the in-game tutorial slides, and the share button, which lets you export and share your worldpack.
Additionally, there is a sidebar to the right of the screen. This sidebar includes important buttons that let you create new worlds/rooms, save your room, undo, and turn on/off gridlock. Don’t worry about these for now – we’ll get to them as we continue.
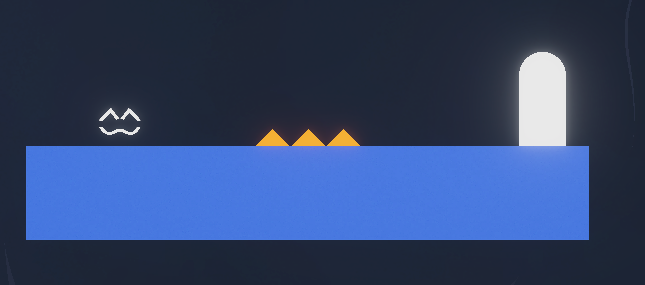
The red line on the screen is the death plane. If Lumi (the name of the cat) falls below this line, she’ll die instantly. If the Companion falls below this line, it will teleport back to Lumi.

Lastly is the actual room contents. Every room must have a Spawnpoint object. You can move this object around, but cannot delete it. In order for a room to be possible to complete, it will need at least one Door as well.
Try moving around the objects! Experiment! Press the Play button in the top right corner to try out your room so far.
What is Polymap?
Now that we’ve covered where everything is in the editor, it’s time to start making our room!
But first…
It can be easy to start designing our room right away. But it’s crucial to know the importance of
polymap.
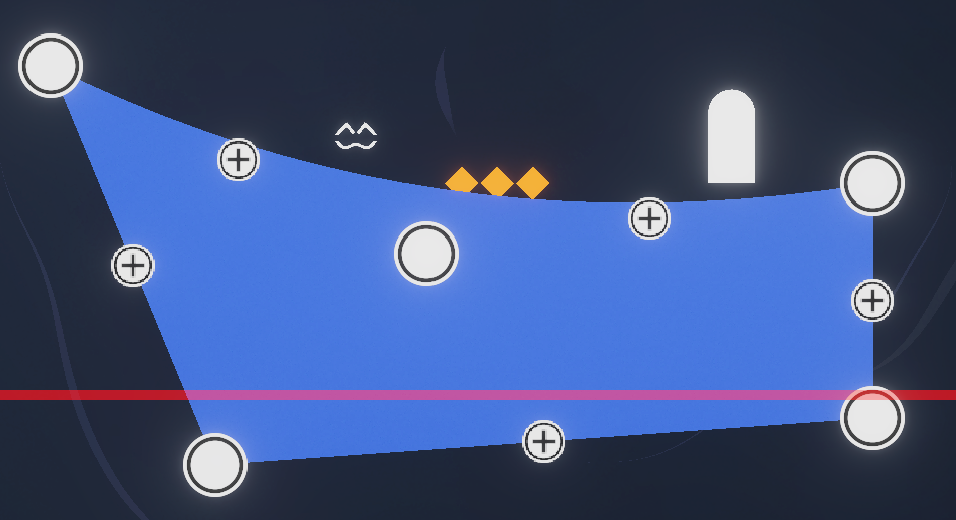
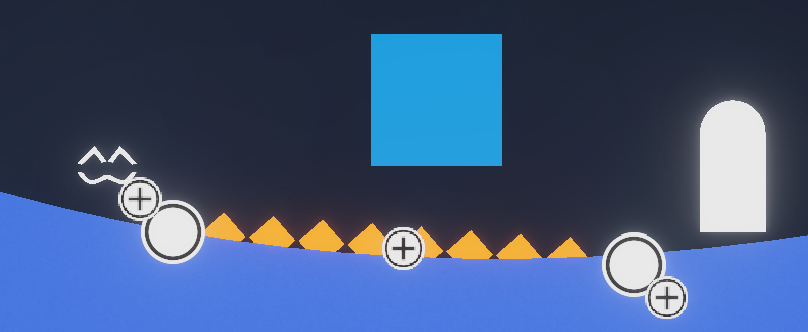
Polymap is used – in the ABP editor – to create dynamic objects. You can control these objects with points, commonly called “joints,” on the polymap. These separate points connect to each other through lines, filling in the object.

While several objects in the editor use polymap, the most common one is ground.
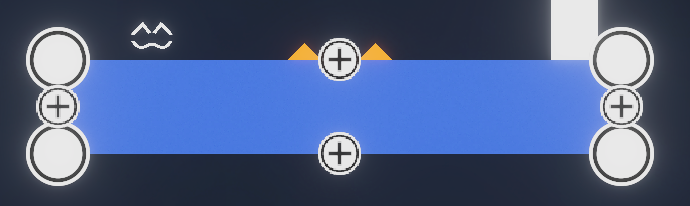
In the image above, we can see the 4 points of the default ground object. To see these points, simply click the ground object.
We can drag out these points to change the shape and size of the ground.
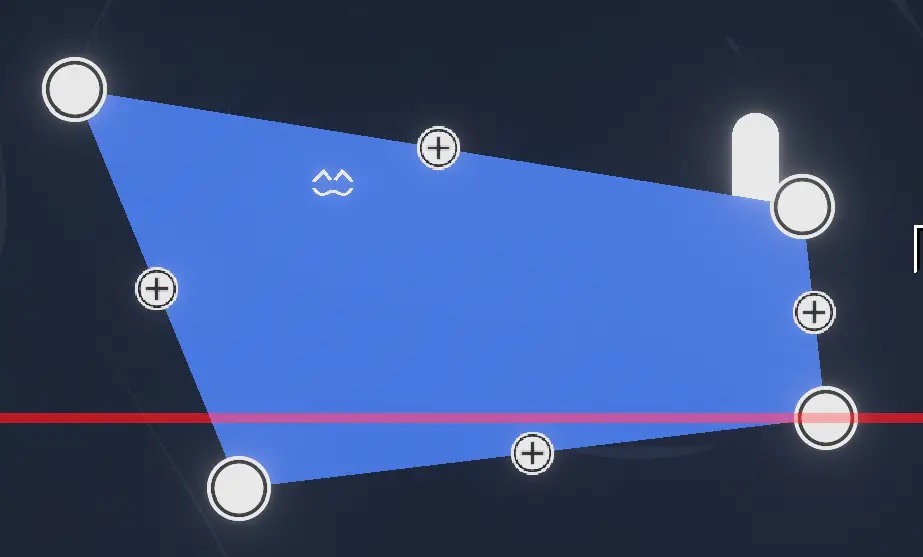
We can also click the plus buttons in between each point to create a new point.
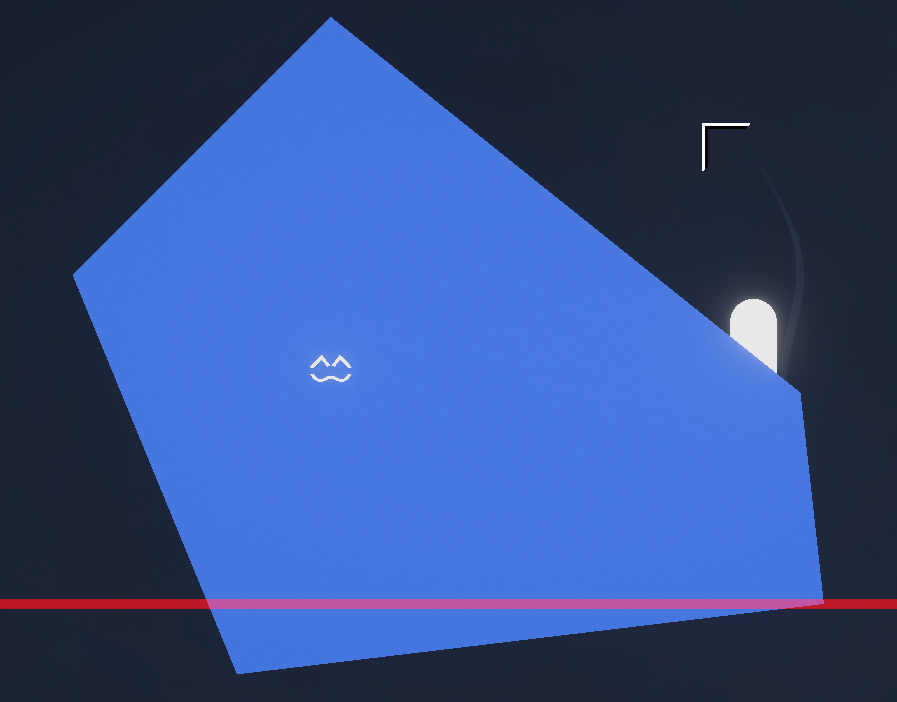
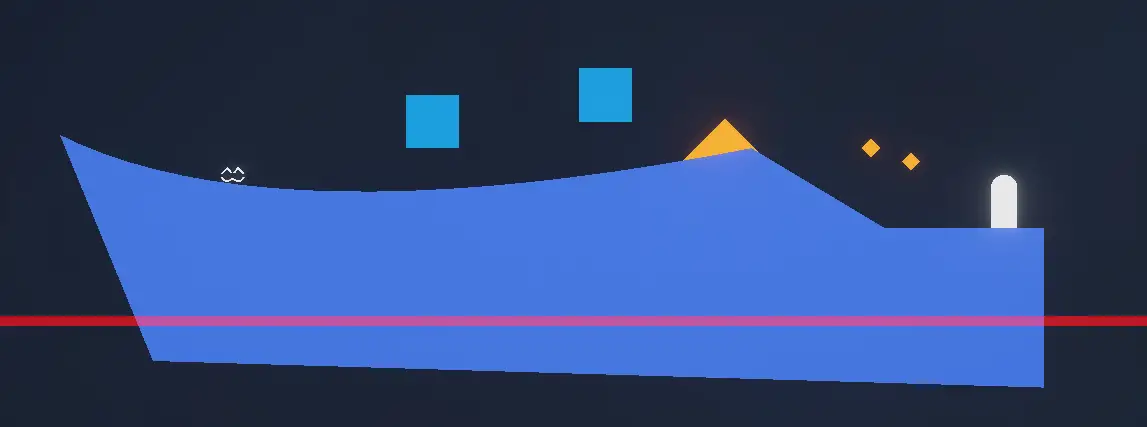
Points can be moved and created in a multitude of ways. However, you may notice that if you cover Lumi (the Spawnpoint object) with the ground, it turns red and the publish button in the bottom left corner is replaced with a warning icon.

This is because you can’t share a worldpack where Lumi is stuck in the ground. You can still experiment and play this pack on your own, but you can’t publish it.
What’s the fix? Just drag the Spawnpoint out of the ground!

If you select a singular point on a polymap object – press and hold on mobile, or press E while hovering over the point on PC – then it will become curved. Curved points typically look cleaner than rigid points, but they both have their uses.
Many objects in the game use polymap – this includes ground, lava, water, prophecies, and hidden platforms.
Some objects have line polymap, like spikes. In these cases, the polymap can be extended and controlled like normal, but it is only one-dimensional. Infinite points can still be created and so can curves.

Adding Objects
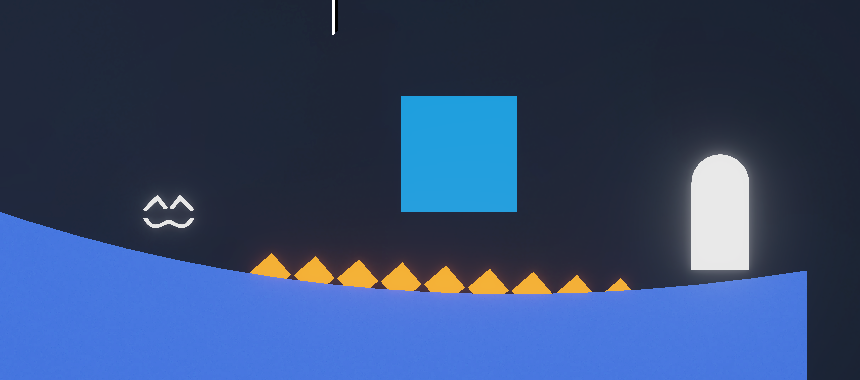
I used the curved polymap from before and extended the spikes on the ground to make the layout more unique – feel free to do whatever you want with the polymap, as long as it’s possible and not unfair to the player.
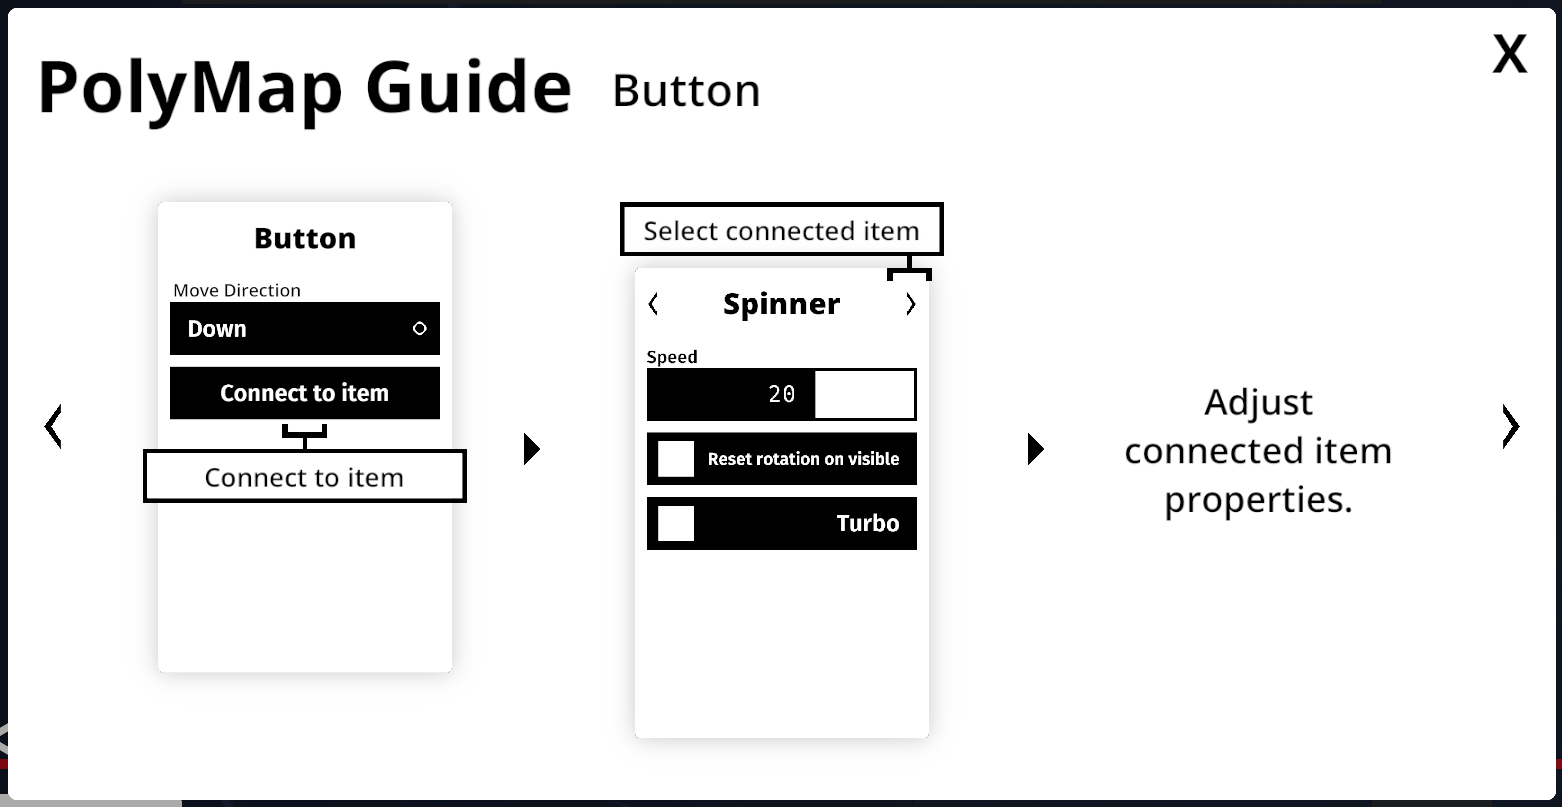
Now seems like a good time to add a new object. How about a spinner? Go to the Dock (the top bar) and select the spinner.

The spinner will automatically be created wherever the middle of your camera is. This is why it’s a good idea to move the camera often.
You can drag the spinner to wherever you want. If you’re working on mobile, make sure your setting is set to Edit. (the pencil symbol on the top right)
Now if you press play, Lumi can jump on this spinner with ease!

But… this seems a little too easy. Let’s make the spinner move faster. To do this, select the spinner by press and holding it on mobile, or pressing E when hovering your mouse over it on PC. A menu should pop up – there are controls that can be changed for the spinner here. 50 seems like a good speed, but choose what feels right for your room.

Note that both positive and negative values can be used, or it can be set to 0 if you want a static spinner. Static spinners can look nice as alternative ground.
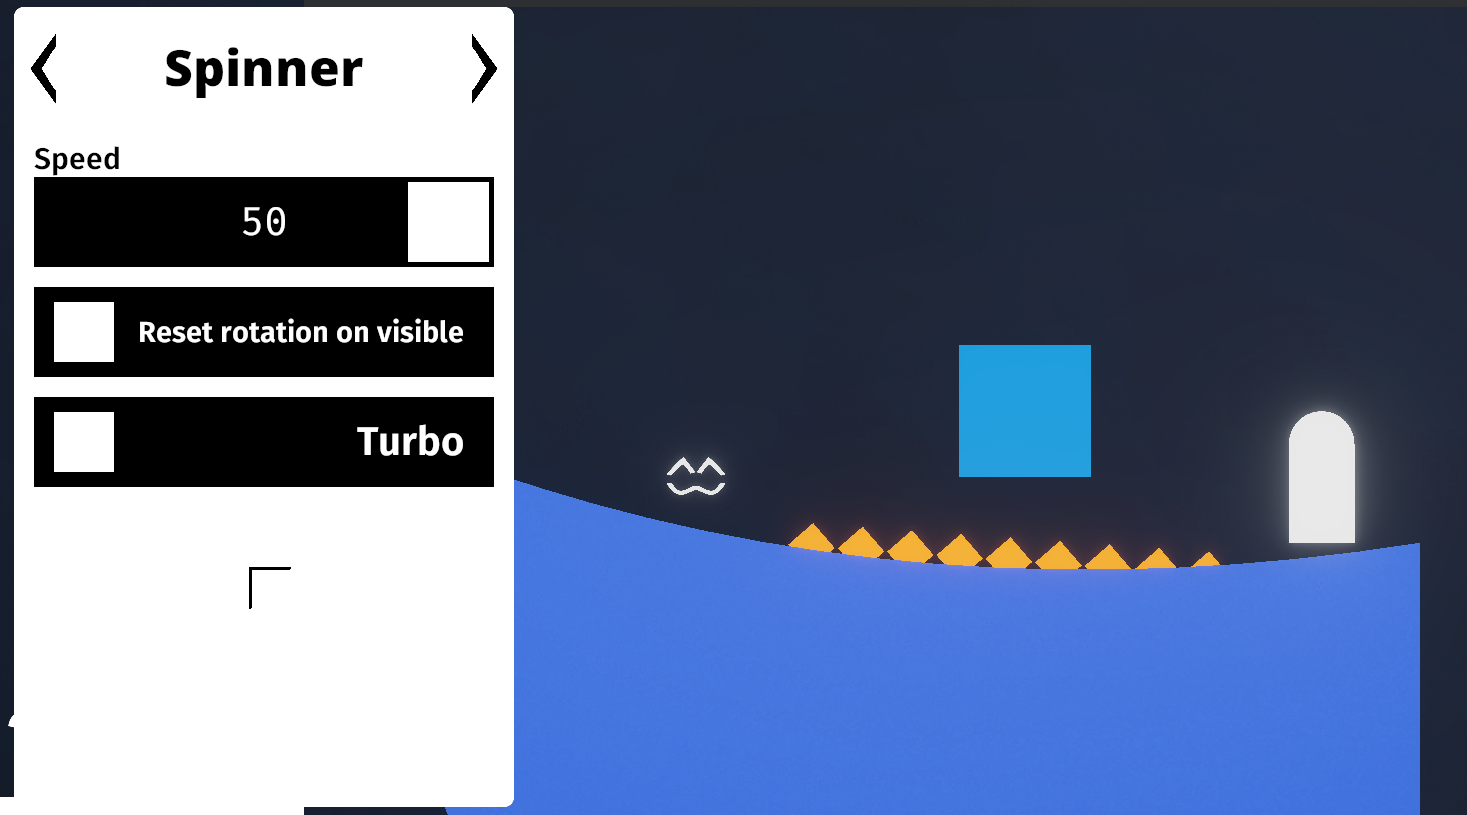
You know what – why not go even further? Select the option “Turbo” to make the spinner spin really fast!

The spinner is moving nice and fast now! But this is only the first room, perhaps we should make it a bit easier for new players. If we delete the spikes, players will have the opportunity to experiment with the turbo spinner safely, where we can implement it in a more dangerous setting in the next rooms.
On mobile, set your editing mode to Delete (the trash can on the top right). Simply click the spikes to delete it – make sure not to delete the ground by accident! If you do, hit the Undo button on the right sidebar to put it back.
If you’re on PC, click the spikes, and then the Backspace key. Alternatively, you can right click the spikes to delete them.

After doing this, I extended the ground polymap a little bit, and duplicated the spinner. You can do this by setting your editing mode to Duplicate and clicking the spinner (mobile), or pressing D while hovering over the spinner (PC). I also added a few more obstacles from the first row of the Dock.
You can do what I did to your room, or do something that fits your style. It’s your worldpack, the choice is yours!
Making New Rooms
I would say that our first room is complete!
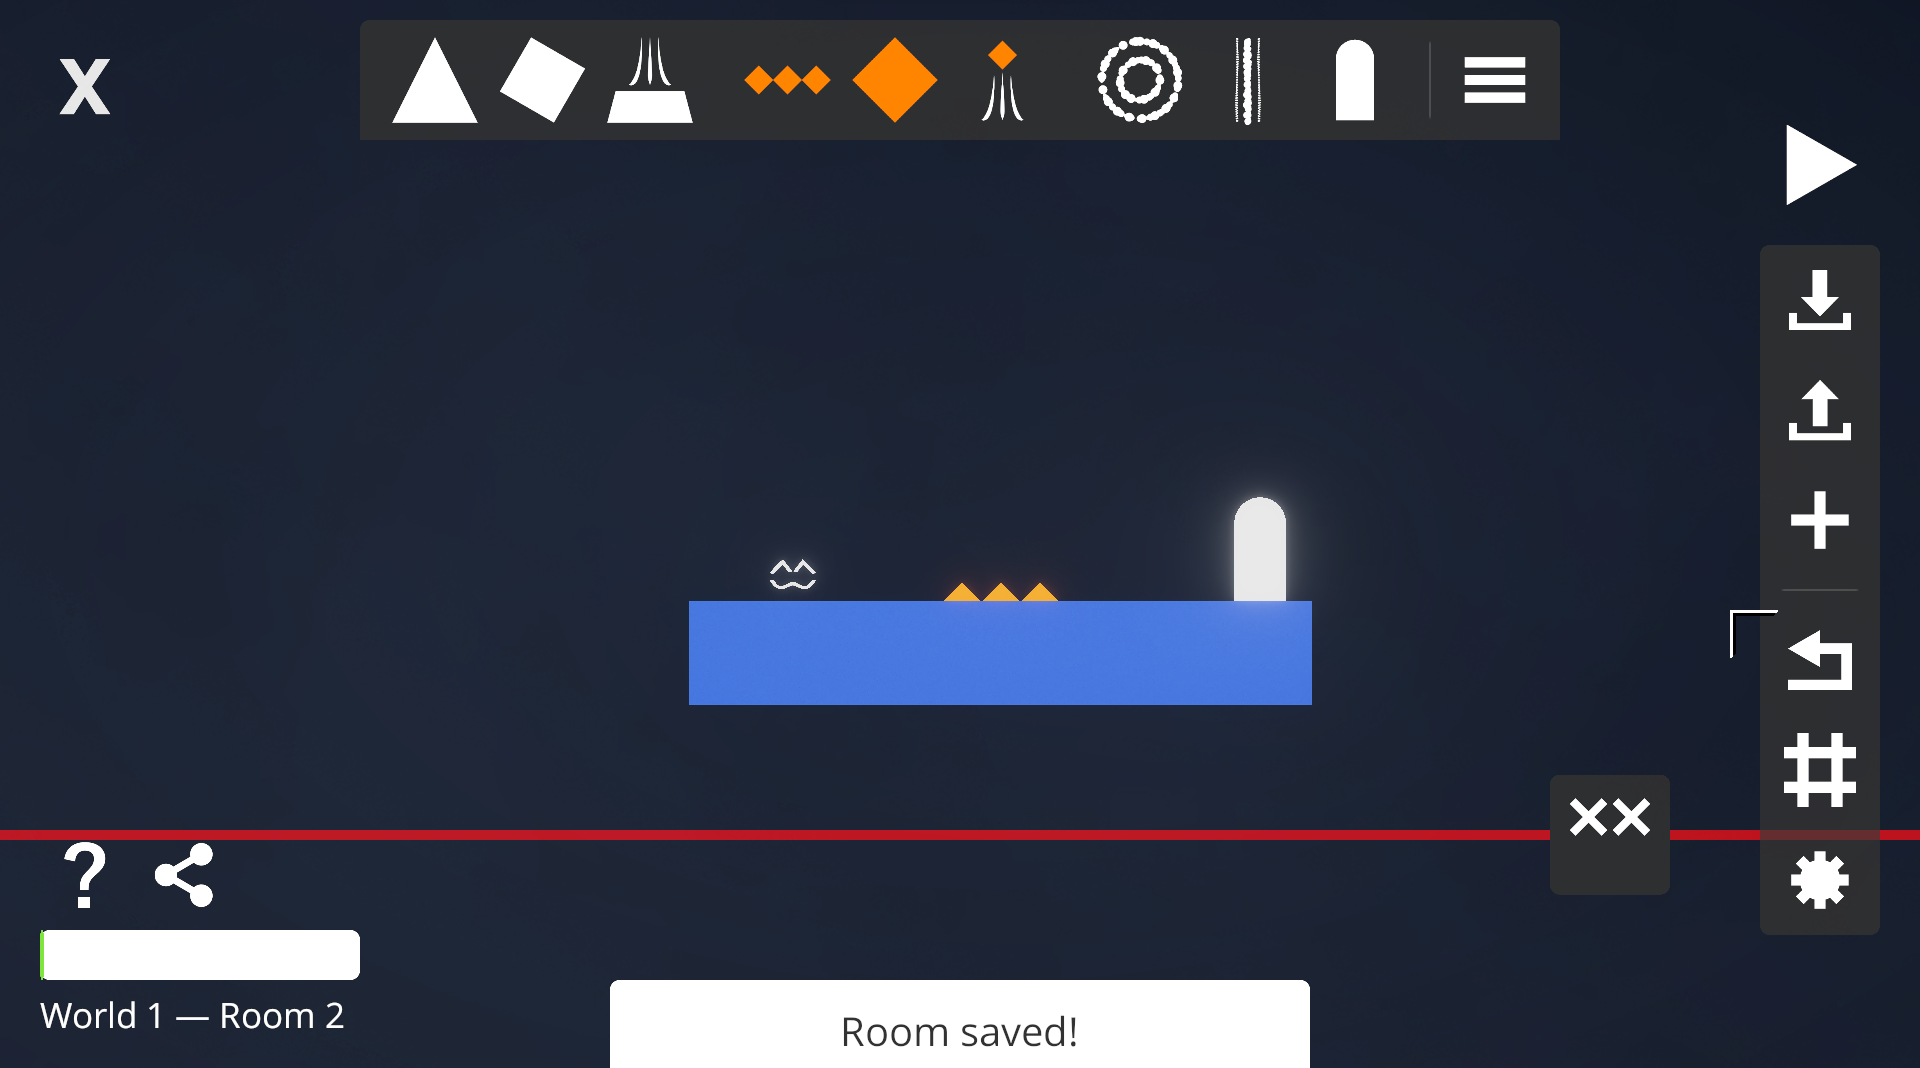
But it doesn’t have to end there – most worldpacks have at least a few rooms, if not several worlds. Before creating a new room, make sure to click the Save button on the right sidebar:

Save your rooms often to assure that you don’t lose any progress!
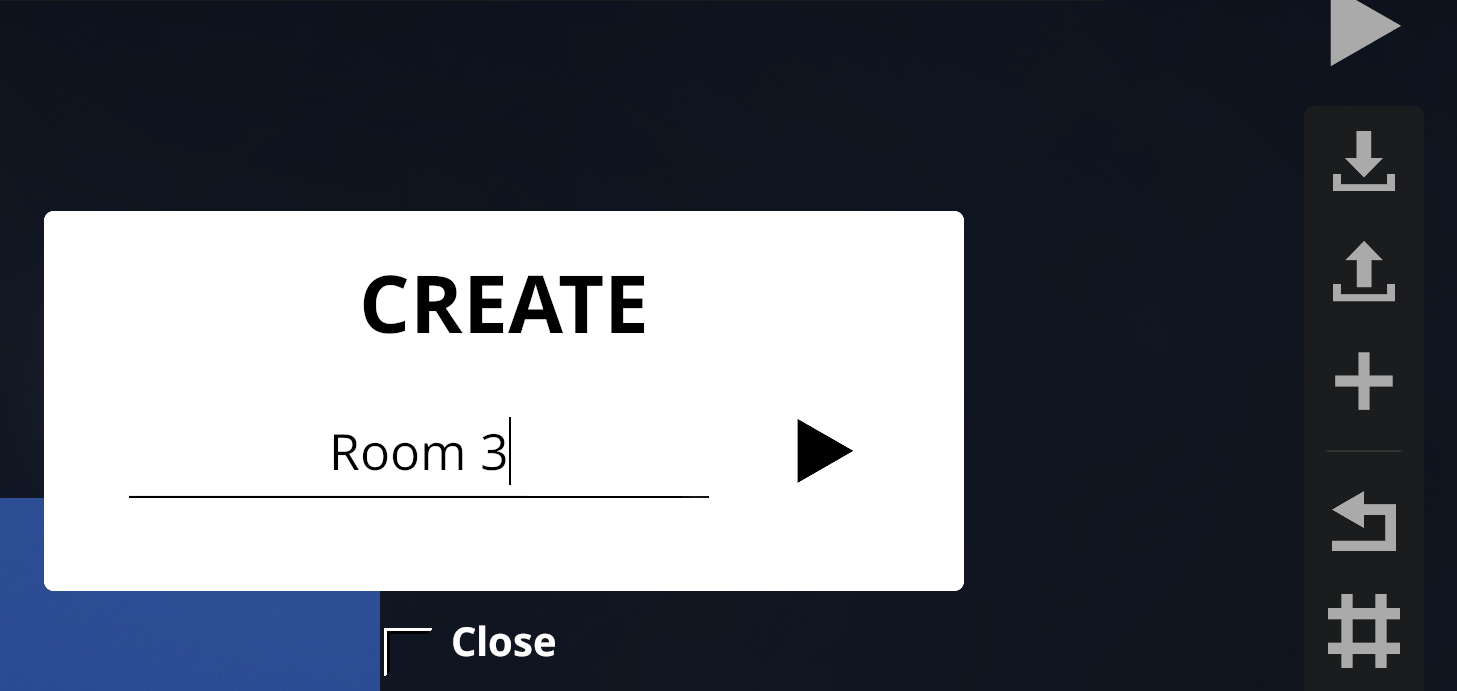
Creating a New Room
To create a new room, click the plus button on the sidebar:

Choose “Room,” and then type in “Room 2.” I find that it’s easiest to keep track when I keep my rooms numbered, and players only see room names in the pause screen when playing your pack.


Room 2 has been made!
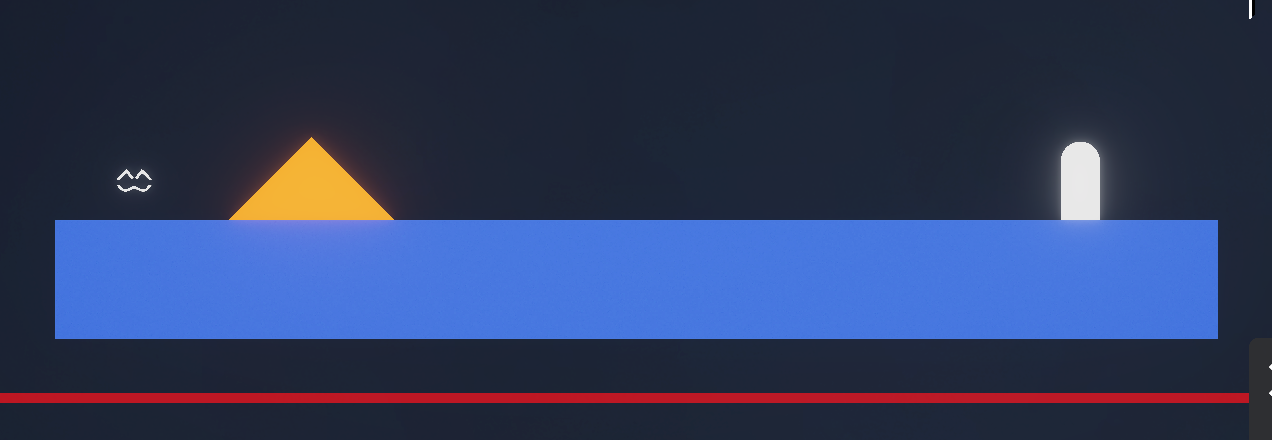
Room 2 looked exactly as boring as Room 1 did at first, so I changed the elevation of the ground and added a single big spike. You may want to add your own customization to the room so it’s not as painfully boring as the default room.

Hey! This is an Important Section!
After being in the Last Quarter Studios Discord server for almost a year, I can safely say that nearly everyone has this problem when creating packs. For some reason, we assume that Room 1’s door will connect to Room 2 automatically. This is not the case. We’ll have to go back to Room 1 and connect it.
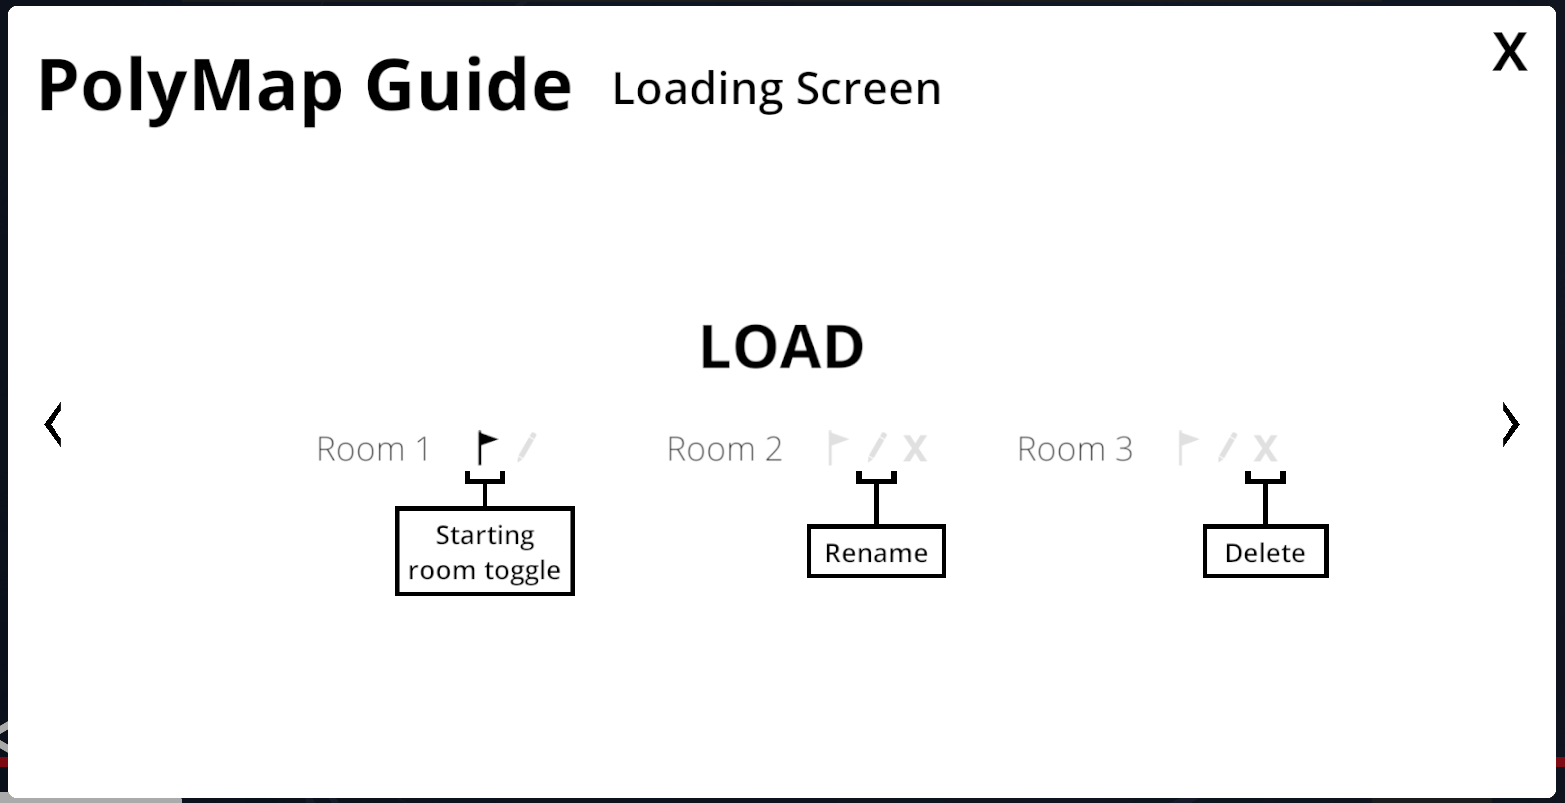
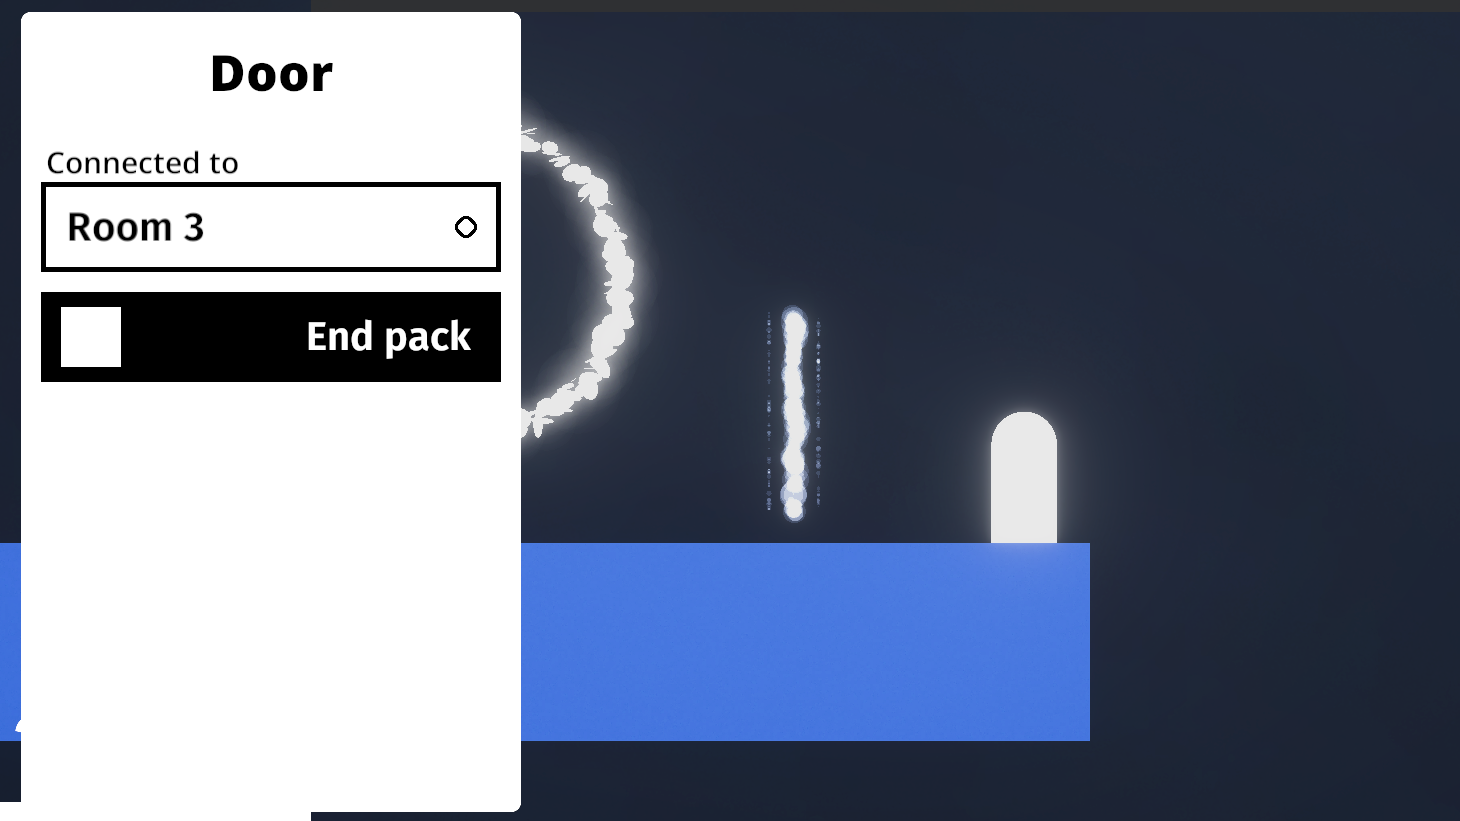
First, load Room 1 again by clicking the load button on the right sidebar, and selecting Room 1:


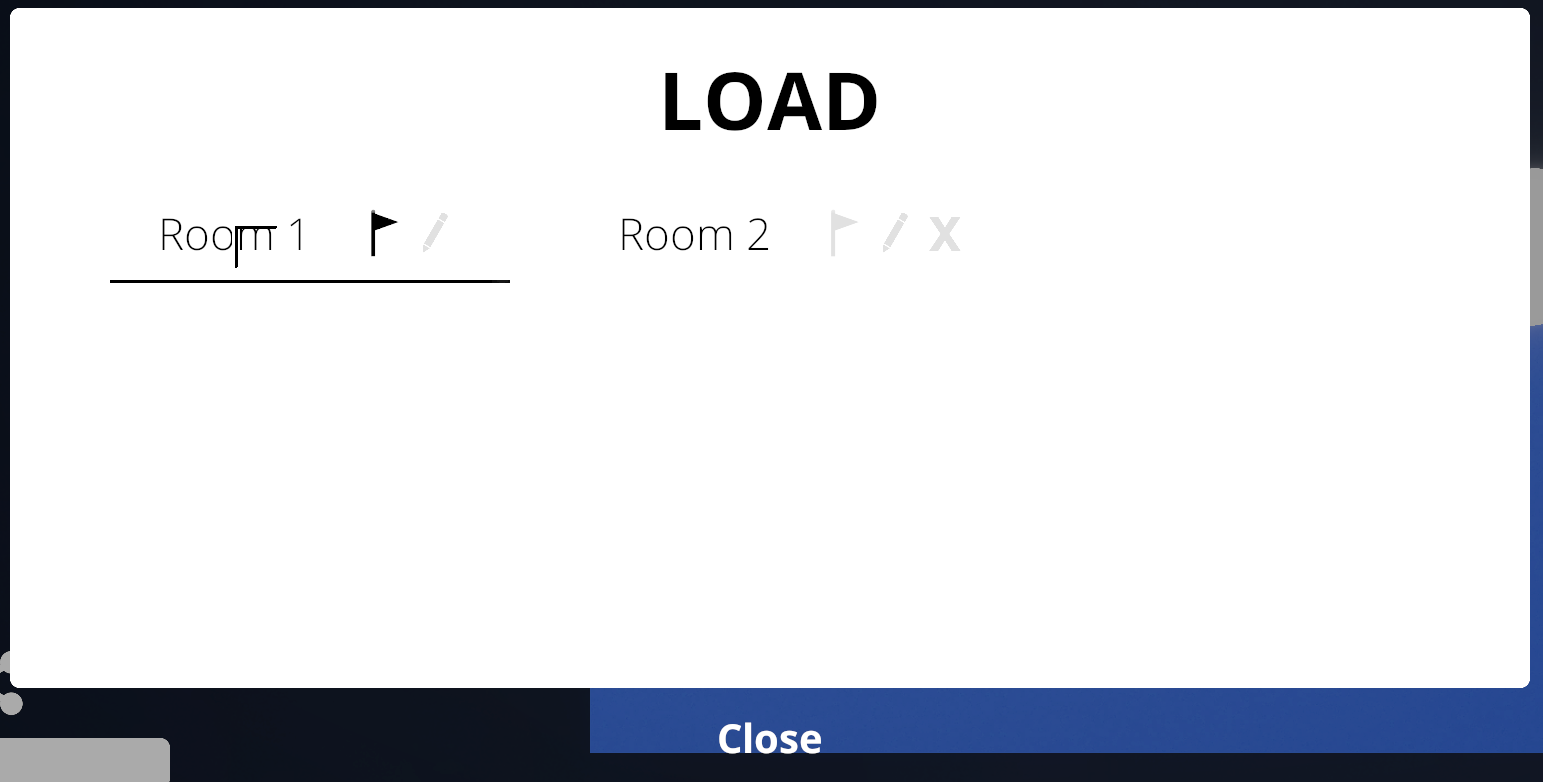
Move the camera over to the Door, and select it (by holding down the Door on mobile, or pressing E on PC). Click the drop-down in the menu that pops up, and select “Room 2.” Now the Door will bring the player to the next room!

Remember to do this for every new room you make! Doors should be the links from one room to the next. While it may seem unnecessary for it to work like this, it opens up many more possibilities for alternate endings and split paths in worldpacks.
Powerups
Room 2 seems like a good place to try out powerups. Powerups can be given to the player in two ways:
- Through a Power Ring
- Automatically for the specific room
We are going to use both methods in this tutorial.
The Power Ring
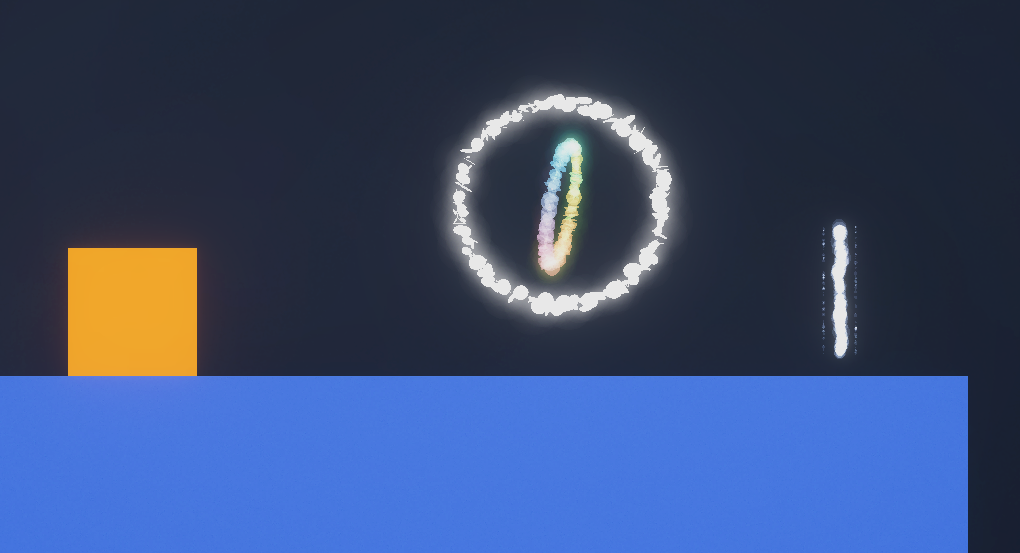
To give the player an ability through a Power Ring, you’ll need… a Power Ring. (wow) Power Rings are still located in the first row of the Dock. Clear some space in Room 2, and add the Power Ring!

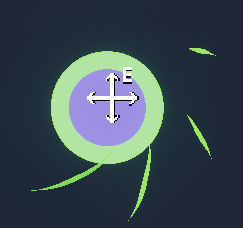
You’ll want to select the Power Ring the same way that you’ve selected everything else: by pressing and holding on mobile, or by pressing E on PC. Once you have the menu open, click the drop-down and select the “Floating” ability. You can select any ability that is used in the base game, but for this tutorial we’ll only use certain abilities for simplicity.
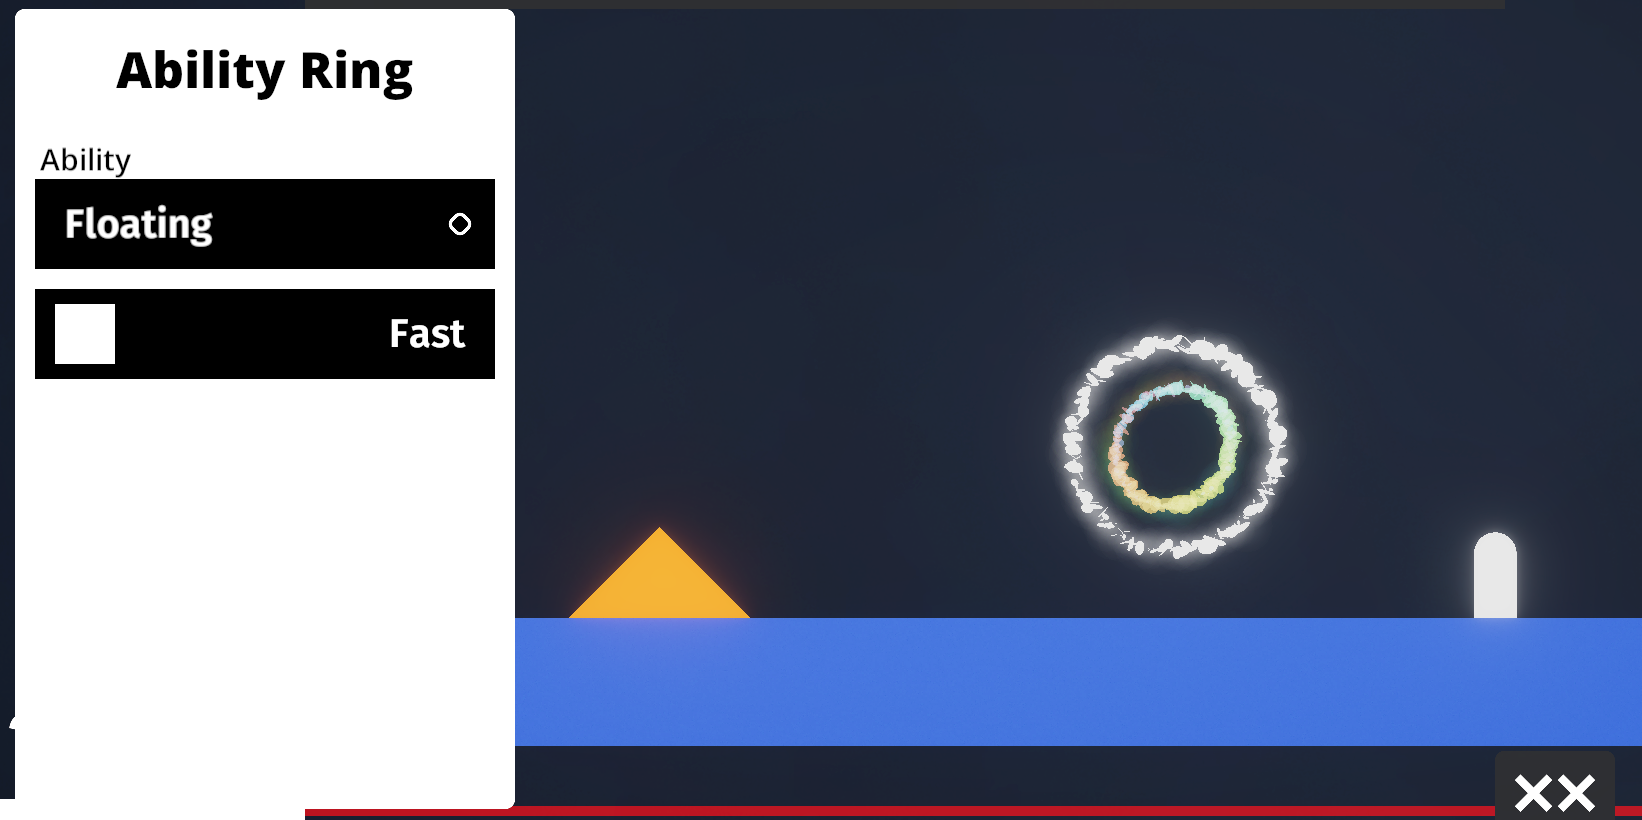
Hey, you can fly now!

Since Power Rings take so long to activate, it’s usually a good idea to put a Checkpoint right after one. If the player dies, they’ll be able to respawn right after the Power Ring. (Note that sometimes they’ll need to regain the ability after respawning, depending on if they got the Checkpoint before or after the Power Ring)
The Checkpoint is right next to the Power Ring. Be aware that only one Checkpoint can be added per room.

Another Room
Let’s extend the ability to another room! We’ll need to create a room called “Room 3” by pressing the plus button on the sidebar. After that, use the load button to go back to Room 2 and connect the Door.
If you played the base game, you’ll remember that the gas ability was used in tandem with wind. The wind object is a line polymap object (like the spikes) and is actually located on the second-to-last row in the Dock. Click the three lines on the side to open it up and selecting the wind:

We can control the line polymap of the wind to move it to where we want it to go. Make sure the direction of the wind is correct!
Now we’ll play it, and use the gas ability to- oh, wait. It doesn’t work.
We just got the ability in Room 2. Why doesn’t the floating ability work?
Actually, that’s exactly the reason why it doesn’t work. Powerups don’t carry over between rooms. In this case, we’ll want Lumi to start with the floating ability in Room 3, since she obtained the ability in Room 2. To do this, we have to go to the room settings by pressing the cog button on the right sidebar.

Click the drop-down on the bottom left to change the ability the player starts with for this room. Change it to “Floating.”
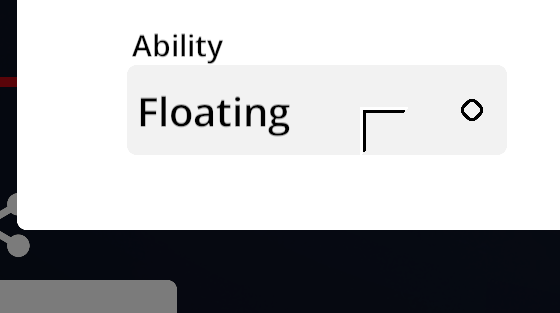
The gas ability works now as intended! Be sure to press the save button on the sidebar before continuing.
Cutscenes
Ground, obstacles, rooms, powerups… all of this is alright, but what about the heart of the game – its story? Short but meaningful cutscenes made up the story in the base game, and just like the rest of the elements, these can be replicated in your worlds.
NPCs
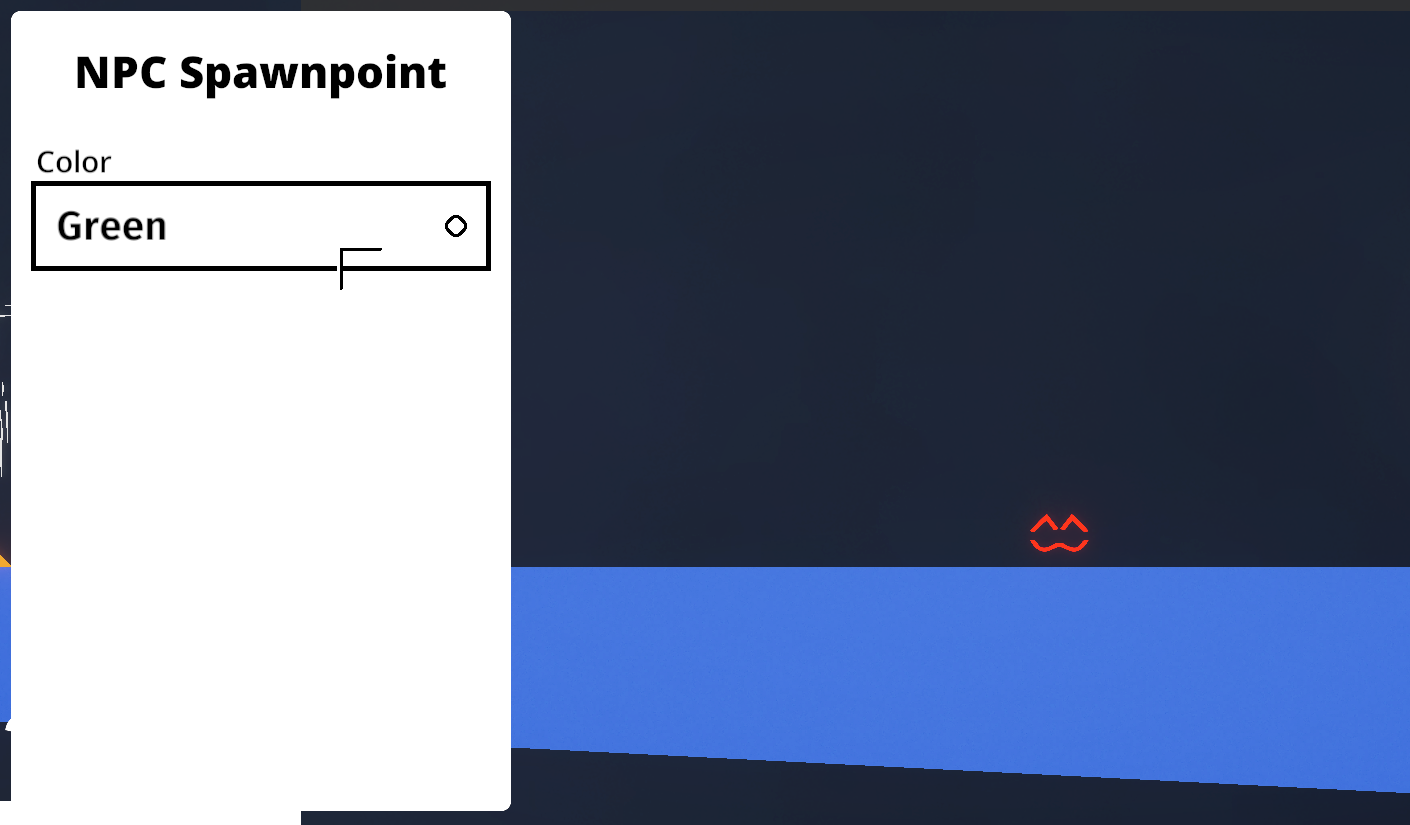
If you don’t know, NPCs stand for “Non Player Characters.” This means that any character that is not Lumi is classified under an NPC. For CaL, this assortment isn’t very varied – NPCs are limited to the other cats: Green, Blue, and Red. You can also add the Purple cat, if you’ve played A Light in the Shadows.
NPCs are on the last row of the Dock. Click it to add it in!

You can select the NPC (hold on mobile, press E on PC) to change which character it is. You can only have one of each character in each room. I set this NPC to Green, as they are my favorite cat.
It is important to note that NPCs follow the same physics as Lumi. They each have 3 health points. They can get hurt by touching obstacles, and can die by exhausting their health or by touching lava or falling below the death plane. They respawn where the NPC object was placed, or at a Checkpoint, if they’ve touched one. NPCs can click buttons (if the button is cat-activated), and enter doors. They can turn into liquid, move, and jump freely.
There are two things that NPCs cannot do:
- They cannot activate Power Rings or gain their own abilities.
- They cannot activate Prophets, Hints, or Tutorial objects. Only Lumi or the Companion can activate these.
Additionally, as we’ll see soon, only NPCs can activate NPC Action objects.
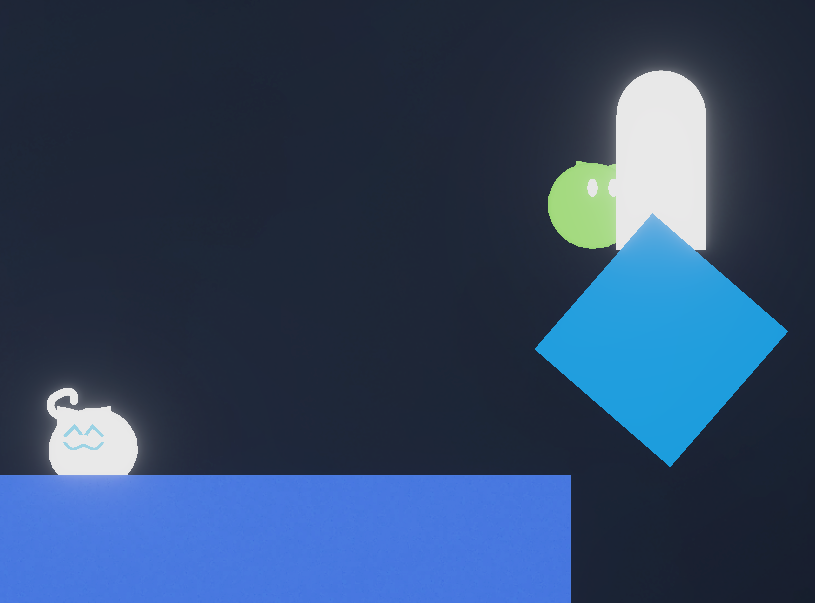
Aw, they’re so nice together
too bad they abandon Lumi at the end
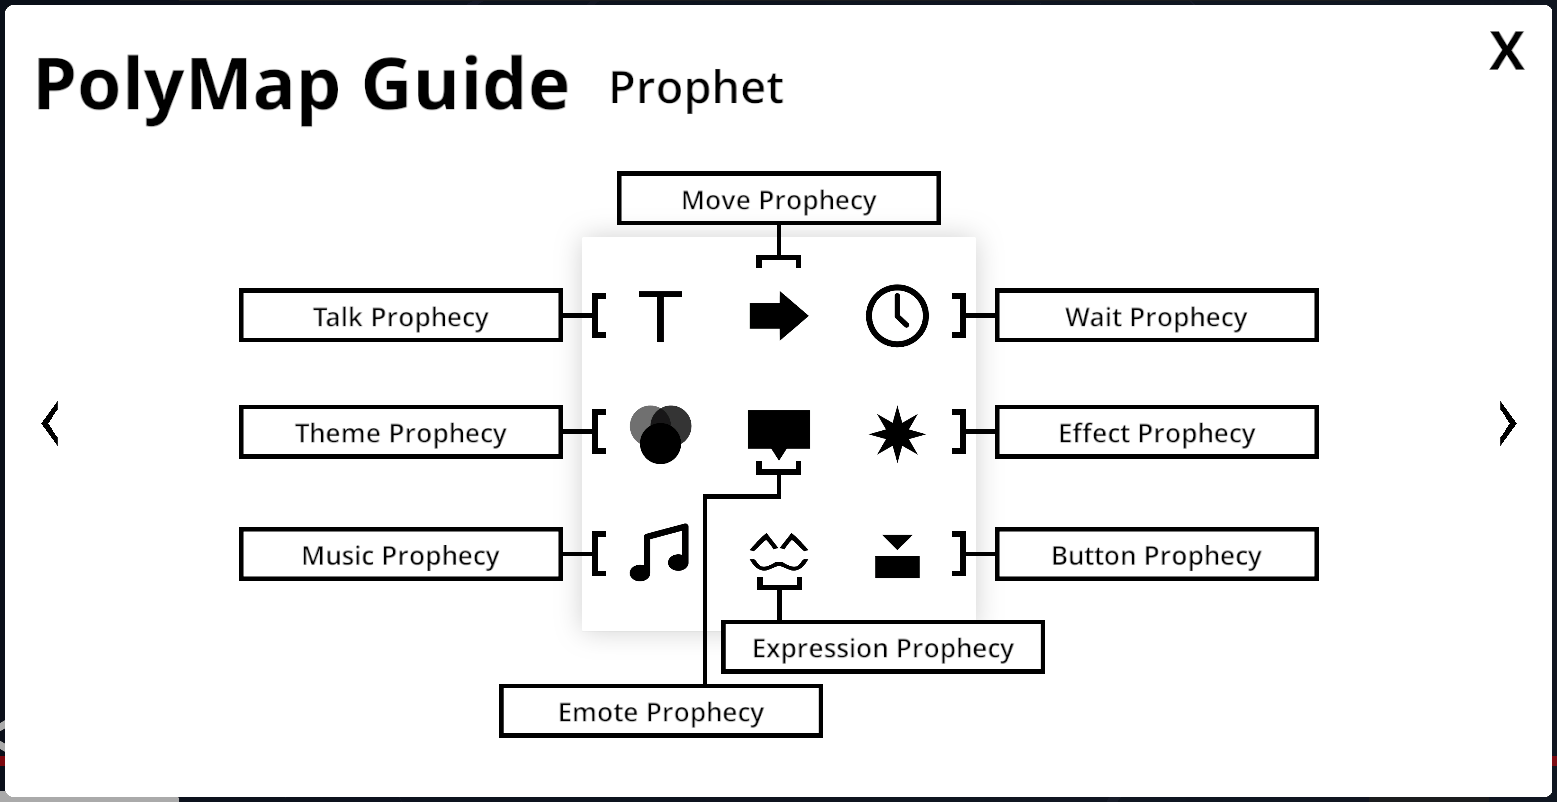
Using Prophets
Every object that we’ve looked at so far in the editor has been solid, or at least visible in the game world. Prophets, on the other hand, are invisible while playing a room, but are one of the most important objects when creating rooms.
The terms “prophet” and “prophecy” often get mixed up. To help remember:
- Prophets are the object in the game world – when touched by the player, they activate all prophecies inside
- Prophecies are the individual actions that can be placed inside and activated by prophets
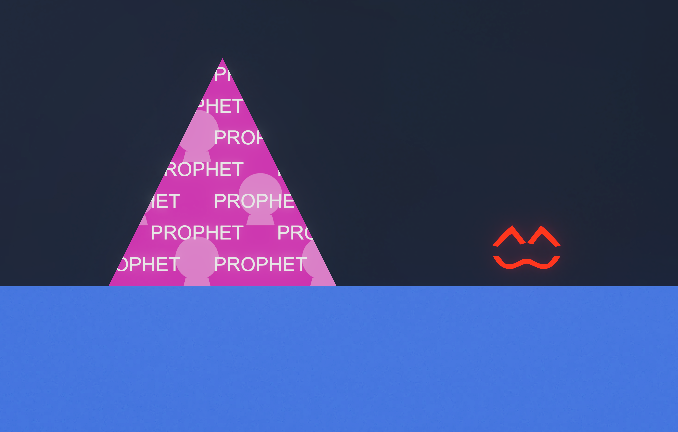
Just like NPCs, prophets are the on the last row in the Dock. They are controlled by polymap, just like ground or lava.

The default size for prophets cannot be jumped over by Lumi, so we’ll leave it as is. We can put it right in front of the NPC so that the cutscene makes sense.
Now that our prophet is there, we can select and edit it to add prophecies inside. Don’t get freaked out – just like the editor, the prophecy selector can take a bit of time to get used to.

As the in-game tutorial explains (although not the easiest to follow), there are 9 types of prophecies. The ones we’ll be using in this tutorial are:
- Text Prophecy: initiates a text box with the text entered
- Move Prophecy: automatically moves or changes the state of the character specified
The rest of the prophecies are still important, but we won’t touch on them in this guide:
- Wait Prophecy: waits for a certain amount of time
- Theme Prophecy: changes the room theme
- Emote Prophecy: spawns a text bubble above the character specified
- Effect Prophecy: initiates an effect on-screen
- Music Prophecy: stops or plays music
- Expression Prophecy: changes the facial expression of the character specified
- Button Prophecy: activates the button connected
To start, let’s click the top left prophecy – the text prophecy, indicated by a
T– to create the prophecy. You’ll see the prophecy pop up in the prophet’s menu.

For each prophecy:
- Click the up and down arrows to change the order of the prophecy in the list. Prophecies run from top to bottom in the order of the list.
- Click the X to delete the prophecy.
- Select the face of the character you want to specify (only in some prophecies). The glitched face on the right represents the Purple one. You can select multiple characters for one prophecy.
- Use the drop-downs and other options to customize the prophecy.
In this text prophecy, I just wrote a simple “hello” from Green. Try it out!

The cutscene looks good, but there’s something that we can do to make it seem more like a… real cutscene, you could say. In the base game, some cutscenes prohibited movement until the dialogue was over. To do that, just check the box for “Remove player control.”

Look, it Moves!
Let’s take it a step further and make Green move! We’ll need a move prophecy which comes right after the text prophecy. Because prophecies run in order, the move prophecy won’t activate until the text prophecy is completely finished. Set the move prophecy to “move right” for “infinite” time.
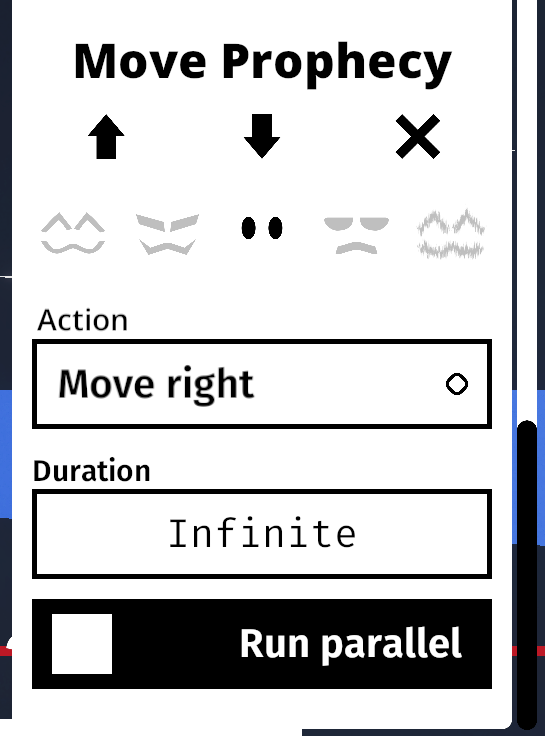
Since the move time is set to “Infinite,” Green will keep moving right indefinitely after the prophecy activates. Let’s try it out!

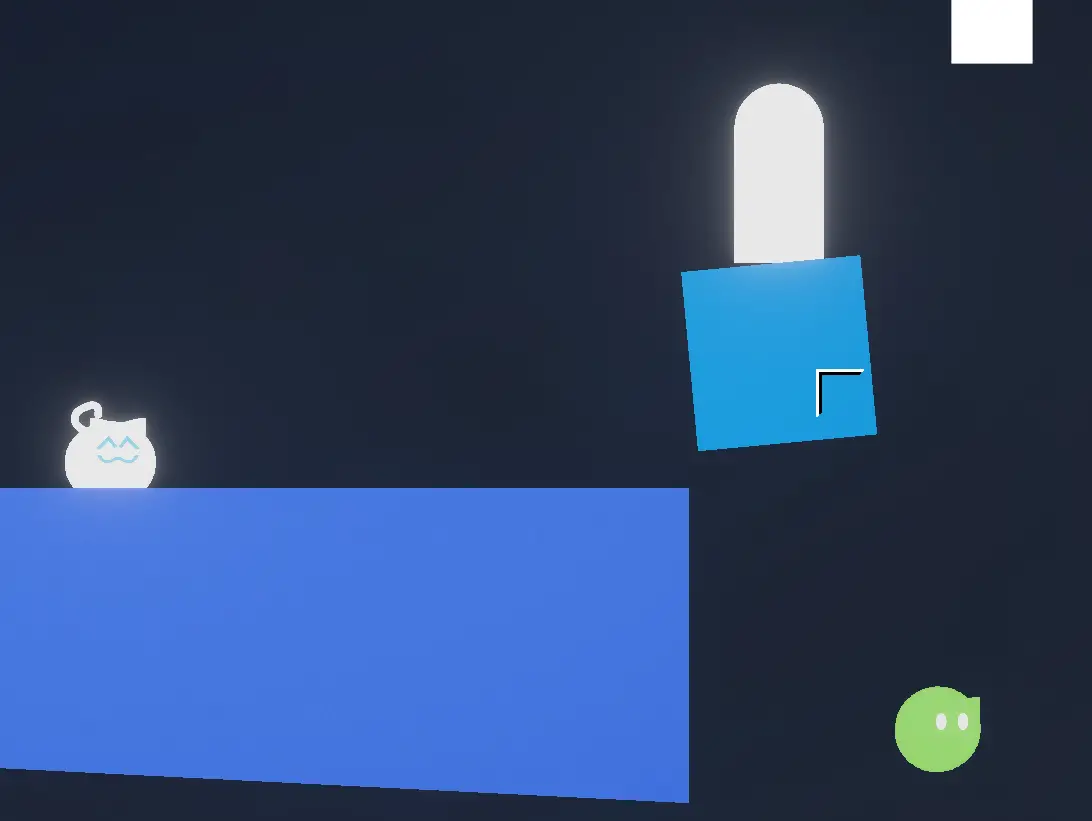
…Oh. Green falls off the room. Hmm… how do we fix this?
We could create another move prophecy to “jump” a certain amount of seconds after the first move prophecy, but that would be complicated and take quite a bit of time. Instead, we can use an NPC Action object. These objects act like a move prophecy, and can only be activated by NPCs.
NPC Action objects are located right next to the NPC on the Dock.

We can edit the NPC Action and set it to “Jump.” Because NPC Actions (just like prophets) are controlled by polymap, I made the NPC Action shape into a right triangle. This way, I know exactly when Green will touch the object and can control their jump.
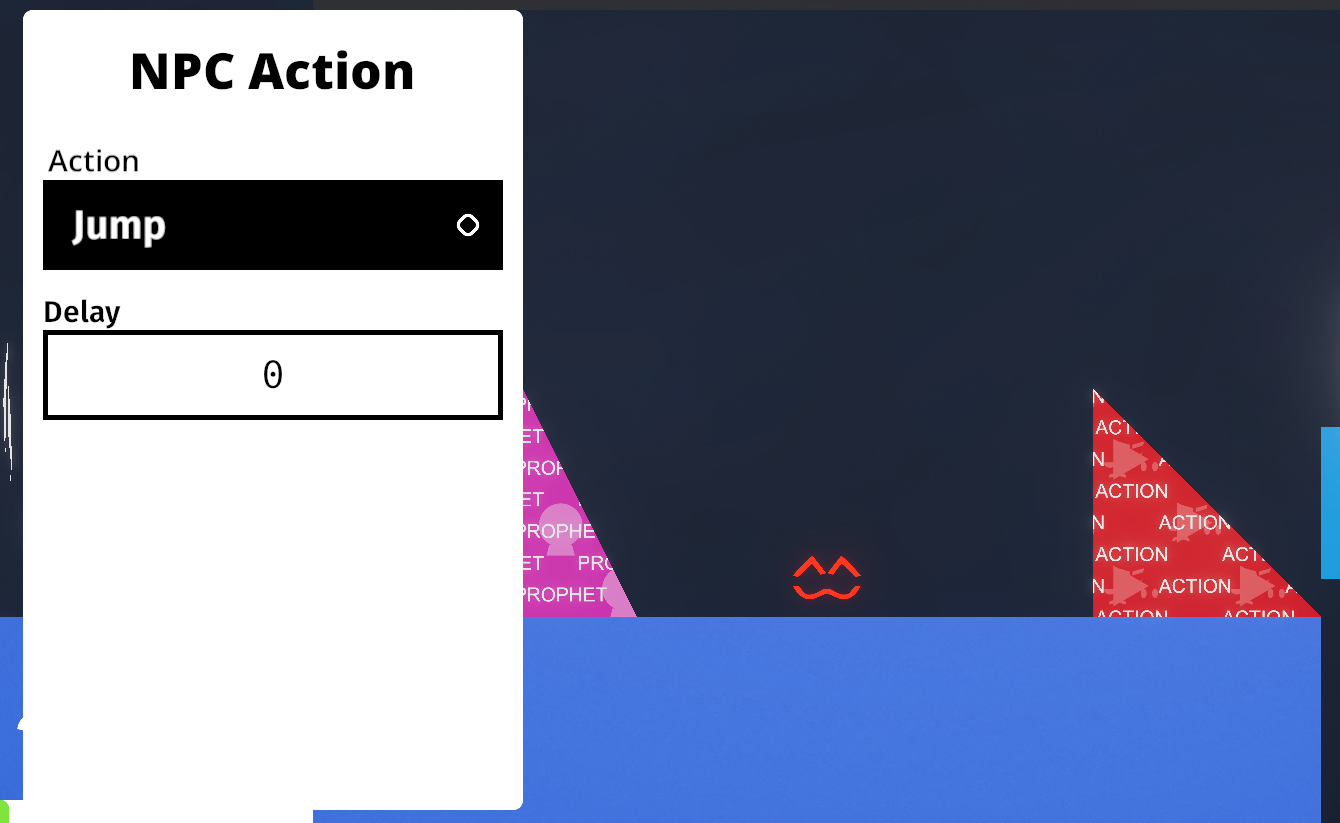
Voila! Green jumps right into the Door! Remember that when an NPC touches a door, they enter it, just like Lumi. However, NPCs don’t go onto the next room – you have to manually add them back.
Settings
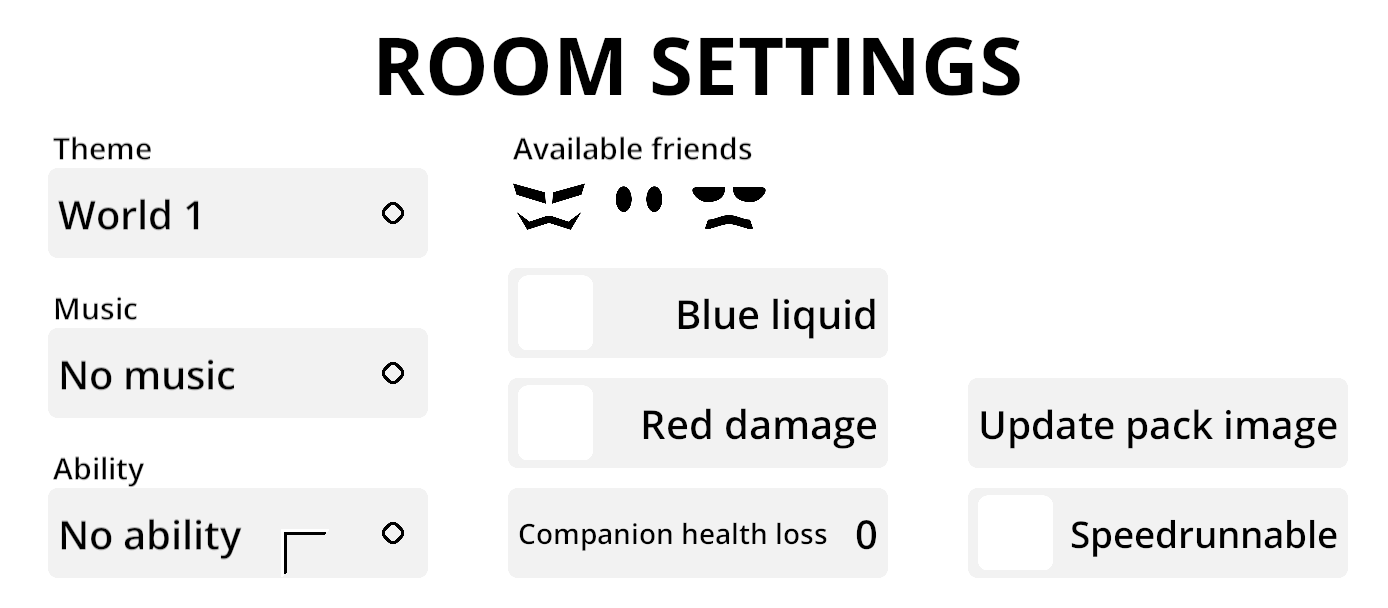
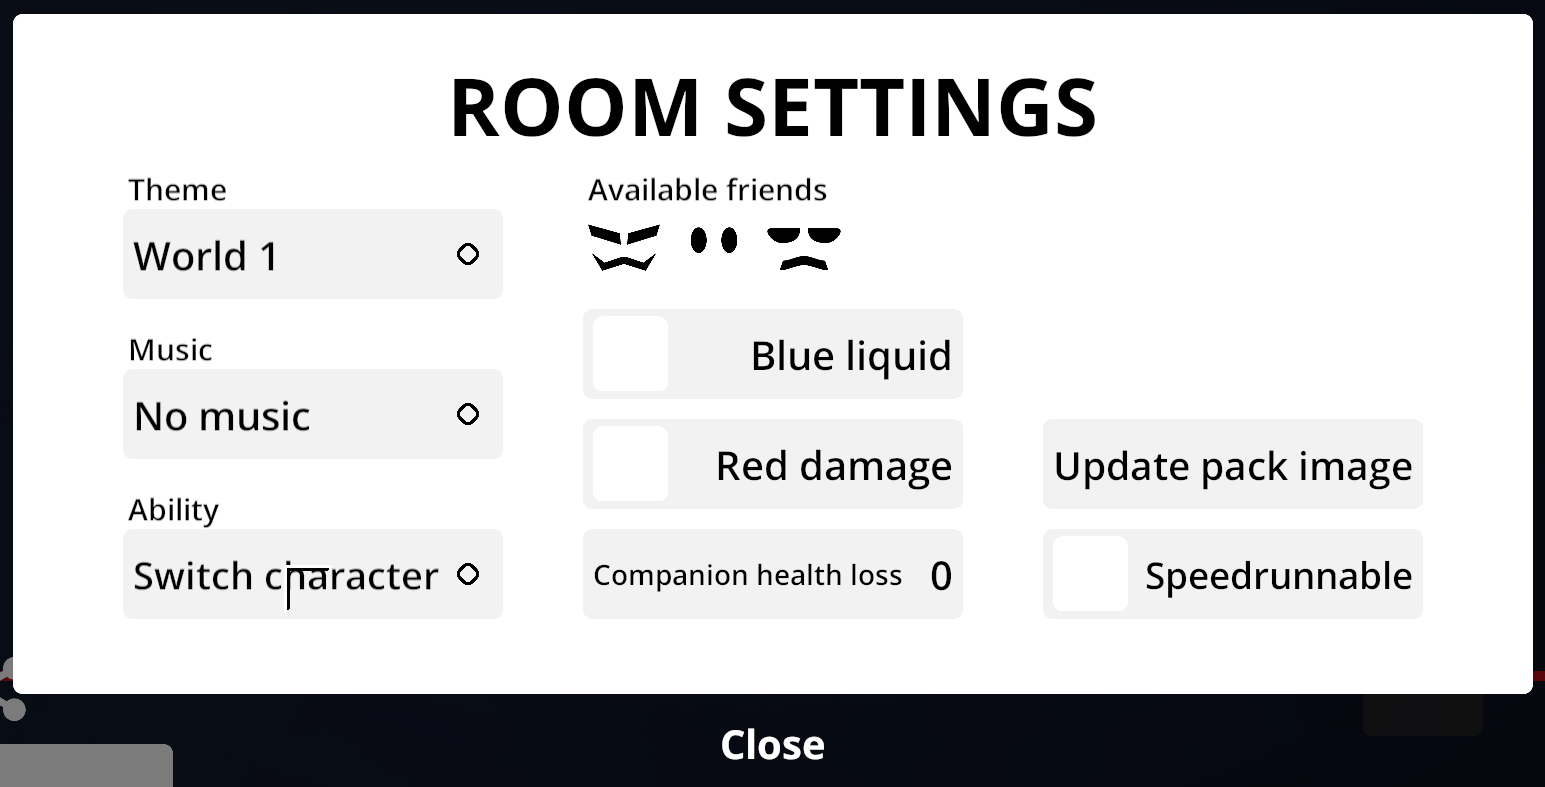
Before we continue, you might want to change some of the room settings. Click the cog on the right sidebar to access room settings. Not only settings for the individual room appear here – settings for your entire worldpack are changeable through this menu as well.

Settings for the specific room:
- Theme changes the room’s theme
- Music changes the room’s music – if two rooms have the same music, the music will continue playing when moving between the two rooms
- Ability changes the ability the player has upon entering the room
- Available Friends changes the friends that the player will be able to switch to when using the Switch Character ability
- Blue Liquid toggles whether Lumi turns blue when in liquid form – in the base game, this happens after World 10
- Red Damage toggles whether Lumi turns red when hurt – in the base game, this happens after World 11
- Companion Health Loss changes how fast the timer is for the Companion. At 0, the Companion can be used for as long as the player wants
Settings for the entire pack:
- Update Pack Image updates the thumbnail for the worldpack
- Speedrunnable toggles whether the pack is able to be speedrunned. In speedrun mode, all prophecies do not function
I recommend playing around with the theme and music for each room you make!
Friends
If you may remember, there is a special ability in World 7 of A Better Place – the ability to switch characters. Green, Blue, and Red all had different abilities that were used in-game. As one of players’ favorite abilities, we’ll add it to our pack.
I created a new room for this ability. Make sure to save Room 3 before creating a room, and then connecting the Door in Room 3 to this room. You may need to return to the “Making New Rooms” section of this guide if you need a refresher.

You may also choose to continue your current room and add this afterward. If you do that, you’ll want to add a Checkpoint, and you’ll need to add another Power Ring to give the Switch Characters ability to the player.
As I just mentioned in the last section, you can press the cog button on the right to open room settings. Here, we’ll want to set the ability to “Switch Characters” and make sure that all friends are enabled in “Available Friends.” If you want only one friend to be available to switch to, only enable that friend in the menu.
Green
Perhaps unsurprisingly, Green’s ability is the hardest to implement in the editor. First, place the item that you want to make Green able to control. In this case, I’ll use some spikes.

Select the item (press and hold on mobile or press E on PC). Here, you’ll want to toggle the item as “Active.” This switch makes it so you can customize the item and make it dynamic. Spikes, big spikes, platforms, and spinners all have this option.
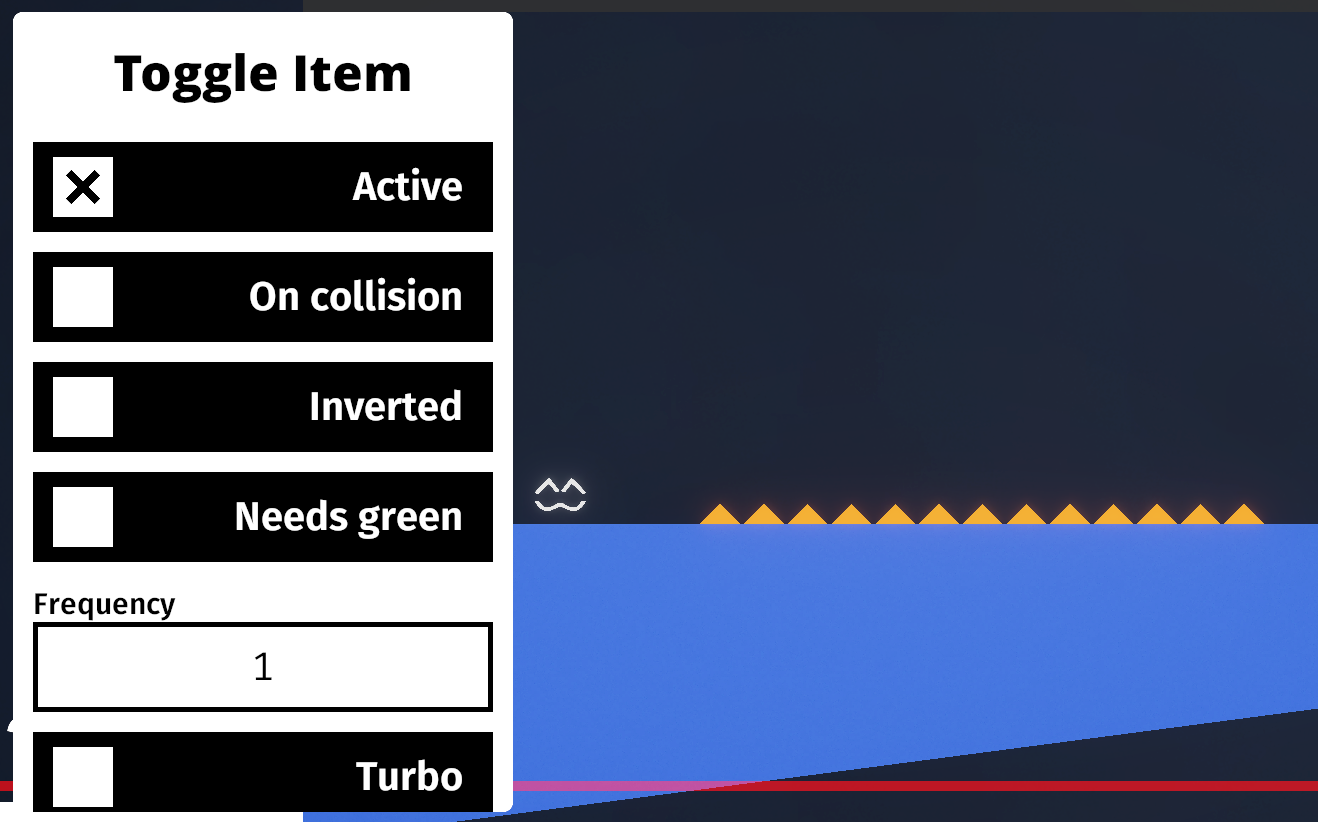
After setting the item as “Active,” you should see more options appear. You can experiment with these, but for our case we’ll need to activate “Needs Green.” This will make the spikes appear when you turn into liquid as Green.
If you press play immediately, you’ll see that this works opposite how we want it to – we want the spikes to disappear when we use Green’s ability! In this case, we’ll need to also enable “Inverted.” This means that instead of the Spikes appearing while using Green, they’ll disappear.
Now it works excellently!

Red
For Red, all we’ll need is one of his red dots. They’re found on the fourth row of the Dock.
Now simply place the dot in the room, and you’re good to go!
(I created another platform of ground separate from the default one by clicking the triangle on the first row of the Dock)

Blue
Lastly, Blue’s ability is to stop time, and we can make this happen using the “Turbo” setting on items. Many items have this option, but to make it simple, we’ll use either the Z Block or the Falling Block. Both of them are found on the second row.

Select the item you chose, and enable “Turbo.”

Try out your room! You should need all 3 cats in order to make it through!
Companion & Buttons
We’re not done with this room quite yet! We’ve implemented so many features into our pack, but our final one will be the hardest one yet. Don’t worry – if you’ve gotten this far, you’ll be able to do this just fine.
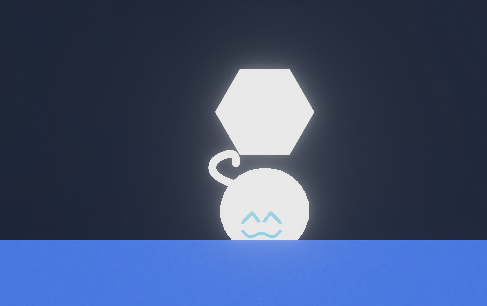
In World 8 of the base game Lumi meets the Companion (cube? square?). This being is the only character that we know for sure is not a cat. We’ll use the Companion for the last part of our room.
First, I created a new Power Ring and a Checkpoint afterward.
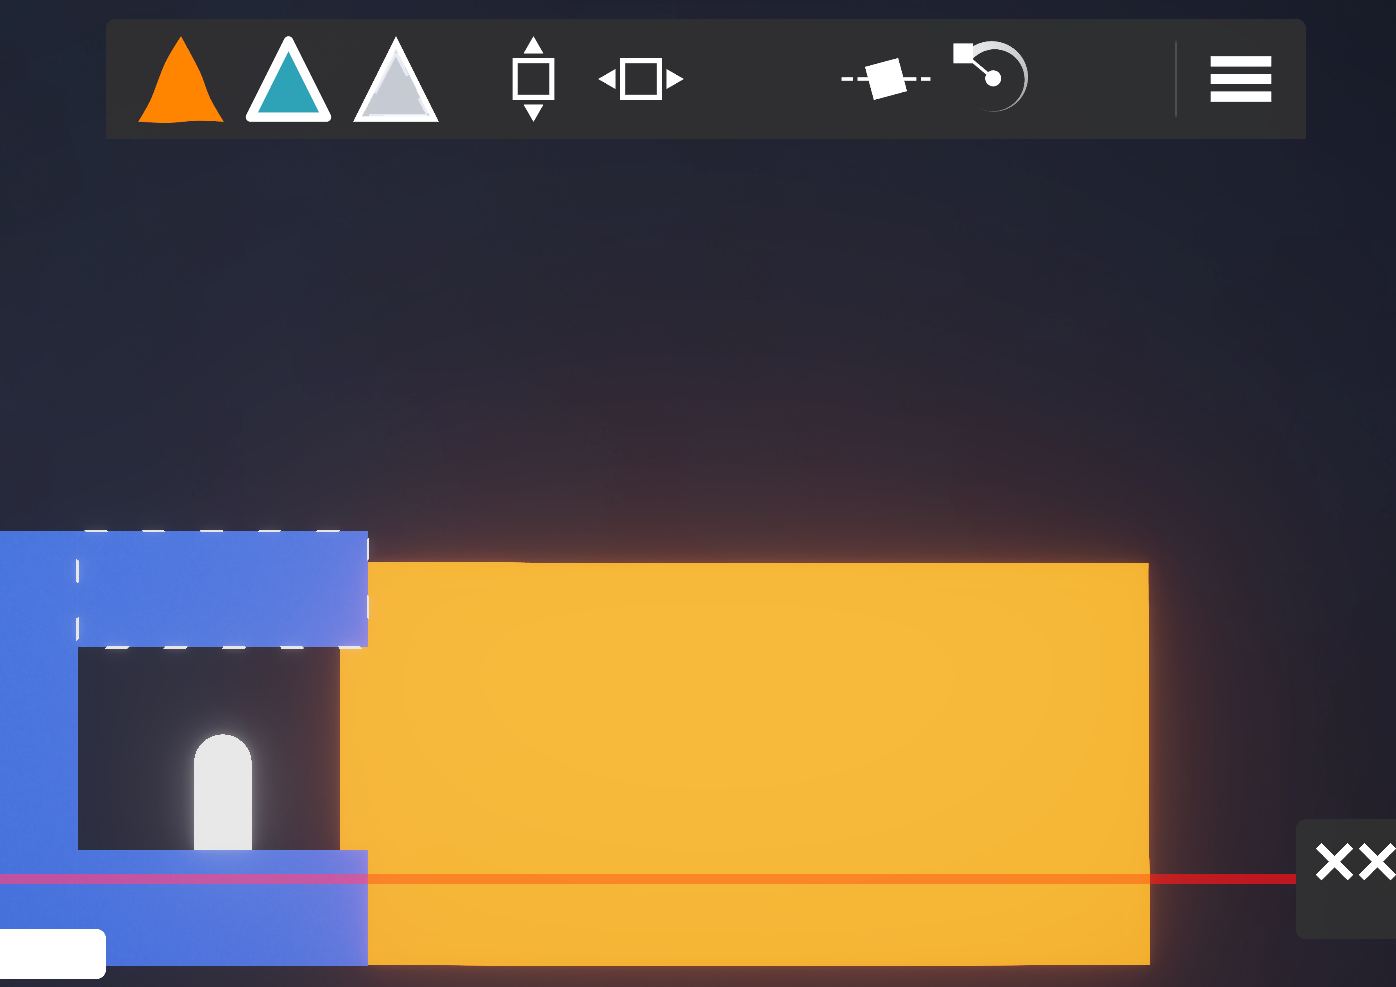
The Companion is usually used with Hidden Platforms. These act just like ground, but can be toggled on and off with buttons. They’re found on the fifth row of the Dock. This is also where you can find the buttons.

I created a Hidden Platform right next to our real platform. If it’s hidden, make sure it’s not hidden by selecting it and unclicking the “Hidden” option.

Afterward, you’ll want to go into the third row of the Dock and find the lava – just like the ground object, it’s a triangle, but is completely orange.
I made and shaped the lava into a position that lined up with the Hidden Platform. I also added a door beneath the Hidden Platform, and another ground object under the Door. Make sure that the player cannot reach the Door unless the Platform is hidden.
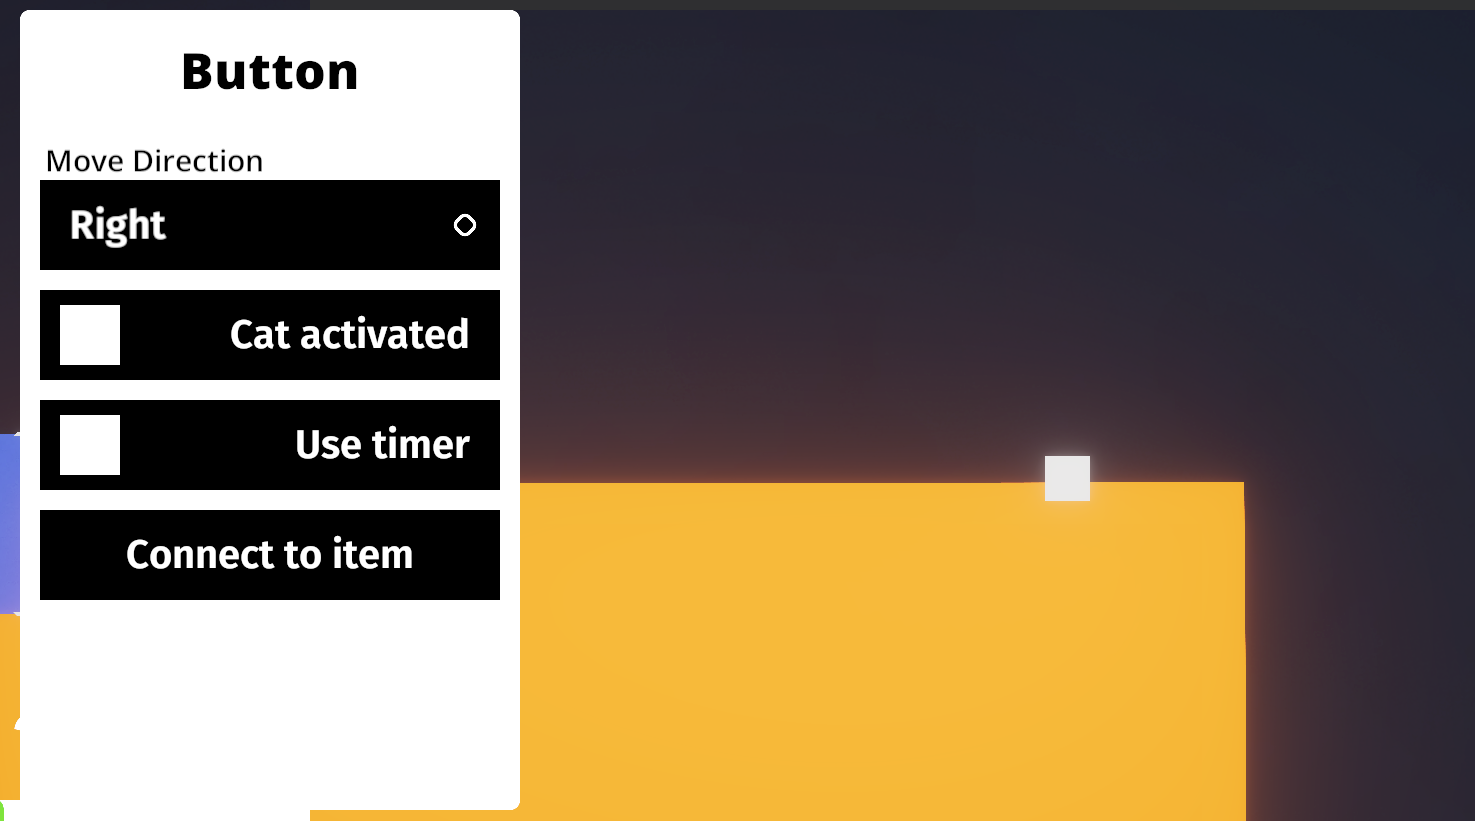
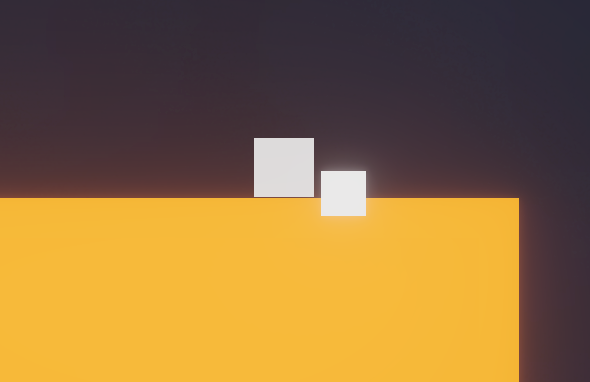
Add a button to the end of the lava so that only the Companion will be able to click it. Select the button and set its direction to the right. This means that the Companion will have to run into it from the left to click it.
Try it out!
…Uh oh. The button isn’t working.
Well, we still have to connect the button to the Hidden Platform.
Select the button, and click “Connect to ___.” Immediately after, click the Hidden Platform. It’s that easy – the button is now connected to the platform.
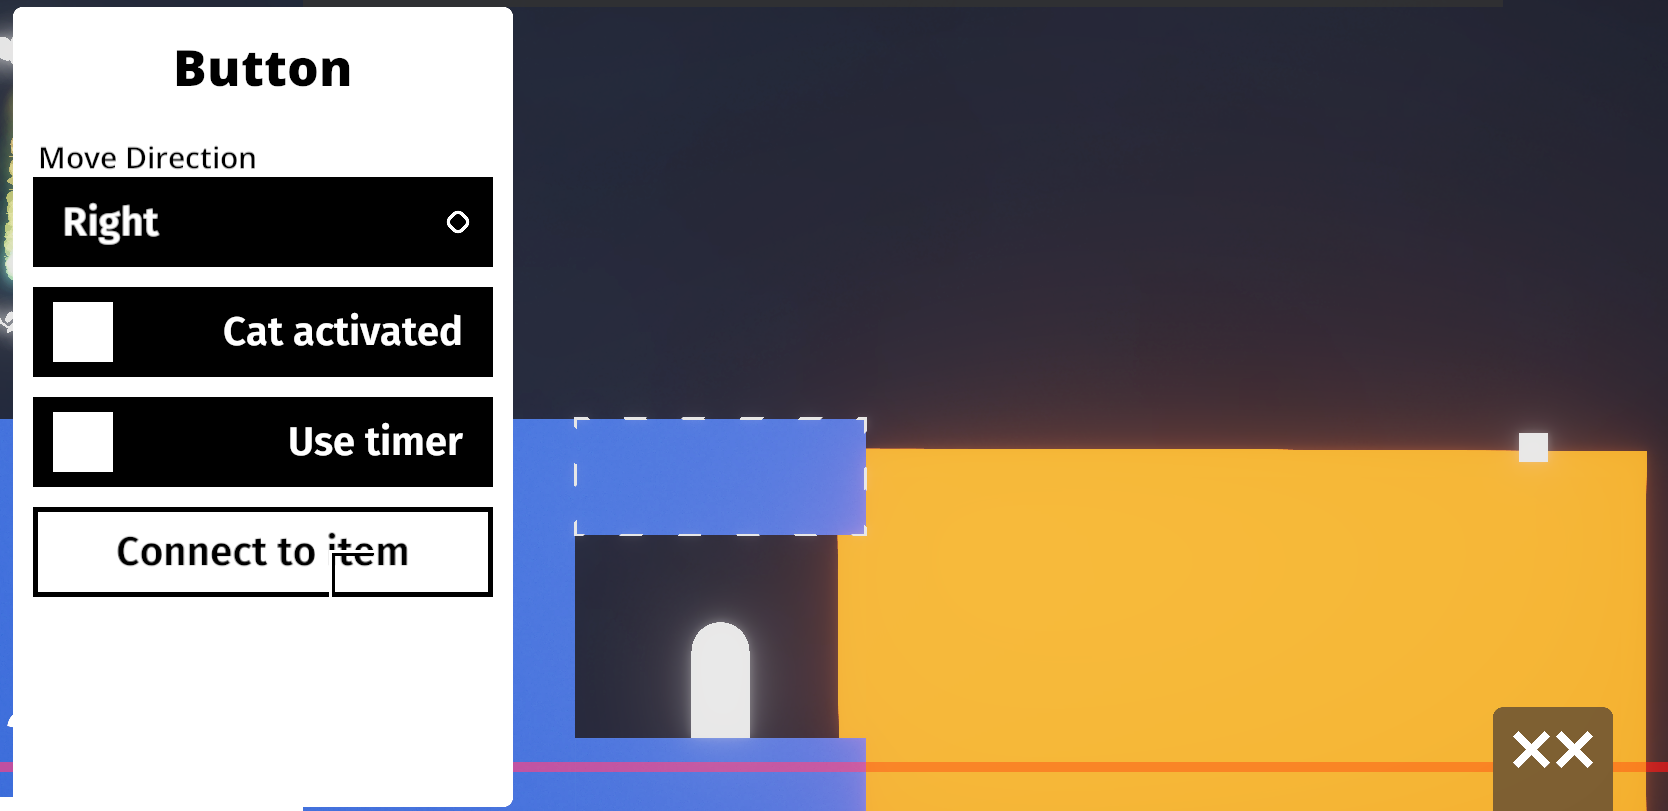
The button will now have a new menu – in this submenu you can control the settings of the Hidden Platform through the button. Anything you change here will change in the Hidden Platform when the button is pressed. Since we want the Hidden Platform to become hidden when the button is pressed, all we have to do is enable the “Hidden” property on the button.
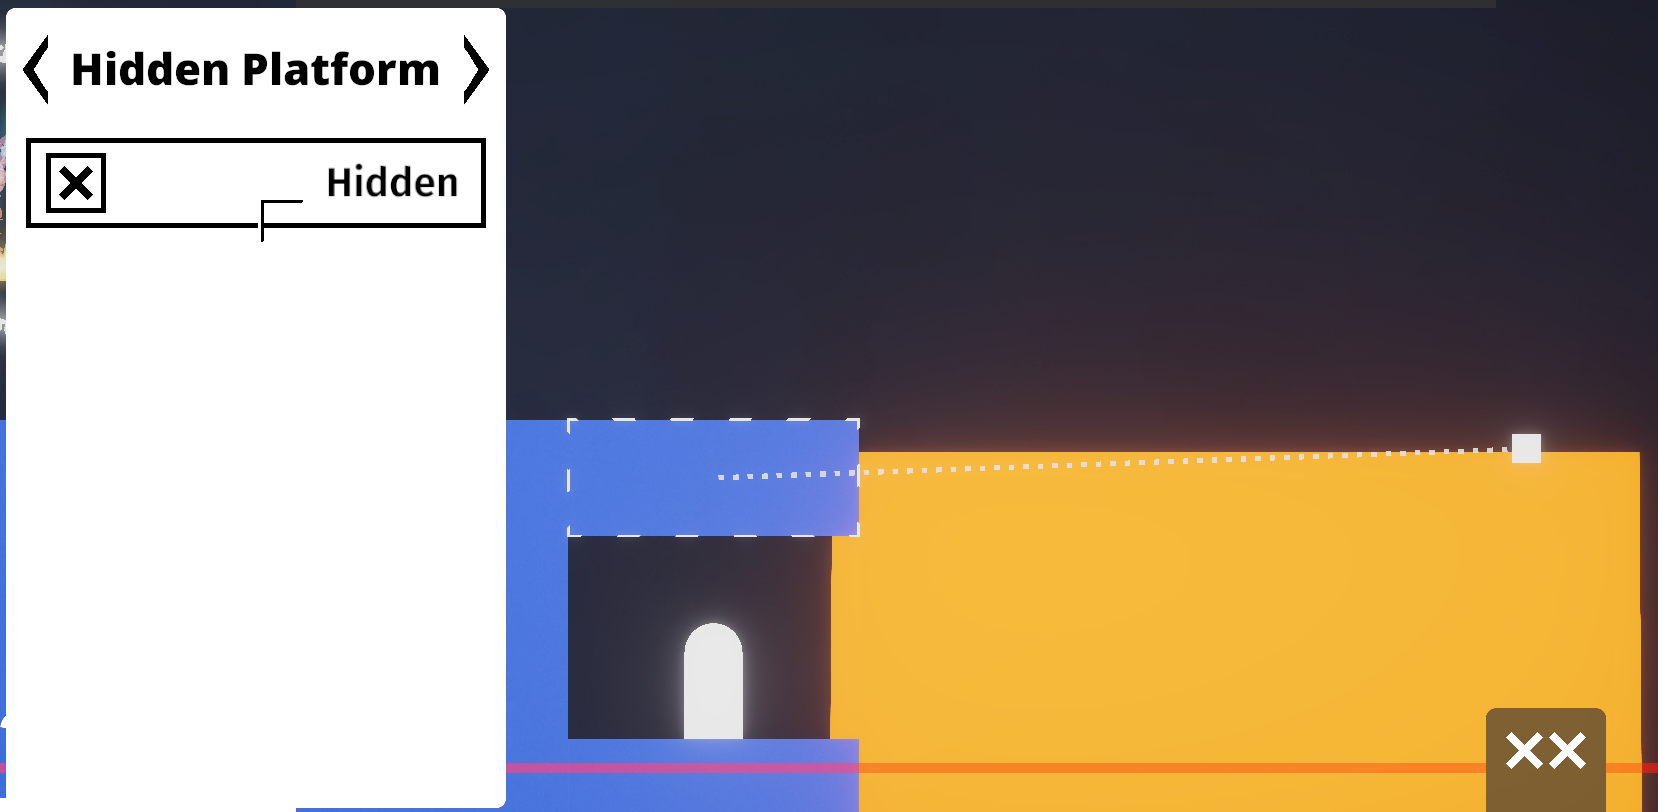
If you did everything right, the Companion will now click the button successfully, and Lumi will fall below the Platform, where the player can lead her to the door.

Other Important Things
Our pack is done, but I felt like I should mention a few other important items in the editor before we finish this guide.
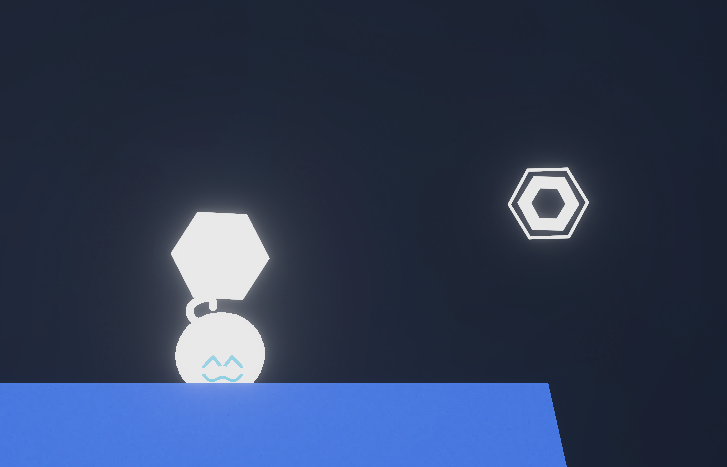
Hexagons
If you remember World 5, the player is able to carry and insert Hexagons into receivers. Hexagons and all Hexagon-related items are on the fifth row of the Dock.
If you’ve never worked with Hexagons, you may not how they operate.
Here’s how it works:
- Lumi can carry one Hexagon at a time
- Each Hexagon contains an item
- When the Hexagon is close enough to a Hexagon Receiver, it merges with the Receiver, and the item spawns
This means that instead of putting the item we want to spawn in the Receiver, we need to put it in the Hexagon itself. Just like the Door situation, this may be more complex at first, but opens up a lot more possibilities for packs.
Remember to go into room settings (via the cog button on the right sidebar) and set the ability to “Pickup” in order for Lumi to be able to pick up the Hexagons!
If you want to spawn a Door with a Hexagon, drag a Door onto the Hexagon.
Make sure that your finger or your cursor is touching the Hexagon when you let go!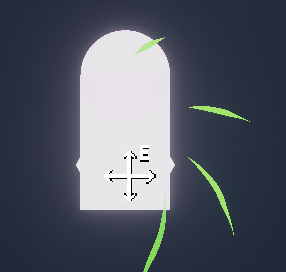
If you select a Hexagon, you’ll be able to edit the properties of the item inside.
Hexagon Receivers are right next to the Hexagons on the Dock. Add one in, and watch the magic happen!

Tracks
Tracks are very useful in the editor, for transporting items, presenting new problems or situations, or just as pack decoration. Just Another Pack made using tracks for decoration popular, beginning a bit of a decoration revolution within packs.

Tracks’ main purpose are to move items along the track. Items can either move backwards after reaching the end of the track, or teleport back to the beginning. This can be changed in the options menu of the tracks.
To add an item to a track, simply drag and drop the item onto the track. Just like with Hexagons, make sure that your finger or cursor is touching the track when you let go!

The speed and direction of the track are alterable as well.

Orbits

If tracks seemed useful, then orbits are on another level. The crazy tricks people have used orbits for is insane. For example, remember that one spinning room in A Light in the Shadows? It was able to be recreated in the editor using orbits! Check out the Academy of Gimmicks pack to see a lot of these orbit tricks.
At their core, orbits spin an object around them. Because of their flexibility and range, and the fact that you can attach multiple items to orbits, including more orbits, and can attach orbits to tracks, these can become very useful.
Just like tracks, drag and drop an object onto the orbit to attach it.
You’ve now got a spinning item!

Releasing your Pack
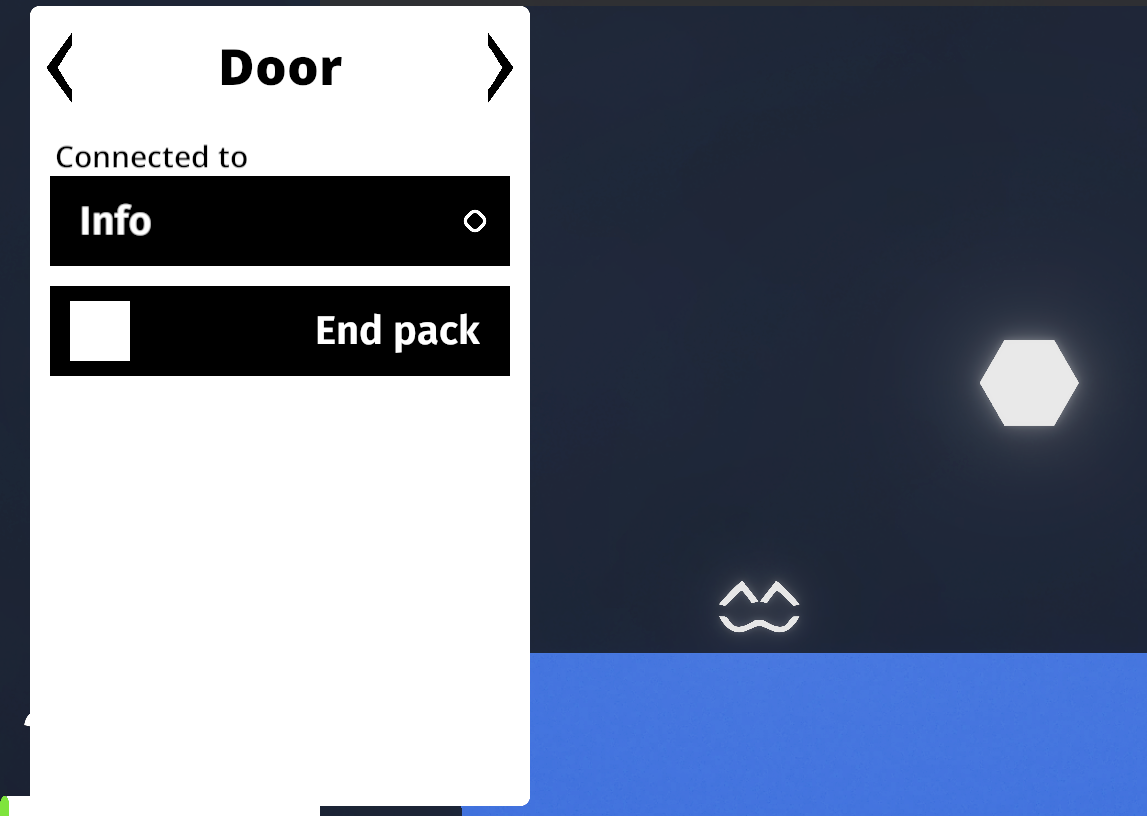
The time has come to finally release our pack! To end the pack, select the Door in your final room, and toggle “End pack.”

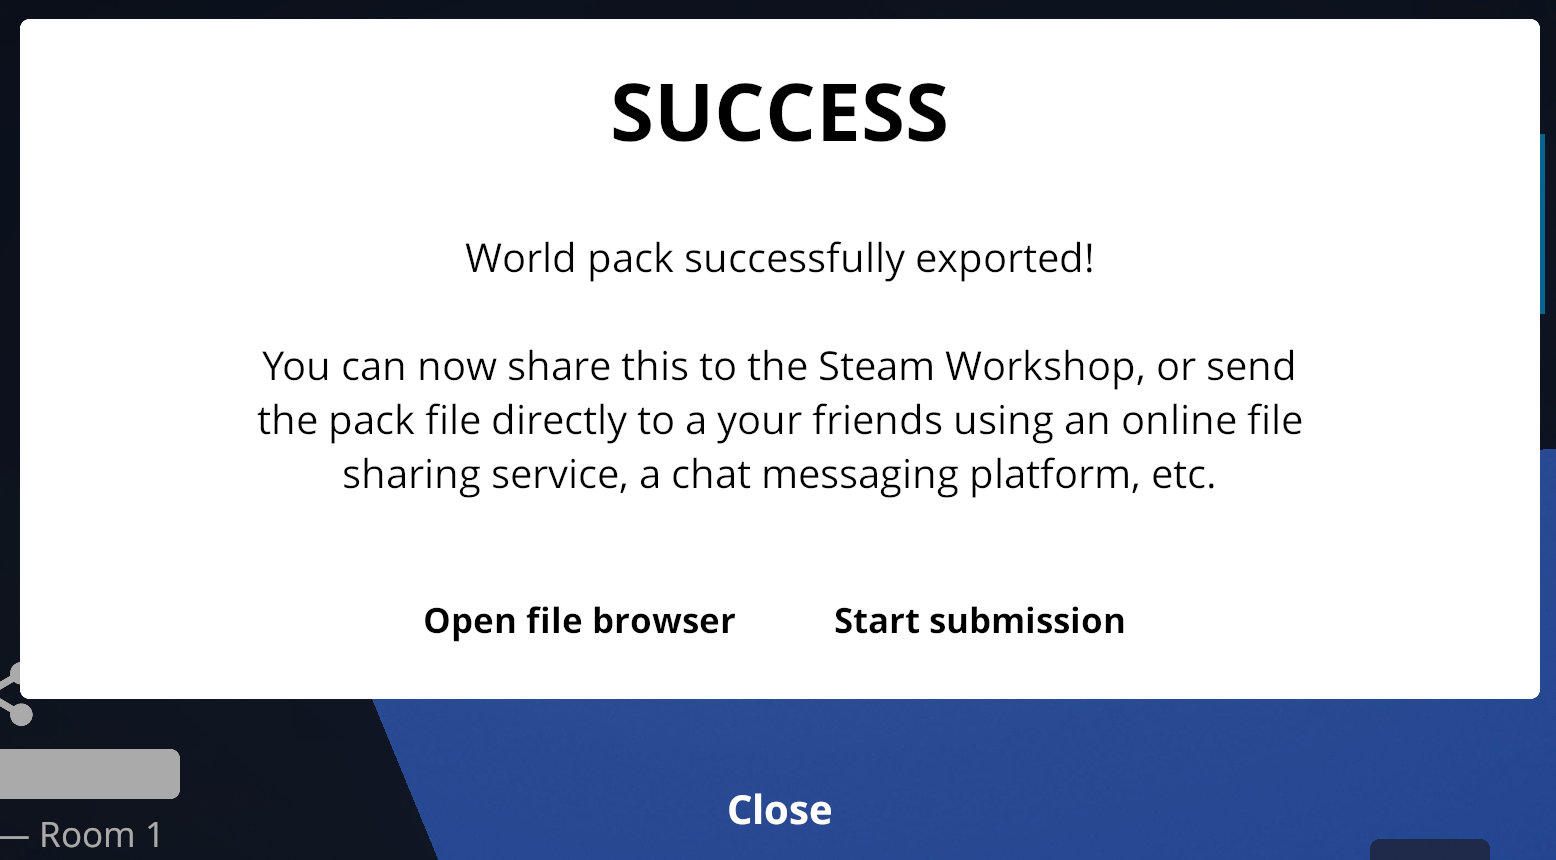
To export the pack, we’ll need to do a full playtest from beginning to end. Click the Share button on the bottom left to begin this playtest.
When you’re done with the playtest, the pack will export!
- If you’re on mobile, click the button to share your pack. From there, I recommend to download the file, instead of immediately sending it to a text message or Discord channel. That way, you can work on the pack’s description before uploading it.
- If you’re on PC, click the button to open your file browser. In the window that opens, find your pack. Here you can copy and paste it to any folder you want, or upload it to a messaging or Discord channel.
…Now where do I put it
Congratulations! You just finished your first Cats are Liquid worldpack, and I’m sure you’ll go on to create many more.