This guide describes how to obtain most (more under Info) badges for Calamity Reef.
Lighthouse Locations
I Knew He Was Annoying
Kill the Prognosticar before entering the lighthouse
This badge is about the Prognosticar who is the second mission objective, not the one in front of the light house.
Deadly View
Kill a guard with a crewmate who is positioned on the lighthouse
I’m actually not sure if this would work with anyone other than Teresa.
Small Crew, Big Plans
No Need For Bloodshed
Don’t attack or kill anyone
This one is… weird. There is a Prognosticar right in front of the ship, which, at least for me, has only moved by himself after I killed most guards around him.
One way to get around this problem would be if you sacrifice one of your team members who get’s stunned by the Prognosticar, which makes you able to steal the ship from right under his nose. Aside from that, you can try to use John, raising alarm by getting spotted and hiding in the Belowm hoping that the Prognosticar is going to look for around for him, leaving his position.
No Iudex Were Harmed During This Mission
Don’t attack any Iudex
There are 2 Iudexes looking directly at the mission objective. Take 2 crewmates with you, so you can distract both of them
Gaëlle’s Letter (Ch. 1)
Cannoness Ready!
Shoot a cannon and kill at least 2 guards
Near your objective is cannon with 2 guards permanently standing in front of it. If you wait a little for the third guard walking by, you can also unlock the Piercing Shot badge.
Suleidy is a good pick for most missions, so if you decide to take her with you, this will become a walk in the park.
Let’s Not All Go There
Only one crewmate is allowed to enter the deck of the Brine Razor
Careful, basically every piece of wood that is/was part of the Brine Razor here counts. I recommend Suleidy, John or Pinkus for this. If you want to go safe, also take Teresa in your team for her Ashen/Iron Judgement skill as support.
Toya’s Perfection (Ch. 2)
Blades Won’t Do
Always kill Sam Bellamy with a firearm
Firearm means only pistols. I haven’t tried Teresa’s Iron Judgement, but when you kill all guards around your objective, you can easily just use pistols.
Clear Target
Don’t kill anyone except Sam Bellamy
I’ve done this even without knocking guards out, so I’m not sure if this would count into this. But with that way, it’s quite a hard badge to get. If you want to do it like this as well, Suleidy is basically mandatory because you need her Cover Seeds, and Wander Dust is also going to be very helpful.
If you got this badge with knocking guards out, please let me know in the comments!
Water-Shy
Don’t touch any water
This is a little tricky for the first half of the mission, since your first objective is near the half shipwreck with water everywhere around it. But if you manage to do it, the rest of the mission is a walk in the park, regarding this badge.
If you want to be absolutely safe, take Gaëlle with you, shoot Toya over the water parts and afterwards pull him back into her Kanol.
Quentin’s Hunt
What Else Is He Going To Do
Quentin is not allowed to use any skill other than his Treasure Rod
As soon as you know the route, i.e. where your objectives are going to be, you see that you will not meet many guards. They can easily be taken out or just distracted with your 2 other team members.
If you choose to only distract them, you can get all badges in a single playthrough.
No Need For Bloodshed
Don’t attack or kill anyone
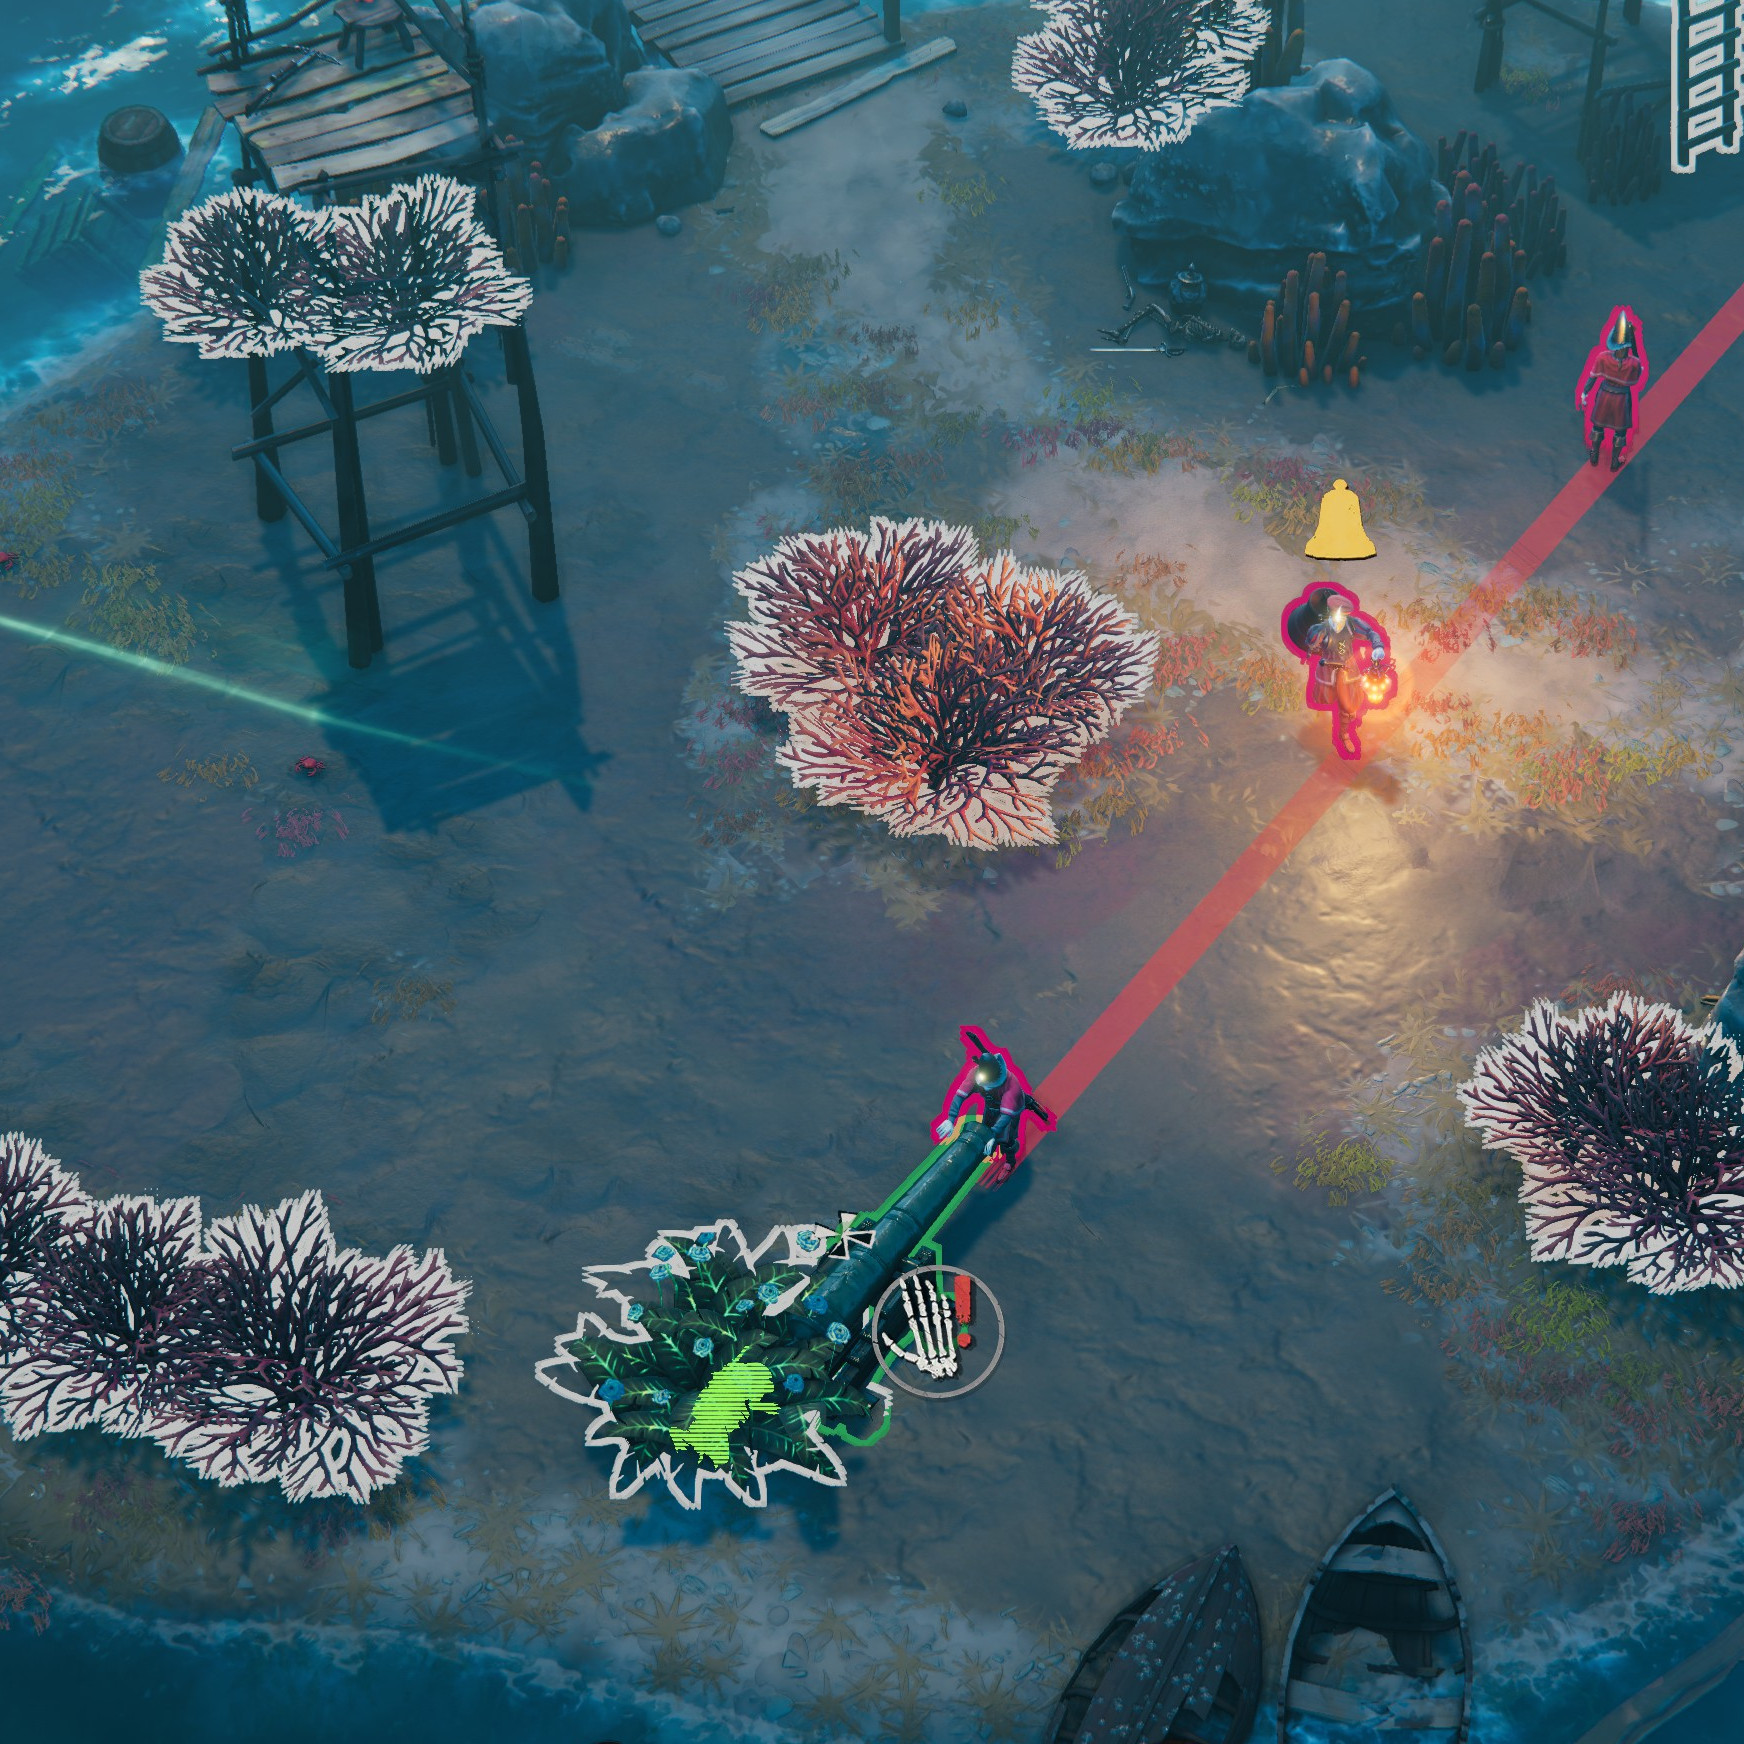
The only tricky part here is the first objective, because there are 3 guards right next to the chest. I recommend using Gaëlle and Suleidy. Instead of walking, shoot Suleidy where you on a good spot, use Cover Seeds, then shoot Quentin into the bush and use Treasure Rod to get Gaëlle.
If you do this consistenly, you can get all badges in one playthrough.
Firekeeper
Don’t extinguish any lights
Remember that this also counts for guards carrying lamps. If you still kill one, don’t walk over/near them because you might extinguish the light then.
The good thing is, there aren’t actually many lights that would need to be extinguished, except 2 guards carrying lamps, but there are also quite easy ways to just avoid them.
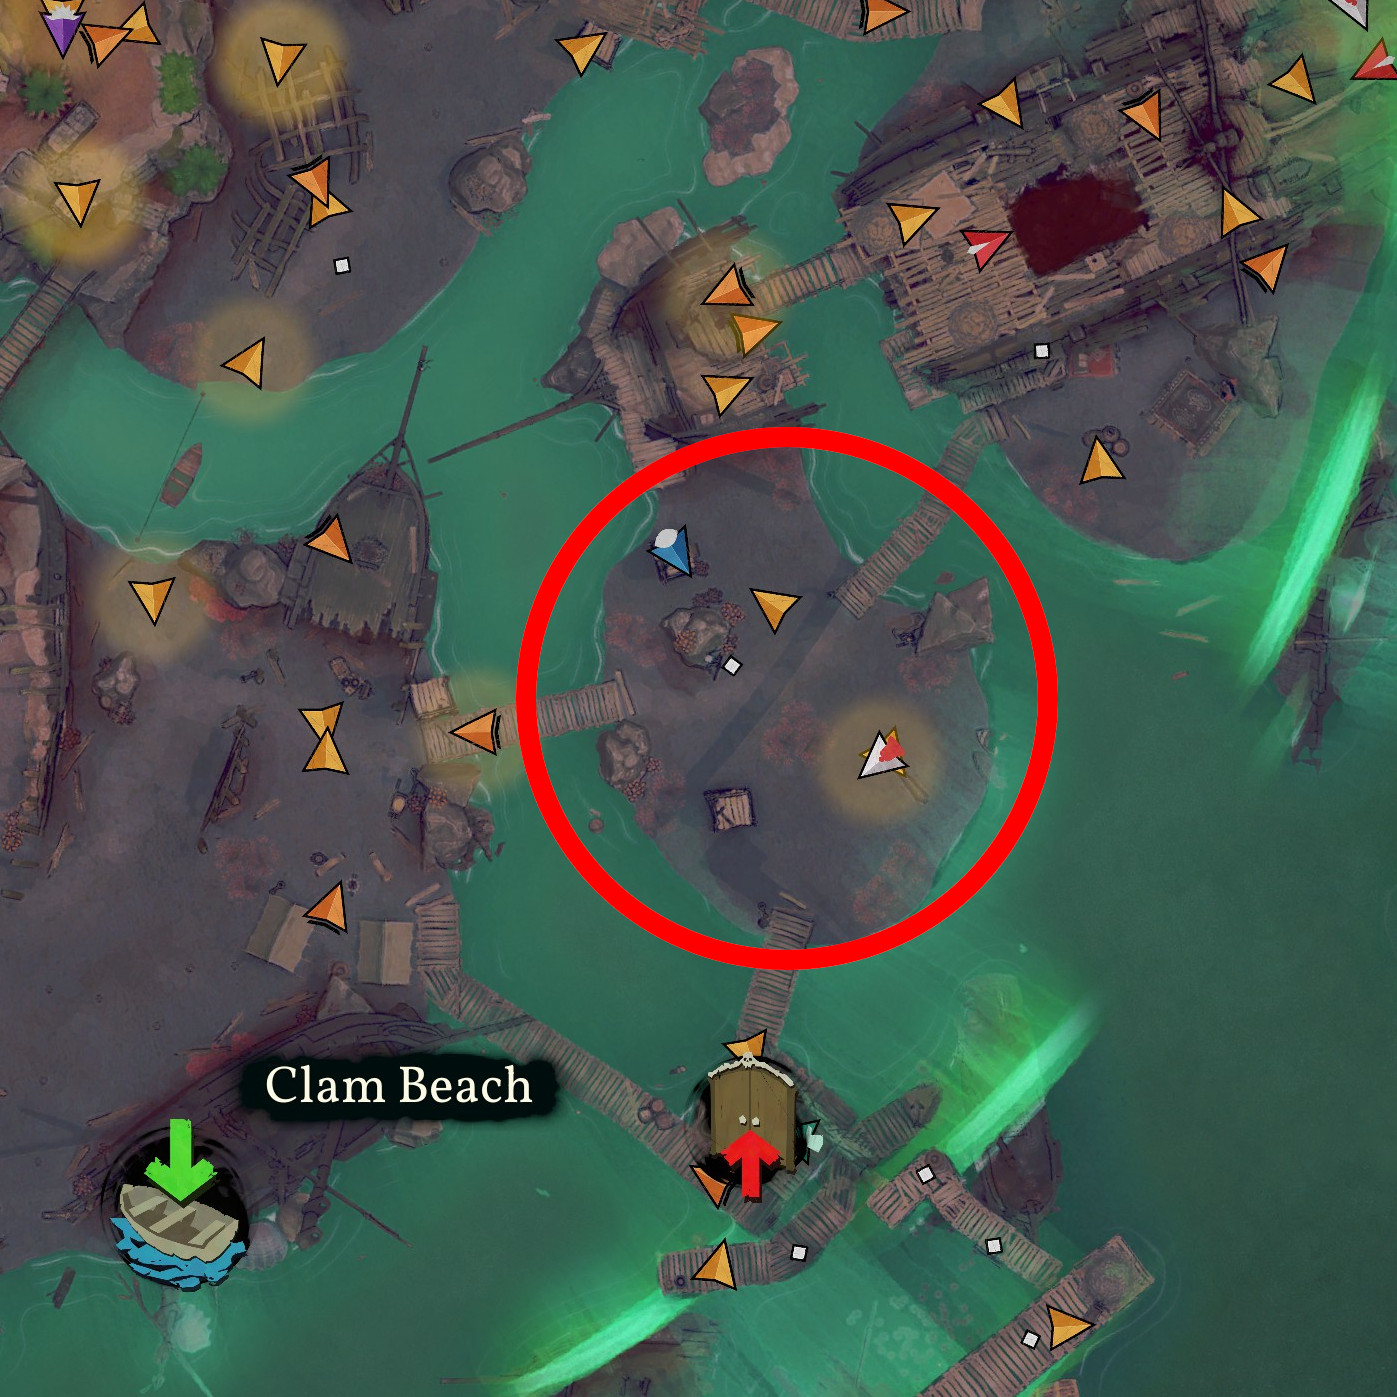
Grounded
No crewmate may move higher then the lowest level
Gladly, less than half of the map is neccessary for this mission.
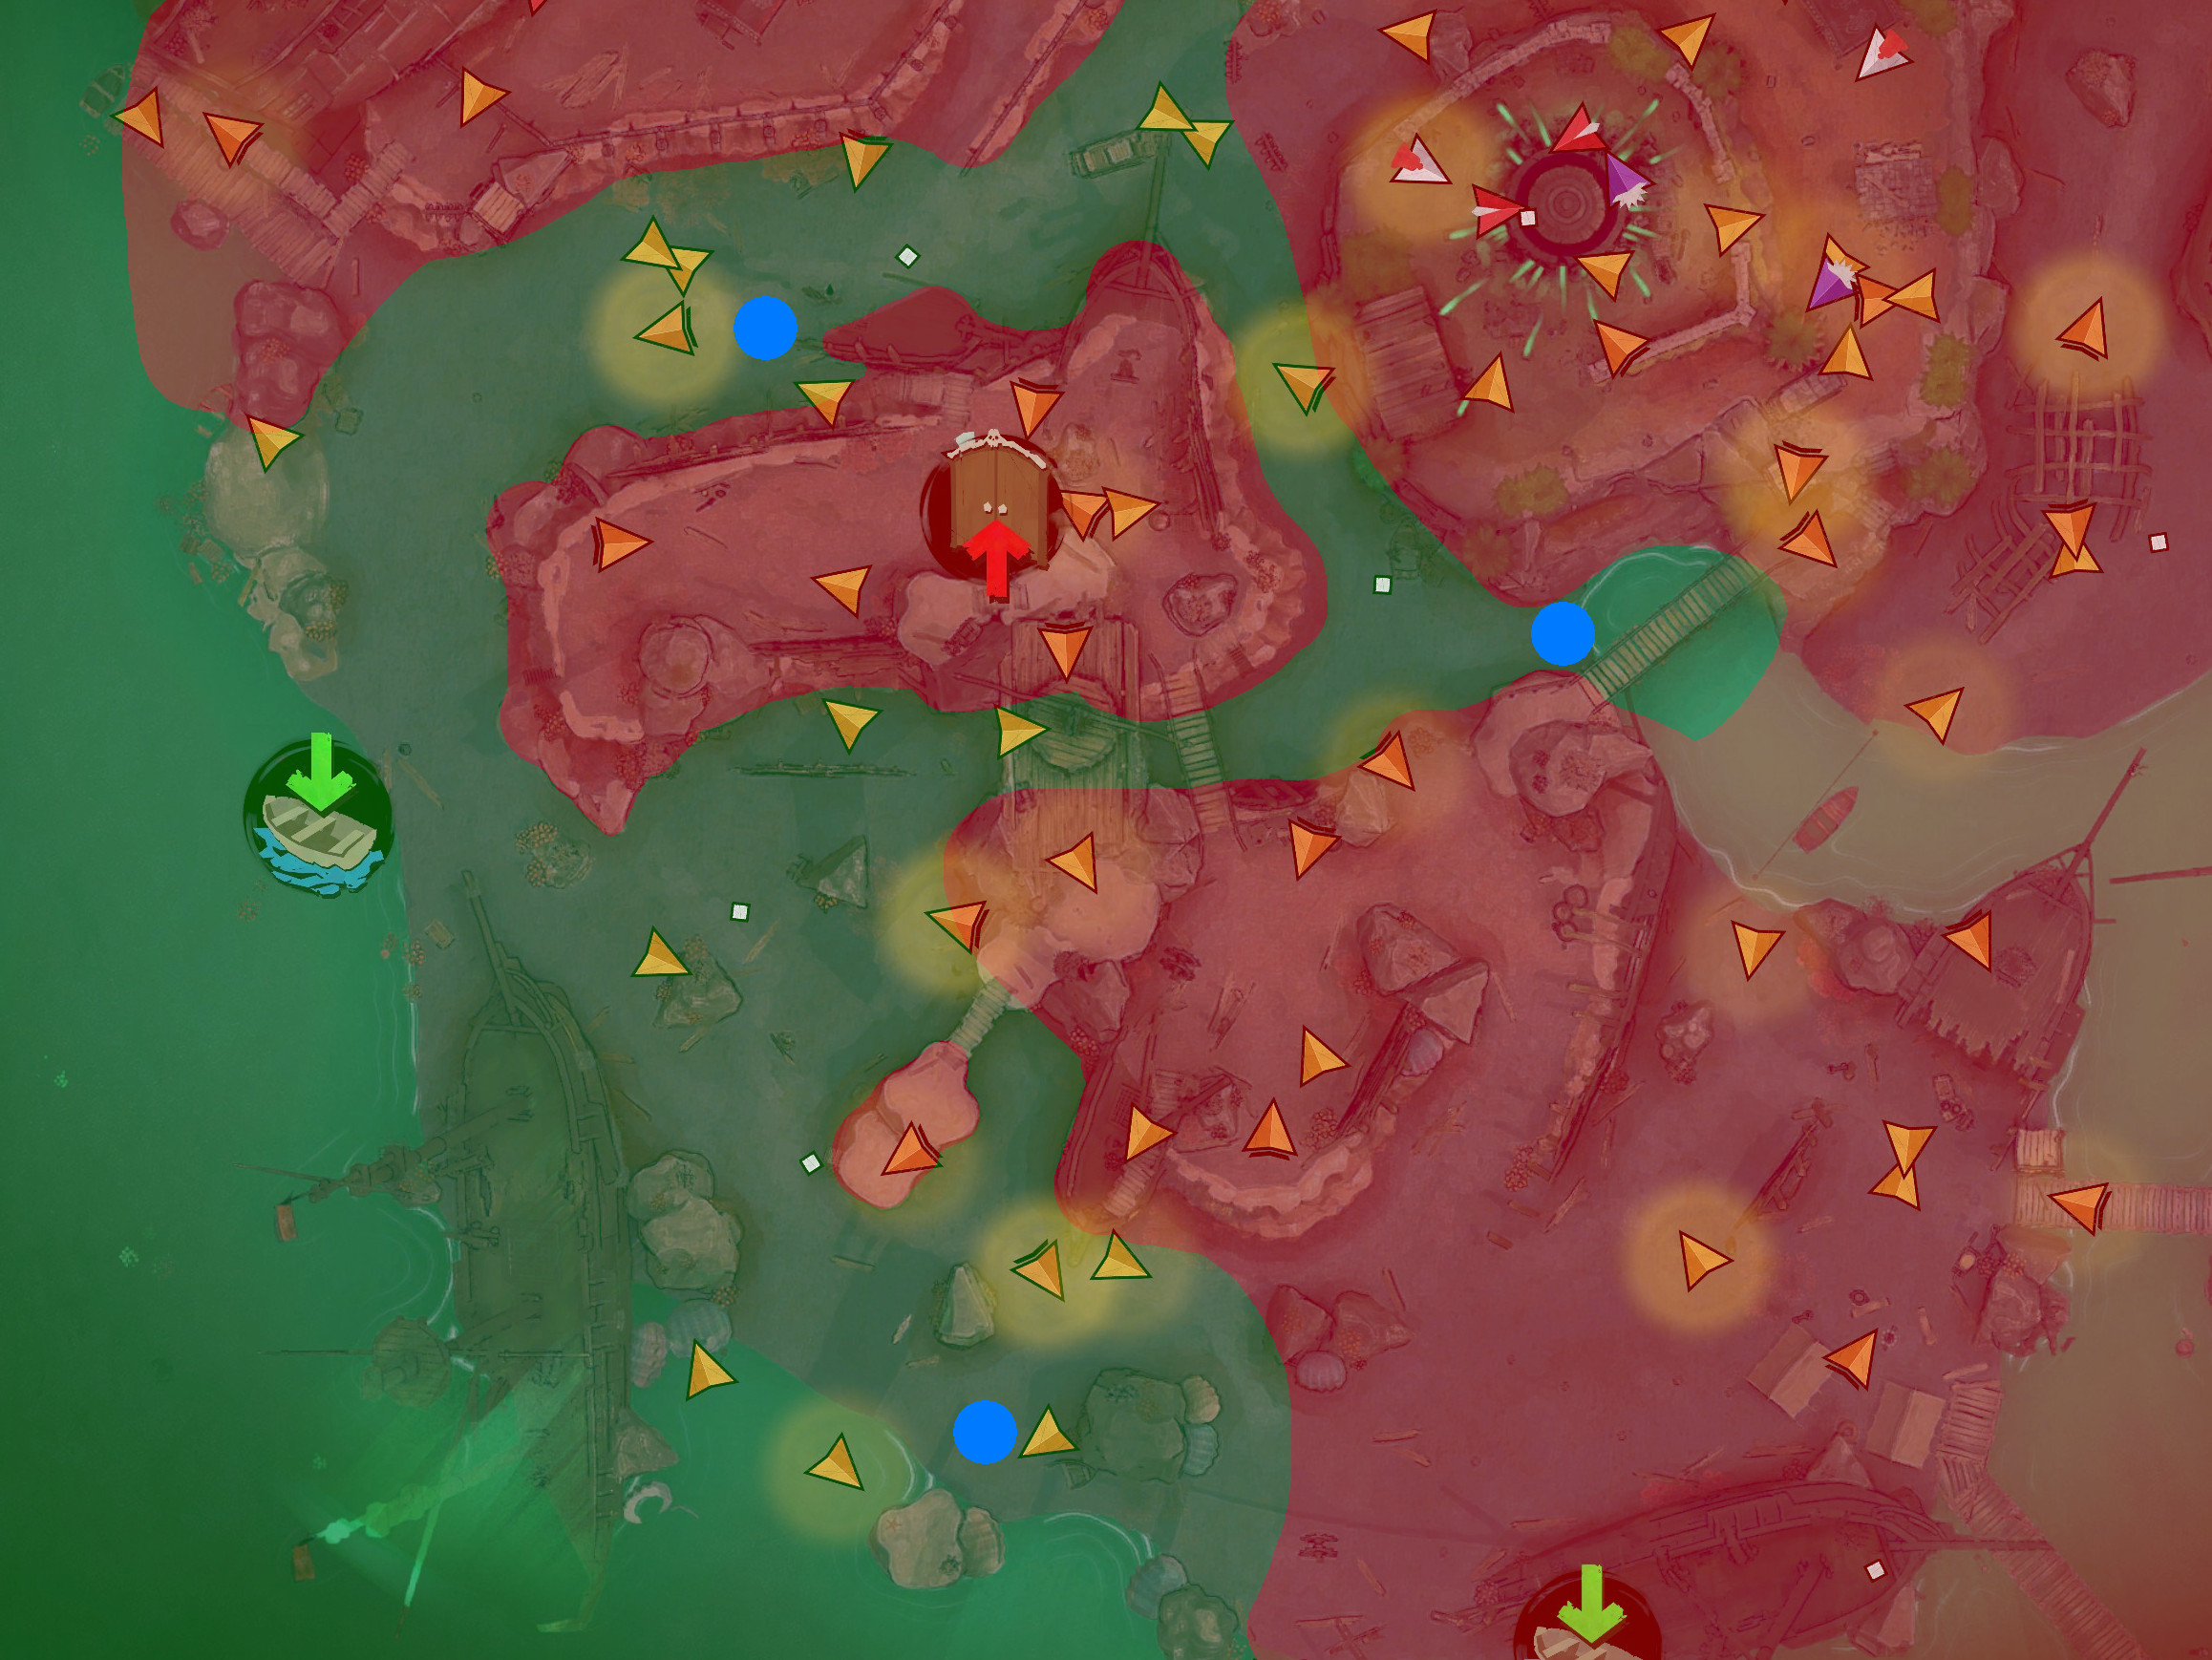
- Green: Area you’re allowed to move on
- Red: Opposite, don’t go here (or just not needed for the mission)
- Blue: Mission objectives