A complete and simple guide on how to properly implement custom thumbnails for texture packs and music packs that will definitely allow your content to stand out on the workshop.
Introduction
Have you ever scrolled the workshop and noticed that some texture packs look different and don’t simply utilize the editor generated preview and instead have a custom makeover? Or a music pack that grabs your attention without the generated title text as a thumbnail? Ever wondered how it’s possible when the game doesn’t give you an option to do it when uploading?
It’s not as complex of a process as you may think, and is about as straightforward as creating a custom level thumbnail with only a couple extra steps. Without any further ado, let’s get right into it.
Preparation
Now the process is essentially the exact same for texture packs and music packs but I’ll mainly be using the texture pack process as an example (any differences will be noted).
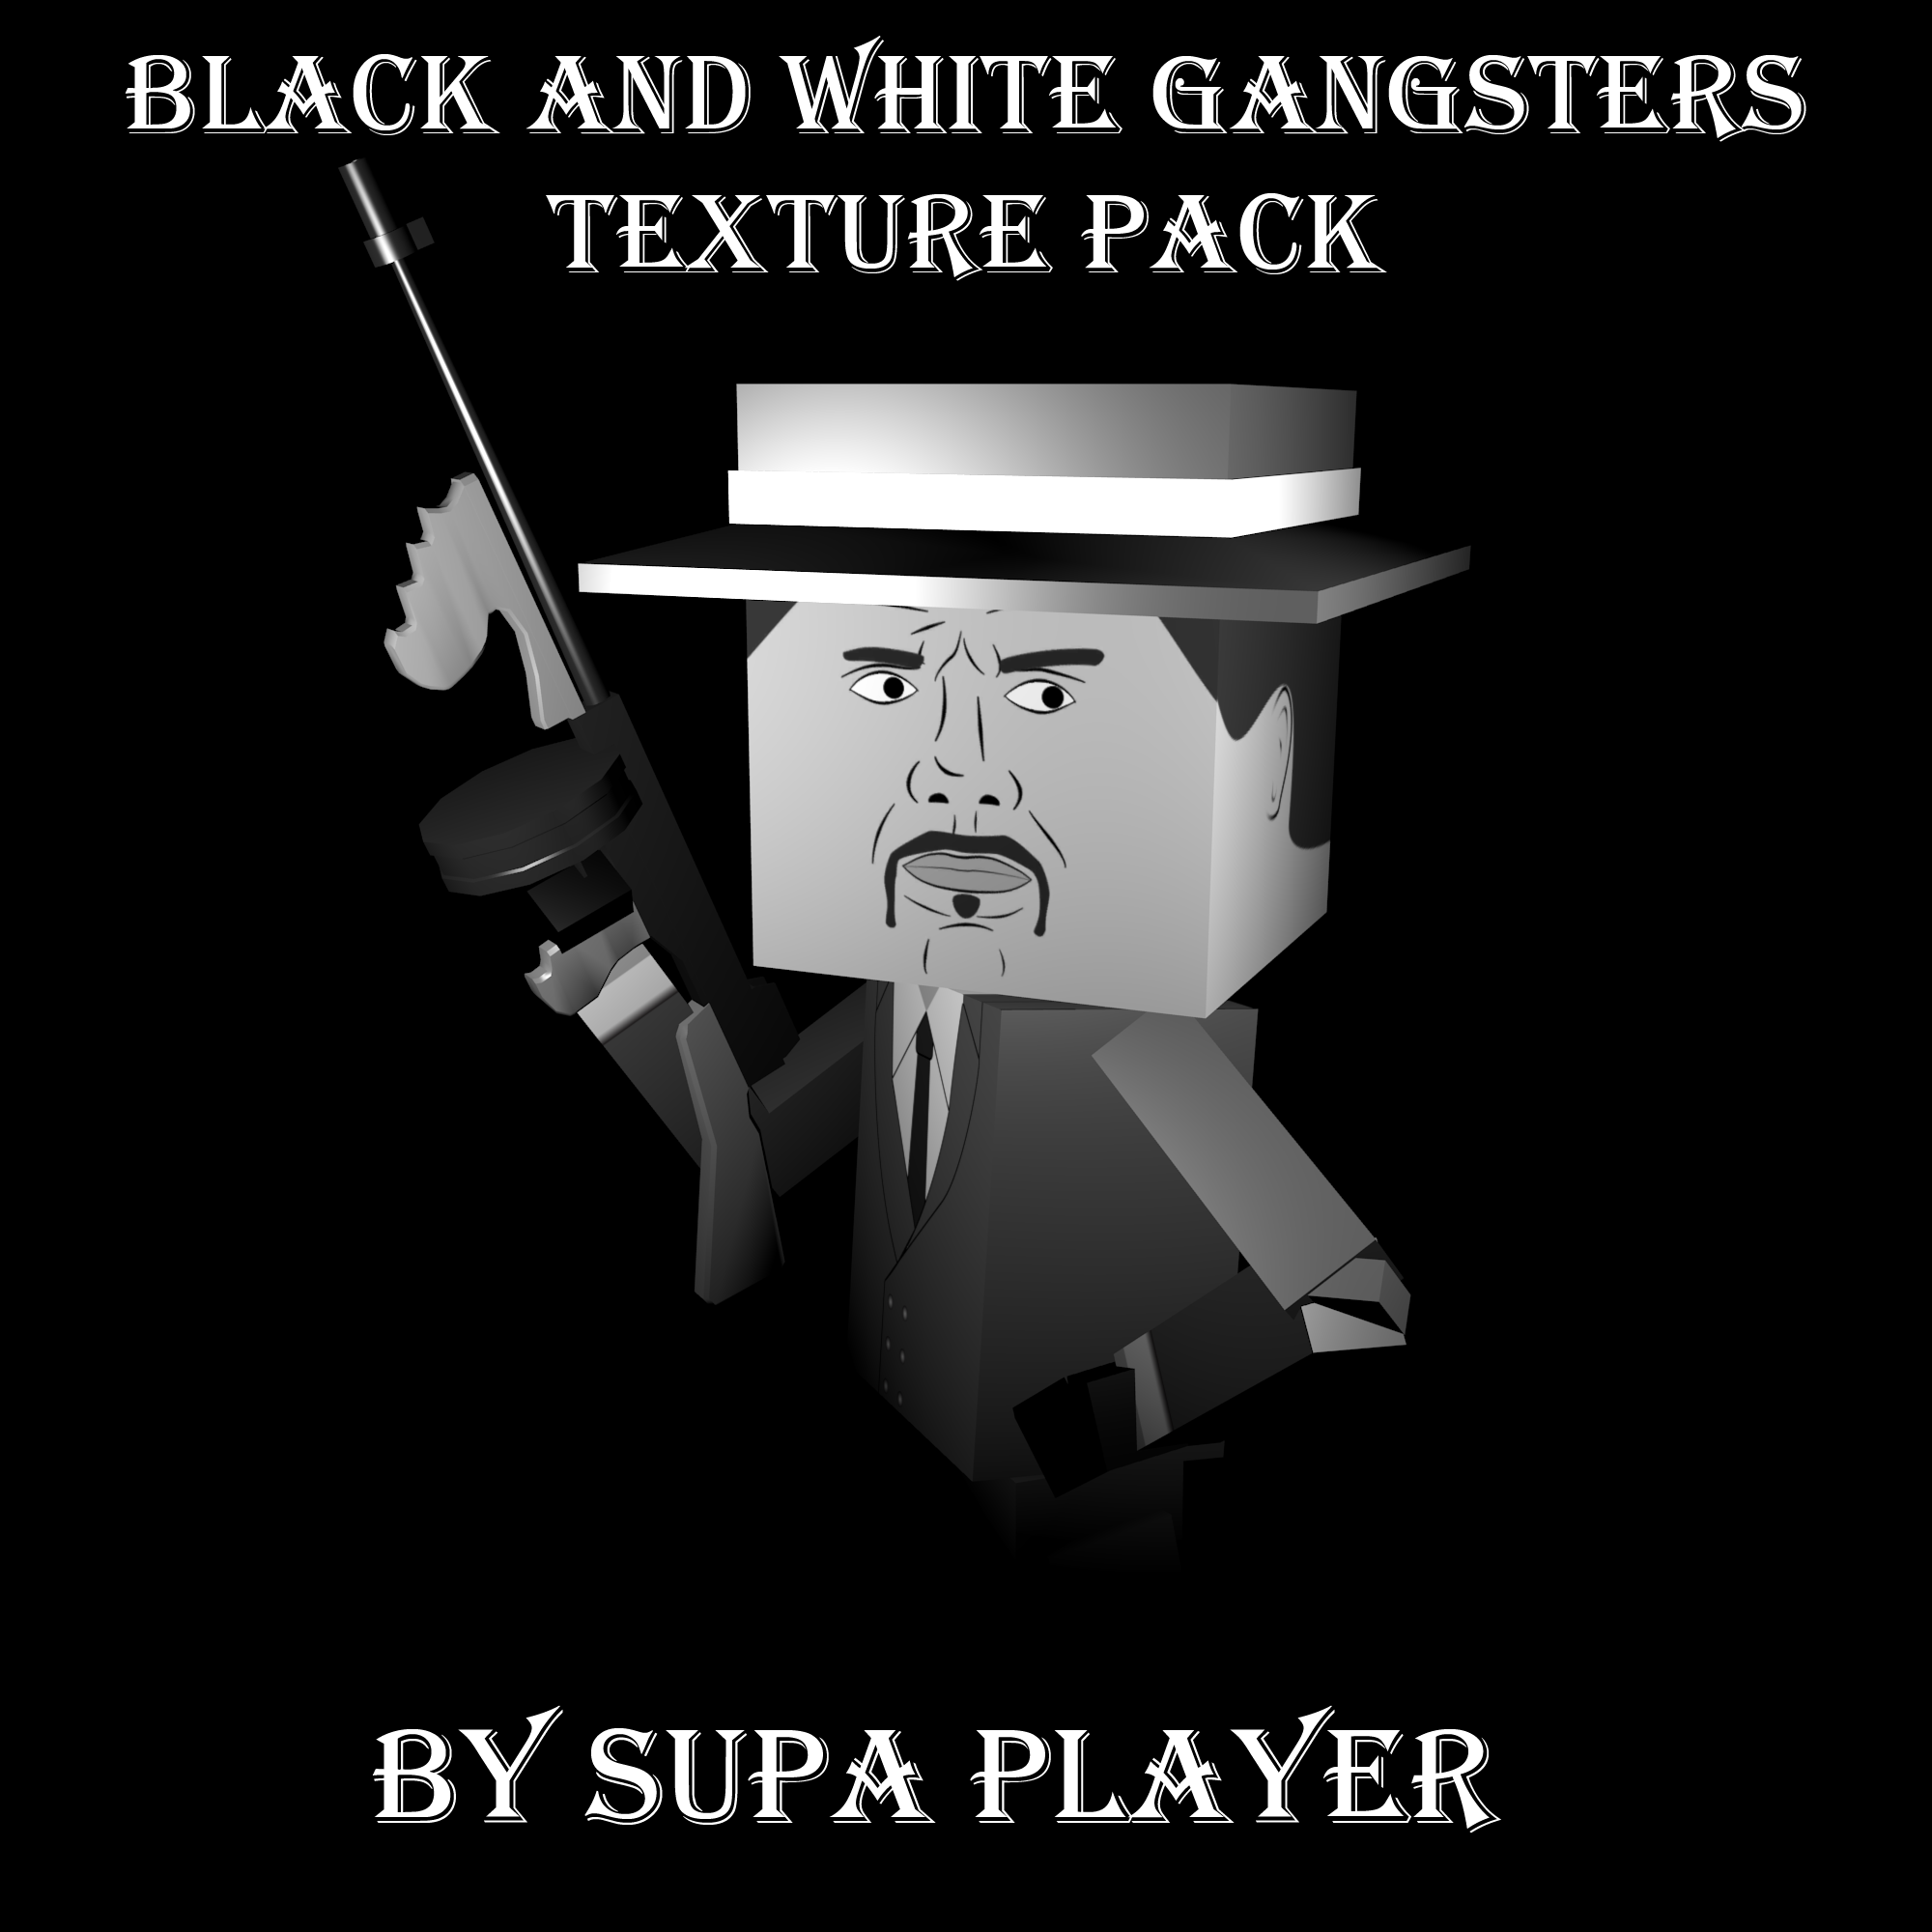
We have our texture pack thumbnail all prepared here, edited and ready to go. It is of a square orientation and does not have an extreme resolution for a smooth upload process. This particular example image is something I created for a texture pack involved in a previous mapmaker contest.
Now, we need to load Paint the Town Red and enter the texture editor. We cannot add the thumbnail file to the game yet as it will be overloaded anytime we create a new texture pack by the game’s default generated thumbnail.
In the Editor
When you are in the texture editor/music editor, open up all of the textures/tracks you want to include when uploading your pack. Then hit the upload button (don’t actually upload the pack yet) and you should see a preview of your pack. It will look something like this:
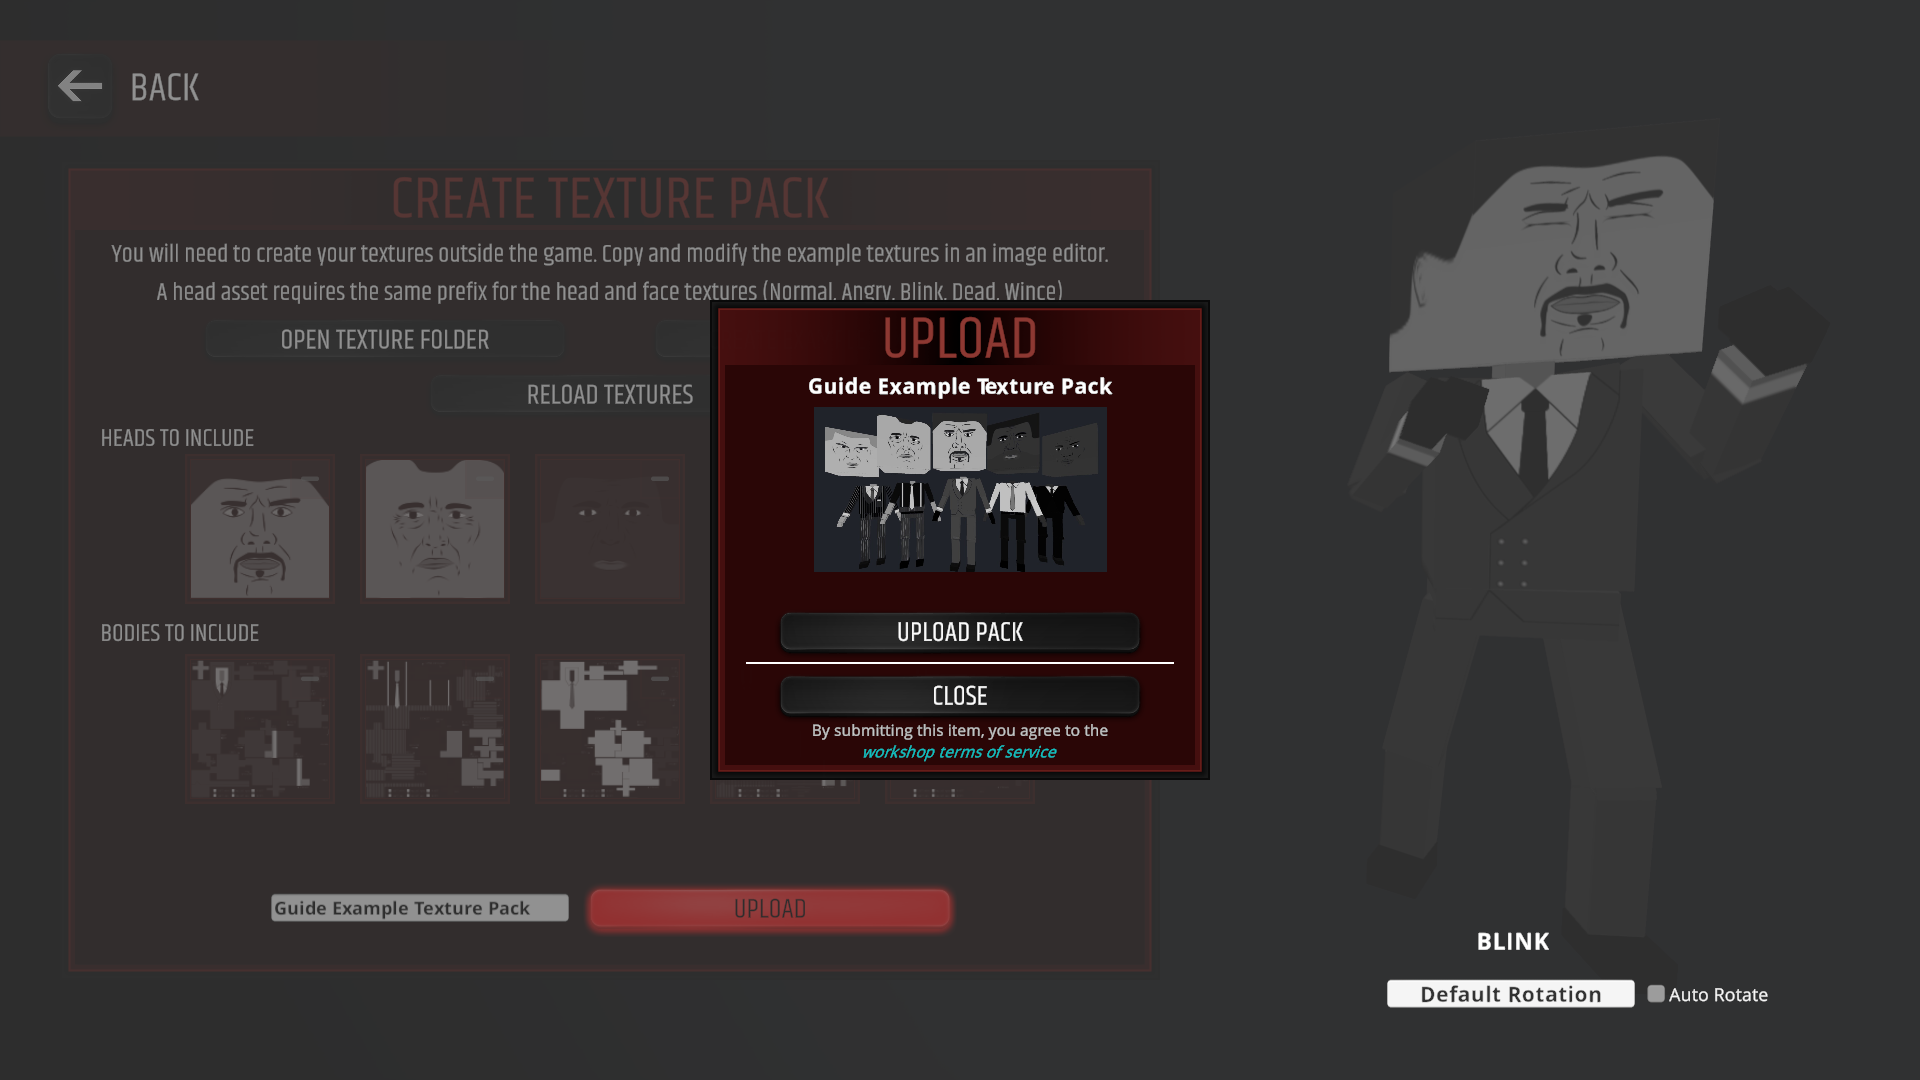
Notice the auto generated lineup of the textures, with no option to change it for yourself. Music packs will show something similar (generally the title of the music pack on a gradient background, although as of an unknown update it glitched out and now does not show any text).
Once you have the pack completely ready to be uploaded here, make sure to stay on this preview screen. The next step will involve actually swapping out the auto generated thumbnail for your own, during the upload process.
Swapping the Thumbnail
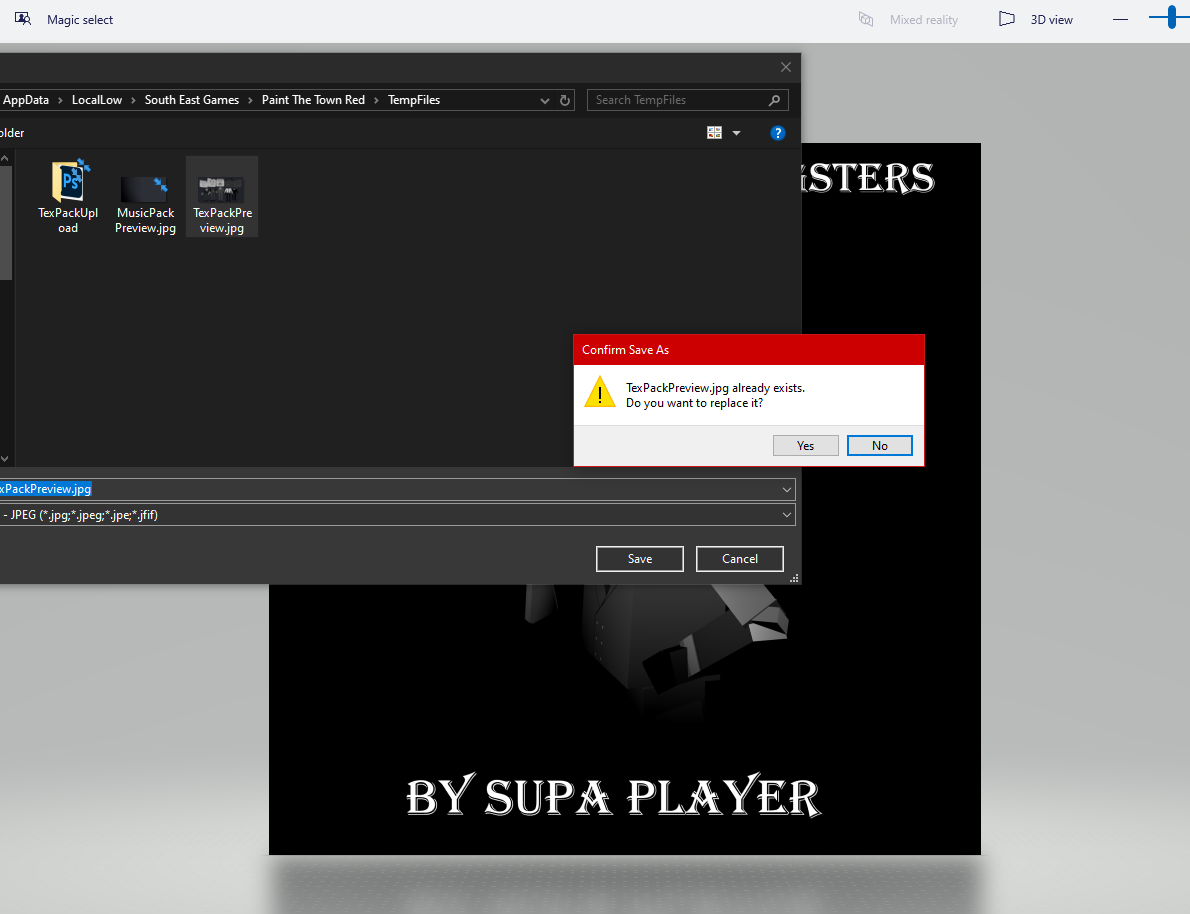
Due to the fact that the game does not allow you to change the thumbnail in game, we are going to use a similar method to swap the thumbnail like one would for a level thumbnail, and this involves tabbing out of the game and going into the game’s files. In file explorer, go to this directory:
“AppData\LocalLow\South East Games\Paint The Town Red\TempFiles”
Now locate the JPG file named “TexPackPreview.jpg” for texture packs. For music packs it is the “MusicPackPreview.jpg” file. If you open either of these files up, you’ll notice it is the exact file that the game auto generates as the pack thumbnail. Now, here’s where we need to swap it out.
Open your custom thumbnail in any image editor of your choice. I will be using Microsoft Paint 3D for this example because it is a quick and easy to use software for this process. Hit the option “save file as” for your thumbnail in the image editor you are using and then locate the directory that was named above. Select the file you want to overwrite (either “TexPackPreview.jpg” or “MusicPackPreview.jpg”).
Now, hit “save” and make sure a popup displays that asks if you want to overwrite the file and confirm. DO NOT click the confirm option yet. We are going to tab back into the game now.
Ok, now it’s time for the swap and we’ll need to act quickly.
Back in Paint the Town Red, hit “upload pack” to upload the item to the workshop. Now as it uploads, tab out of Paint the Town Red again. Go back to the image editor of your choice and hit the confirmation option to overwrite the file.
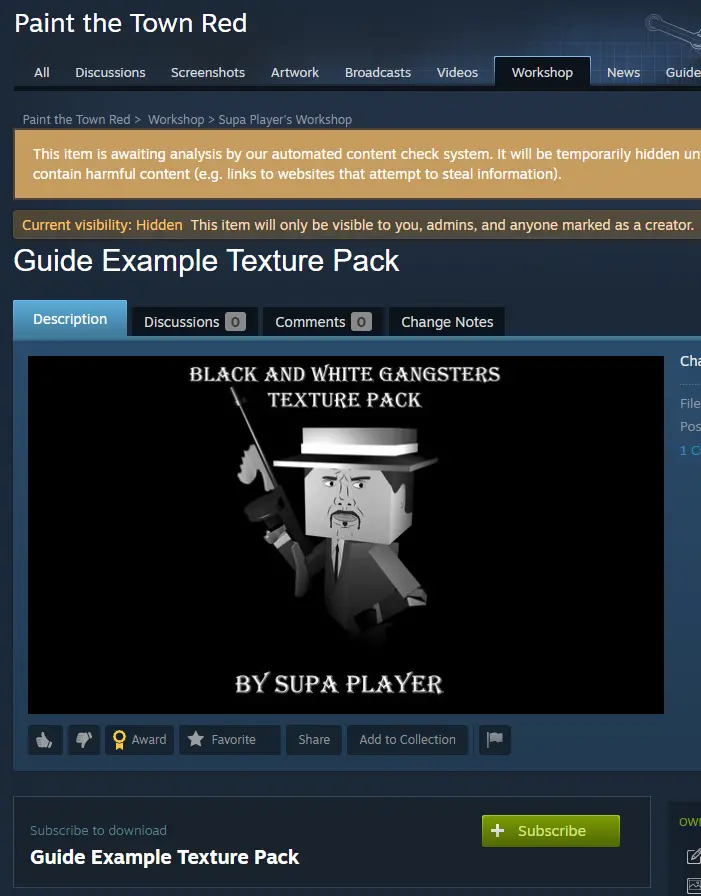
If you have done it fast enough, the game will allow you to view your workshop item and there you go, a custom thumbnail will be displayed for your texture or music pack instead of the default auto generated thumbnail.
If all goes well, the workshop item should look like this after the upload:
Conclusion
Once again, this process is fairly straightforward but may require some practice to get just right due to the necessary action of quickly acting to swap the files, as the Paint the Town Red lacks a proper method to do it in the game itself. It may take some time and you might have to delete the workshop item and try again if it doesn’t work the first time, but it will be well worth it once you have the item fully uploaded with a great looking thumbnail that is sure to catch attention.
If there are any questions I would be happy to answer them in the comments below.