Step by Step process of repairing boards
Intro
I do have some fun with the mini-game and I noticed there wasn’t a guide to it.
I have both experience in real life and the repair minigame with the demo, closed beta, and now early access, and feel this is a nice approximation but easier of what it takes in real life. Knowing some may not have the experience I do, I thought I’d share some tips & instructional help.
Select board to repair

Left click and drag the board you want to repair from your inventory to the square on the right side, then release.
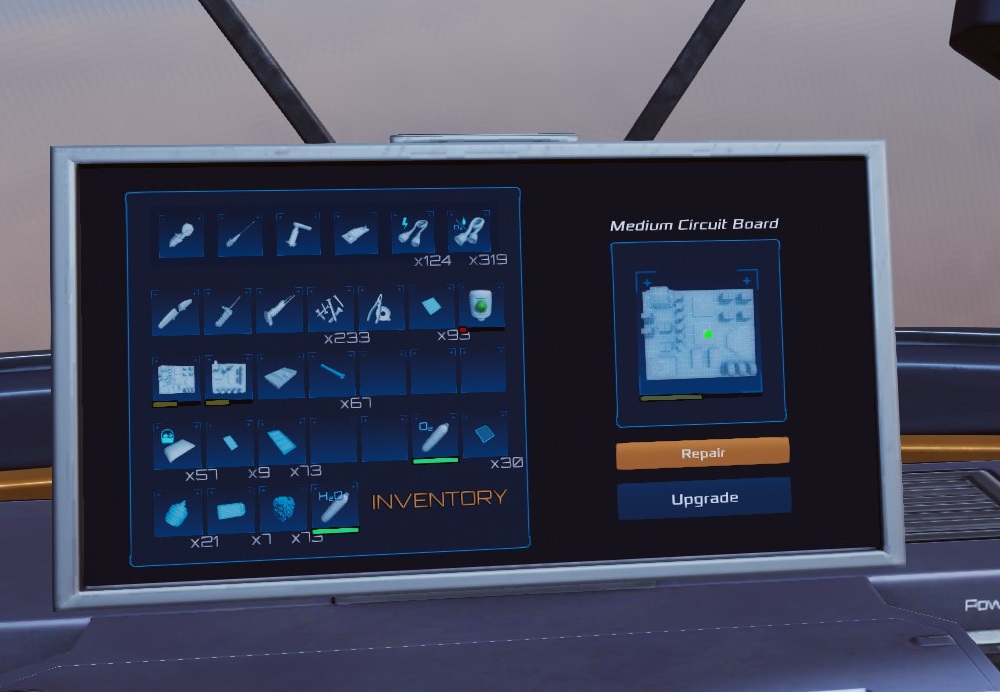
The board should appear in the square and the repair option lit up.
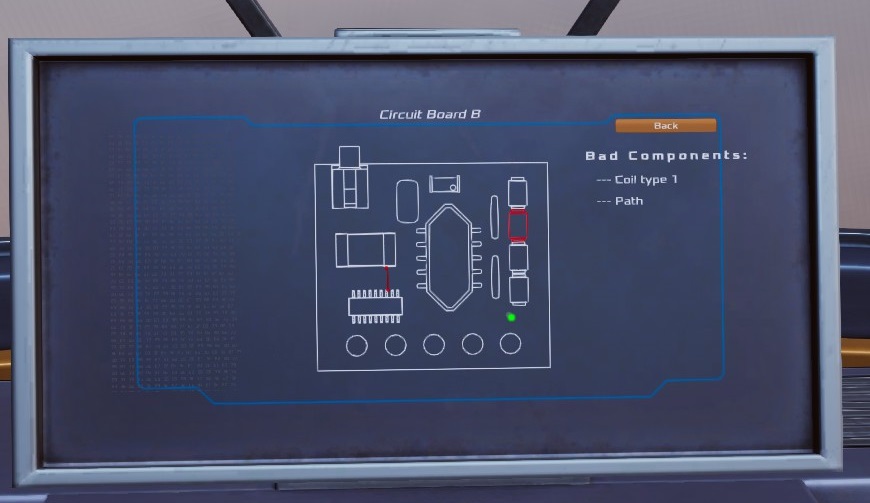
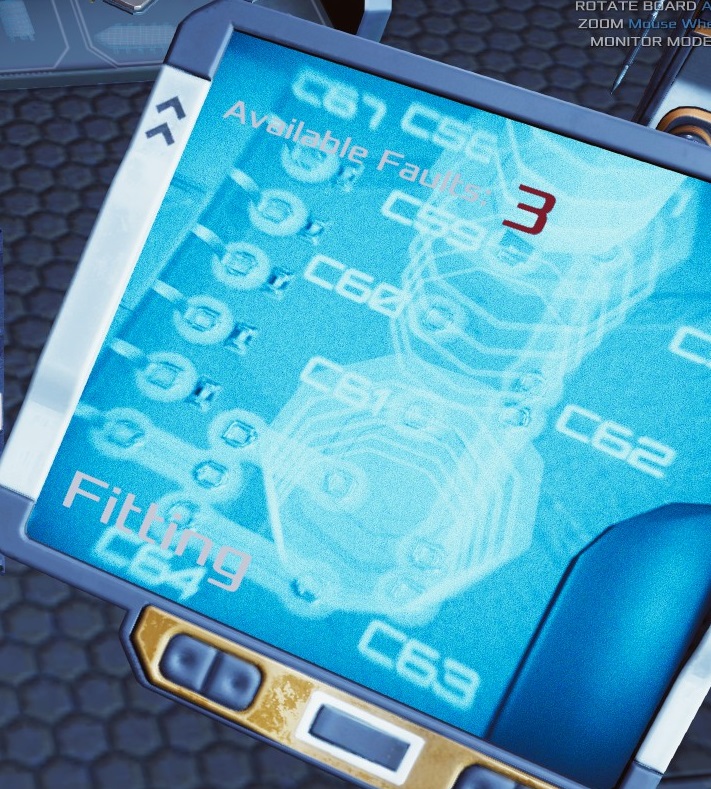
Click on repair to begin the process. You will be shown a Diagnostic screen of all problems. Bigger boards, and more damage means more repairs to be done.
Begin repairs- Removing components
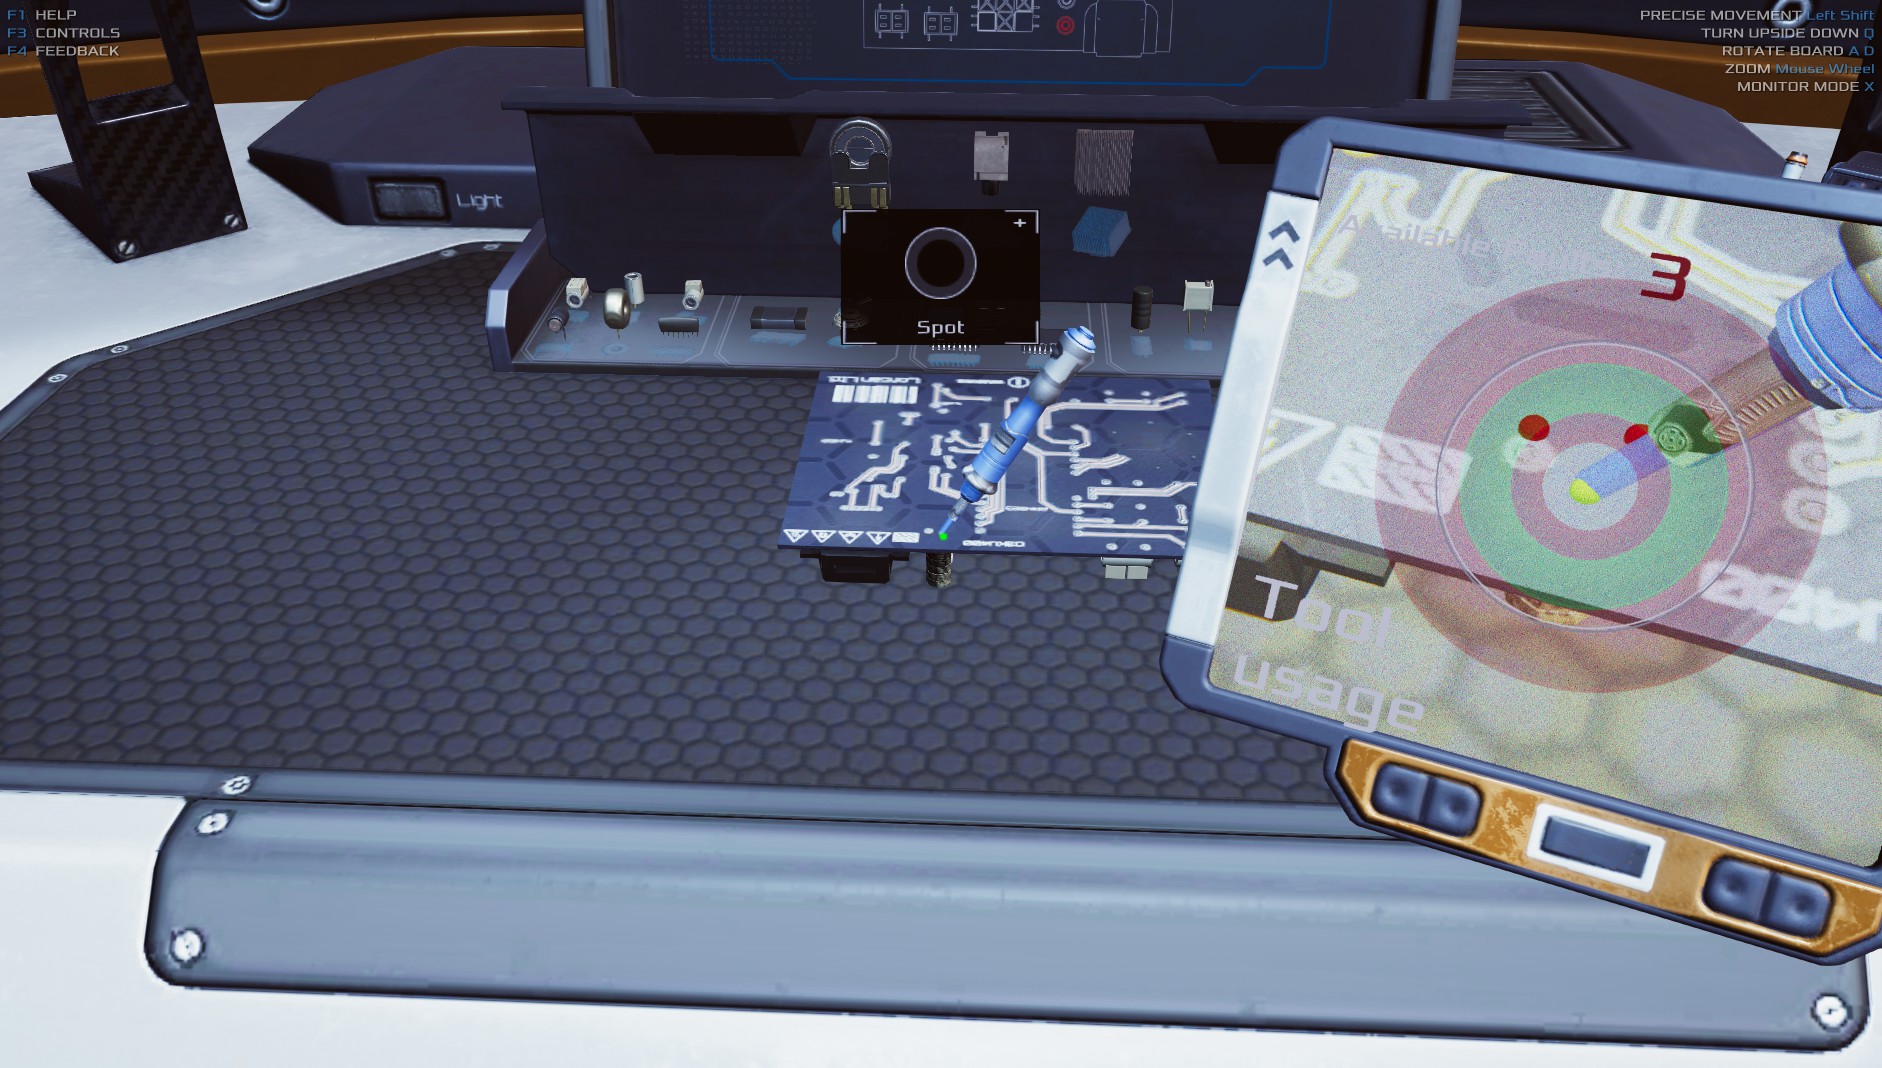
1) Look at magnifier for Red Dots. This works for locating solder points, and start points on board trace repairs.
2) Remove all bad components first, if they aren’t already missing. I have yet to have missing phantoms for components doing this.(currently a bug with multiple of the same component missing can cause phantom not to show if not all identical damaged parts have been removed)
3)W & S keys moves closer or further from board. This also changes magnifier position as well. Remember to look for those red dots.
4) Rotate board with A & D keys arguably you may never need this after getting skilled except for the occasional trace repair, and aligning a new component.
5)
A)Flip board over with Q key to remove solder(hot air tool) , from a bad component. Remember you are flipping the board over, if the component was close to you, it is now far from you, if it was on the left it is now on the right.
B) make sure you have the hot air tool in hand, use the magnifier to help locate the solder point.
C) align the tip of tool to the red dot in the magnifier, once it is aligned it will turn green. Also a box above the board will appear that says “SPOT”
D) You then left click and hold. A bullseye appears. Red-Green-Red-Transparent center. A white circle that starts from the outside will begin to shrink towards the center. Once you get past the first red section and into the green, Release the mouse button. The goal is to release in the green circle.
E) repeat for each point on the component.
F) Flip the board back over , left click the component to grab it then right click to trash it. Repeat as needed.
6) Once all components are removed, open the spare parts panel just below monitor (left click mouse on panel) Components are sorted by type.
Install new components
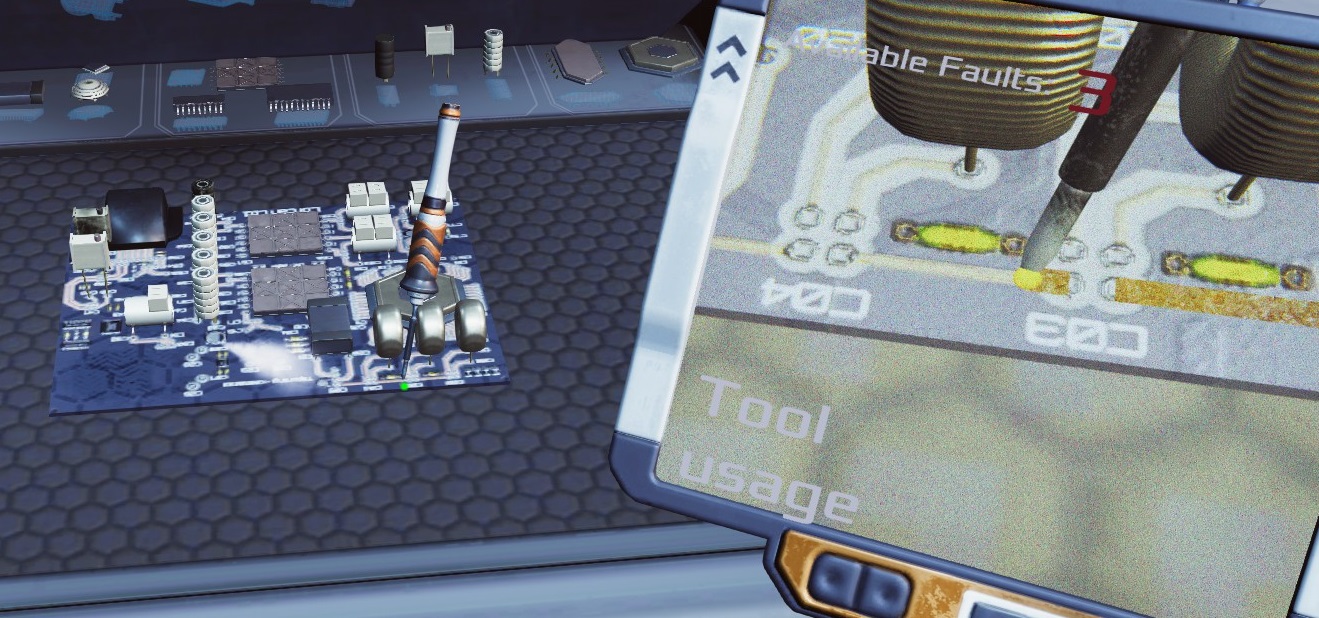
Phantoms will appear in the magnifier where you need to install new components.
7) locate one of the components in the bad parts list from the right side of monitor, grab (left click) a new component from the list . There will be a light grey phantom visible on the circuit board where it goes.
8) move the component to where it covers the phantom, then left click again. It should snap into place. You may have to rotate the board with A & D keys some to get it to work.
9) Grab the solder tool
10)
A)Flip board over with Q key to solder. Remember you are flipping the board over, if the component was close to you, it is now far from you, if it was on the left it is now on the right.
B) Use the magnifier to help locate the solder points.
C)align the tip of tool to the red dot, once it is aligned it will turn green. Also a box above the board will appear that says “SPOT”
D)You then left click and hold. A bullseye appears. Red-Green-Red-Transparent center. A white circle that starts from the outside will begin to shrink towards the center. Once you get past the first red section and into the green, Release the mouse button. The goal is to release in the green circle.
E) repeat for each point on the component.
F) Flip the board back over with Q
11) Repeat steps 7-10 as needed.
Repairing Paths.
If you have to repair a Path on the board (Red line) now is the best time to locate it. Use the magnifier on the top side to locate a red dot on the board.
Use the solder tool (left click) when you align the tip with the red dot.
It turns green on the magnifier when you are holding left mouse.
Move the point along the path that has the rough texture.
If you get too far off with the tip, just re-align and continue on until it is repaired.
Once all steps are completed the board will Disappear from the table and be returned to inventory as repaired.