A quick-start guide for getting into the game. Explains the interface and general tips for getting started as a new player.
Space Interface and Stock Exchange
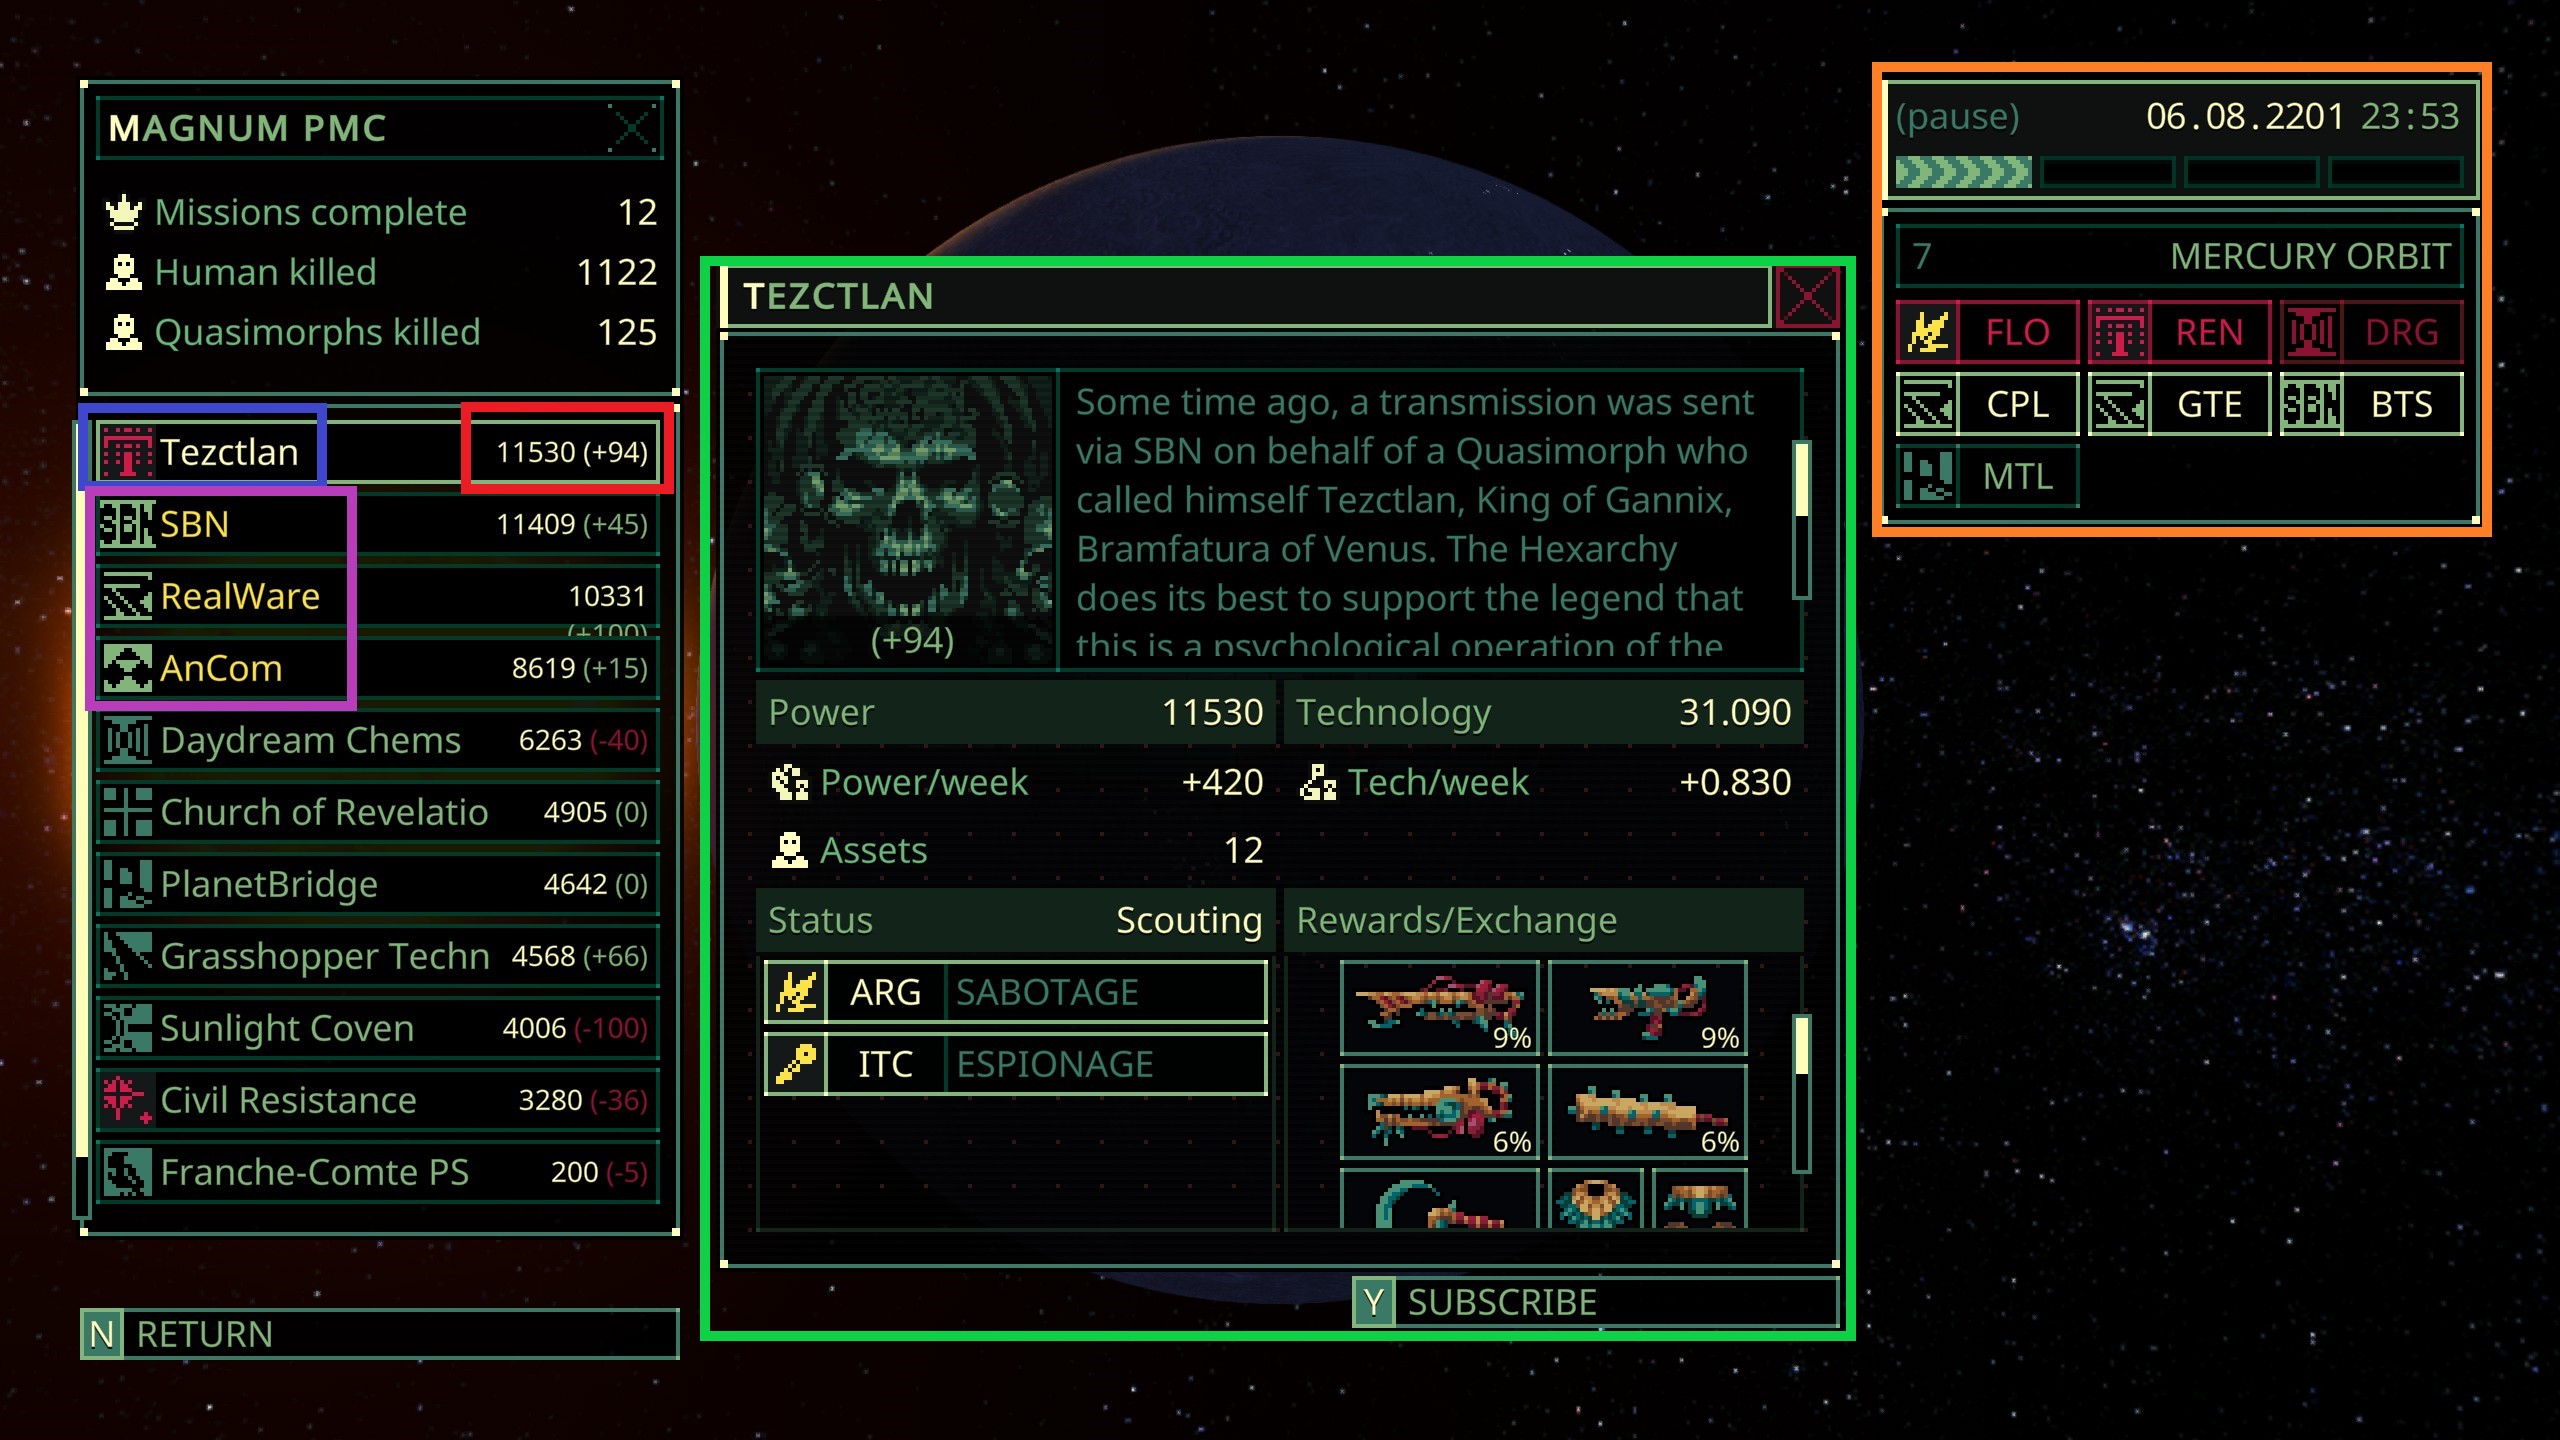
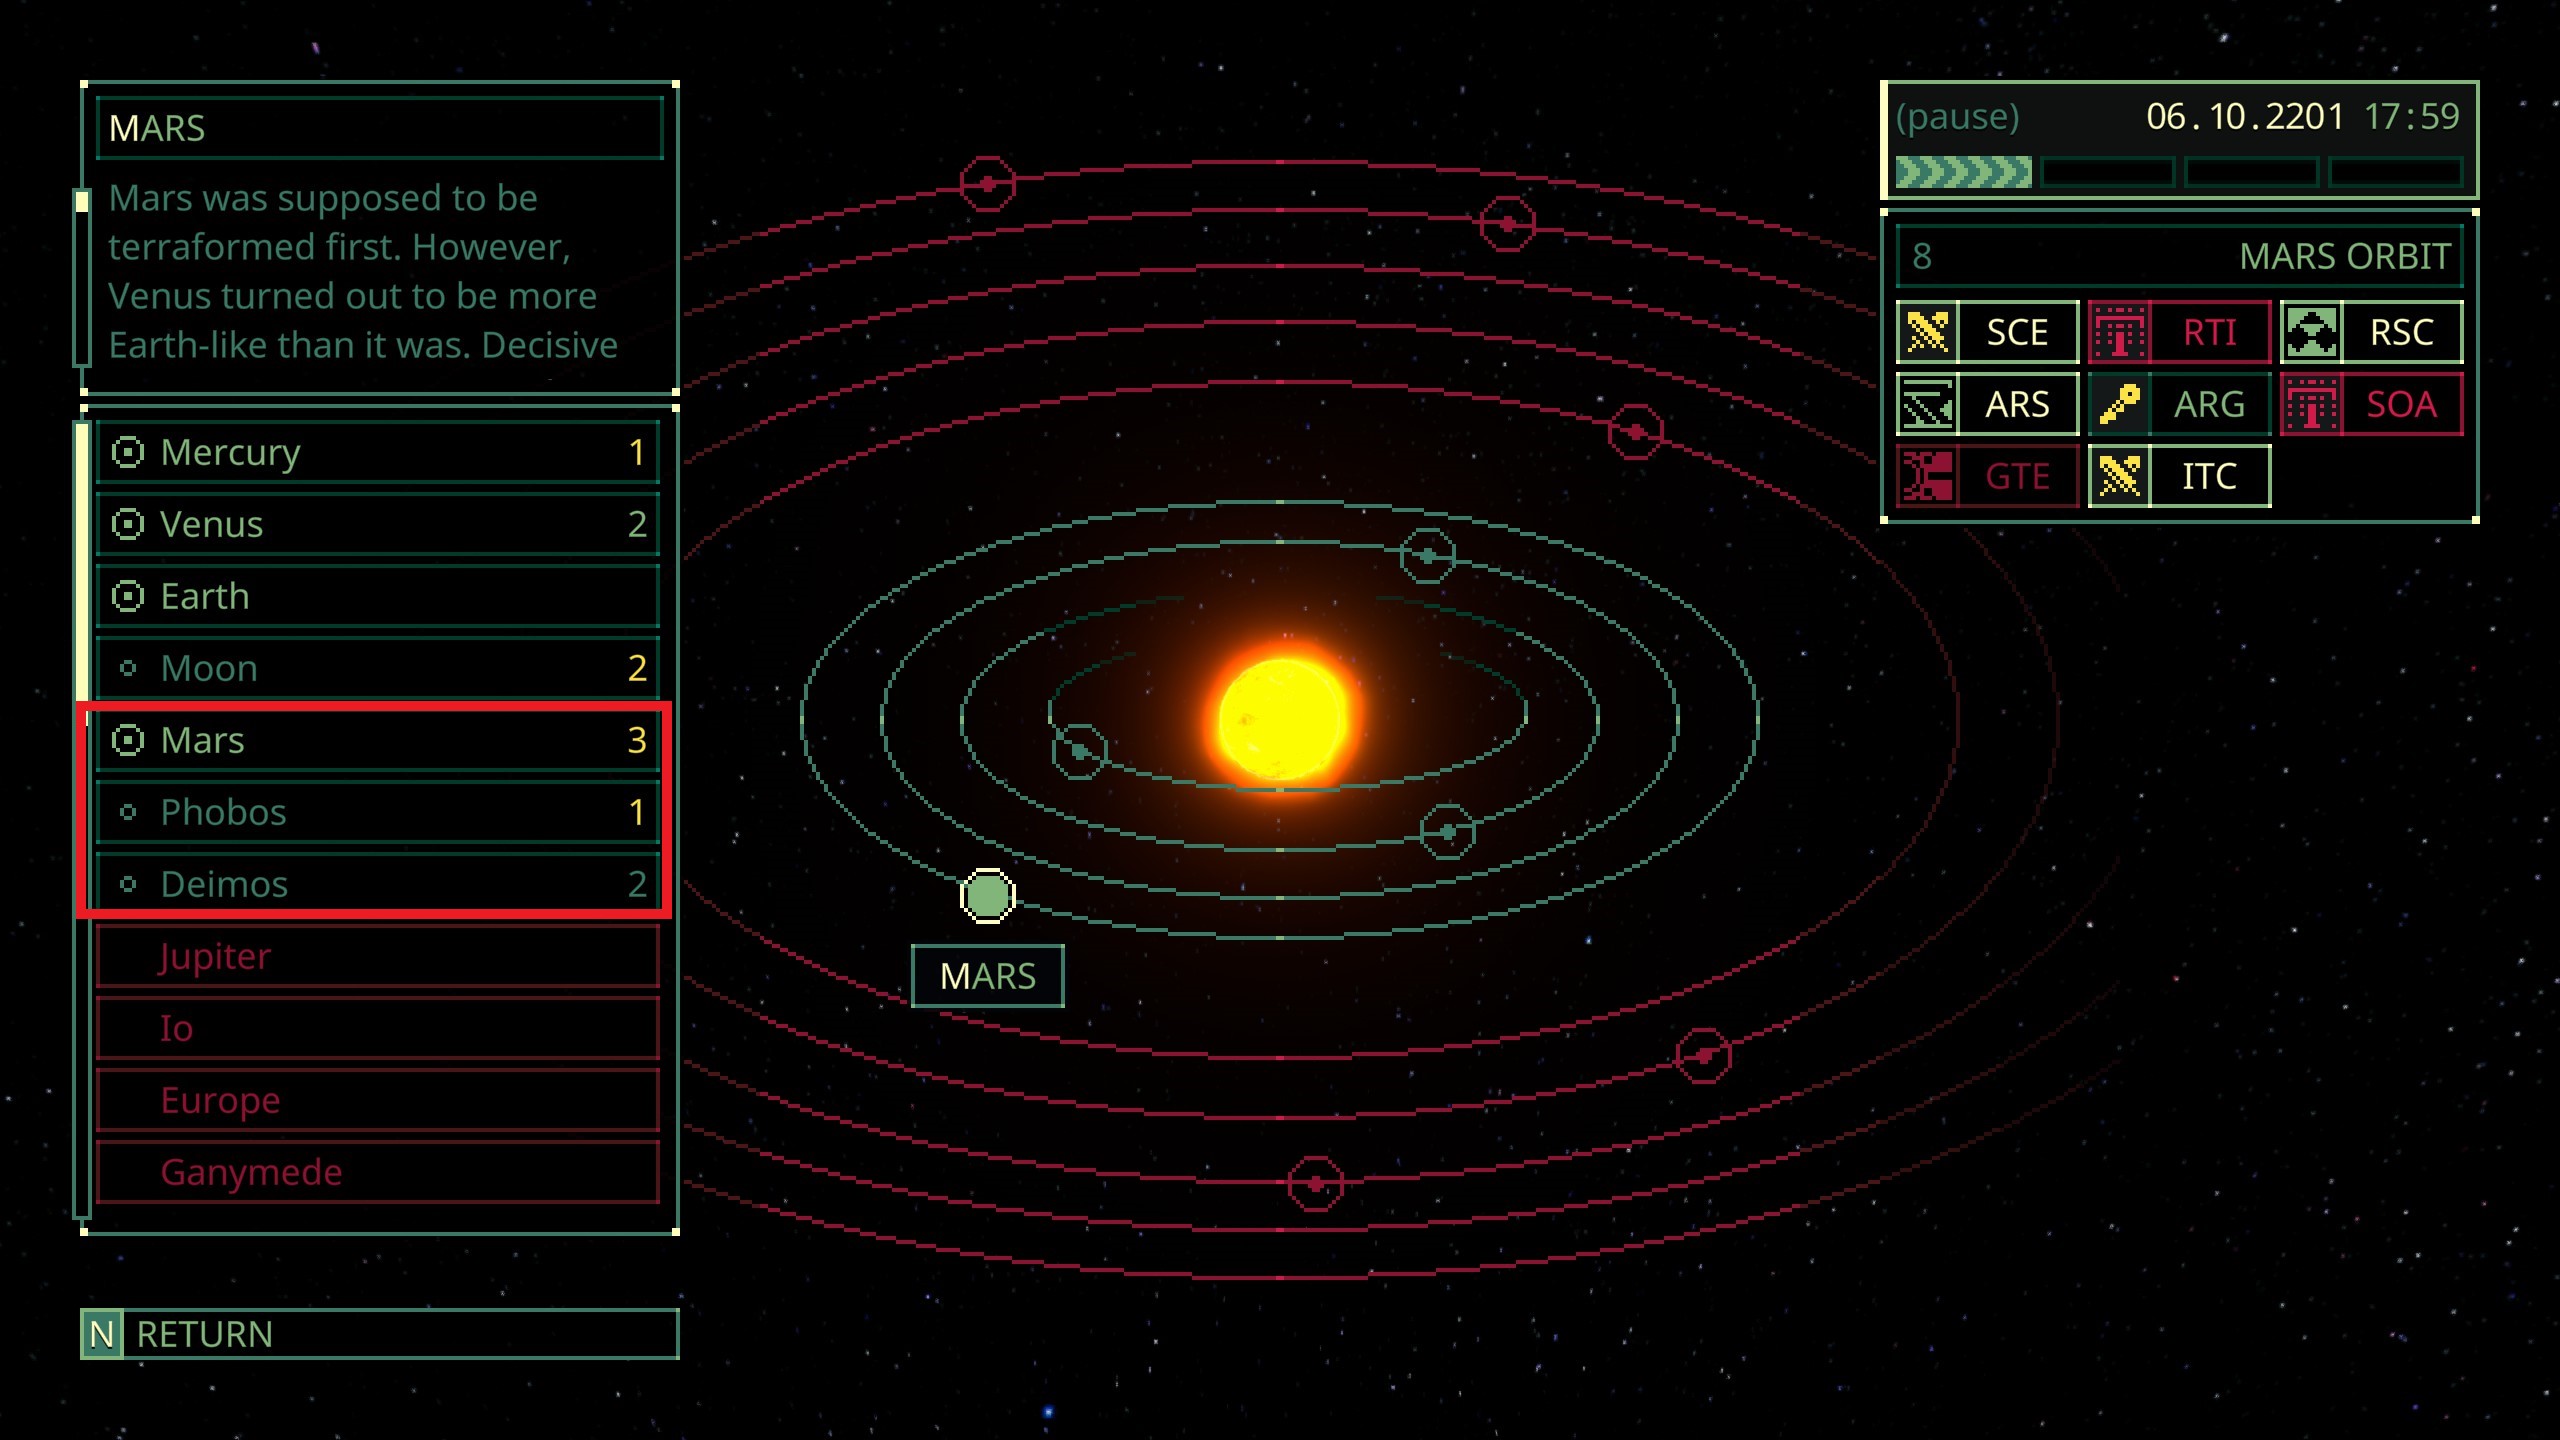
On the left is the stock exchange. Here, you can see the various factions in the game and navigate to their main screens (highlighted in green).
For ease, each portion is highlighted with a coloured box.
Blue: Faction Name and Icon
Red: Faction power level and Reputation
- The larger number is the power level, this dictates the strength of enemies you will encounter when taking missions against this faction
- The smaller number is your reputation with the faction. The higher your rep (max +100) the better the items you can receive when bartering with them (this is also influenced by tech level, which will be covered later).
- A negative reputation with a faction will prevent you from visiting stations owned by them and trading with them. It is best to avoid taking action against factions you are interested in trading with.
Purple: Main Human Factions
- You should focus on these main factions for reputation and trading. They provide some of the best barter options: large backpacks, strong equipment, and meta-progression chips. It is best to choose missions that help them to increase their tech level. However, advantageous trade routes may be available between some of the other factions in the game’s current state. You are free to help or hinder any faction you choose.
Green: Faction Information Screen
- At the top will be the faction’s image with your reputation with them along the bottom portion
- To the right of the faction image, there is some lore about the faction. It is neat and worth reading.
- Under the Power section, the faction’s weekly power gain is displayed along with their assets. Assets are controlled stations and influence the weekly power and tech gains.
- The technology section indicates the faction’s tech level and tech gain per week. Tech level dictates the tier of gear available. The higher the level, the stronger the items you can receive from bartering.
- The Status section displays the faction’s current strategy, which affects the mission types they will have available. These will change as factions dynamically act against each other; your mission involvement also influences this. Also listed here are the faction’s currently available missions.
- The Rewards/Exchange section displays the items available from completing missions for or bartering with the faction. The numbers on each item display the weight of receiving them. Greyed-out options are unavailable due to low rep.
Orange: Planet Information Screen
- Along the top is the date and time. Each bar represents a game speed and can be used to speed up time for crafting or waiting for new missions to appear.
- Underneath the timer is the number of stations and the planet’s name
- Each station is represented by a three-letter acronym and the icon of the station owner. Yellow station icons mean there is a mission there with different icons denoting different mission types. Red stations typically mean that you cannot land there due to rep. However, Tezctlan and Civil Resistance always seem to appear red even when you have a positive reputation with them and can land.
Mission Information
Currently there are 4 mission types:
- Sabotage
- Seek out and destroy a number of targets. These targets are always on the last floor of the station and need to be damaged a few times to destroy them. On the final floor, they will be marked by a yellow x on the map. Warning: Used ranged weapons as these tend to explode
- Espionage
- Seek out and find an item. The item is always on the final floor and will take up inventory space. It will be marked by a yellow x on the map.
- Conquest
- Move through the station, killing a certain number of enemies on each floor. The number you need to kill is half of the total floor count. To check your status you may hit the extraction button (radio button on the top right) and it will list the enemies left on each visited floor.
- These missions are nice as there is no guesswork concerning the number of floors, as it is always listed when clicking the extraction button.
- Defence
- You will fight to survive in a small arena for 150 turns.
- Once the turn counter is up, no more enemies will spawn and you will have to kill the remaining survivors to extract.
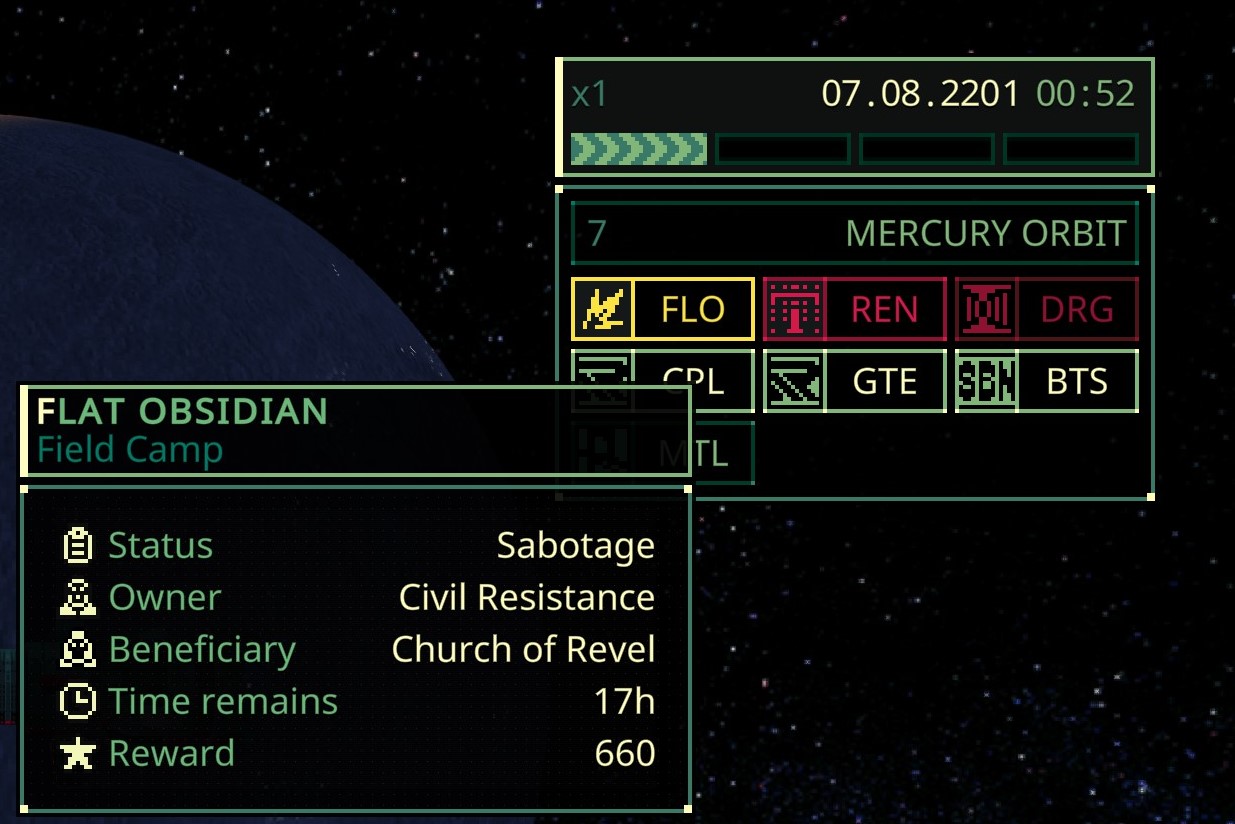
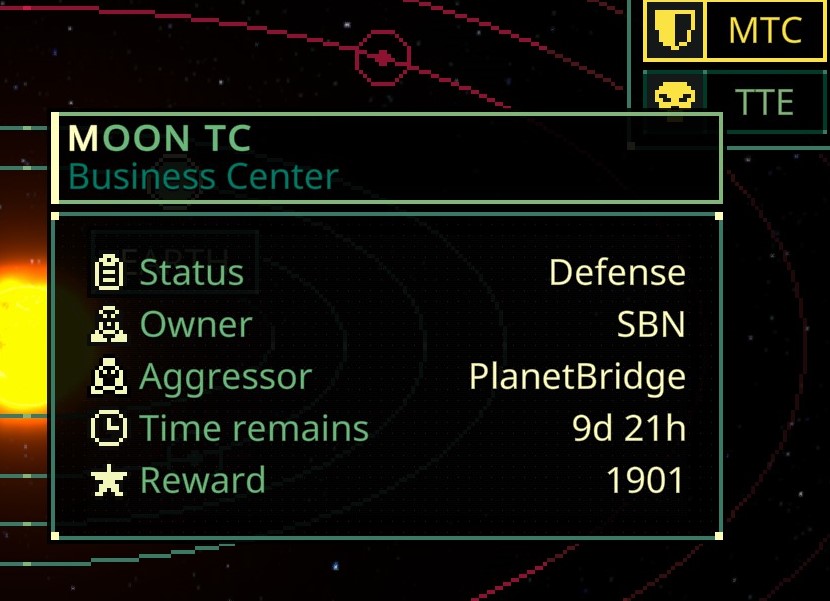
Hovering over available missions will display information regarding the mission;
- Mission type
- Station Owner
- This dictates what sort of enemies you may encounter and their equipment. This information can be gleaned from the faction’s power level and tech level. Power influences enemy count and tech influences equipment.
- Attacking a faction’s station hurts your reputation with them so choose wisely.
- For Defence type missions you are helping the station owner against the aggressor so the reputation gains/losses are reversed along with the enemies encountered.
- Beneficiary
- The faction who has posted the mission.
- This is the faction you are helping and will reward you for mission completion.
- Aggressor
- During Defence missions, this is the faction undertaking the assault. The enemy/equipment pool will draw from this faction’s power and tech levels.
- Time remains
- How much time is left until the mission expires and the station is available again for trade.
- Reward
- The number here dictates the reward weighting. A higher number means more rolls of the reward pool for a given faction. This pool can be found on the faction information screen via the stock exchange.
Mission Prep and Character Selection
On this screen you can select your clone for the mission and modify your gear.
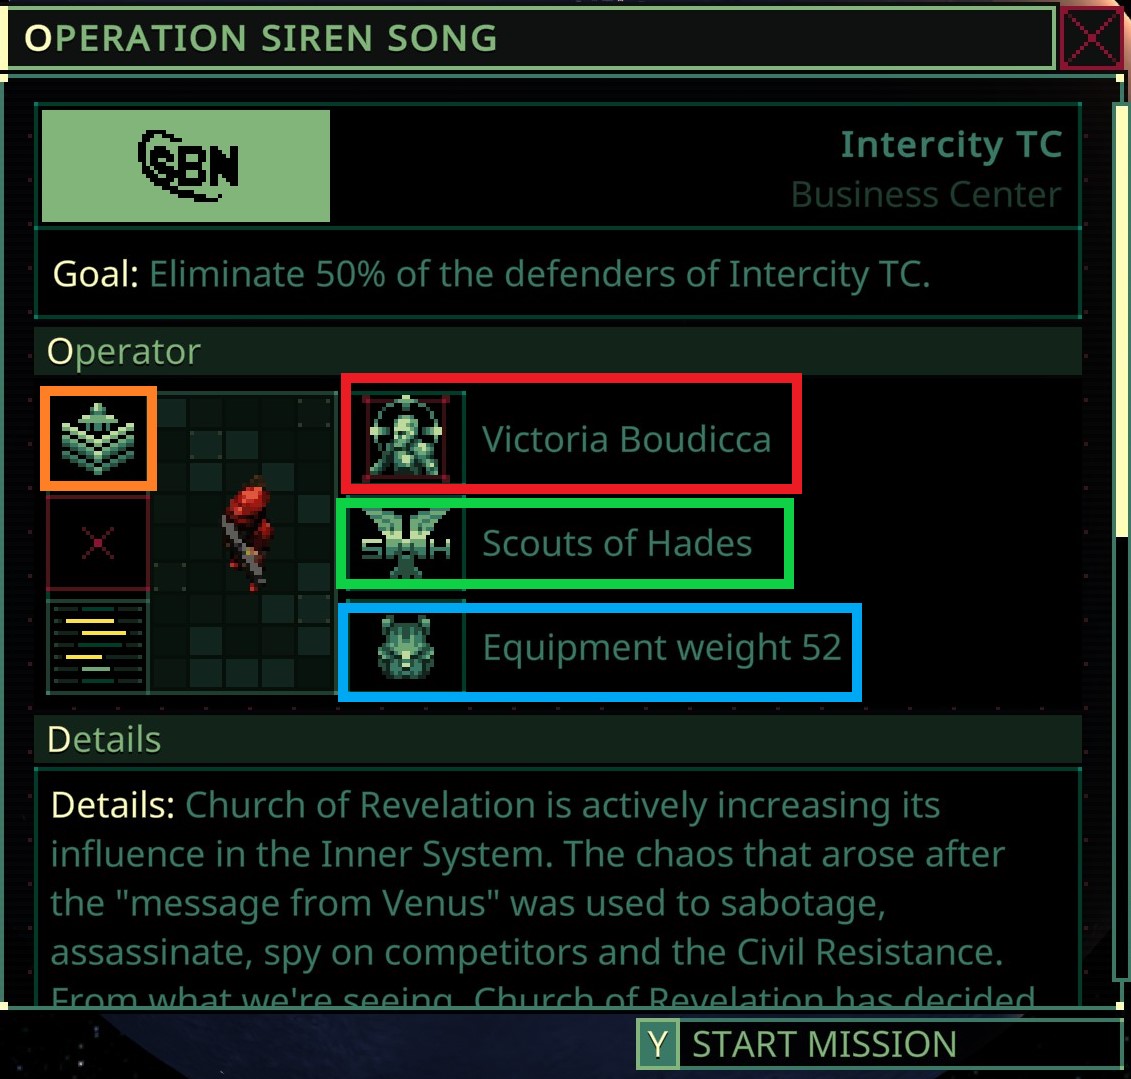
Orange: Character rank insignia
- This is based on completed missions and does not seem to do anything at the moment
Red: Clone
- This is the clone selected for the mission.
- You may have only one clone of each gene-type at a time.
- The clone dictates base stats and a special trait (see below)
Green: Class
- The class of the selected clone can be seen and changed here.
- Changing the clone’s class resets are skill levels and experience progress.
Blue: Equipment
- Clicking this button allows you to change the gear you will take into the mission
- Equipment weight affects dodge chance and calorie consumption. More weight = less dodge + getting hungry faster.
Clone Information
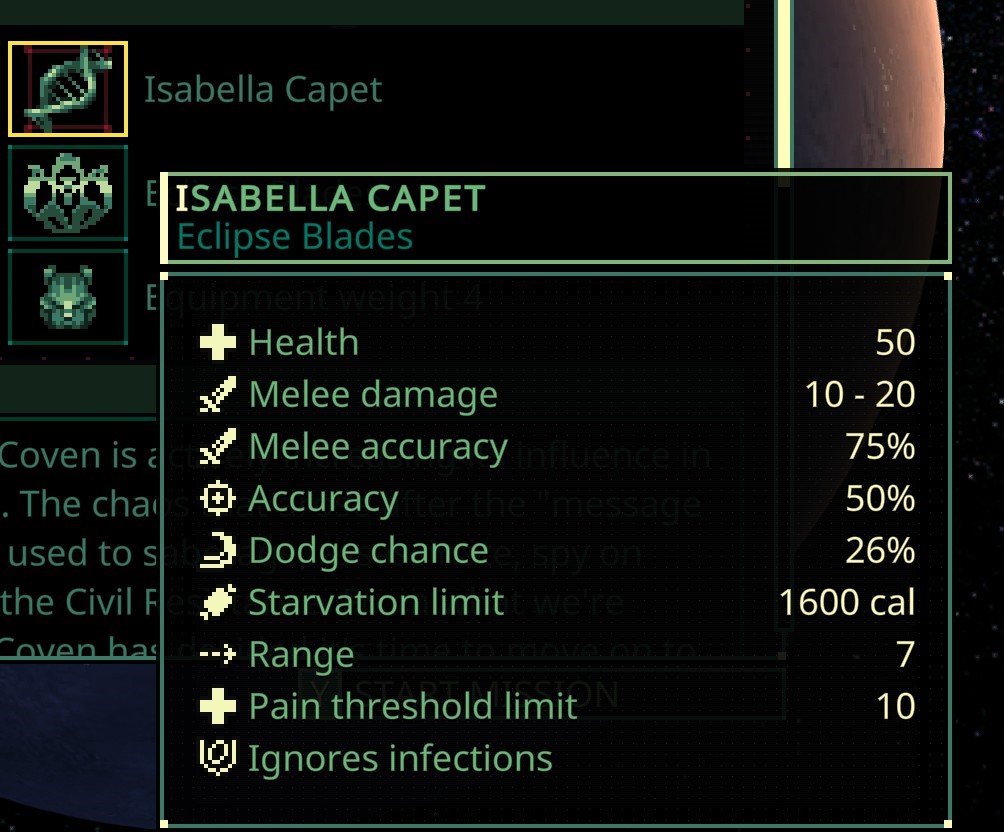
Health
- The starting health of a clone.
- Some classes can increase max health, and some items can do so temporarily, but this is all you have to work with usually.
Melee Damage
- This damage is added to melee weapons.
- You do not have to do any math, weapons you pick up in missions will already have this value added to the weapon’s information
Melee Accuracy
- This is your base chance to hit with melee weapons.
- Certain melee weapons and attack types will increase or lower this value.
Accuracy
- This is your base chance to hit with ranged weapons.
- Guns and the chosen fire-mode can modify this value.
Dodge Chance
- Your chance to avoid attacks.
- Currently, with the way that equipment weight works, this is almost meaningless. A full backpack will almost always result in a negative dodge value.
Starvation Limit
- The starting calories you will have upon entering a mission and the max you can have in reserve
- Eating beyond the limit wastes food.
Range
- The view distance of the player.
- This can be modified by the lighting of some levels. You cannot see far in the dark even with a large view range.
- This stat is extremely helpful. The clone Mirza Aishatu has a base range of 9, making it possible to see enemies before they are in firing range.
Pain Threshold Limit
- How high your pain meter can go before the player character is stunned and loses an action
- Being in pain causes various debuffs, this is also true for enemies.
Clone Trait
- Every clone has a unique trait which can affect how you want to play/build them.
Quickstart Guide and Tips
1. Firstly do the tutorial mission. It is missing a bunch of details, but you get free loot and a basic explanation of the game.
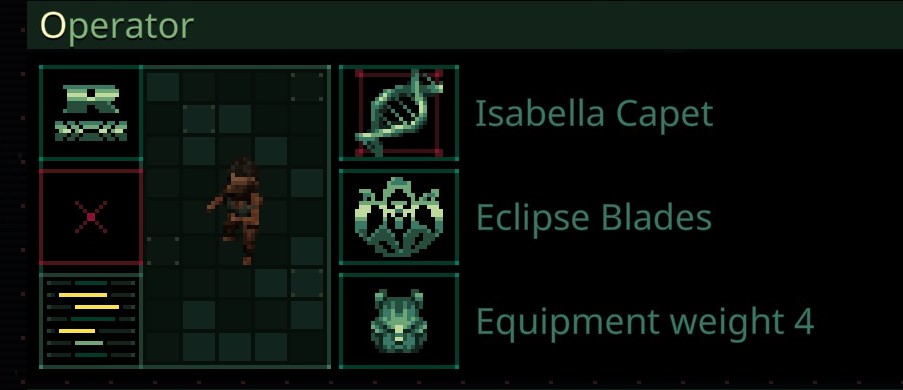
- I recommend playing as Isabella Capet for your first clone. Her ability to avoid infections will be helpful for farming Mars, Phobos, and Deimos missions.
- The main reason Isabella Capet is so powerful is that meat and flesh are essentially free forms of food that typically come with the downside of a chance of infection. By ignoring infection you can eat flesh and farm out maps completely without risk of starvation.
- I also recommend playing Isabella as an Eclipse Blades which is a melee orientated class. Melee becomes changeling as the game progress but early game it is very easy to stomp most enemies by allowing them to walk up to you and attacking. Doorways are your friend here. Importantly even when playing as an Eclipse Blades you will want a ranged weapon to deal with your biggest threats on Mars and its moons Flamethrowers and Cutters.
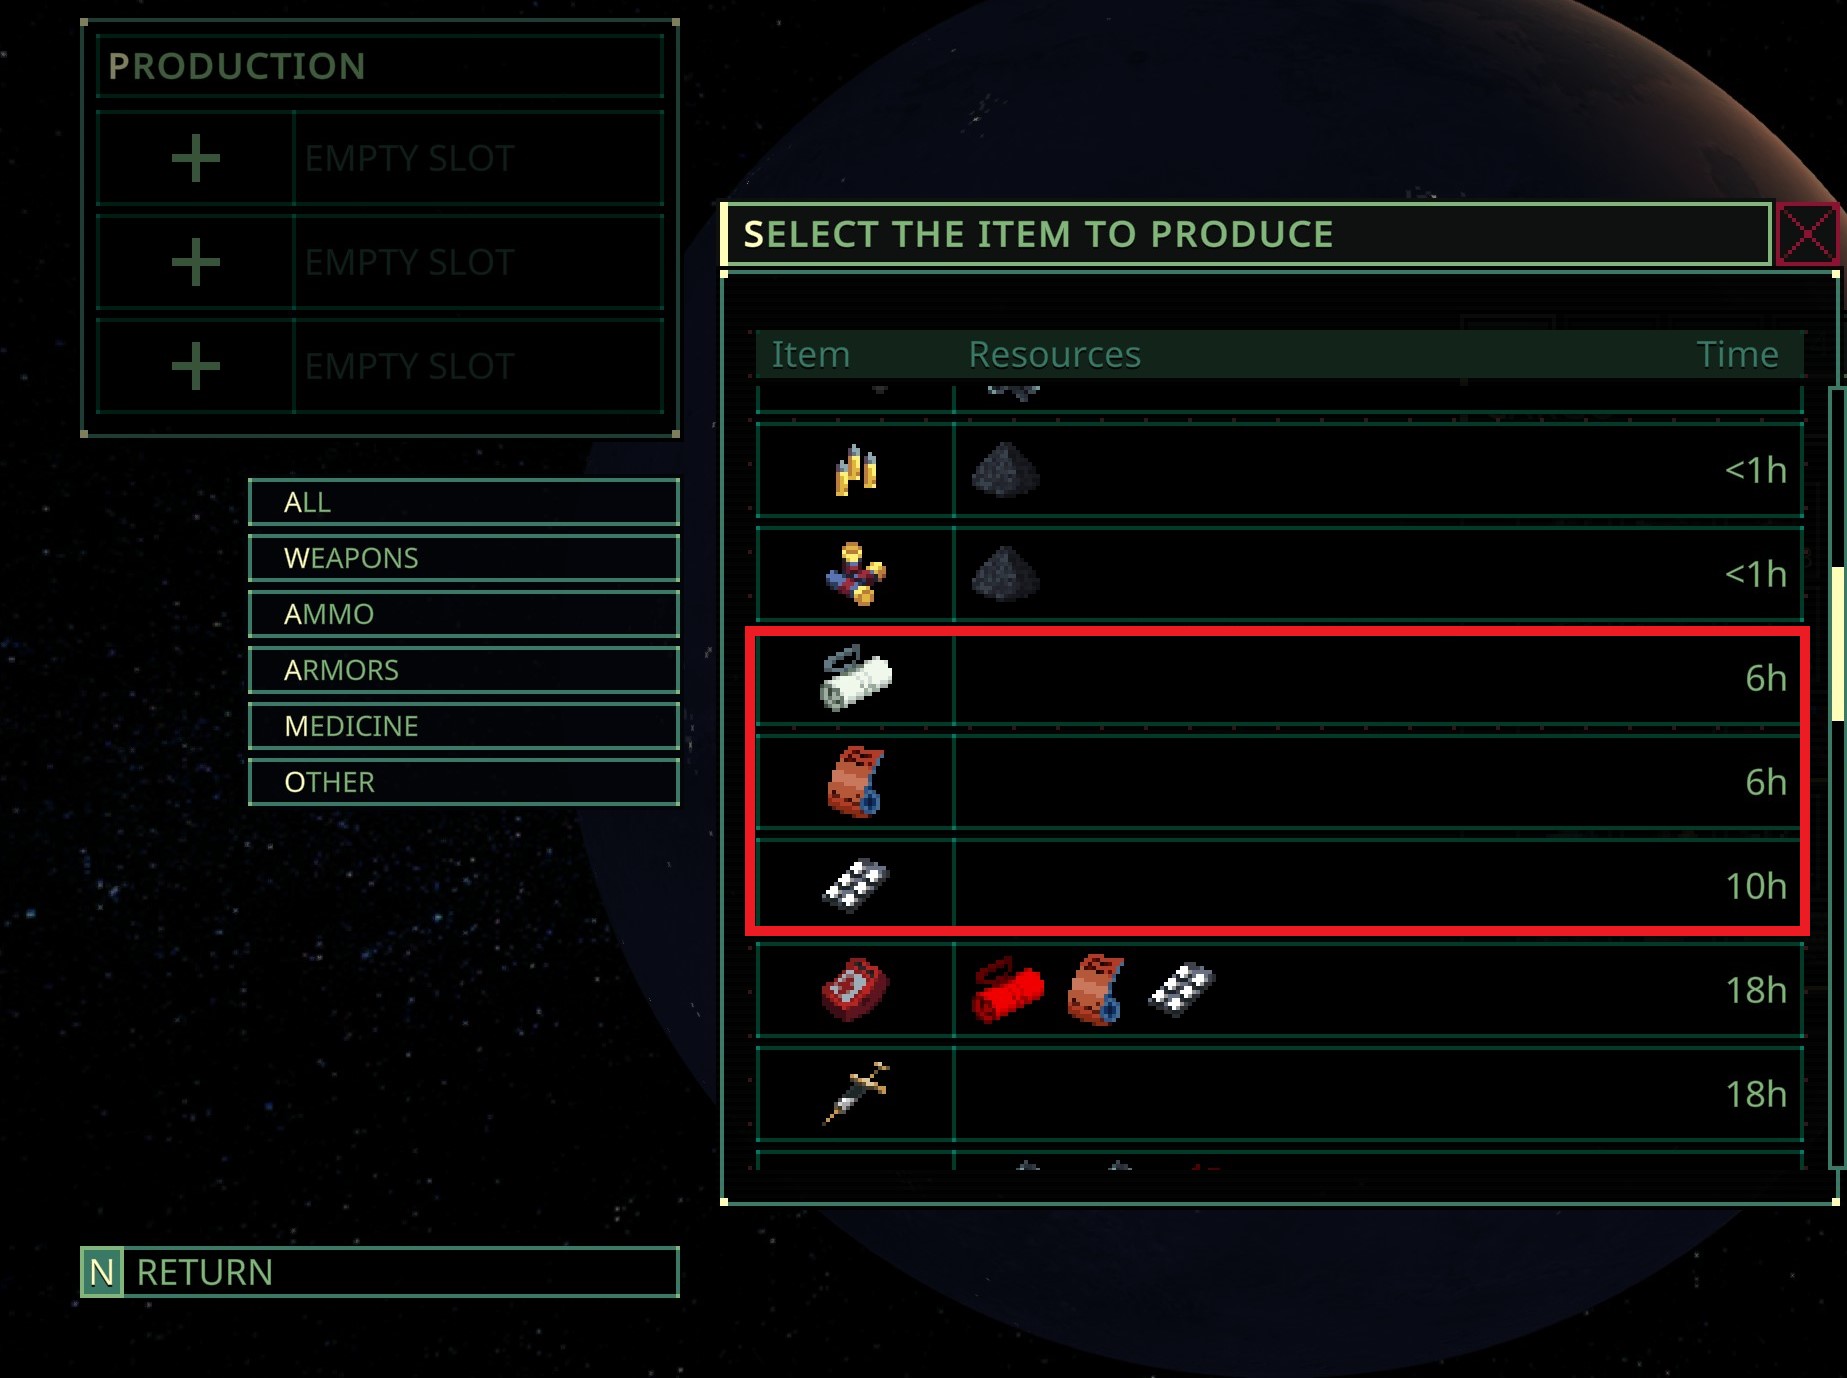
2. Next queue up some healing items in your ship’s production queue.
- This can be accessed by hitting I or clicking the spacecraft button.
- I recommend crafting bandages, splints and some antibiotics. You can skip the antibiotics if you plan to play as Isabella.
3. Fly to Mars or its moons. Mars, Phobos, and Deimos do not have a Quasimorph timer for story reasons. This means that space demons will not explode out of enemies and there will be no counter increasing as you move around the map. This makes missions much easier and gives you a chance to grab everything you can without fear of getting wrecked by the space demons.
- Eating raw meat and flesh typically increase the Quasimoprh timer but as there is no timer on these missions it provides further reason to use Isabella Capet as you starting clone.
4. Choose any missions on Mars or the moons to undertake.
Avoid Defence Missions at the start, they do not offer much in terms of loot and are more for rep grinding.
- I recommend avoiding missions against SBN, RealWare, and AnCom as these factions have the most to offer for trades. Additionally, I would avoid missions against Tezctlan as they tend to field more dangerous enemies for starter clones.
- Take your starter gear and some meds, if you are not playing as Isabella Capet you will need to take some food and antibiotics as well.
I usually only take a knife and some meds in for the first mission, you are welcome to take a gun but you will almost certainly find one soon enough.
5. Rip and Tear (This is literal)
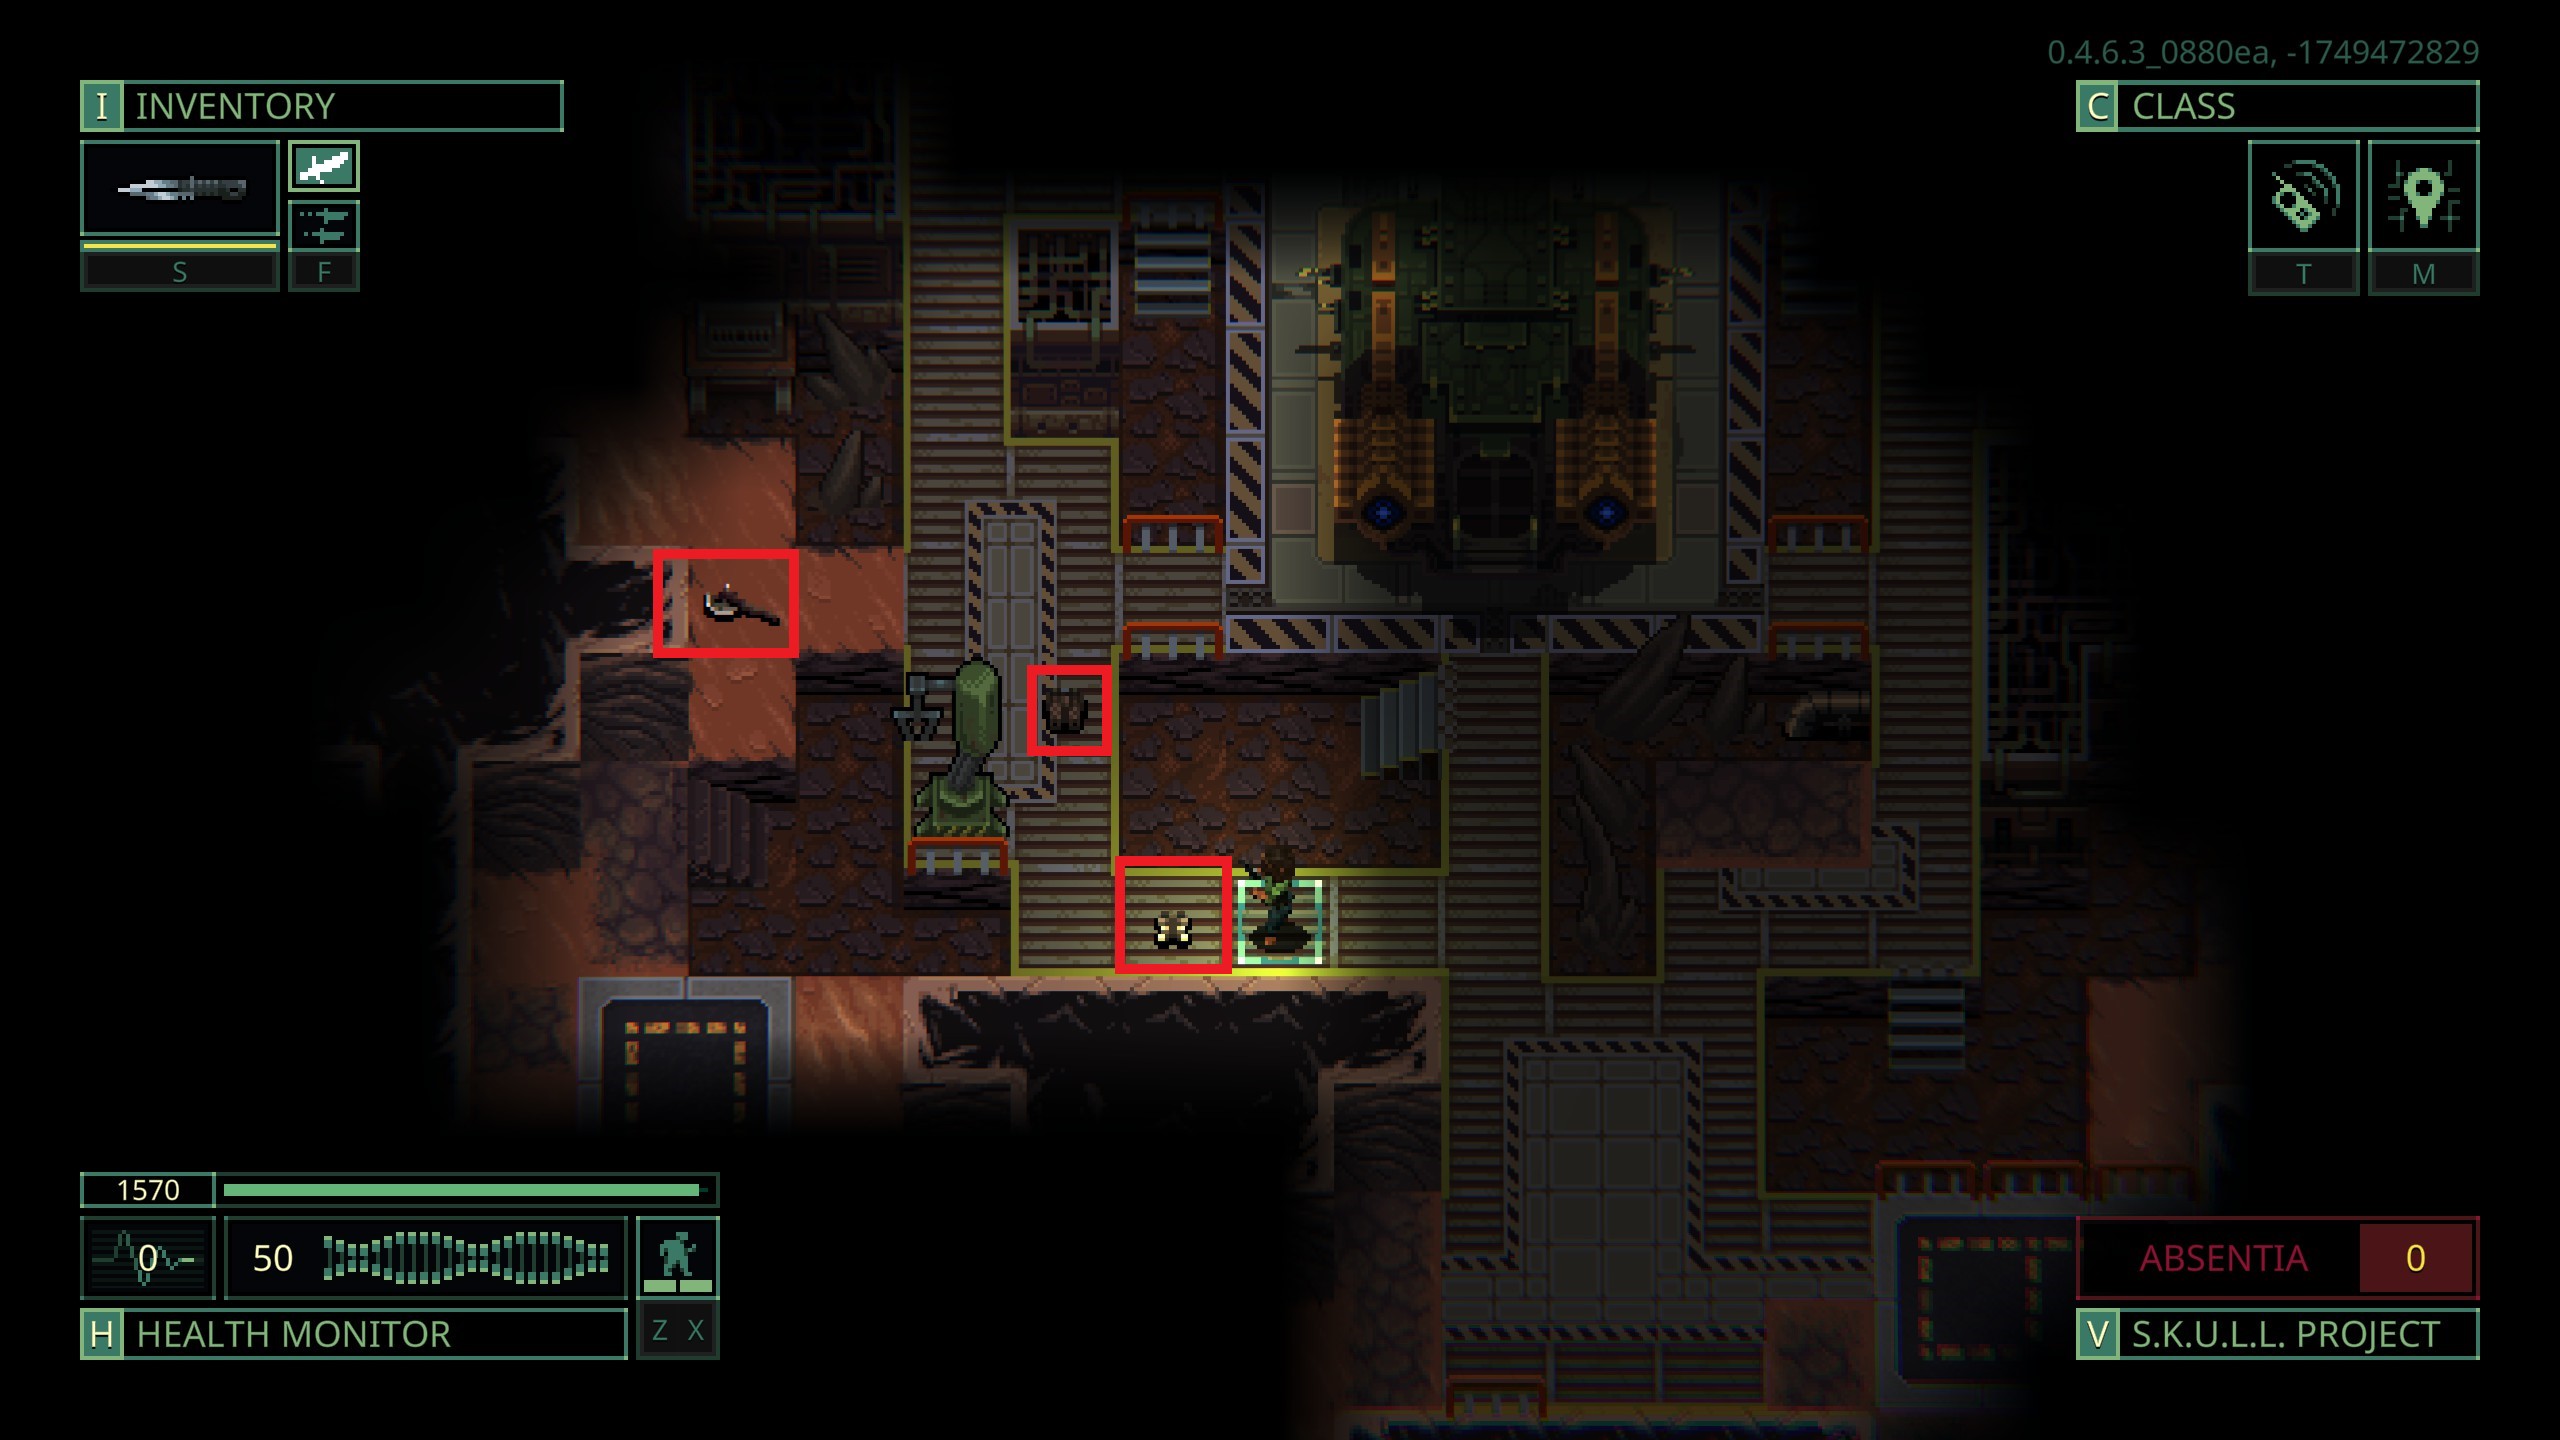
You will span by your ship and there is usually some loot around.
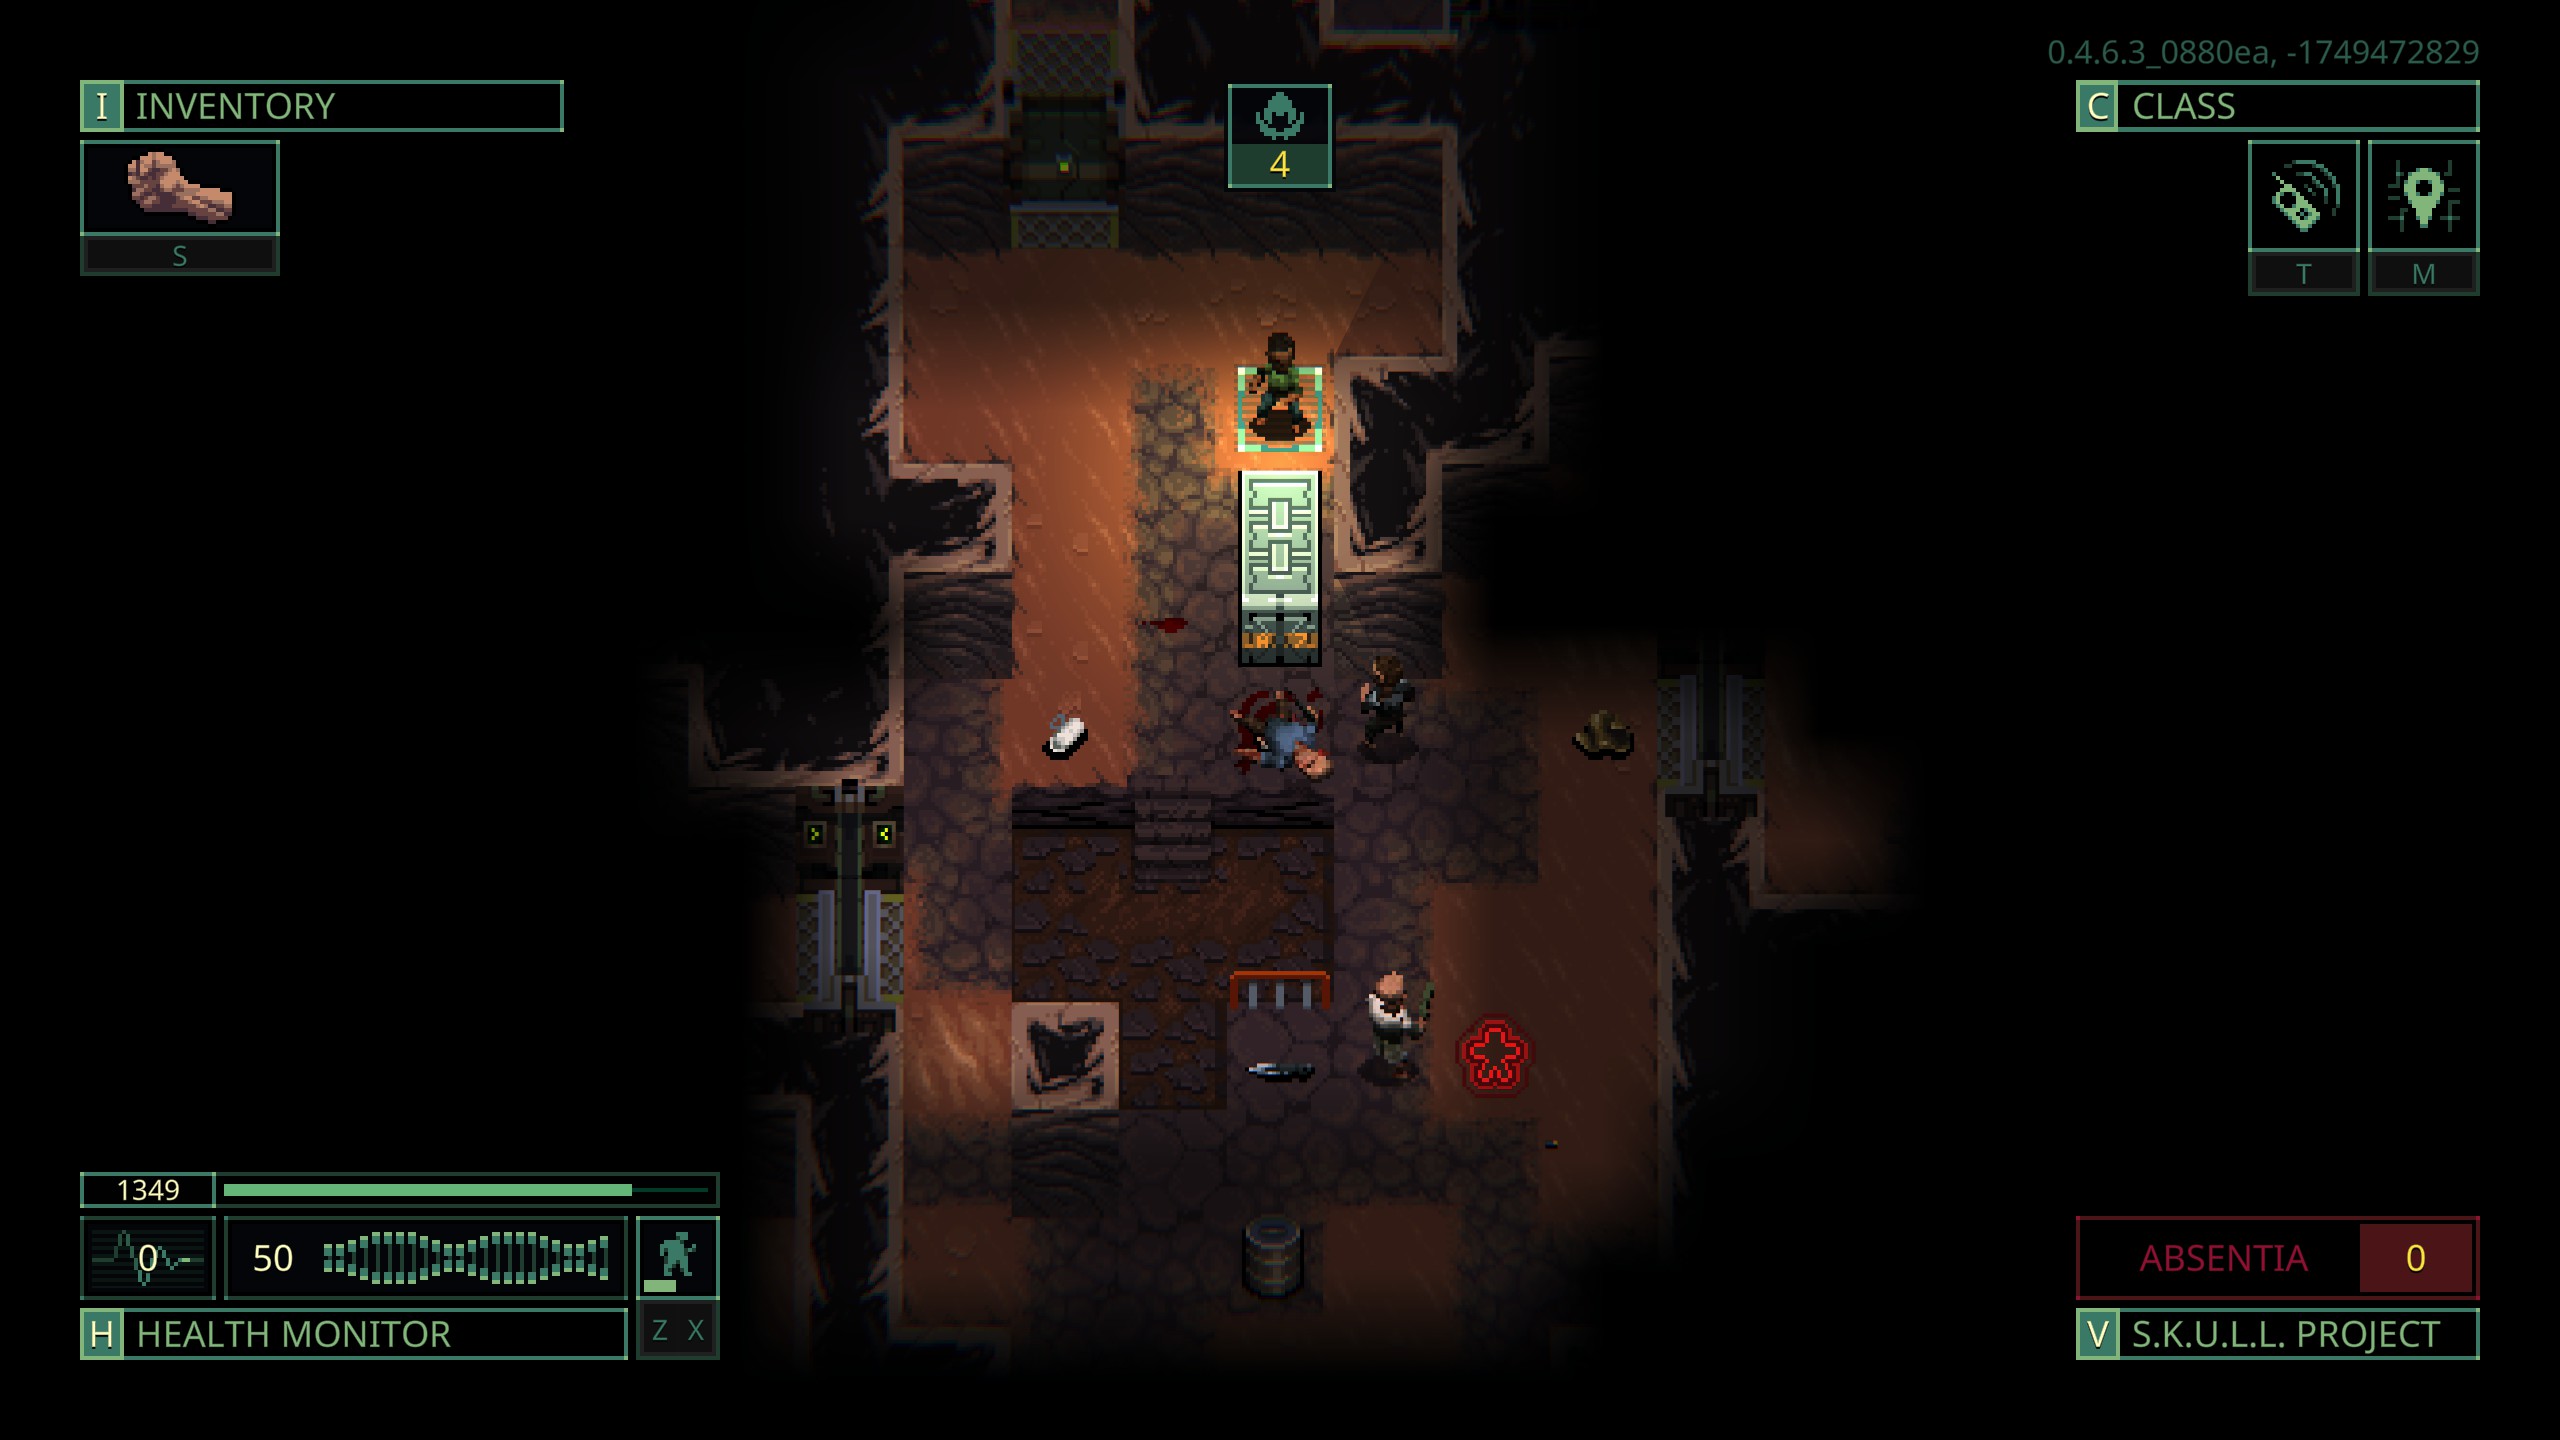
Move around the floor until you find some enemies. Doors and line of sight blockers will be your best friends.
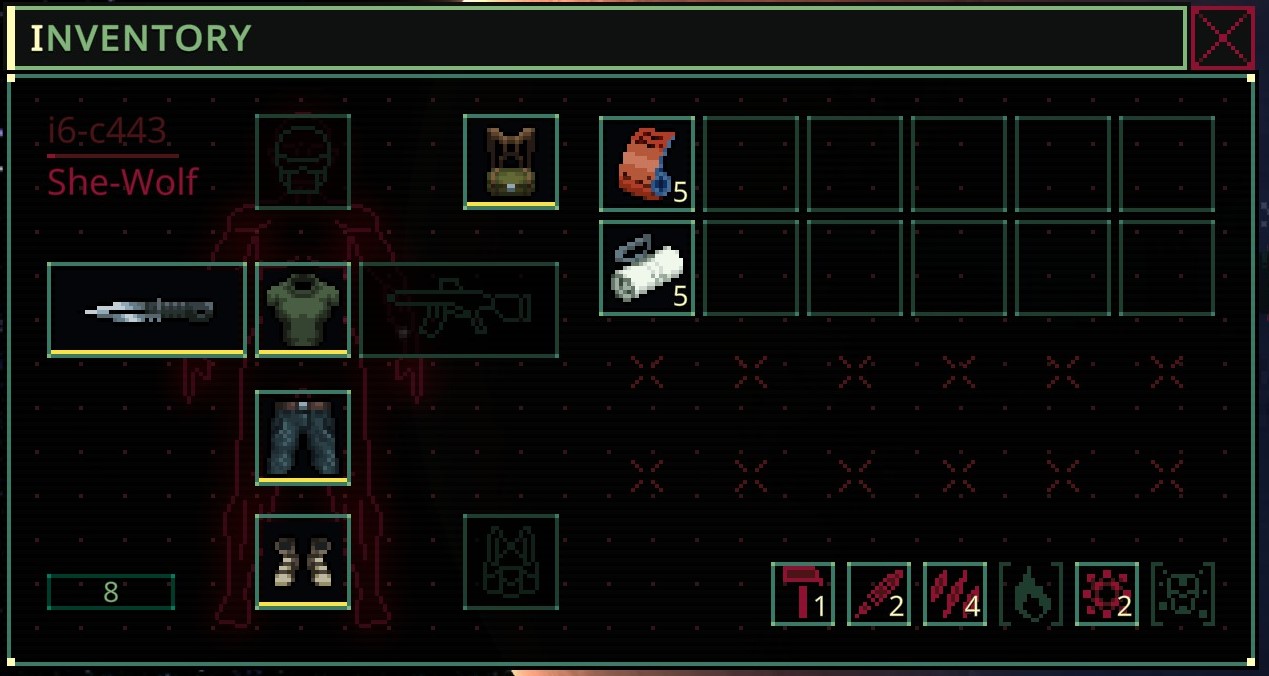
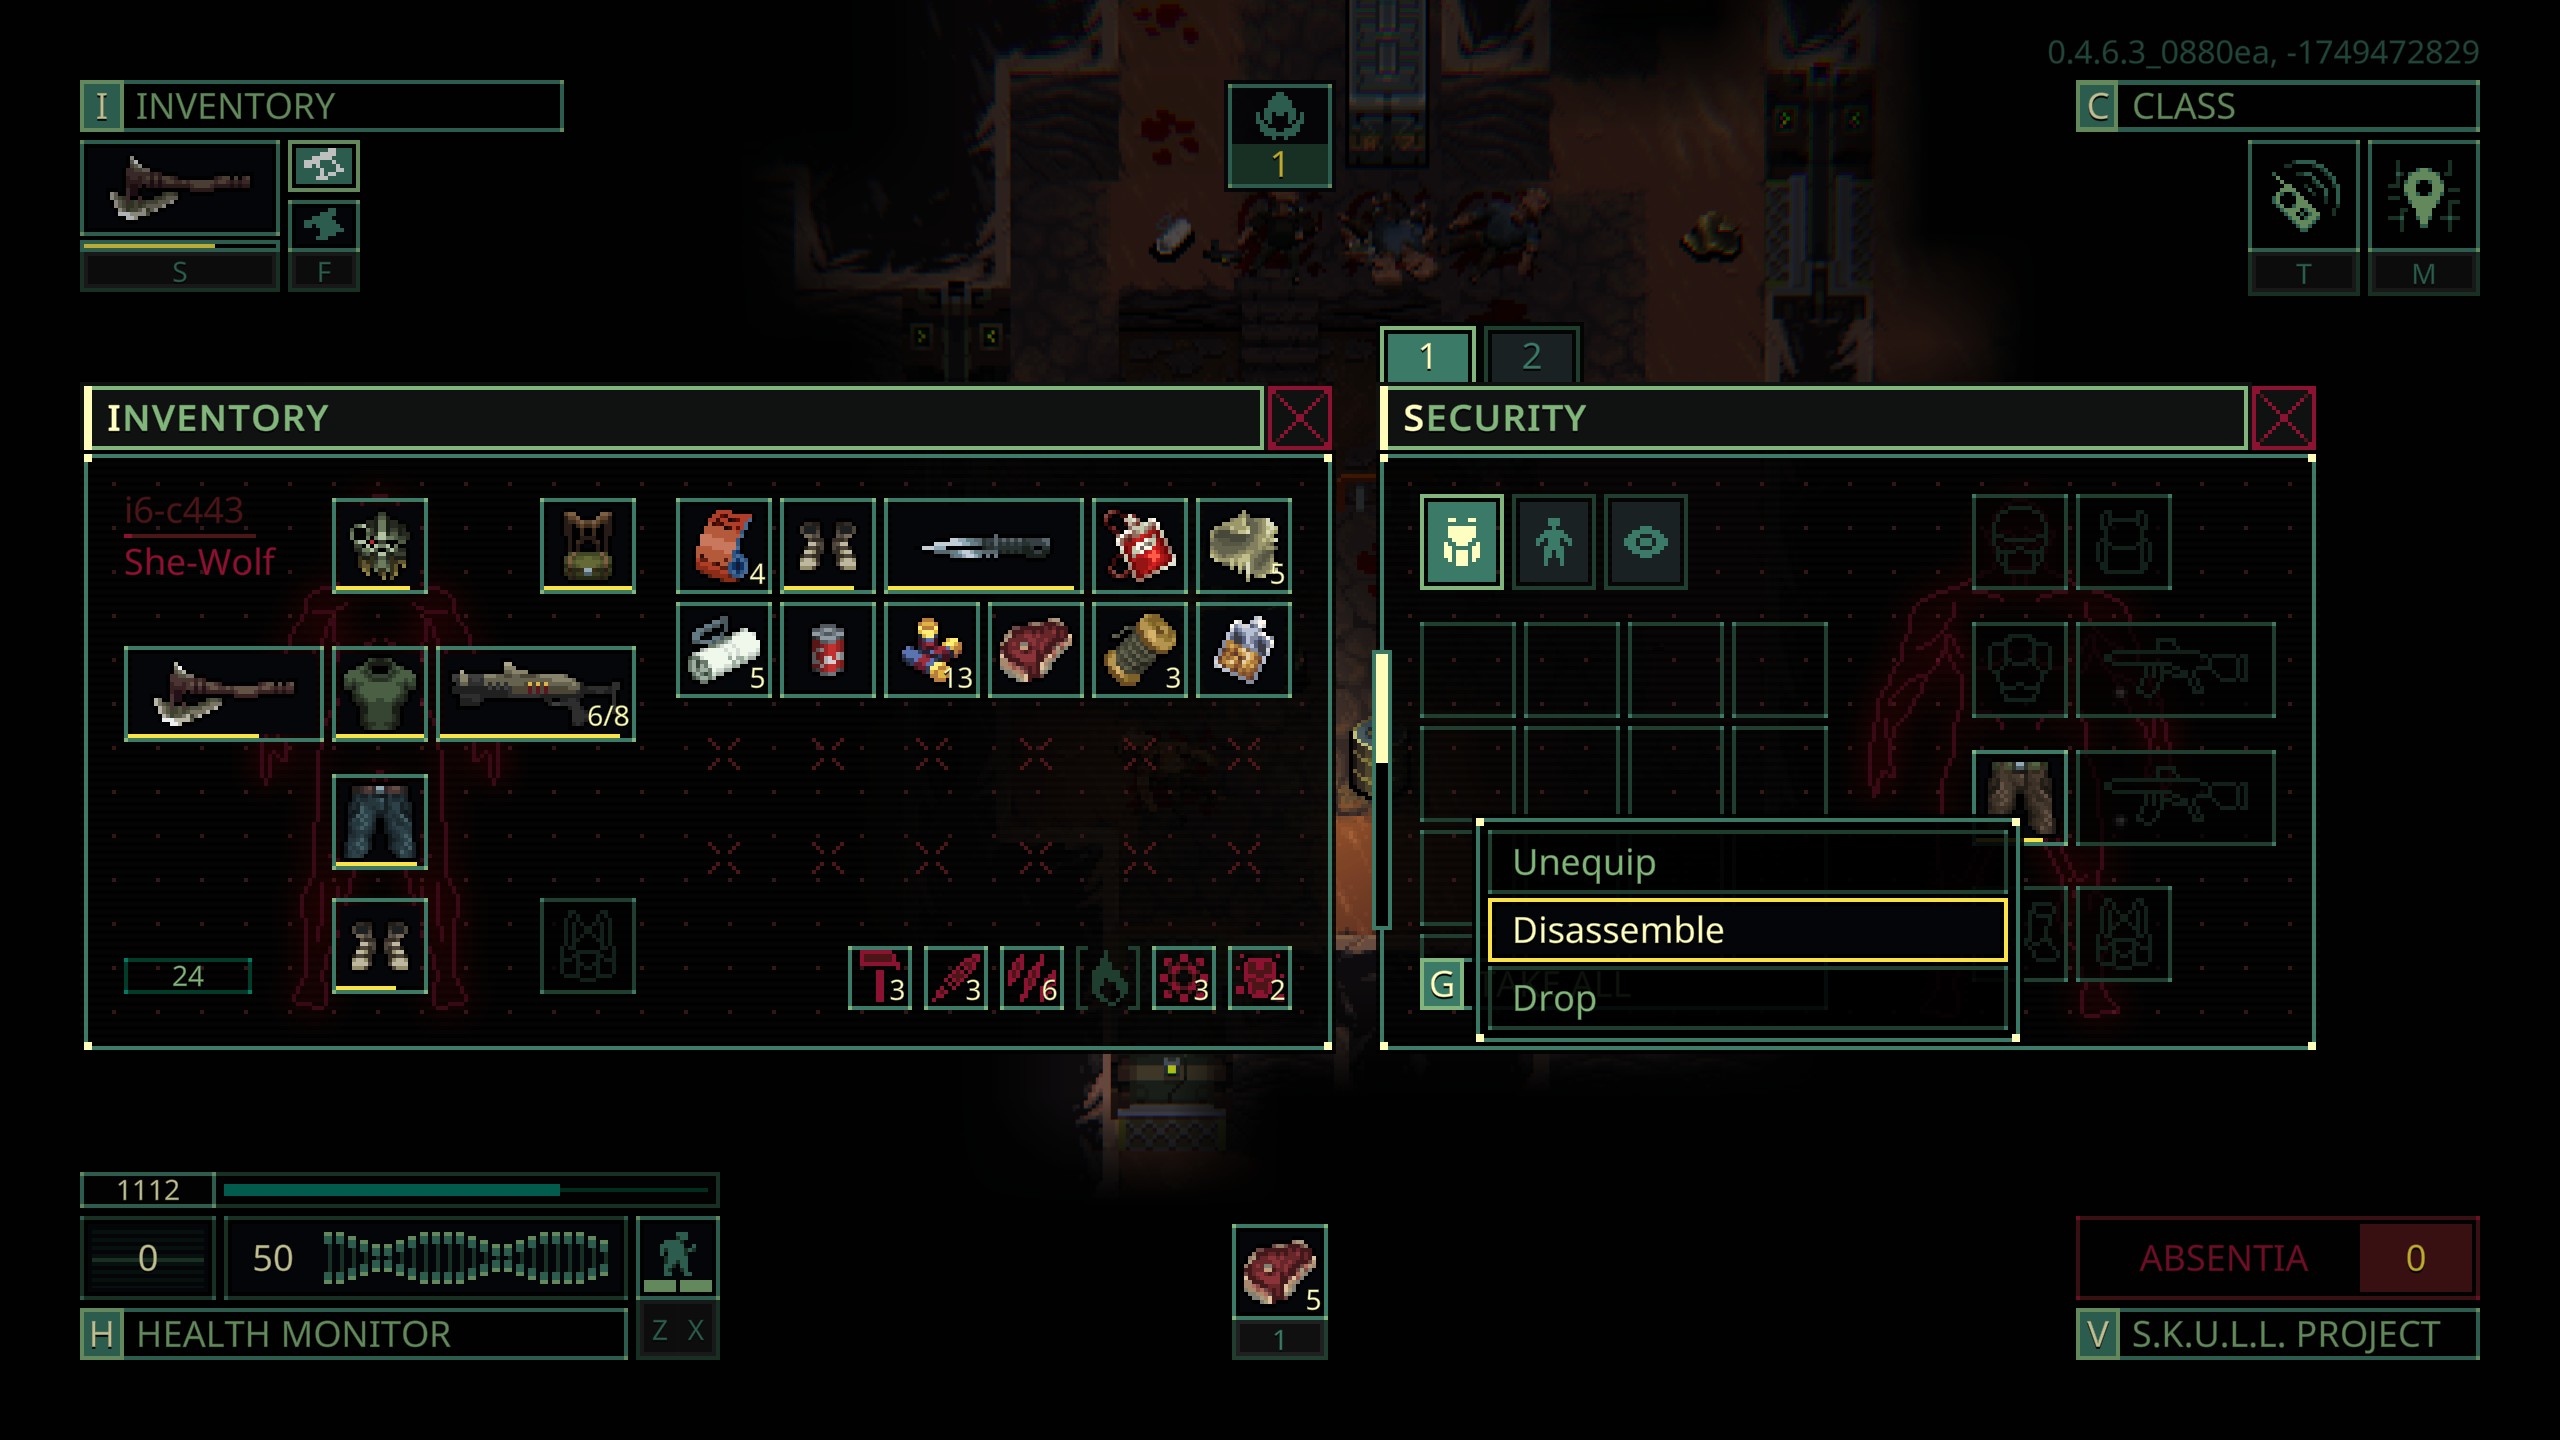
After killing your first foes loot them, clothing can be broken down into rags which you can use as cheap and quick med items.
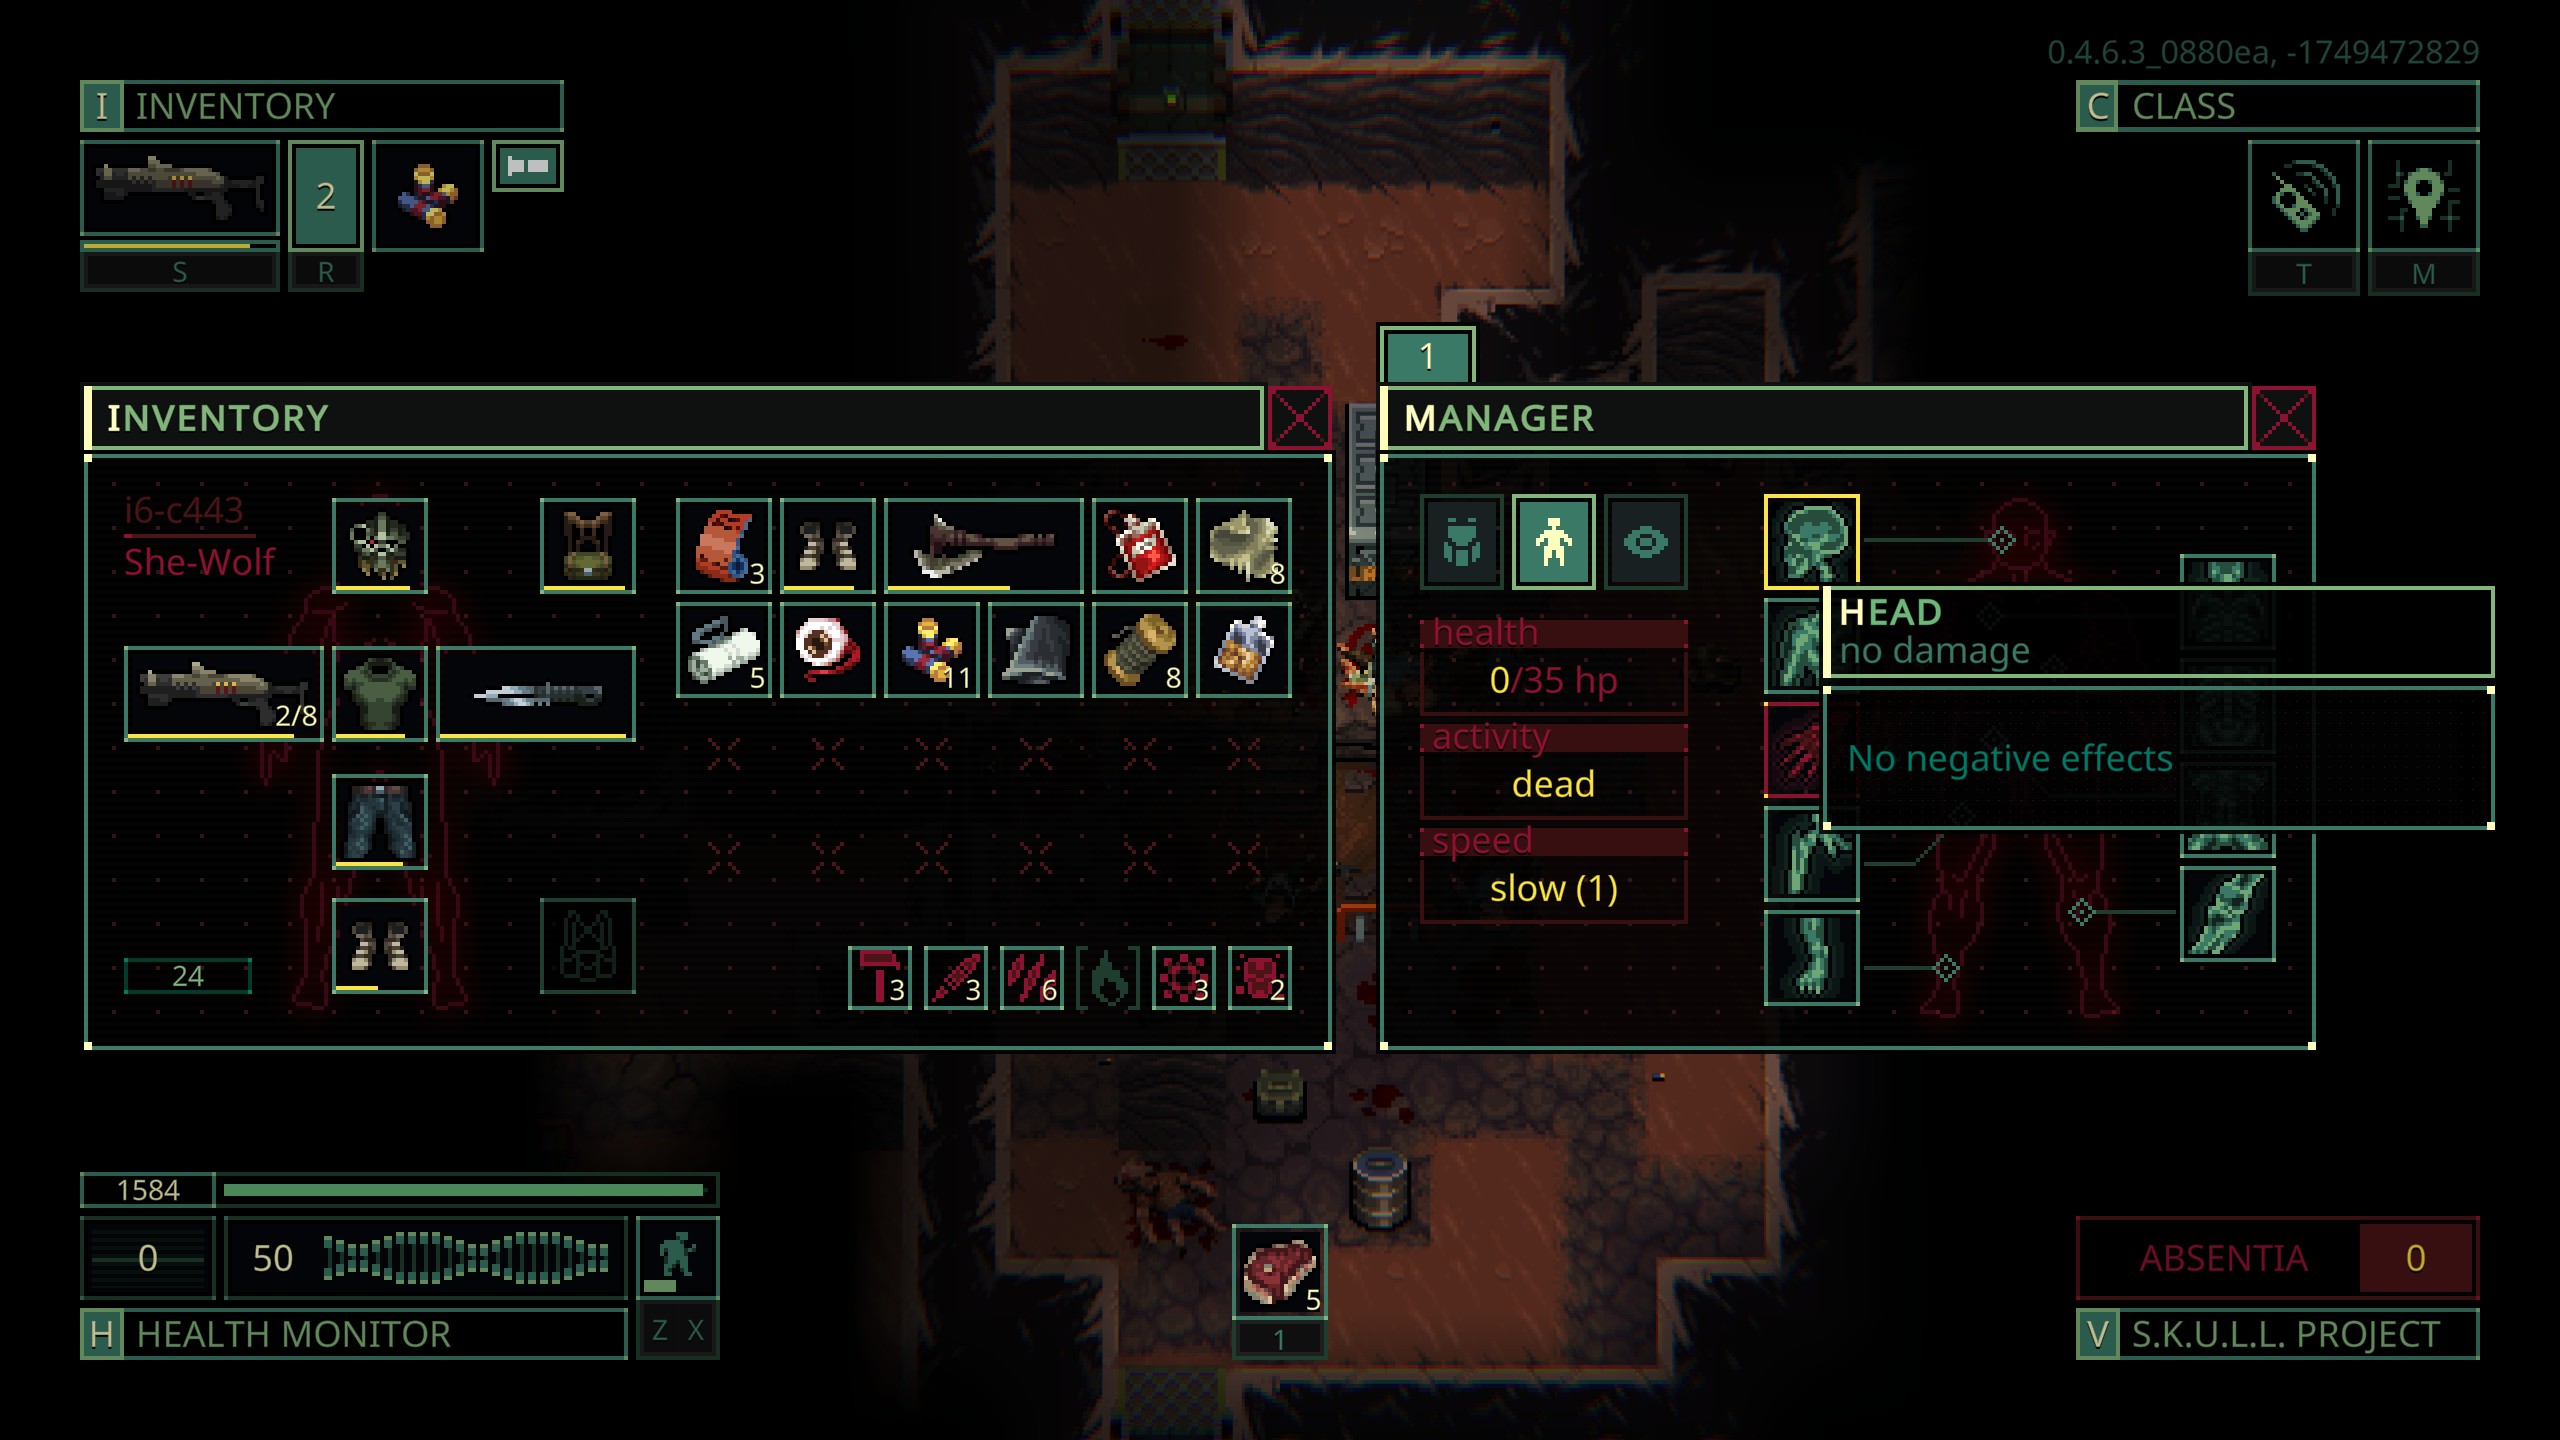
As Isabella Capet you can harvest meat by opening up the enemies body and click the body parts to amputate them.
Items of interest also obtained by amputation are eyes which can be obtained from heads as they are a good bartering item in some stations.
6. Help I got hit.
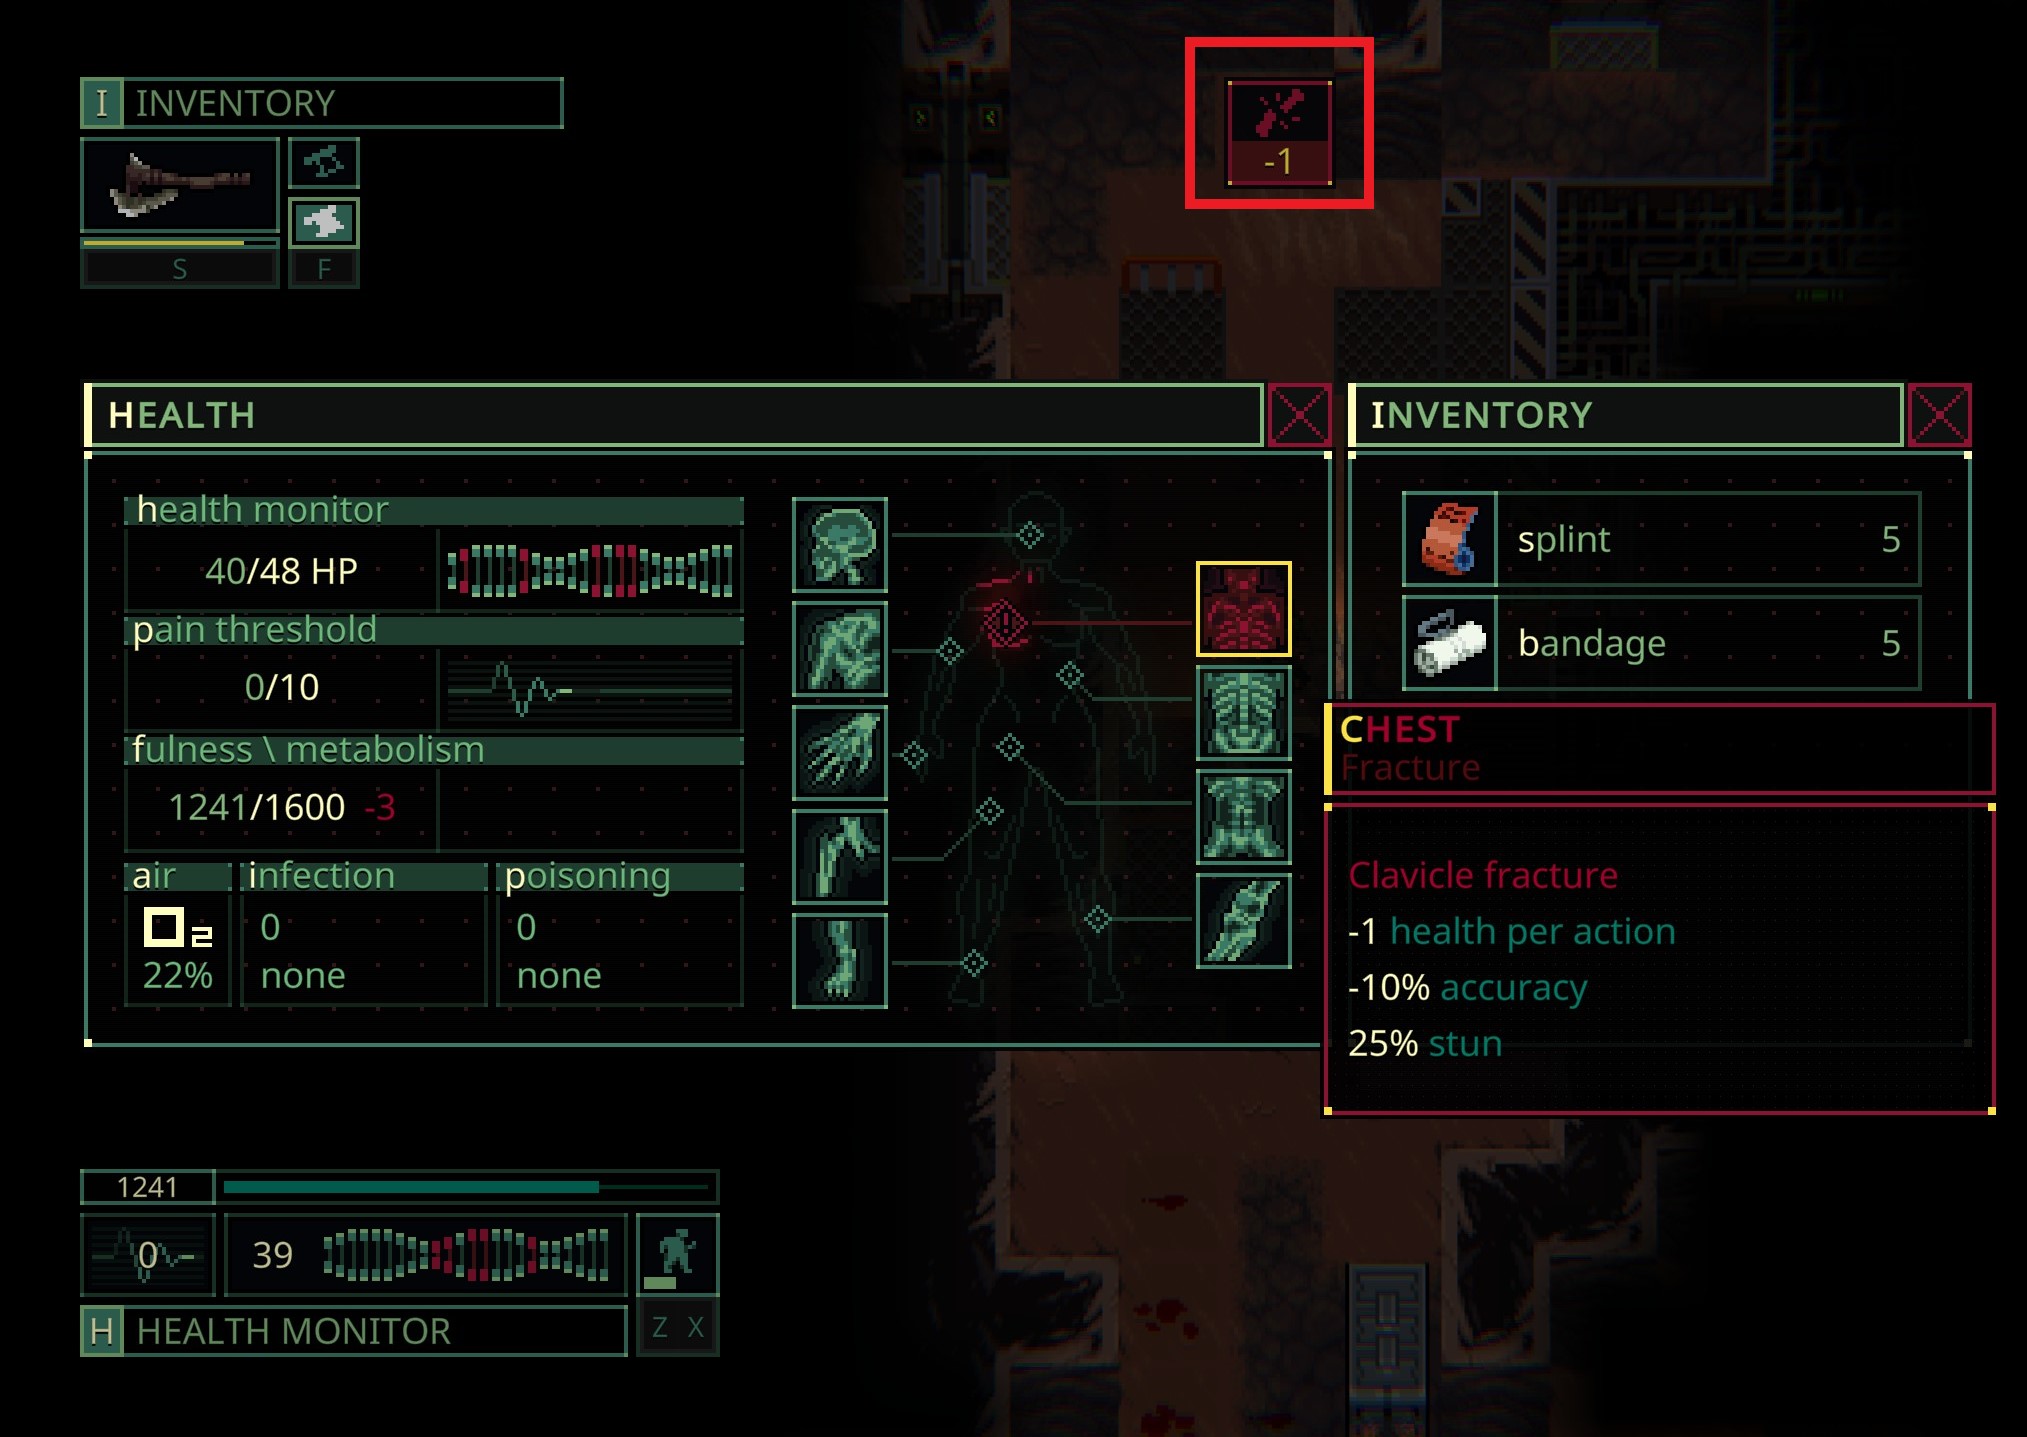
At the top of the screen, you can see your injuries in red.
To heal yourself hit h and select a healing item from the right-hand side and apply it to your injury. Bandages are better for pierce injuries and burns while splints are good for fractures.
Sometimes it takes a few uses of an item so be careful in the following turns.
7. Action Economy
There are three movement speeds in the game:
- Sneaking
- You only get one action point per turn
- You move quietly and can see some enemy movement. You can even stealth kill enemies if they are sleeping. (No one sleeps on Mars and its moons really but this helps for other planets)
- consumes the fewest calories per turn.
- Walking
- This is the default way to fight and move if you do not care about sneaking.
- You get two actions per turn.
- Moderate calorie consumption per turn.
- Sprinting
- You get three actions per turn.
- While sprinting you take a penalty to accuracy so be careful.
- High calorie consumption, sprinting too often will cause you to starve quickly.
8. General Tips
- Do not open doors or walk through them with your last action!
- Dissembling gear and bodies can provide you with useful material for completing the mission and for stacking and extracting for trading.
- As you play you will find meta-progression chips. These allow you to extract without completing the mission. I recommend safely filling your inventory if you can and leaving with them. The recipes, clones, and classes they unlock are extremely helpful.
- You can easily pass time in the Mars area by flying to the moons and back instead of just passing time. Either is fine depending on your goals.
- Before leaving the relative safety of the Mars you should stock up on gear for a few clones and level them. Additionally having some Quasimorph-reducing items like alcohol and cigarettes will make missions with the timer much easier.
- Enemies have resistances and armor like you. You may check an enemy’s stats and equipment by right-clicking them. Robots for example are highly resistant to pierce, blunt and fire but fall quickly to cut so use those machetes and shotguns!
- Explosive barrels can be disarmed by left-clicking them and taking the gas out.
- The biggest dangers of Mars are enemies with cutters and flamethrowers. Take them out from a distance as quickly as possible. If this is not an option sprint through a door and find cover.
Good luck Merc
Thanks for reading through the guide and good luck with your runs. I will continue to update this guide as the game changes and I learn more. The game sorely needs some documentation.
Also, this is my first Steam guide so If you have any format advice or further questions let me know!
