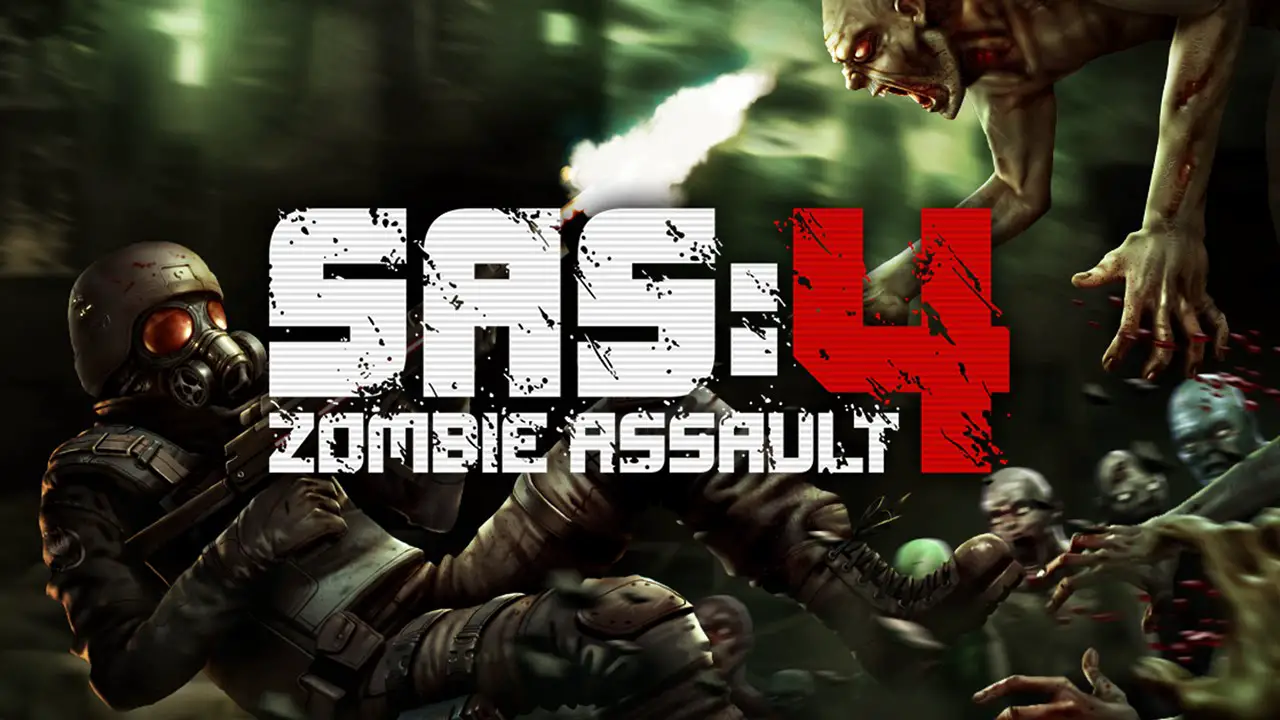
This is a comprehensive guide detailing a step by step walkthrough of all 50 Achievements in the game. If you have never played this game, this guide will show you a road map & order in which these unlocked for me. If you are simply hunting for Achievements this will hopefully help illuminate the ones you are missing.
Introduction
Achievement Breakdown: (50)
Story Related: (10)
Secondary Objectives: (1)
Collectibles: (7)
Perks: (32)
This game only requires one full playthrough, on any Difficulty, to unlock all the Achievements. For the two Difficulty related Achievements, they can be earned just by replaying the final Chapter on Über Difficulty.
There are 32 Perk Achievements related to killing enemies in different ways. All progress towards these Perks are cumulative across the same Save file & can be Save Scum farmed by reloading Checkpoints. What we do not earn naturally over our first playthrough we will be by reloading Chapters to farm our remaining Perk Achievements. Most will come through natural progression if you are aware of what to work towards ahead of time. If possible, as try killing enemies in ways that work towards Perk completion.
We have some Collectibles to hunt for over our first playthrough such as 50 Gold items, 10 Letters, & 72 Enigma Codes. There are no Achievements for Concept Art or Character Entries. Depending on which timeline you choose, there are either Health or Armor Upgrades available for you to collect; they do not have Achievements associated with them either.
For those interested, here is an organized list of all the Achievements/Secret Achievements. Unlike most of the Achievement Checklists listed in my guides, this one was created by Carrot <3 Sexy Time. Why create a new Checklist when someone else made an even better one? Be sure to check it out, Rate it, & give them some Steam Awards!
Sequence 1: Death At the Gates Again
1. Chapters: Deathshead’s Compound
2. Weapon Focus: Handguns
3. Letters: 1/10
4. Enigma Codes: 2/72
5. Gold: 1/50
6. Perks: 6/32
7. Achievements: 7/50
Since our Difficulty related Achievements can be earned just by replaying the final Chapter over, you are free to beat the game on whatever Difficulty you prefer. Bring’em On! is a nice middle ground Difficulty…
Chapter #1 – Deathshead’s Compound

Achievement #1 – Gunner: Save allied planes.
As soon as the game begins, we are thrown right into the action. Get your tools, & fix the damage in our plane’s fuel line. Next get to the cargo bay, & begin ditching all the excess weight we are carrying so we can regain altitude.
Once that is done, return back to Fergus at the cockpit, & we will take our position at the plane’s turret. This is where our Achievement comes in.
For the Achievement, we need to use the turret to shoot down at least four Nazi planes before they destroy our allies’ plane to our left. If we are not fast enough, we will miss the Achievement & have to Restart our Last Checkpoint (now or later on in mop up).
Assault Rifle: Some story will occur, & we will bull rush a Nazi automated turret & destroy it with Hand Grenades. Here we will be pit against Nazi Soldiers who will drop this Assault Rifle.
For Tactical & Assault Perks, we will need this Rifle. To start, be sure to either Dual-Wield when you can or get Headshots with the Assault Rifle (At least 3)…
Handgun: After we exit the second automated turret bunker, we will be exposed to no man’s land underneath the “Stomper”. Before we charge across the plains, look to the right of the German warning sign & we can see a weapon cache against some sandbags with this new Weapon.
Try getting at least 1 Headshot with this Weapon.

Achievement #2 – Deadeye: Unlock Tactical Perk 1.
Complete 3 Headshots with an Assault Rifle & 1 Headshot with the Handgun. Take your time & just focus on lining up those Headshots with these Weapons…
We will now unlock five new Tactical Perks to work towards. Most are cumulative & just require you to focus killing with either the Handgun or Assault Rifle. When it says “killing from cover” we need to have our bodies blocked by cover & lean out to kill enemies.
I would pick one of the two Weapons to focus on first instead of juggling both if possible…

Achievement #3 – Scout I: Unlock Stealth Perk 1.
Progress onwards through the battlefield & we will eventually reach a bunker where a Stealth tutorial will pop up. Inside, we can find our first Commander.
Sneak in & stealth kill the Commander to unlock the Achievement.
Completing this Perk will unlock four new Stealth Perks for us to work towards. Always stealth kill Commanders when you can help it.

Achievement #4 – Knife Throwing: Unlock Stealth Perk 2.
With stealth introduced, they will hand feed us the next couple Nazi Soldiers to practice on. Take advantage of this opportunity, & kill as many Soldiers as you can with stealth.
Be sure to do the same to the Commanders!
Completing this Perk will now reward us with Throwing Knives!

Achievement #5 – Knife Sheath +: Unlock Stealth Perk 3.
The game is still in “stealth mode” right now making stealth kills very easy. With our one Throwing Knife, try killing as many Nazi’s as you can with it; for the Perk we only need to kill 5!
Handgun Silencer: There are two ways to enter the primary bunker when we collect the Explosives Bundle: the front gates or the missile storage room. Ignore the front gates & backtrack to the area before it to place the Explosives Bundle on some missiles.
When they explode, we can drop down into a sewer area; head down the tunnel past B9/B1 ports to the B7 ports, & we can collect this Upgrade on the port to our left. Now we can work towards Tactical Perk – Silent Shot.
Remember you can stack kills for Perks: if you are on the ball, you can use a Silenced Pistol, while Dual-Wielding, to get a Headshot from cover & work towards four different Perks at the same time with your kills…
Enigma Code #1 – 1:1: Exit the sewer tunnels & we will be able to access a larger room with a Commander & some rail lines. Follow the rail lines Southwest & we will be at the opposite side of the front gates to the bunker we could have entered through. From here, enter into the security office off our left, & we can find our first Enigma Code on a crate.
Gold #1 – Medal: Follow the rail lines backwards now to the dead end at the lower level of the bunker. Here, on the left side we can find an open vent we can crawl through to enter a morgue. On the table next to the exit doors back to the main room, we can find a Gold Medal on a table.

Achievement #6 – Double Reload: Unlock Assault Perk 1.
When possible, especially if you have the Silenced Handgun, Dual-Wield your Weapons to earn 10 kills for this Achievement.
Always plan your kills. There is no reason to play on a harder Difficulty than you can manage, so when the opportunity presents itself always try to work towards kills for our Perks. Make each one count.

Achievement #7 – Quick Regeneration: Unlock Tactical Perk 3.
As we begin progressing further up the floors in the bunker, we will come across a +40 & two +20 Medkits on floor 03. Ignore these for now, & fight your way up to floor 05 where there will be some Nazi’s defending our first AA Cannon.
Look down the railway tracks here off our right & it will end in a +80 Medkit. For this Perk, we need to hit 200 Overcharged Health. Grab the +80 Medkit & leap off the railing down to floor 03 where the other Medkits are. We will lose Health, but collect the Medkits we left behind to hit over 200 Health to complete the Achievement.
Enigma Code #2 – 1:2: Once the first AA Cannon is disabled, pass through into the next room & head up the stairs where two doorways will be. Enter the doorway deadhead of us & we can find three Levers along the right wall.
Pull the leftmost Lever first, then the rightmost, before pulling the center Lever to open a secret room within a wall; it may take a couple repeats for it to trigger. Inside, we can an Enigma Code on a desk; we can also find the Handgun Silencer Upgrade as well if you missed it earlier…
Letter #1 – Oskar’s Letter: Pass through the other doorway now, & head up the stairs to fight off some more Nazi Soldiers. Here, head up the first of two sets of stairs in the center of the area & head right to enter a red lit sleeping quarter. We can find a Letter on a bunk at the back right of the room.
Sequence 2: Among Warriors
1. Chapters: Deathshead’s Compound
2. Weapon Focus: Handguns
3. Letters: 1/10
4. Enigma Codes: 13/72
5. Gold: 5/50
6. Perks: 8/32
7. Achievements: 13/50
Chapter #1 – Deathshead’s Compound
Gold #2 – Goblet: Disable the second AA Cannon now & enter the next room where there is a riveted red door that is locked. To the right of the door, we can see some crates with a tarp over them. Look below the tarp on the ground, to find a Gold Goblet tucked underneath it.
Enigma Code #3 – 1:3: Exit outside the bunker briefly before re-entering it further down… or try to as a Panzerhund will come out to attack us. Wyatt will appear out of nowhere to help us & offer his hand down to bring us up.
Do not grab his hand yet & instead go back to the room we tried to enter to find an Enigma Code inside on a crate.

Achievement #8 – Gun Magazine +: Unlock Tactical Perk 4.
If you have been focusing on using your Handgun, be sure whenever possible to kill enemies while leaning out from behind cover. Kill 15 enemies this way to unlock the Achievement.
Gold #3 – Chalice: Scale the walls of Deathshead’s Compound & open the front gates to let the rest of our squad in. Head deeper in yourself by climbing down the mechanism chains & we will be notified of two Nazi Commanders in the area.
One can be found on our level at the end of the hall in a dinning room. At the back of this room, under some portraits, we can find a Gold Chalice on a table against the wall.

Achievement #9 – Scout II: Unlock Stealth Perk 7.
Whenever Nazi Commanders are present, always try to take them out using stealth; even after we complete this Perk. Get 5 Commander stealth kills to complete the Perk.
Enigma Code #4 – 1:4: With the Gold collected, deal with the other Nazi Commander, & then return back up to the upper level. Navigate to the area opposite where the dinning room is to see a hole in the floor with planks stretching across it. Drop down through the hole & we can collect an Enigma Code from on top of a crate here.
Gold #4 – Sword: Head across the planks over the hole in the floor now & we will reach a room with a spiral staircase & a portrait of Deathshead in it. Search the statues along the walls here & we can find one of them holding a Gold Sword.
Enigma Code #5 – 1:5: Go back to face Deathshead’s portrait & we can see two knight statues beside it. Examine the sword of the statue to the left, & we can adjust it to open up a secret passage behind the portrait.
Enter inside it, follow the stairs up, & we will be led to a vent grate with a Commander sitting in an office. Remove the grate, kill the Commander, & we can collect an Enigma Code from his desk.

Achievement #10 – Silent Shot: Unlock Stealth Perk 5.
If you have been focusing on using the Silenced Handgun, get as many kills from stealth with it as possible; we only need 10 to complete this Achievement.

Achievement #11 – Quick Draw: Unlock Tactical Perk 2.
For this Perk, we need to get 40 Headshots; it can be done with any Weapon. Place your shots carefully & try to get Headshots whenever possible.
Gold #5 – Floorball Trophy: Pass across the wooden walkways outside & we will need to link up with our squad inside an open courtyard. As we approach, we will be attacked by a Kampfhund. Head around to the other side of the crates the dog jumped over, & we can break some wooden boxes that will have this Gold Floorball Trophy.

Achievement #12 – Throwback: Unlock Demolition Perk 1.
Now enter the main courtyard & kill the Nazi Soldiers attacking our squad; there are many bunched up Nazis here that we can lob our Hand Grenades at to kill well over the two required for this Achievement.
Once this is unlocked waste the rest of your Grenades on the Nazis for the Grenade Pouch + Perk then try getting as many kills as you can with a Mounted Turret for the Bullet Feeder Perk.
Enigma Code #6 – 1:6: Once the Nazi Soldiers are all dead, navigate to where the crashed plane is but do not enter it yet. Instead, look around the corner to the right of the plane to see a smashed wall; we can grab this Enigma Code through the hole.
Enigma Code #7 – 1:7: Some story will happen, & we will wake up in Deathshead’s lab. To progress, we need to find a key to escape the furnace room. Before we freak out looking for the key, quickly look inside the first cabinet to the left of Fergus’s locked door to find this Enigma Code.


Achievement #13 – Fergus/Wyatt Saved: Choose to save Fergus/Wyatt.
Story Related. When Deathshead captures us at the end of the Chapter, we will need to make a decision on which of these two companions will get sacrificed. Whoever lives, stays with us the rest of the game, & it is altered in their presence.
Whoever you do not pick, we can easily unlock their corresponding Achievement by replaying this Chapter over again after we beat the game… for the record, I am team Fergus 100%.
Sequence 3: An Angel of Death
1. Chapters: Asylum, A New World
2. Weapon Focus: Handguns, Throwing Knife Kills
3. Letters: 3/10
4. Enigma Codes: 15/72
5. Gold: 10/50
6. Perks: 8/32
7. Achievements: 13/50
Chapter #2 – Asylum
Enigma Code #8 – 1:8: After we awake from Blazkowicz’s fugue state, navigate along this starting floor until we reach a large main staircase. Before heading down them, take the stairs up to the top & we can find an Enigma Code on the ground at the barricade.
Letter #2 – Izabela’s Letter: Head down the main stairs now to the lower floor & clear out the Nazi Soldiers here. Consulting your map, head to the East side of the room to staircase A which goes back up to the second floor. Near the bottom of these stairs, there will be cracks in them; peer through the broken stairs & we can shoot open the door of a small crawlspace. Head around to where it was opened on the lower floor & we can find a Letter inside on some boxes.
Gold #6 – Hood Ornament: When we escape outside the asylum, do not go to help Anya up straight away. Before we do that, walk over to the front of the car she is laying under & we can find a Gold Hood Ornament underneath the car’s hood on the ground.
Chapter #3 – A New World
Gold #7 – Watch: When we gain control of Blazkowicz in the cellar when this Chapter begins, we will need to go interrogate Officer Keller. Before we do this, look over at the table next time him to find this Gold Watch.
Letter #3 – Roman’s Letter: Collect the Apron then the pair of Goggles from the drawer with the Chainsaw on top of it. Before we grab the Chainsaw, look back into the same drawer we took the Goggles from to find this Letter.
Enigma Code #9 – 1:9: After some story, we will exit the trunk of a truck at the Oder Bridge on route to a prison. To the left of the truck will be a hole in the road we can drop into with a pipe we can then crawl through. Pass through the pipe into a larger room & we can find an Enigma Code in the back left corner near the entrance to another pipe.
Enigma Code #10 – 8:1: Take the hallway beside where we picked up the last Enigma Code & navigate through, up some stairs, until we are back outside. From here, head to the Western corner around the building towards a very bright spotlight on a tower. Head to the bottom of this tower & we can find a shed with this Enigma Code pinned to its wall with a Throwing Knife.
Gold Item #8 – Egg: While still at the shed, head around it to the opposite side & search the walls here for a broken piece of siding with this Gold Egg sticking out of it.
Enigma Code #11 – 8:2: Keep heading North now & enter into the building ahead of us from the shed. In this building, there should be a room full of bunks we can enter. Go to the far end of the room & head up some stairs to the next floor where a Commander will be; an Enigma Code can be found close to the top of the stairs on some comms equipment.
Enigma Code #12 – 8:3: Clear the area & return back to the truck with Anya & her grandfather. Drop off the truck at the end of the road, & enter into the base at the end to try to clear the way. Clear the Nazi Soldiers inside then pass through the doorway on our right in the very first room to enter a storage room; we can find an Enigma Code on top of a small wire coil in here.
Enigma Code #13 – 8:4: Get over to the opposite side of the base now & work your way through it to the control room. Along the way, we will enter a garage/workshop that has a large digital blueprint of a transport truck on a screen. Along the left side of this room will be a series of small green lockers with numbers ranging from 29-70. Go to locker 43 & we can find this Enigma Code inside it.
Enigma Code #14 – 8:5: Now enter into the actual garage room close by where a Nazi Commander is/was. Past the large transport truck, we can find the body of an old car; the Enigma Code will be on the passenger side floor.
Enigma Code #15 – 8:6: Raise the lift & return back to the truck to carry on further. In the next area, there will be two guard posts on either side of the road. Navigate over to the barracks that the Nazi Commander is in & we can find an Enigma Code on some comms equipment at the back.
Gold #9 – Medallion: Now make your way over to the guard post on the opposite side of this area. Detach the Mounted Turret then drop down off the guard post’s South side to see a crate beside a ladder. Destroy the crate, & we can see a metal grate behind it; unload the Turret into the grate to melt it off. Enter inside where the grate was & we can collect this Gold Medallion off of one of the tables.
Gold #10 – Doorknob: Use the Mounted Turrets to defeat the two Guard Robots then return back to the truck to escape Oder Bridge.
Once we are on the train to Berlin, we will need to play a non-consensual card game with a very bad woman. Just remember: think Nazi. When it is over, exit the diner car to enter the passenger car. Past the bathrooms, look left to see some cabinets where towels are stored. To the left here, we can see a cabinet door slowly swing open & closed; look into it as it opens to collect this Gold Doorknob.
Sequence 4: The Kreisau Circle
1. Chapters: Eisenwald Prison, A New Home
2. Weapon Focus: Knife Stealth Kills, Dual Wield Kills
3. Letters: 4/10
4. Enigma Codes: 21/72
5. Gold: 15/50
6. Perks: 13/32
7. Achievements: 16/50
Chapter #4 – Eisenwald Prison
Letter #4 – Erdman’s Letter: When the Chapter begins, speak with Anya & step outside onto your hotel balcony. Cross over to the balcony further ahead & we can enter into the room beside it through an open window; this Letter will be on a table inside.
Gold #11 – Plate: When we drop in through a hatch into the next building, we can see three caged areas. Inside the cage to the far left, we can spot a Gold Plate; we cannot grab this just yet, but remember that it is here.
Collect the Laser Cutter from the workshop area then head back to the cage. There is not a lot of battery in the Laser Cutter so quickly/carefully cut yourself out a Blazkowicz sized hole in the chain link fence & we can collect this Gold.
Gold #12 – Frame: Recharge your Laser Cutter at the station up the stairs nearby & then cut a hole in either set of chain link fences here to enter a new room. Ignore the window for now, & we can spot a cage to its right. Cut a hole in the chain link fence & we can collect this Gold Frame from inside the cage.
Enigma Code #16 – 8:7: Exit through the window & leap across to another rooftop to enter into the building through its own window. Sneak into the main office room from the hall we enter from & look over at the far right corner near the chalkboard to find a Folder on top of some filing cabinets.
Collect it, then place the Folder inside the filing cabinets close to the back of the room where we entered it from to open a secret room. Go into the room & we can collect this Enigma Code from inside an open briefcase.
Enigma Code #17 – 8:8: Now head upstairs & over to room where the Nazi Commander is/was that has music playing in it; we can find this Enigma Code on his desk.
Enigma Code #18 – 2:1: Jump onto the prison transport now as a part of the story & we will be taken to Eisenwald Prison. Sneak through the prison grounds & crawl through a pipe to enter the main building… where a Panzerhund will chase us. Quickly turn around & slide under some pipes behind us, then use the Laser Cutter to cut a chain on the grate we are standing on to drop us down.
The Panzerhund won’t follow us down here & we can breathe. Down here, we can spot some chain link fencing we can cut through to drop down to a tunnel lower down. Follow the tunnel along & we can find this Enigma Code on some short metal steps near some Body Armor & Medkits at a doorway.
Enigma Code #19 – 8:9: Exit the tunnels though a vent into a bathroom. Make your way over to the room where the Nazi Commander is & we can find this Enigma Code directly in front of the chair he was sitting at in the cell.
Gold #13 – Nugget: Collect the Key & exit into a room that has coal furnaces burning in it. On the ground floor, we can spot an automated vehicle driving around collecting coal from a pile to feed to the furnaces. Drop down, & head to this pile to see a Gold Nugget near the back lower end of the pile.

Achievement #14 – Vive La Resistance!: Locate the resistance.
Story Related. Enter cell block B & navigate to cell B2 up on the fourth floor. Enter B2 & use the Laser Cutter to release the prisoners here to unlock the Achievement.

Achievement #15 – Endurance I: Unlock Assault Perk 2.
After we free the Resistance fighters, we will need to escape the room. Crawl through the vent & we will drop down into a room with a Nazi Commander & an Automatic Shotgun we can collect. With the Shotgun, open up the door to see the Nazi Soldiers all lined up down a tight walkway. Sprint, slide, & unload the Shotgun into them. When the slide stops, stop shooting, run back & slide again until we kill three enemies this way. Easy.

Achievement #16 – Scavenger: Unlock Assault Perk 3.
Collect as much Assault Rifle ammo as you can & keep your eyes open for grouped up Nazi Soldiers (three or more). Duel Wield for more firepower & mow down three of them without releasing the trigger or running out of ammo to unlock the Achievement.
Enigma Code #20 – 2:2: After you & Fergus/Wyatt fight across the outer hall & enter back into the building there will be large force of Nazi Soldiers waiting for us. Kill them, & in the center of this room will be a security office with iron bars around it; we can find this Enigma Code on one of the “floating” desks here.
Gold #14 – Helmet: Continue onwards from the checkpoint & head up some stairs to have to fight off more Nazis in a hallway. In the middle of the hall, two Soldiers will bullrush us from a room off our right. Enter inside this room to find a Gold Helmet inside an open locker.
Enigma Code #21 – 2:3: Round the corner from the hallway & we can head up a small set of stairs to our left into a small office space where we can find this Enigma Code inside a briefcase on one of the desks.
Chapter #5 – A New Home
Gold Item #15 – Urn: Leap off the bridge in Berlin & follow Fergus/Wyatt through the water to be taken to the Kreisau Circle HQ. After we meet with Caroline, we will get to free roam & explore the area while being tasked with locating the Project Whisper Folder.
Collect a Crowbar from Thibault’s room & take it to Max Hass’ to pry open a wall to grab Project Whisper. Do not take it to (or speak to) Caroline just yet as it will end the Chapter. Instead, head inside her room & interact with the large pin up poster to take it off the wall. Enter inside the secret room we opened up, & we can collect this Gold Urn after crawling through a vent that will drop us into a vacant room (soon to be ours). Grab it before climbing over the crates to get back into the main base.
Sequence 5: Learning to Fly
1. Chapters: London Nautica
2. Weapon Focus: Stealth Kills, Assault Rifle Kills From Cover, LKW Kills, Marksman Rifle Kills
3. Letters: 4/10
4. Enigma Codes: 29/72
5. Gold: 19/50
6. Perks: 15/32
7. Achievements: 19/50
Chapter #6 – London Nautica
Gold #16 – Statue Plate: As soon as we gain control of Blazkowicz in front of the London Nautica building, go & climb onto the platform where that statue of a man holding a missile used to be; we can find this Gold Statue Plate in the center of the platform.
Enigma Code #22 – 2:4: Before we begin crawling through the rubble to reach the London Nautica entrance, follow the rubble around to the right (North) & we can find a side path through it along the boundary walls that will take us to a dead Nazi Soldier. We can find this Enigma Code beside his corpse along with a Handgun.
Enigma Code #23 – 2:5: Navigate through the rubble further into the London Nautica building & eventually a Guard Robot will break through some debris & launch us backwards. When we stand back up, immediately turn around away from the Robot & run to the back of the area. At the back look to your left to see this Enigma Code behind some concrete debris.
Enigma Code #24 – 2:6: Get past the Guard Robot & enter the following room to then be attacked by some Nazi Soldiers & another Robot. Quickly enter into the storage room to our left & we can find this Enigma Code on a chair; there are also a lot of Hand Grenades & ammo in this room as well.

Achievement #17 – Grenade Pouch +: Unlock Demolition Perk 2.
If you have not already been doing so, begin trying to log some Hand Grenade kills when there is no avoiding combat. For this Achievement, we need to accumulate 10 Hand Grenade kills.
Gold #17 – Carafe: Defeat the Nazi Soldiers in this room along with the Guard Robot, then make your way to the center of the lower level. Look along the walls here & we can spot this Gold Carafe in a glass display case. Break open the glass to collect the Gold.
Gold #18 – Knife: Head up to the second floor of this room now & make your way over to where the cafeteria is. Go behind the front counter into the freezer room & we can climb up into a vent in the freezer’s ceiling. Crawl through the vents & we can find this Gold Knife caught on some iron grating overlooking the room we were just in.
Marksman Rifle: When you are finished in the entrance room of London Nautica, head over to where the Guard Robot lifted open the gate & look to the left to find a wrecked room with a Marksman Rifle in it. We need to accumulate 25 kills with this Weapon for the Quick Reload Achievement.
Enigma Code #25 – 2:7: Pull the switch, & progress into the next room with a large moon in its center. Fight your way to the very top command room. Before pulling the lever here, search around on the consoles to find an Enigma Code.
Enigma Code #26 – 2:8: Progress through the elevator shaft & we will drop down into a Nazi lab full of “Da’at Yichud” Artefacts. Look on the other side of one of the counters in the center of the room to find an Enigma Code on it.

Achievement #18 – Power to the Laser: Find the Laserkraftwerk.
Story Related. While in the lab, collect the Laserkraftwerk to continue onwards; this replaces our Laser Cutter.
Gold #19 – Pocket Flask: Once we have the Laserkraftwerk, cut a hole in a vent cover & crawl through it back into an elevator shaft. Ignore shooting the elevator brakes & instead climb up a nearby ladder. At the top, look to your left to faintly make out another vent grate we can cut through. Pass through the vent & we can find this Gold Pocket Flask at the dead end.

Achievement #19 – Autopanzer: Unlock Assault Perk 6.
We now have to drop into a helicopter hanger full of enemies. Kill them all, Guard Robots included, & a massive even bigger Heavy Robot mini-boss will arrive. For the Achievement, we need to fire an entire full clip of Laserkraftwerk into it without missing a single shot; this is the perfect opportunity. We can find recharge stations on either side of the central platform. If you accidentally miss, quickly recharge the LKW & try again. Pick your shots carefully & do not spam fire.
Watch out for its disabling blasts as they will completely drain the LKW & wreck your attempt.
Enigma Code #27 – 7:1: Once the enemies in the hangar have all been defeated, we can now take our time & collect our last Collectibles on this Chapter. To start, stand where the Heavy Robot came out of the walls & face back into the hangar. Head over to the far-right helicopter pad & go underneath it where there will be three different stacks of crates. Look at the center stack of crates, & we can spot this Enigma Code on the long horizontal one at the bottom of the pile.
Enigma Code #28 – 2:9: Now head up the nearby stairs to your right up to the second level (not up to the helicopter pads) & we can enter into a side room with some terminals in it. Go in behind these terminals & we can collect another Enigma Code.
Enigma Code #29 – 7:2: Return over to where the Heavy Robot came out of the wall & climb up the ladder here now. Pass through the vent & cut a hole through the grate to exit out onto the third floor of the hanger. Pass into the nearby control room & we can find this Enigma Code at the workstation in the center of the room.
Sequence 6: Payback
1. Chapters: A Mystery, Camp Belica
2. Weapon Focus: Stealth Kills, Throwing Knife Kills, Overcharge Health Knife Takedowns
3. Letters: 6/10
4. Enigma Codes: 37/72
5. Gold: 24/50
6. Perks: 17/32
7. Achievements: 21/50
Chapter #7 – A Mystery
Letter #5 – Bobby’s Letter: As soon as the Chapter begins, we will be with Anya in the main comms area of HQ. Behind her we can spot this Letter on one of the beds tucked under a pillow.
Laserkraftwerk Reflection Upgrade: Speak with Anya now & we will receive two different task we need to complete for her… well, three technically. The files will be easy to collect from the archives, as for the mold, we will need to navigate down to the hangar bay.
The mold sample can be found near Caroline & the others near one of the helicopters. To collect it, we will need a circular saw which can also be found nearby them. When we go to grab it, we will fall through some boards down into an old sewer system.
Destroy a Sentry Turret, pass through an armory, & we will drop down into another tunnel. Instead of going left towards a second Sentry Turret, head right, & we can collect this Upgrade; we won’t farm kills with this until later on…
Gold #20 – Ashtray: Carry on through the old sewers & we will be attacked by a group of Drones. Defeat them, then head down to the far end of the tunnel where they came from to see a large drainage hole in the center of the floor. Look along the walls of the hole & we can see a circular pipe; leap down to it. Crawl into the pipe to enter a secret room where we can find this Gold Ashtray on a barrel.
Chapter #8 – Camp Belica
Side Quest – Killing Officer “Knife”: Once we are living the prison life, break your concrete mixing machine, get into Block 4, & locate Set Roth. Once he tells us the game plan, head over to the entrance of the morgue & a woman will call out to us. Speak with her, & we will receive this little Side Quest will reward us with a Gold item when we complete it.
Enigma Code #30 – 7:3: Enter into the morgue now & make your way across to the far end. Do not open the doors to exit the morgue yet & instead search the back wall where we can find this Enigma Code on some crates.

Achievement #20 – Assassin: Unlock Stealth Perk 8.
Getting the 50 silent kills either using a Knife Takedown, Silenced Handgun, or Throwing Knives is not too difficulty to accumulate. What might be, as it is a lot more specific, is silent Kampfhund kills. Because of their armor, getting them at range is tricky & less reliable making a Knife Takedown your best option.
After meeting Officer “Knife”, we will climb out of a furnace & we will have a Kampfhund & Nazi Soldier right in front of us. At least for the five Kampfhund kills, I recommend using a Knife Takedown to kill the hound for this Achievement. Reload the Latest Checkpoint to repeat the process; the other stealth kills can be done anywhere much more easily…
Enigma Code #31 – 7:4: Outside of the furnace once you are done farming Kampfhund kills, navigate to the upper level across a walkway & open a door to continue. Enter the room & take a right to enter through a medical storage room that will have this Enigma Code on the lower shelf of a trolley.
Enigma Code #32 – 7:5: Track down the Officer “Knife” in the room down at the end of the hall & be sure to kill him good. Look around this room & we can spot this Enigma Code on a shelf next to a radio.
Enigma Code #34 – 7:6: Enter into the security control room up next but do not press the switch just yet to disable the systems. Look to the right of the switch to find this Enigma Code sticking out from the top of a filing cabinet.
Gold #21 – Dagger: Disable the security systems & exit back out into Block 4; go speak with the woman we talked to earlier to receive this Gold Dagger as a reward for killing Officer “Knife”.
Letter #6 – Christa’s Letter: Go to the sleeping quarters in Block 4, do not speak with Set yet, & instead locate a woman on a lower bunk with a man resting his head in her lap. Speak with her & we will need to collect some Medicine for the man. Remember that medical storage room we found Enigma Code 7:4 in?
Rush back into the base & backtrack to it to collect the Medicine for her; we will receive this Letter as a reward.
Enigma Code #34 – 7:7: Go find Set Roth now & set the rest of the plan into motion. Sneak through Block 4’s processing room & begin making your way up some scaffolding outside to sneak into a nearby building’s top floor window. Once inside, pass into the first room off our left to see a Nazi Soldier & a Kampfhund. Dispose of them & we can collect this Enigma Code from a filing cabinet close to the desk.
Gold #22 – Pistol: From this room, head directly across the hall to the first door on the right & head inside it; it will be Frau Engel’s room. Interact with the drawer at her desk to obtain her safe combination now go to the painting at the back of the room & move it aside to find the safe itself. Use the combination to open it & we can collect the Gold Pistol; same one she was brandishing back in Chapter 3 on the train.

Achievement #21 – Vampire: Unlock Stealth Perk 6.
Whenever stealth opportunities present themselves, search around for Medkits or Food to put your Heath into Overcharge. As soon as it is, quickly perform a Knife Takedown on an enemy; do this five times to unlock the Achievement.
Enigma Code #35 – 7:8: Head downstairs in this building now & make your way over to far wall across the office to our right. In the back corner, opposite side of the office as the stairs heading down, we can find an open locker with this Enigma Code on the top shelf.
Gold #23 – Bust: Take the next set of stairs down from the office to the bottom floor (not the stairs at the opposite end to the garage) & we can find this Gold Bust on a table directly ahead of us at the bottom of the stairs.
Enigma Code #36 – 7:9: Right across from the Gold Bust, we can find this Enigma Code nearby on a trolley.
Enigma Code #37 – 3:1: Navigate down to the garage now & we can find the Detronic Battery in a sparking console. Do not collect it just yet & instead turn around in this work area to find an Enigma Code inside some lockers against a short wall section.
Gold #24 – Mask: Take the Detronic Battery & we will have some plot happen. After we complete the sequence driving the Herr Faust, we will be tasked with joining Set at the escape truck. Get out of the Herr Faust, but do not go to the truck yet. Instead head over to an office room to the left in the garage & we can find this Gold Mask in an open drawer on the main desk.
Sequence 7: Drowning In Anticipation
1. Chapters: New Tactics, Berlin Catacombs
2. Weapon Focus: Dual Wield Kills, LKW Kills, Throwing Knife Stealth Kills
3. Letters: 8/10
4. Enigma Codes: 45/72
5. Gold: 30/50
6. Perks: 18/32
7. Achievements: 23/50
Chapter #9 – New Tactics
Letter #7 – Charlotte’s Letter: When the Chapter begins, we will be in the main meeting room of HQ. Look over to where Klaus Kreutz is cleaning a gun behind Caroline, & we can find this Letter tucked into a stack of papers beside him.
Gold #25 – Vase: Before we go looking for that welder for Set, head into the open archive room & we can find a woman named Anne crying behind the door. Speak with her to obtain a Side Quest to locate her lost wedding ring; go up to the top floor & we can find her ring on the ground next the toilet by the tools room. Bring her ring back & we will receive this Gold Vase as a reward.

Achievement #22 – All That Glitters: Collect 25 Gold items.
If you have been following along with the guide, we will unlock this Achievement after collecting our 25th Gold item – only 25 more to go…
Chapter #10 – Berlin Catacombs
Gold #26 – Book: When the Chapter begins, we will take the Tunnel Glider along through the sewers until we reach a gate blocking our way. Cut it with the Laserkraftwerk & maneuver the Tunnel Glider inside. To our right will be a large iron barred wall & to our left across from it we can spot a narrow tunnel in the cave walls; this is found at the very top of the cave area, do not pilot downwards yet.
Approach this narrow tunnel & exit the Tunnel Glider so we manually swim ourselves through it. Quickly swim to the end of the tunnel & we will surface inside a cave. Follow it along to find a hidden hideout where we can find this Gold Book on a wire coil near some beds.
Letter #8 – Ingrid’s Letter: In the same hidden hideout, we can find this Letter across from the Gold Book on the floor by the bed opposite it.
Enigma Code #38 – 3:2: Once again in the same room, we can find this Enigma Code at the back of the room on a table beside the floor escape we can drop through to get back to the Tunnel Glider.
Enigma Code #39 – 3:3: Head further into the sewers now & we will reach a half-submerged room not quite full of water. Navigate through a turbine & we will shortly reach a control room to fill the area with water. Jump over the railing ahead of us into the basin we filled, then swim over to the back right wall behind us to enter into a now submerged doorway. Climb up a ladder here & it will take us to a room with this Enigma Code on a crate.
Gold #27 – Ladle: Jump over the railing here to enter back into the room we were in previously with the two turbines. Swim over through the furthest turbine & then swim down underwater to spot this Gold Ladle out in the open on a ledge below us.
Gold #28 – Lantern: Dive further underwater here & we can see a tunnel we can swim through. Swim through it as fast as you can & we will re-enter the very first room in this half-submerged area. In this section of the room, swim around & we can find a doorway with a light shining down above it. Swim inside the room & we can find the Gold Lantern on the floor.
Gold #29 – Snake: Leave the room & swim back underwater to pass through a different pipe going West. The pipe goes to a dead end where we can find this Gold Snake.
Enigma Code #40 – 3:4: Return back to the platform now & carry on further into the sewers. Leap off the platform down into the water below & we will see two sea mines that are chained to the floor. Cut the chain to the center most sea mine & it will destroy the iron bars blocking our way. Cut the chain on the second sea mine & let it float through the hole we made.
Now go swim through the hole yourself & we can see some stairs going up off our left halfway in the tunnel. Walk up them & we can find this Enigma Code in the next room nearby on a crate.
Enigma Code #41 – 3:5: That second sea mine we cut will have blown open another iron barred tunnel. Swim through it all the way into another tunnel & we can climb up some more stairs off our left to see an Enigma Code on a shelf beside a chained door.
Enigma Code #42 – 3:6: Cut the chain on the door now & we will see a busted sewer grate in the floor. Drop through the hole, pass through a concrete pipe, & climb up a ladder to find this Enigma Code on a shelf at the top.
Gold #30 – Lunula: Enter into the next room from the last Enigma Code & we can find this Gold Lunula on the ground leaning against some crates.
Enigma Code #43 – 3:7: Take the service elevator up to the train tunnels & cut a hole in the chain link fence to enter them. The tunnels will split in three; choose the leftmost tunnel & head down it. As we approach, two Nazi Commanders will come into view, one being on the platform dead ahead of us. Crouch at this platform & follow it along to the right, around some stairs, & we can find an Enigma Code underneath them.
Enigma Code #44 – 3:8: Deal with the enemies in this area & we can navigate over to a room with ramps leading down to it close to the door controls. Enter the room & we can find an Enigma Code inside on a shelf.
Enigma Code #45 – 3:9: Use the door controls now & deal with the Supersoldaten that comes out of it. Re-open the doors & head on up to the track control room where we can find this Enigma Code beside the track controls.

Achievement #23 – Duel-Wield Expert: Unlock Assault Perk 8.
When you are in combat situations always Dual Wield your Assault Rifles or Shotguns to work towards 100 Dual Wield Kills. Once that is done or you have mechanical/heavy enemies to deal with, use your LKW to kill 25 of them for this Achievement.
Sequence 8: Steamboat Billy
1. Chapters: U-Boat
2. Weapon Focus: Shrapnel Mode Kills, LKW Reflection Kills, Assault Rifle Kills From Cover
3. Letters: 8/10
4. Enigma Codes: 50/72
5. Gold: 36/50
6. Perks: 21/32
7. Achievements: 27/50
Chapter #11 – U-Boat

Achievement #24 – Shotgun Magazine +: Unlock Tactical Perk 5.
As soon as we exit our torpedo hideaway at the start of the Chapter, we will equip the Shrapnel Mode Upgrade to our Shotgun; we will be inside a storage bay with some Nazi Soldiers & a Commander. For the Achievement, we need to kill enemies indirectly with the Shrapnel. The best way to do this is to shoot at the walls behind or around enemies & have the Shrapnel bounce back & kill them; we need to do this 10 times.
This is a good place just to farm this Achievement. When you run out of Shrapnel Ammo or enemies, Restart the Latest Checkpoint to keep killing until you unlock it.

Achievement #25 – LKW Battery +: Unlock Assault Perk 7.
If you collected the Reflection Upgrade back in Chapter 7, this is also as good a time as any to farm 5 indirect kills with reflected LKW shots. The easiest strategy I found was just walking up close to an enemy & shooting the floor in front of them so the shot bounces forward into them. It can be a bit tricky to pull off. When you run out of ammo or enemies, Restart the Last Checkpoint until the Achievement unlocks.
Gold #31 – Letter Opener: When you are done farming, we will progress through the Chapter for real. Deal with the enemies in the torpedo room & exit through a bulkhead door on the upper level. Pass through another bulkhead door, & turn down the next hall to our left.
Pick the lock on the first door if you saved Wyatt or hotwire the other door if you saved Fergus; both doors will lead us to the same place, though you will need to cut through a metal panel on a vent if you saved Wyatt. Once past the door, enter the room & we can collect this Gold Letter Opener from on top of the desk.
Enigma Code #46 – 6:1: Turn around from the desk & we can collect this Enigma Code from the cot in the same room.
Enigma Code #47 – 6:2: Pass down the right of the corridor now where all the Nazi Soldiers are patrolling & we will be in a barracks. Enter the first barracks off our right & we can collect this Enigma Code from the bottom right cot at the back.
Enigma Code #48 – 6:3: Now enter into the center left barracks to find another Enigma Code on a safe in the middle of the floor here.
Gold #33 – Tray: Lastly, head over to the top right barracks & we can find this Gold Tray on top of a safe in the middle of the floor.

Achievement #26 – AR Magazine +: Unlock Tactical Perk 6.
Ideally, you have been working towards this Achievement throughout the playthrough; we need to kill 80 enemies with Assault Rifles from behind cover. For it to count, your body must be obscured by cover as you lean out to kill them.
Enigma Code #49 – 6:4: Carry on through the Chapter until you drop down from a vent into the main command center. Fight off the waves of Nazis inside & head up to the second floor where the commanders chair is to find his Enigma Code close by.
Enigma Code #50 – 6:5: Go back down to the first floor now & enter into the radio telemetry room. Ignore our current objective here & enter a side room to our left with comms equipment inside; an Enigma Code can be found on one of the counters.
Gold #33 – Skull: Finish in the U-Boat & radio for the Resistance to come aboard. We will then travel deep underwater to try to locate Set’s lost Da’at Yichud keep. We will eventually enter a room with a large gold platform in its center that we need to use the LKW to reach an elevator.
Before doing this, search the rocks along the wall to the left of this platform & we can find a Gold Skull hidden away – it will be half submerged in water.

Achievement #27 – Hidden In the Deep: Locate the underwater stash.
Story Related. Use the LKW to help solve the puzzle of opening up the vault. We will unlock the Achievement after we enter the vault by taking the elevator up.
Gold #34 – Robot Toy: Once inside the vault look around the walls & we can spot quite a few Gold Items; do not place the golden Hexagon thing into the machine that Fergus/Wyatt is interacting with. This will end the Chapter!
Starting from where Fergus/Wyatt is, we can find a Gold Robot Toy to their right.
Gold #35 – Crown: Keep following the room around to the right to find a Gold Crown on a strange canister thingy along one of the walls.
Gold #36 – Chamber Pot: Close by the where the Crown was, we can find this Gold Chamber Pot on a shelf to the right.
There is an optional puzzle we can complete in this room for a LKW Upgrade involving the floating objects in the pillars; look at the image in front of Set for an idea of how to solve it. Start at the top & work down through the objects.
Sequence 9: Bridge to Nowhere
1. Chapters: Gibraltar Bridge
2. Weapon Focus: Marksman Rifle Kills, Mounted Turret Kills
3. Letters: 8/10
4. Enigma Codes: 58/72
5. Gold: 39/50
6. Perks: 24/32
7. Achievements: 30/50
Chapter #12 – Gibraltar Bridge
Apologies in advance. 3/4 of this Chapter takes place inside train cars making descriptions for the Collectibles a little challenging…
Enigma Code #51 – 6:6: After we stop the train, we will need to make our way through the broken train cars until we reach our first Rocket Trooper. Deal with them & exit out of the train car where they were standing. Instead of heading left up the next car, go around the back of the train we are on to the right across a beam. Looking along the wall of this train car, & we can see a Nazi hanging out the window with a briefcase cuffed to their wrist. Use the LKW to break the chain, & we can collect an Enigma Code from the case.
Enigma Code #52 – 6:7: Start walking up the leaning train car but do not drop into the opening in it yet. Instead, walk to the top & look ahead down at the bridge to see a Nazi Soldier trying to pull another back onto the bridge. Drop down, without falling into the next train car below us, & leap over to where they are. Walk along backwards across the bridge to see an open doorway in one of the supports; we can find this Enigma Code at the top of the stairs inside it.
Enigma Code #53 – 6:8: From the top of the stairs now exit back out to the area we were previously (be sure to snag that Marksman Rifle for later…) & navigate back to that leaning train car. Now we can drop into it, pass through, then drop down into the train car that we had used to leap over to the bridge. Follow it along then crouch & duck left to access where the upper floor of it should be. Walk along to the back to find this Enigma Code on the ground.
Enigma Code #54 – 6:9: Leave this train car now but before you enter the next one, follow it around its outside to the right to find this Enigma Code close to the girders of the bridge near where the road breaks away.
Enigma Code #55 – 4:1: Pass through & exit the next train car now & we will see the sun shining through the windows to our left. Progress halfway through this car & we will be attacked by Nazi’s further ahead of us across the way; search around this halfway point in the train car to see this Enigma Code under a seat to our left near a large hole in its wall.

Achievement #28 – Marksman Magazine +: Unlock Tactical Perk 7.
If you grabbed that Marksman Rifle earlier, then this is the perfect opportunity to try for this Achievement. Use the new Rocket Mode Upgrade for your Assault Rifle (or LKW) to kill the Supersoldaten, then switch to your Marksman Rifle to deal with the Nazi Soldiers in the train car. Without exiting your scope, kill three of them for the Achievement.
We can earn this Achievement at multiple points throughout this Chapter…
Gold #37 – Army Man: With the Nazis dead, approach the train car they were in but do not enter it. Instead head around its outside to the right & we can spot this Gold Army Man on the other side of the rail tracks close to where the bridge breaks away.
Gold #38 – Compass: Climb up the train car we are near now & climb up to the top of it. Pass across a striped yellow girder into the next train & we can see a chain link fence in front of us. Cut a hole in it with the LKW & jump on top of some crates close by to be able to leap from onto a leaning iron bar wall to collect this Gold Compass from a crate beyond it.
Gold #39 – Rabbit: Drop down through the next train car until we drop back down onto the bridge. Ahead of us, we can see some smoking Supersoldaten pods. As we approach, a living Supersoldaten will exit pod 4; kill it, & enter the pod when you can to collect this Gold Rabbit inside.

Achievement #29 – Quick Reload: Unlock Tactical Perk 8.
For this Achievement we need to accumulate: 100 Assault Rifle kills, 50 Handgun kills, & 25 Marksman Rifle kills. By this point, you should have the first two completed or close to it. Then it is just a matter of logging your last kills with the Marksman Rifle; if you feel the need to, you can reload Checkpoints for it though we will be using the Marksman Rifle a lot in the next Chapter…
Enigma Code #56 – 4:2: For the next Collectible we need to get on top of the Supersoldaten pods now. At the top of the rubble hill, we can see a concrete slab off our right that we can climb onto. Do just that & follow it back towards the pods where we can leap across to them. Now follow a series of steel beams along the upper portion of the bridge to find the Enigma Code along with some Marksman Rifle Ammo.
Enigma Code #57 – 4:3: This may differ depending on who you chose to survive. Head across the rubble hill now & enter the bridge support room where a Supersoldaten will attack us. Across from it, if you chose Fergus, we can hotwire a door open with more enemies inside. Once they are defeated, look along the wall to the right of the door & we can smash a wooden crate on a shelf to find this Enigma Code.
If you chose Wyatt, you will need to head up the stairs & across the roof to where a Mounted Machine Gun is set up. Here we can find a metal grate we can cut open in the floor to drop down onto some vents in the same room.

Achievement #30 – Bullet Feeder: Unlock Assault Perk 4.
Regroup with your companion on the helicopter & we will be taken higher up on the bridge & get attacked. Use the Mounted Machine Gun off the helicopter & get your remaining of the 25 kills we need with it for the Achievement.
Restart the Checkpoint if you need more kills.
Enigma Code #58 – 4:4: Get out of the helicopter & go over to the small locker room off our right to find this Enigma Code on a large safe.
Sequence 10: Fly Me to the Moon
1. Chapters: Lunar Base, Return to London Nautica
2. Weapon Focus: Throwing Knife Kills, Rocket Kills
3. Letters: 9/10
4. Enigma Codes: 69/72
5. Gold: 45/50
6. Perks: 27/32
7. Achievements: 33/50
Chapter #13 – Lunar Base
Gold #40 – Cane: Leave the transport shuttle & make your way through spaceport security. Once you are through go check the baggage claim conveyor belt off our right. Crouch through it, drawing some rather strange looks, & we can find this Gold Cane at the end of the conveyor next to some Body Armor.

Achievement #31 – Grenade Pouch ++: Unlock Demolition Perk 3.
Collect your gear & progress into the next area with two Nazi Commanders in it. As soon as we enter, we can see a Tesla Grenade next to a Nazi Soldier & some Body Armor off our left – grab it.
Carefully make your way around the room to the left & look for an opportunity to get close to the first Nazi Commander. When ready, throw the Tesla Grenade at them & kill them to unlock the Achievement; feel free to restart the Checkpoint if you want to carry on more stealthily.
Enigma Code #59 – 4:5: Pass into the next section where we will find two more Nazi Commanders. From where we enter, pass into the first crew quarters off our left where a Nazi Commander will be sleeping; there will be an Enigma Code in his bathroom on the toilet.
While in this area, be sure to loot some Throwing Knives if you can…
Enigma Code #60 – 4:6: Leave the crew quarters through a pipe into a red lit maintenance shaft & we will drop down outside two labs. Head over to the leftmost lab & we can find this Enigma Code on the lower shelf of one of the workstations in the middle of the room.

Achievement #32 – Knife Sheath ++: Unlock Stealth Perk 4.
Whenever possible, use Throwing Knives while in stealth to kill Nazis for this Achievement; we need to kill 25 with them. We cannot be discovered, or these kills will not count.
Gold #41 – Face Mask: Pass through decontamination & we will enter the third area with two Nazi Commanders. Carefully enter into the center of the room with operating tables in it, & head around it to the left to see this Gold Face Mask on a trolley beside one of them.
Letter #9 – Dieter’s Letter: Head up to the second floor now & enter into the rooms towards the second Nazi Commander. Enter the second room of the group, & we can spot this Letter on a table to the left of the doorway leading into the third room.
Enigma Code #61 – 4:7: Pass through a red lit vent to access the next area & drop down into the below room. Carry on into the next one & look immediately off your right to see this Enigma Code on a desk beside us.
Gold #42 – Meteor Rock: Later on, we must put on a Spacesuit & go for a walk along the Moon’s surface. Shortly after we are out of the base, we will pass through a short crevice to the other side where two Drones will be patrolling. From where we exit the crevice, drop down to the ground below us to our right, & we can collect this Gold Meteor Rock.
Enigma Code #62 – 4:8: Get back inside the Lunar Base now & we will peel off our old prison identification. Carry on into the next room & head towards the large gold glowing generator to find an Enigma Code nearby it on a desk.
Enigma Code #63 – 4:9: Take the elevator up from the room with two Nazi Commanders in it to reach a large circular room. Take the ramp up to the second floor then another ramp up to the third floor. Follow the third floor around & we can spot this Enigma Code along the outer edge on a divider in between two ramps leading down to the second floor.
Enigma Code #64 – 5:1: Leave the circular room now & enter into Decontamination Block D-7. Follow it along to the left & pass into the area marked “Projekt Venus” until you reach a large meeting room area. Ignore your objective on the console here, & search on the meeting room table for this Enigma Code.
Gold #43 – Bottle: As we escape the Lunar Base, we will eventually head down some inactive escalators with red lit “Achtung” signs at the bottom. Enter into the following room, do not board the tram, & instead search behind a red travel bag along the right wall to find this Gold Bottle behind it.
Chapter #14 – Return to London Nautica
Enigma Code #65 – 5:2: When we awaken on board the crashed transport cruiser… we will be in a bit of a hairy situation. Don’t bother fighting & hold out until an enemy Helicopter begins blasting our transport. Run through the back of it & leap out to catch a rope that swings us down into a building below like we meant to do it all along.
Once inside the building, we can find an Enigma Code on some cardboard boxes against the wall directly right of the window we came through.
Gold #44 – Bangles: Deal with the enemies in this room then head to the far-left corner of it to find a hole in the wall leading out onto to some scaffolding. Use the LKW to cut a chain to drop us lower down then follow the scaffolding along down to another platform held up by chains. Do not shoot these yet though & follow the platform along to the other side to see this Gold Bangle beside the bottom of a gutter.
Enigma Code #66 – 5:3: Shoot the chains off the second platform now & drop down to the lower level of the scaffolding & leap across to the building again to re-enter it. Enter into the offices & pass into office #5 on our right to find the Enigma Code on a table next to a projector.
Gold #45 – Football: In the same office, examine a blank painting & interact with it to open up a secret room; we can grab this Gold Football on top of some surveillance terminals.
Enigma Code #67 – 5:4: Leave the offices & we will eventually need to destroy that Nazi Helicopter that returns to harass us in the cafeteria. Once it is destroyed, search the cafeteria in the far-right corner to find this Enigma Code in the rubble.
Enigma Code #68 – 5:5: Head down the ruined concrete ramp to the next floor below us & go over to opposite end near the fire escape doors. In between the exit & a large blue “Heimet” banner, we can spot this Enigma Code on the ground.
Enigma Code #69 – 5:6: Drop down one more floor now & kill some Nazi Soldiers that come charging out of another fire escape. Head over to where it is & we can find this Enigma Code in a filing cabinet underneath a chalkboard.

Achievement #33 – London Uprising: Defeat the London Monitor.
Story Related. Exit down to the ground floor of London Nautica & we will be intercepted by the London Monitor. Use the LKW & time your shots to shoot it in the eye or in its missile pods as they are about to fire to deal damage to it; hide in the tunnels directly below where it patrols to stay safe.
Sequence 11: Am I Clear to Fire?
1. Chapters: Under Attack, Return to Deathshead’s Compound
2. Weapon Focus: Any Previously Completed Perks
3. Letters: 10/10
4. Enigma Codes: 72/72
5. Gold: 50/50
6. Perks: 27/32
7. Achievements: 37/50
Chapter #15 – Under Attack
Gold #46 – Shoehorn: Infiltrate your own hideout & get up to second floor where Klaus’s room is; we can find this Gold Shoehorn on his cluttered desk.
Letter #10 – Max’s Letter: Leave Klaus’s room & head next door into Max Hass’ room to find our final Letter on the ground by his bed.

Achievement #34 – The Lives of Others: Collect all 10 Letters.
If you have been following along with the guide, we will unlock this Achievement after collecting the final Letter.
If the Achievement does not unlock, press right on the D-Pad on Letters in the Collectibles tab to see a list of the Chapters with Letters in them to see which one(s) you are still missing.
Fight your way to the hangar bay & escape with the last remaining survivors of the resistance.
Chapter #16 – Return to Deathshead’s Compound
Gold #47 – Trowel: When the Chapter begins, we will tear a hole in Deathshead’s Compound using the Spindly Torque. When we drop off the side of Eva’s Hammer & begin swimming towards the compound, we will reach a ladder leading out of the water. Do not climb it, & instead dive under the water & we can spot this Gold Trowel on some rocks to the left of us.
Gold #48 – Armor: Climb up the ladder now & pass through a broken iron gate to enter a tunnel. Head left down the tunnel to the end & we will see a busted hole in it off our right leading onwards. Before heading through it, turn around & we will see a set of Gold Armor in the rubble behind us.
Enigma Code #70 – 5:7: Pass through the hole now towards the bright light & a Kampfhund will charge us. Head down the hallway it came from & carry on straight into the room ahead of us to find this Enigma Code sticking out the top of a filing cabinet inside.
Gold #49 – Teapot: Massacre the Nazi Soldiers & the Guard Robot inside the long corridor area & we will then carry on into a large atrium room with more Nazi Soldiers & two Supersoldatens in it. Kill them, & press the button to open the door out of this room. As we head towards the door, look off our right to find this Gold Teapot inside a green disposal bin near a support column.
Enigma Code #71 – 5:8: Leave the atrium now & take a right down the hall to enter another long corridor full of enemies. Once they are all defeated, walk down the center of the corridor & we can find this Enigma Code on one of the benches near the far end of it.
Enigma Code #72 – 5:9: Exit the corridor through a bay door we need to open & we will enter into a “human studies” lab. Make your way around a shelf with human brains on it, & we can find our final Enigma Code on a counter below some X-ray photos of different human bones.
There is no direct Achievement for finding all Enigma Codes, but we will be using them to unlock four other Achievements them from the Main Menu… Use the D-Pad while looking at the Enigma Codes in our Collectibles tab to see if you are missing any from the different Chapters.

Achievement #35 – Deliverance: Release friend.
Story Related. Navigate to… umm, well Bubi… & he will take it from there.
Take the elevator afterwards, & find our friends have already broken themselves out. After some story, we will be face to face with the final boss. An old friend even.
Enter into our “boss room” & we will have all our Weapons taken from us except a Knife & Tesla Grenades. Use the Grenades to disable the boss & put them out of their misery to unlock the Achievement.
Gold #50 – Pot: Now for the stressful part. With the LKW back in our possession we can now defeat General Deathshead. Destroy the two zeppelins powering his shields by cutting through the fence line to access some AA Cannons & the rest is history.
Before you chase after him & leap down through the hole in the center of the boss room to finish the job, we have one last Gold item to collect. Search around the corners of the boss room for two steel containers side by side with some wooden crates above them. Use the LKW to cut into the steel containers & we can collect the Gold Pot.

Achievement #36 – Heart of Gold: Collect all 50 Gold items.
If you have been following along with the guide, we will unlock this Achievement after collecting our final Gold Item.
If the Achievement does not unlock, press right on the D-Pad on Gold in the Collectibles tab to see a list of the Chapters with Gold items on them to see which one you are still missing.

Achievement #37 – Liberation: Complete game on any Difficulty.
Story Related. Drop down into the hole now & we will have round two with Deathshead. Roll credits… we will unlock our Achievement after we return to the Main Menu.
74% Complete
Sequence 12: You’re Clear…
1. Chapters: Main Menu, Deathshead’s Compound, Return to Deathshead’s Compound
2. Weapon Focus: Any Previously Completed Perks
3. Perks: 28/32
4. Achievements: 45/50
Now that we have officially beat the game & found all of the Collectibles, we will enter Post Game. All that is left is to mop up our last few Achievements, most regarding our straggler or tricky Perks that still need completing.
Main Menu
With all 72 Enigma Codes collected, go to the Extras tab from the Main Menu & select Enigma Codes. Here we will see Codes 1-4 & a series of number combinations we can cycle through. Solving the Enigma Codes will unlock new Modes for us to play the Campaign with on a New Game; we can still unlock certain Achievements in these Modes, but all Perk progress & their associated Achievements are halted.

Achievement #38 – Secrets Revealed I: Solve the first Enigma Code.
For Code 1, we can cycle through sets 1 & 8; these are their number solutions.
1: 01, 02, 03, 04, 05, 06, 07, 08, 09
8: 08, 07, 06, 05, 04, 03, 02, 01, 09
Solving the Code will unlock 999 Mode for us & unlocks the Achievement; this Mode can be extremely useful for unlocking our last two Difficulty Achievements should you need the help…

Achievement #39 – Secrets Revealed II: Solve the second Enigma Code.
For Code 2, we can cycle through sets 2 & 7; these are their number solutions.
2: 02, 04, 06, 08, 01, 03, 05, 07, 09
7: 07, 05, 03, 01, 08, 06, 04, 02, 09
Solve the Code to unlock the Achievement & Walk In the Park Mode.

Achievement #40 – Secrets Revealed III: Solve the third Enigma Code.
For Code 3, we can cycle through sets 3 & 6; these are their number solutions.
3: 03, 06, 09, 03, 06, 09, 03, 06, 09
6: 06, 03, 09, 06, 03, 09, 06, 03, 09
Solve the Code to unlock the Achievement & Hardcore Mode.

Achievement #41 – Secrets Revealed IV: Solve the fourth Enigma Code.
For Code 4, we can cycle through sets 4 & 5; these are their number solutions.
4: 04, 08, 03, 07, 02, 06, 01, 05, 09
5: 05, 01, 06, 02, 07, 03, 08, 04, 09
Solve the Code to unlock the Achievement & Ironman Mode; Ironman Mode is the premise for Mein Lebon Difficulty in Wolfenstein – The New Colossus… which unfortunately has an Achievement attached to it. Not this game thank goodness!
Chapter #1 – Deathshead’s Compound
Now we explore a different timeline. Go to Chapters from the Main Menu & swap to the different timeline/character you did not save & select Chapter #1 – Deathshead’s Compound on any Difficulty; I recommend a lower Difficulty to make things quicker.

Achievement #42 – Endurance II: Unlock Assault Perk 5.
While we replay this Chapter, now is the best time to complete this Perk for killing 5 enemies in 10 seconds with a detached Machine Gun. Complete the plane sequence of the mission & get to the stretch of Nazi defences after reuniting with your squad. Destroy the automated machine gun nest then fight your way to the area with the second Nazi Commander in it. Kill them all, & collect the Explosives Bundle to blow up the front entrance. Close by the front entrance (outside it) we can find a Mounted Machine Gun; be sure to detach it before entering the bunker.
Once inside the bunker with the detached turret, get spotted before you start killing enemies so more arrive. Get in cover close by the enemies & wait for them to group up on you before mowing them down. If you fail, reload the last Checkpoint & try again; we can find an alternate Mounted Machine Gun to detach in this area as well if you need it.
Achievement #43 – Wyatt/Fergus Saved: Choose to save Wyatt/Fergus.
Story Related. Play through the whole rest of the Chapter to the very end where we are captured by General Deathshead & have to make our sacrificial decision. Choose the character you did not save in our previous game to live, & sacrifice the other to unlock the alternate Achievement.
Chapter #16 – Return to Deathshead’s Compound
Now we need to unlock our last two Difficulty Achievements; fortunately, all we need to do is replay Chapter 16 on Über Difficulty to unlock both of them.
If you want an easier time while also experiencing the alternate timeline, consider starting a New Game & going to Bonus Modes to activate 999 Mode for infinite ammo on Über Difficulty. Requires an entire full playthrough to get back to Chapter 16 though…

Achievement #44 – Super Hero: Complete game on I AM DEATH INCARNATE! (or ÜBER).
Story Related. Take it slow, Checkpoint by Checkpoint, Bubi by Bubi, until you reach the Deathshead boss fight. When you need to disable the zeppelins, sprint to the walkways leading up to them then disrupt Deathsheads shields with the LKW as you run so it stuns him for a bit while he recharges them. This may take a few tries to get the timing right.
Unfortunately for the final fight, our last Checkpoint will be just as Deathshead falls into the lower area meaning that you will have to recollect all your Health, Armor, & ammo before dropping down to him… Don’t skimp out & set yourself up for success each attempt. Focus on using your LKW & Dual Wield your Assault Rifles in Rocket Mode to annihilate him; I actually find this part easier than the first part of the fight.
Our Achievement will unlock after witnessing the end of the Credits again; this Achievement will also unlock if we were playing on Über Difficulty.

Achievement #45 – Über Hero: Complete game on ÜBER.
Story Related. Beat Chapter 16 on Über Difficulty to unlock this Achievement.
Sequence 13: Howling My Name…
1. Chapters: Asylum, A New World
2. Weapon Focus: All Remaining Perks
3. Perks: 28/32
4. Achievements: 45/50
Now it is the final grind of our 100% which will be mopping up our final Perks. Apart from those already unlocked in the guide, these last few were left deliberately as they are pretty specific.
Before tackling our last few Perks, should you still need some of the ones previously mentioned in the guide, here are some quick cliff notes:
Throwing Knife Kills – The start of Chapter 2.
Overcharged Health Knife Takedowns – The start of Chapter 3.
Kampfhund Knife Takedowns – Chapter 8 after climbing out of the furnace.
Shrapnel Mode Kills – Start of Chapter 11.
Mounted Turret Kills – Near the middle of Chapter 1 when in the courtyard.
Detached Turret Kills – Upon entering the bunker in Chapter 1.
LKW Reflection Kills – Start of Chapter 11.
The rest of the Perks are part of the Demolition Tree which we will dive into now; set it to Can I Play, Daddy? Difficulty for the easiest time.
Chapter #2 – Asylum

Achievement #46 – Bullseye: Unlock Demolition Perk 4.
Blast through the entire Chapter until you reach the end where you step outside & have to save Anya near the parked Nazi car. As soon as we exit the asylum, quickly head over to a table off our left & grab the two Tesla Grenades here.
Kill the Nazi Soldiers, then wait for three Drones to appear. The first Drone flies close to the ground making it an easy target for a Grenade. For the other two, wait for them to get close together before throwing the last Grenade; hiding behind cover can help this happen. When they are dead, or you messed up, Restart the Last Checkpoint & try again. Farm 5 kills this way to unlock the Achievement.

Achievement #47 – Rocket Magazine +: Unlock Demolition Perk 5.
We can farm this next Achievement in this exact same location on this Chapter. Restart the Last Checkpoint & exit back outside with our Assault Rifle equipped in Rocket Launcher Mode. Sprint towards the car, & there will be exactly 5 Nazi Soldiers here for us to kill with Rockets. Kill them in under 10 seconds to unlock the Achievement.
Chapter #3 – A New World

Achievement #48 – Vaporize: Unlock Demolition Perk 6.
Continue on to Chapter #3 now & progress through it until we exit the truck at the Oder Bridge. Clear the East Section, & ride the side of the truck towards the blocked gate. As soon as we drop off the truck, Anya’s grandfather will kill a Nazi & we will earn our farming Checkpoint.
Approach the doorway the Nazi came through & we will be attacked by four Soldiers. Stand in the doorway, getting shot, & eventually one of the Nazi Soldier will walk backwards in the center of the room & prime a Grenade. Wait for him to pull the pin with his teeth (through his helmet) & then shoot him in the legs until he drops it. The explosion should kill at least 1-3 Nazi Soldiers; reload the Checkpoint & repeat to unlock the Achievement.
Kill him too fast, & the Grenade will not be primed & won’t explode. Wait too long, & he will throw the Grenade at us. The timing has to be just right.

Achievement #49 – Sentinel: Unlock Demolition Perk 7.
We can farm this newly unlocked Perk at the exact same Checkpoint. This time, wait for that Nazi Soldier to throw the Tesla Grenade at us then quickly throw it back at the group to kill them with it. Restart the Checkpoint if you need more kills or mess up until you have killed 5 of them with their own Grenade.

Achievement #50 – Hardened: Unlock Demolition Perk 8.
This Achievement was most likely earned a while ago or at some point during our final Demotion Perk farming. If it still hasn’t unlocked, just farm your last few kills at this same Checkpoint through one of these two methods or by using your own Grenades/Rockets.