This guide explains how to farm XP, Requisition Slips, Medals, Super Credits, and all sample types as a solo player.
Introduction
Welcome to my Helldivers 2 Solo Farming Guide. Many people have claimed that this game isn’t meant to be played solo, but I’ve found that most of my enjoyment of this game has come from lone-wolfing missions against impossible odds. This guide is meant to help solo players even those odds.
While the strategies contained within are written from a solo player’s perspective, all of these methods can also be done within a group. I would recommend getting a group of friends to help you farm though…dropping in on a random player’s mission and expecting them to farm with you when they’re focused on completing the mission is unrealistic and kind of rude lol
Does Farming Negatively Impact the War Effort?
Kind of.
It was a common belief when this game first launched that purposefully failing missions or leaving them early would lower the war score for the planet that you did it on. However, the developers have confirmed that this is not true. So, while you may not be hindering the war effort by spending your time farming, you’re not exactly helping it either. There are some other negative effects to consider however.
Fooling the Player Base
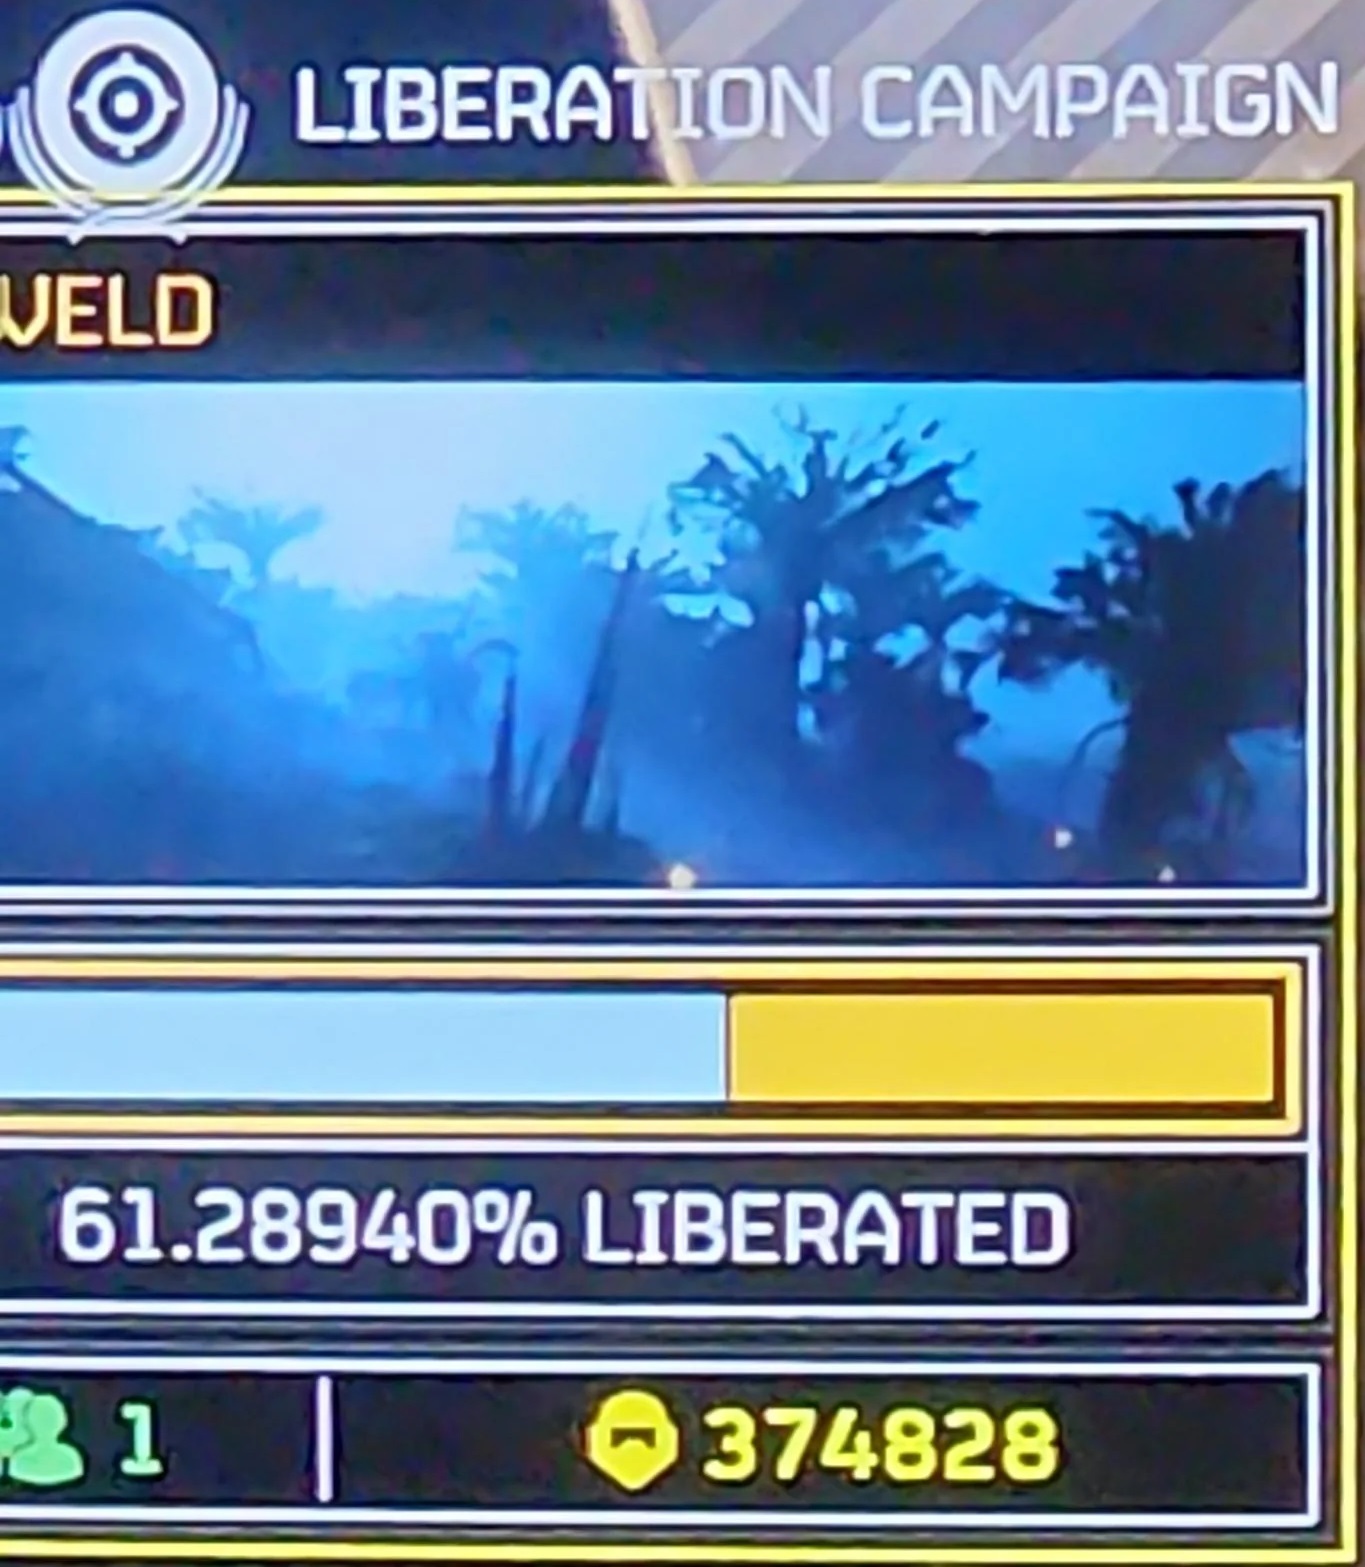
Farming can fool the player base into believing that the human offensive on a certain planet is stronger than it actually is. For example, one major war goal was the liberation of Veld. At one point, there were 374,828 Helldivers actively engaged in missions on the planet but the war score was barely ticking upwards.
How many of those players were actually doing missions though as opposed to just farming? It’s impossible to know, but if we were to assume that 25% of those players were farming, the real number of active Helldivers would be closer to about 280,000. Therefore, if you’d like to spend your time farming and don’t want to contribute to the erroneous active player count on the target planet, think about farming on another planet instead.
Taking Up Server Capacity
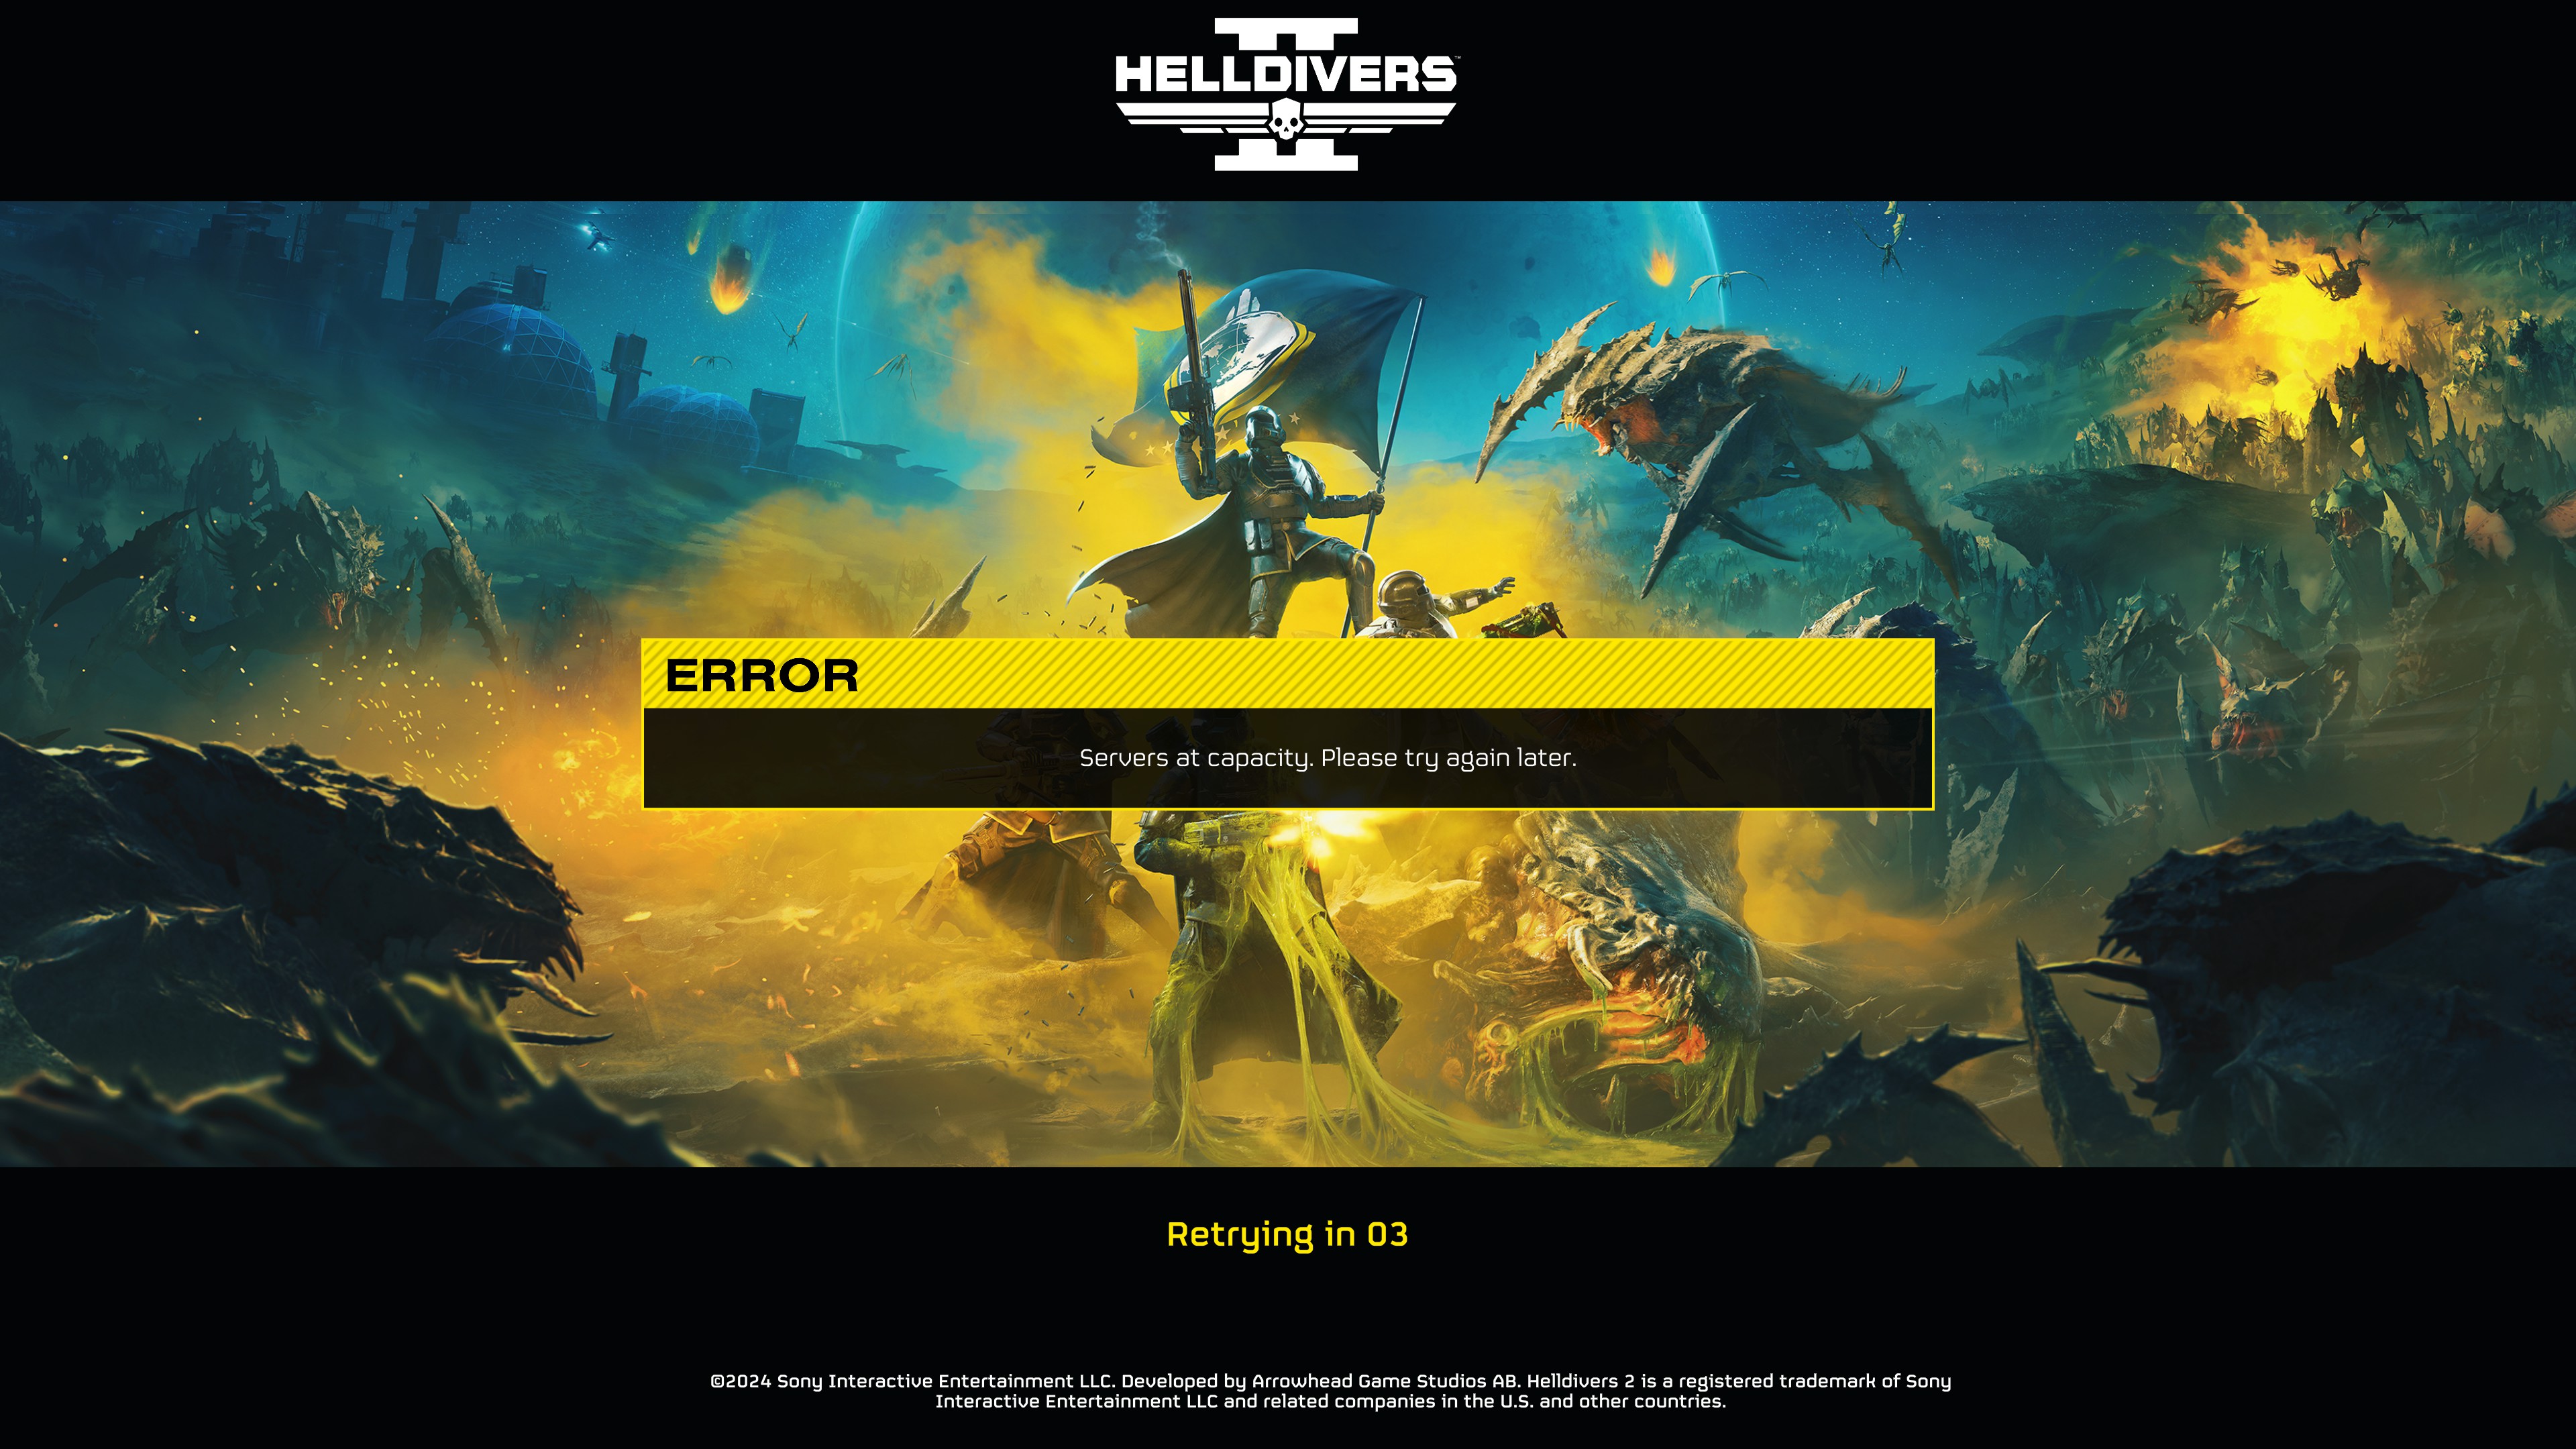
Another way that farming can negatively impact the war effort is by keeping players who want to fight locked in the server queue. When the game first launched, server capacity was at a premium and many players were locked out of assisting the war effort (I once spent over 2.5 hours in the queue myself!). Knowing that a large portion of that capacity was being taken up by farmers unwilling to assist with the war effort led to many people angrily shaking their fist at the sky.
Fortunately, updates were made to the game in February 2024 to alleviate these issues and, personally speaking, I haven’t run into any server issues since. However, if you boot up the game on a Saturday night and find yourself sitting in the server queue, perhaps choosing another time to farm would be better and you should join the fight against the bots and bugs when you get past the queue instead.
Benefits of Farming
Given these potential negative impacts to the war effort, you may be thinking that farmers are the scum of the earth – not so! Farming allows people to unlock higher-tier stratagems, weapons, armor, and ship upgrades, leading to Managed Democracy being spread faster. In most other games that I play, I often take a lackadaisical approach, letting the game play out in the manner in which the developers intended it. However, progression in this game can feel painfully slow at times, especially in regards to unlocking new weapons and armor to use. After dozens of missions using the same stock armor, assault rifle, and machine gun, I said “F*** this,” and began exploring ways to unlock new things faster.
The funny thing though is that even with these techniques…unlocking new things is still pretty slow! The game is still a grind even when using these techniques, but it actually feels like you’re making progress towards something as opposed to the “Chinese water torture” slow drip that the developers intended. So, if you’d like to unlock new things a bit faster so that you can kick some bug and bot ass and positively impact the war effort to an even greater degree, keep reading!
Things to Farm
There are seven resources that you can gather while playing
Helldivers 2:
- XP
- Requisition Slips
- Medals
- Super Credits
- Common Samples
- Rare Samples
- Super Samples
XP
XP is mostly useless in this game. All character stats are tied to weapons and armor, so a Level 1 player wearing B-01 Tactical armor and holding an assault rifle is just as strong as a Level 50 character equipped with the same gear. The only utility that XP has is in unlocking higher-tier stratagems and new player titles. XP can only be gained by completing a mission – killing enemies does not award XP.

Requisition Slips
Requisition Slips can be used to purchase new stratagems. XP is used to unlock stratagems so that they may be purchased, whereas Requisition Slips are what you actually use to buy the stratagems with. Requisition Slips are primarily awarded by completing missions, but they can also be found at Points of Interest (POI) around the map.

Medals
Medals are used to unlock items found within War Bonds. These items include:
- Armor
- Boosters
- Emotes
- Player Cards
- Super Credits
- Victory Poses
- Weapons
Out of all of the resources to grind, I’ve found that farming Medals is the slowest. However, obtaining Medals allows you to unlock new things which can radically affect your game and spruce things up, so accruing them is always a joy. Medals are rewarded by completing missions or by finding them at Points of Interest.

Super Credits
Super Credits are considered Helldiver 2’s “luxury currency”. They allow you to buy additional War Bonds (which are available for purchase at any time) and new armor (which swaps out with a new selection every 2 days). They can be purchased with real-world currency, unlocking them with Medals on some War Bond pages, or by finding them at Points of Interest.
Common/Rare/Super Samples
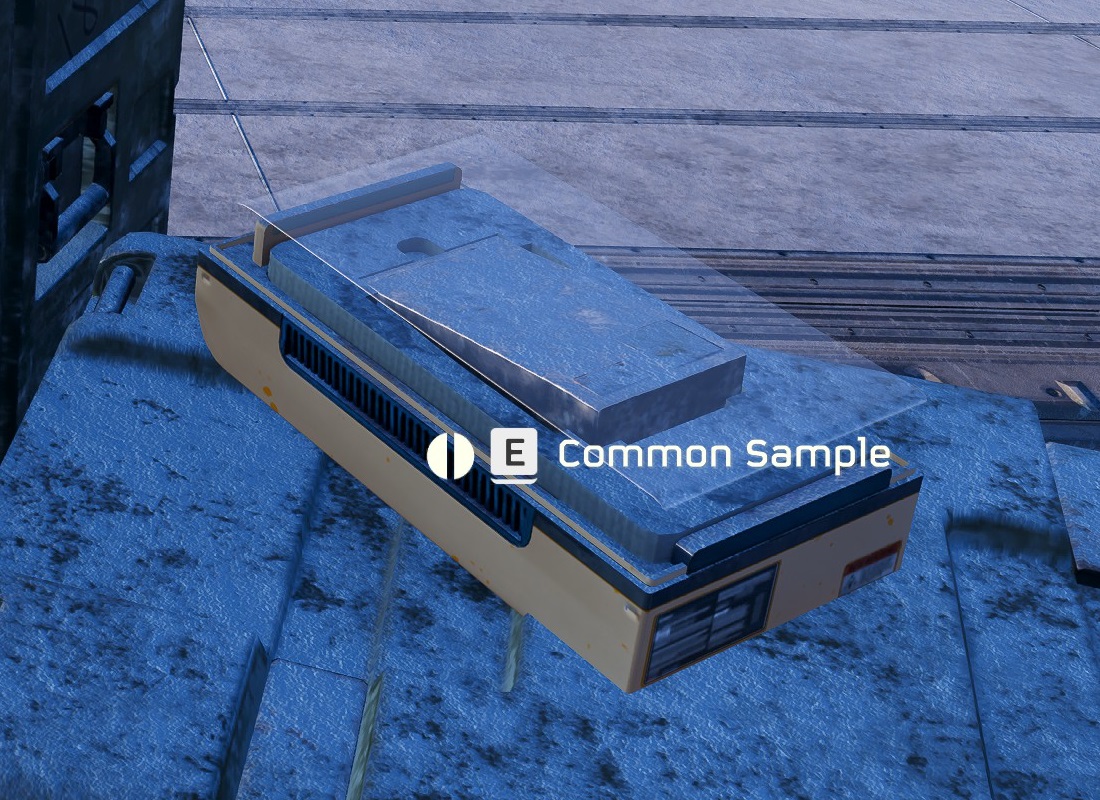
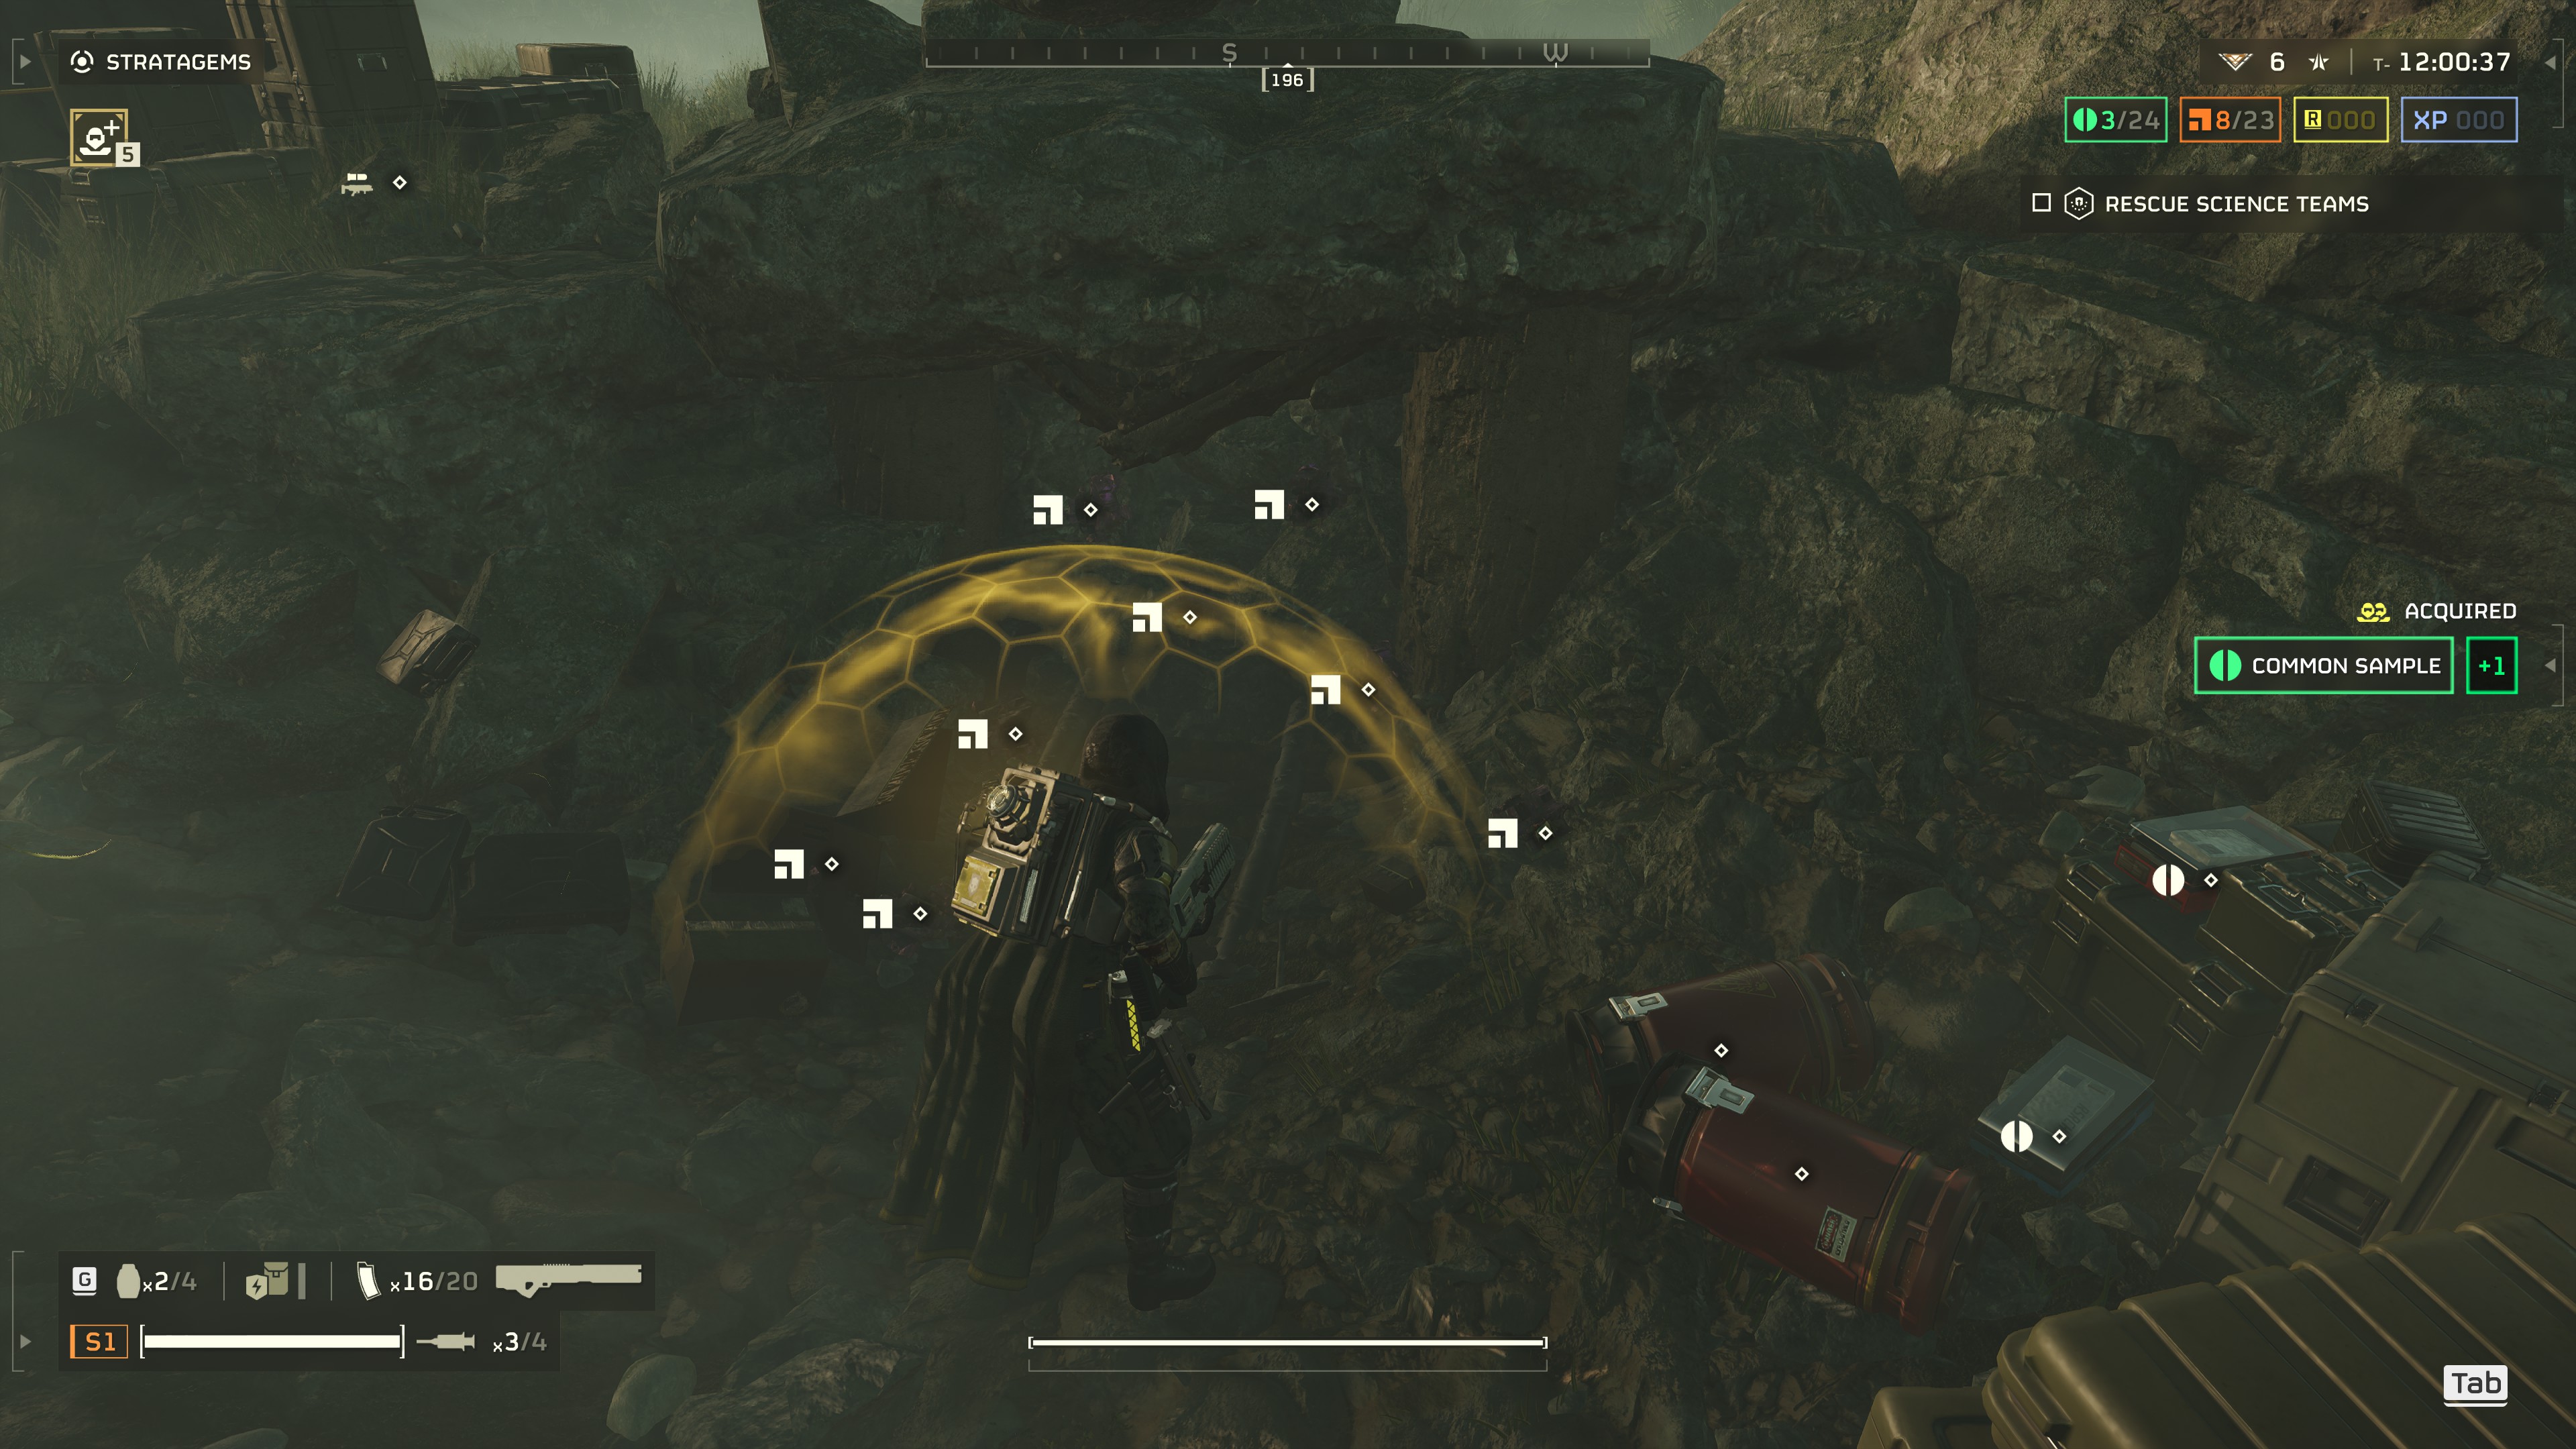
Samples are used to upgrade your ship with various bonuses. These bonuses can include faster deployment times, additional air strikes, and more. Samples can only be obtained by finding them on the map – either at enemy bases or at Points of Interest. Unlike every other resource though, Samples are dropped upon death and you must extract out of the mission with them in order for you to keep them. This usually makes farming them more…exciting…than it is to farm other resources. I’ll explain in more detail below.

Guide Structure
I break down each individual guide like this:
- Quick Guide: This is a quick checklist of everything you need to do to perform the strategy. If you don’t feel like reading my long-winded explanations for each strat, you can just check this out instead.
- Full Strategy Explanation: The aforesaid long-winded explanation of the strategy. Further broken down into:
- Introduction: An overview of what the strategy is, which planet and mission to choose, and a recommended gear loadout.
- Strategy: A detailed explanation of the strategy and some tips.
- Rewards: The amount of resources you can expect to earn per run.
XP & Requisition Slip Farming
Strangely, there are 50 levels in this game, but only 20 of them matter. Some stratagems are unavailable for purchase until you reach higher levels, but the highest-tier stratagems only require that you be Level 20. Afterwards, XP serves no purpose besides unlocking new player titles like “Sergeant” and “Space Chief Prime”.
If you follow this guide, I would recommend that you farm to level 20 and no further. This farming method requires that you only do one mission type over and over again, so if you farm to level 50 and then drop into a mission with other players, they’re going to think that you’re a master of the game when you really don’t know anything. However, no one will think you’re Superman if you stop at Level 20 and you’ll still have access to everything useful that XP unlocks.
As for Requisition Slips, you’ll need a lot of these to unlock all the Stratagems. Since I’ve already unlocked everything, I can’t go back to see what the total cost of everything is, but I think you need something like 200,000-250,000 slips in order to unlock everything.

XP & Requisition Slips (Quick Guide)
- Choose an Automaton planet, select the highest difficulty possible, and choose an Eradication mission that doesn’t have the “AA Defenses” operation modifier.
- Choose this as your loadout:
- Armor with one of these buffs:
-
- Fortified
-
- Engineering Kit
- Weapons:
-
- Primary: SG-225 Breaker
-
- Secondary: P-19 Redeemer
-
- Grenade: G-16 Impact
- Stratagems:
-
- RS-422 Railgun
-
- SH-32 Shield Generator Pack
-
- A/M-12 Mortar Sentry
-
- A/M-23 EMS Mortar Sentry
- Booster: Hellpod Space Optimization
- Land on the planet and place your mortars and a resupply at the top of the hill. Call down your support gear as well.
- Let the mortars do most of the killing for you. Assist where you can and kill any enemies that make it to the top of the hill. Do not let your mortars be destroyed.
- If your mortars run out of ammo before the objective is complete, hold the hill until you can call down the mortars again.
- Extract once the mission has been completed.
XP & Requisition Slips (Introduction)
The best way to farm XP and Requisition Slips is to complete Eradication missions at the highest difficulty that you’re able to handle. Using this method, missions can take around 5-6 minutes and award close to 900 XP and 4,100 Requisition Slips each.
Prerequisites
To follow this guide, you must have, at a bare minimum, the following things unlocked:
- “3 – Medium” difficulty.
- “A/M-12 Mortar Sentry” stratagem.
To maximize rewards however, it’s best to follow this method on the higher difficulties. To accomplish this, you’ll need to have unlocked the following stratagems:
- RS-422 Railgun
- SH-32 Shield Generator Pack
- A/M-12 Mortar Sentry
- A/M-23 EMS Mortar Sentry
Choosing a Planet
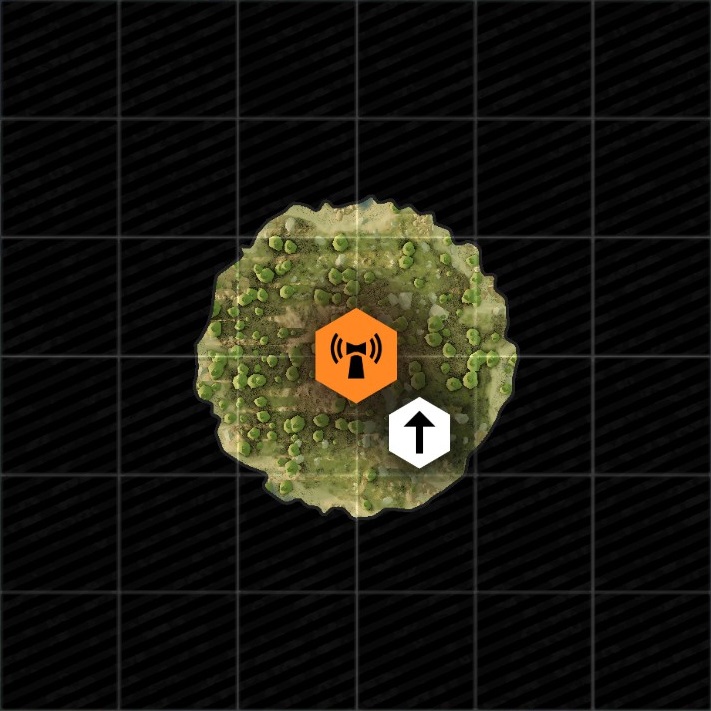
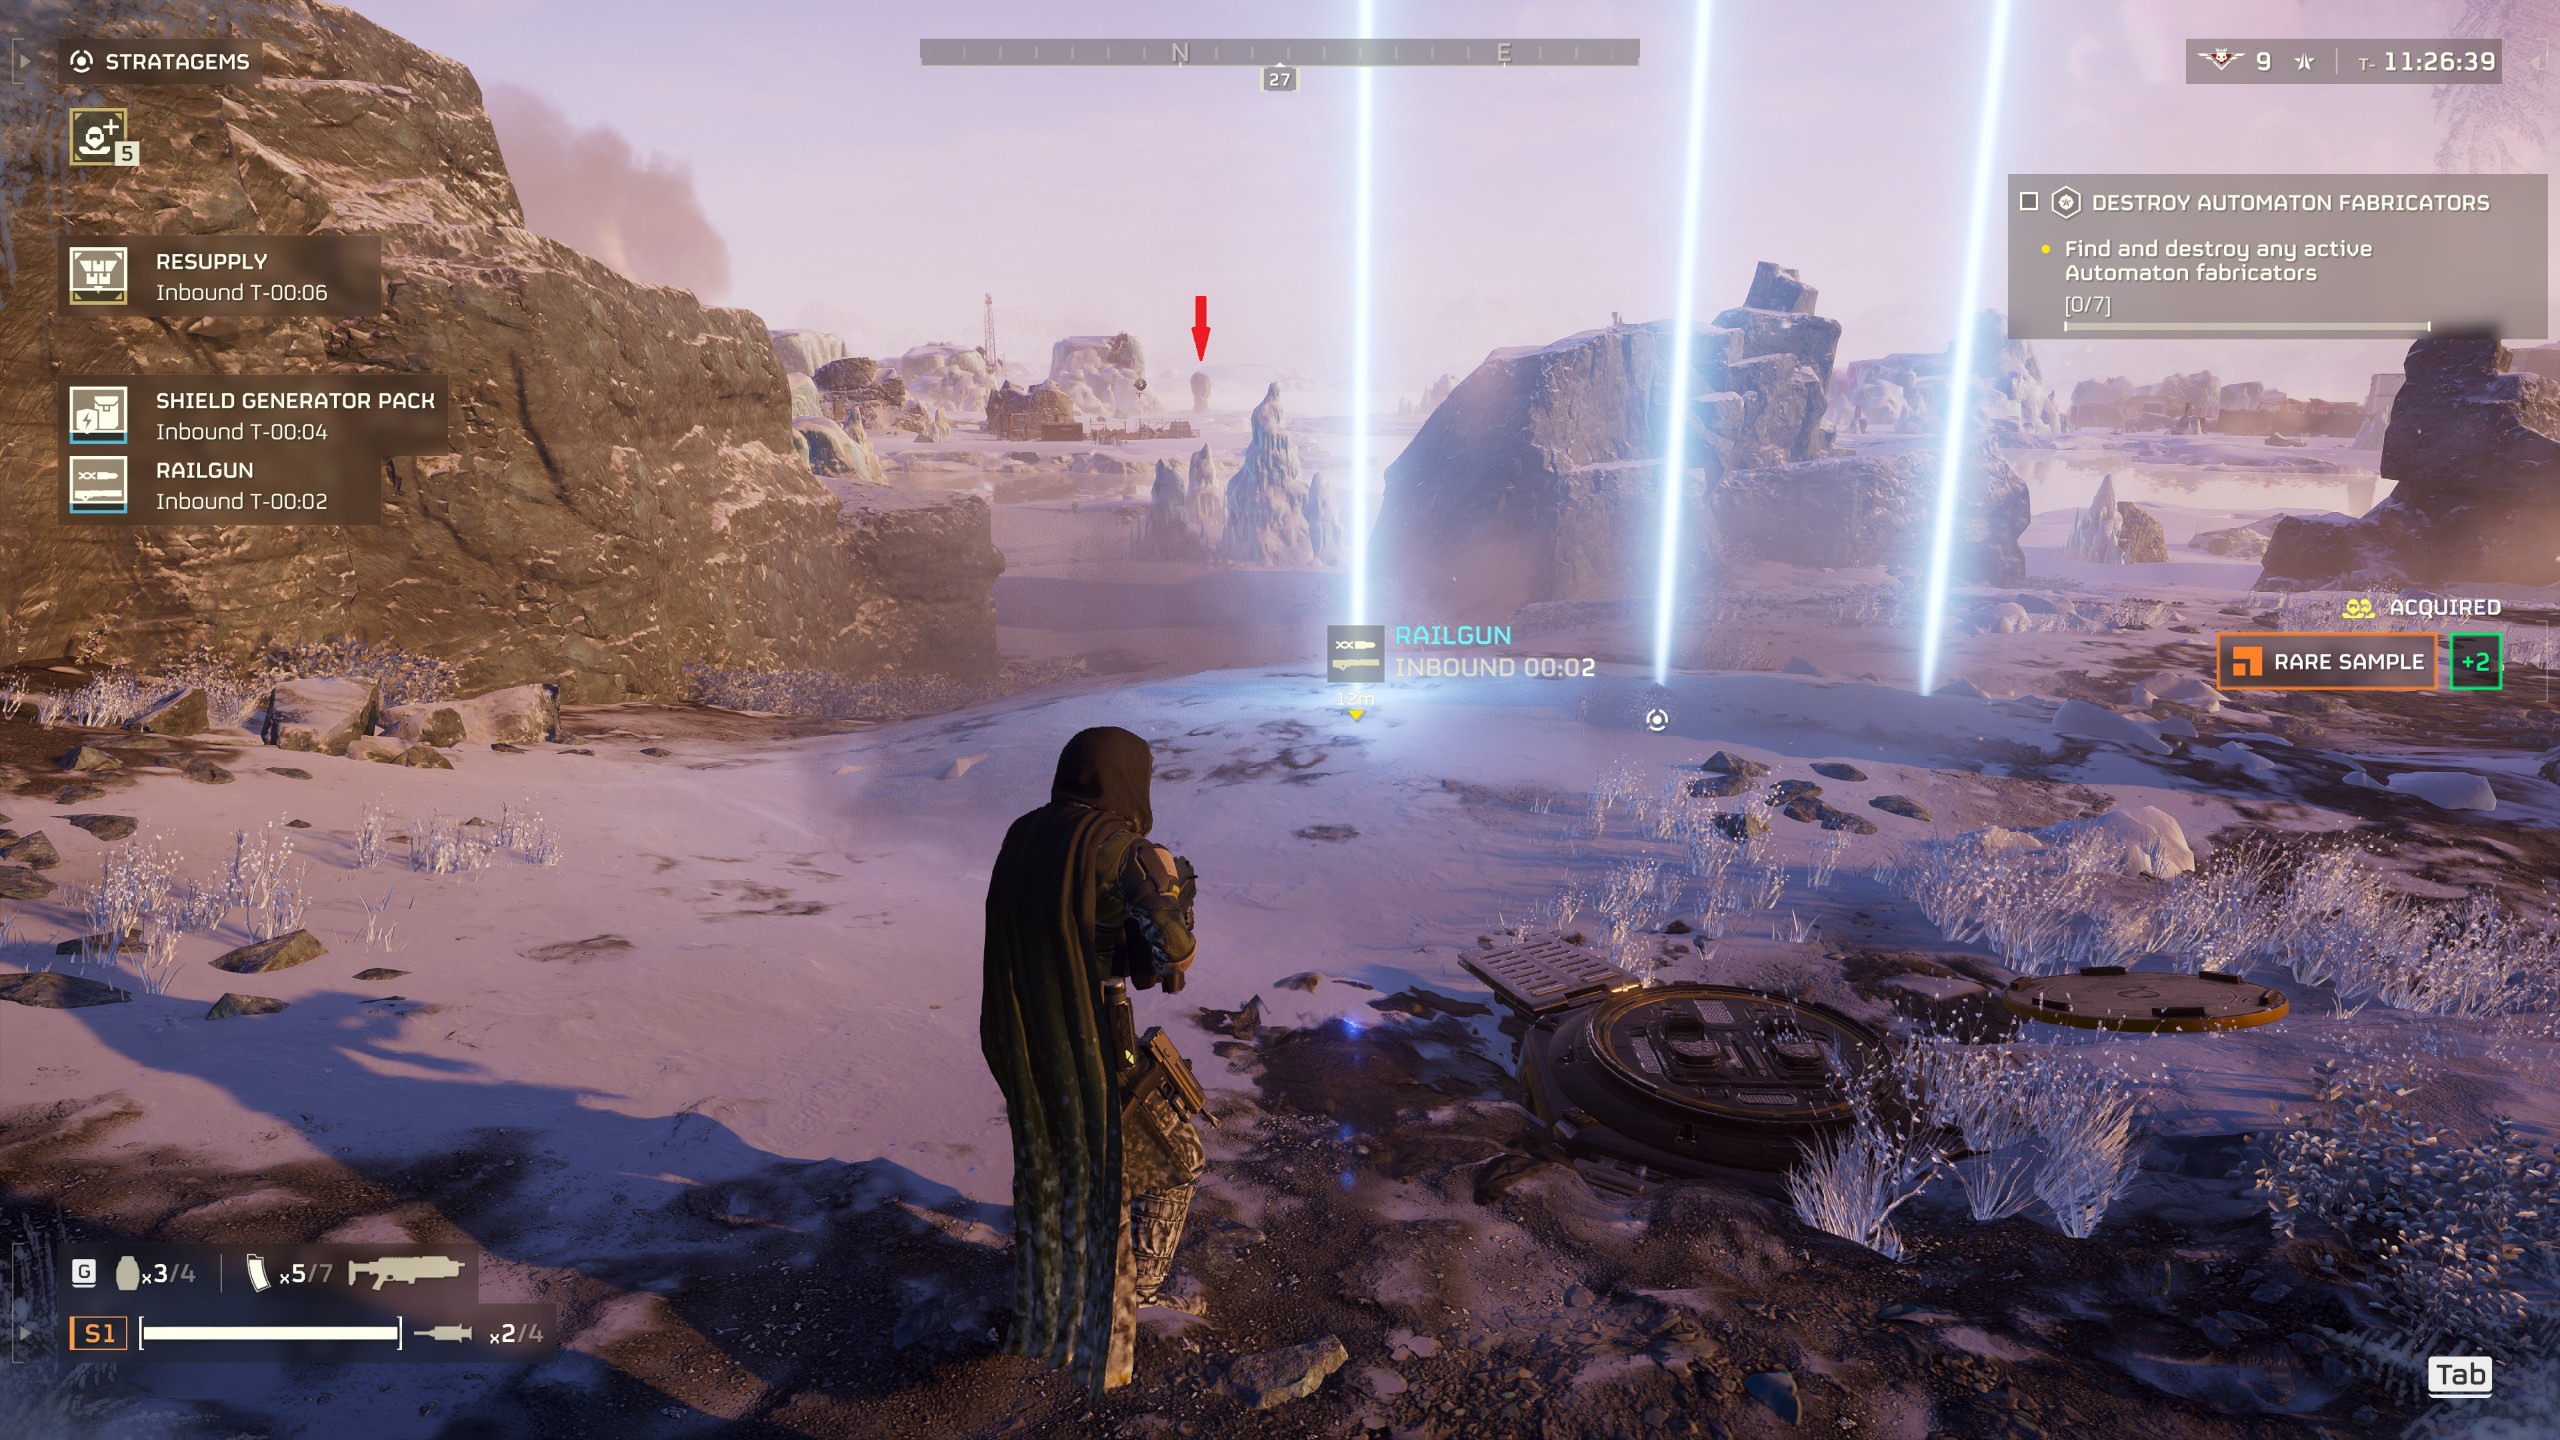
Choose an Automaton planet and find an Eradication mission. They look like this on the planet map:
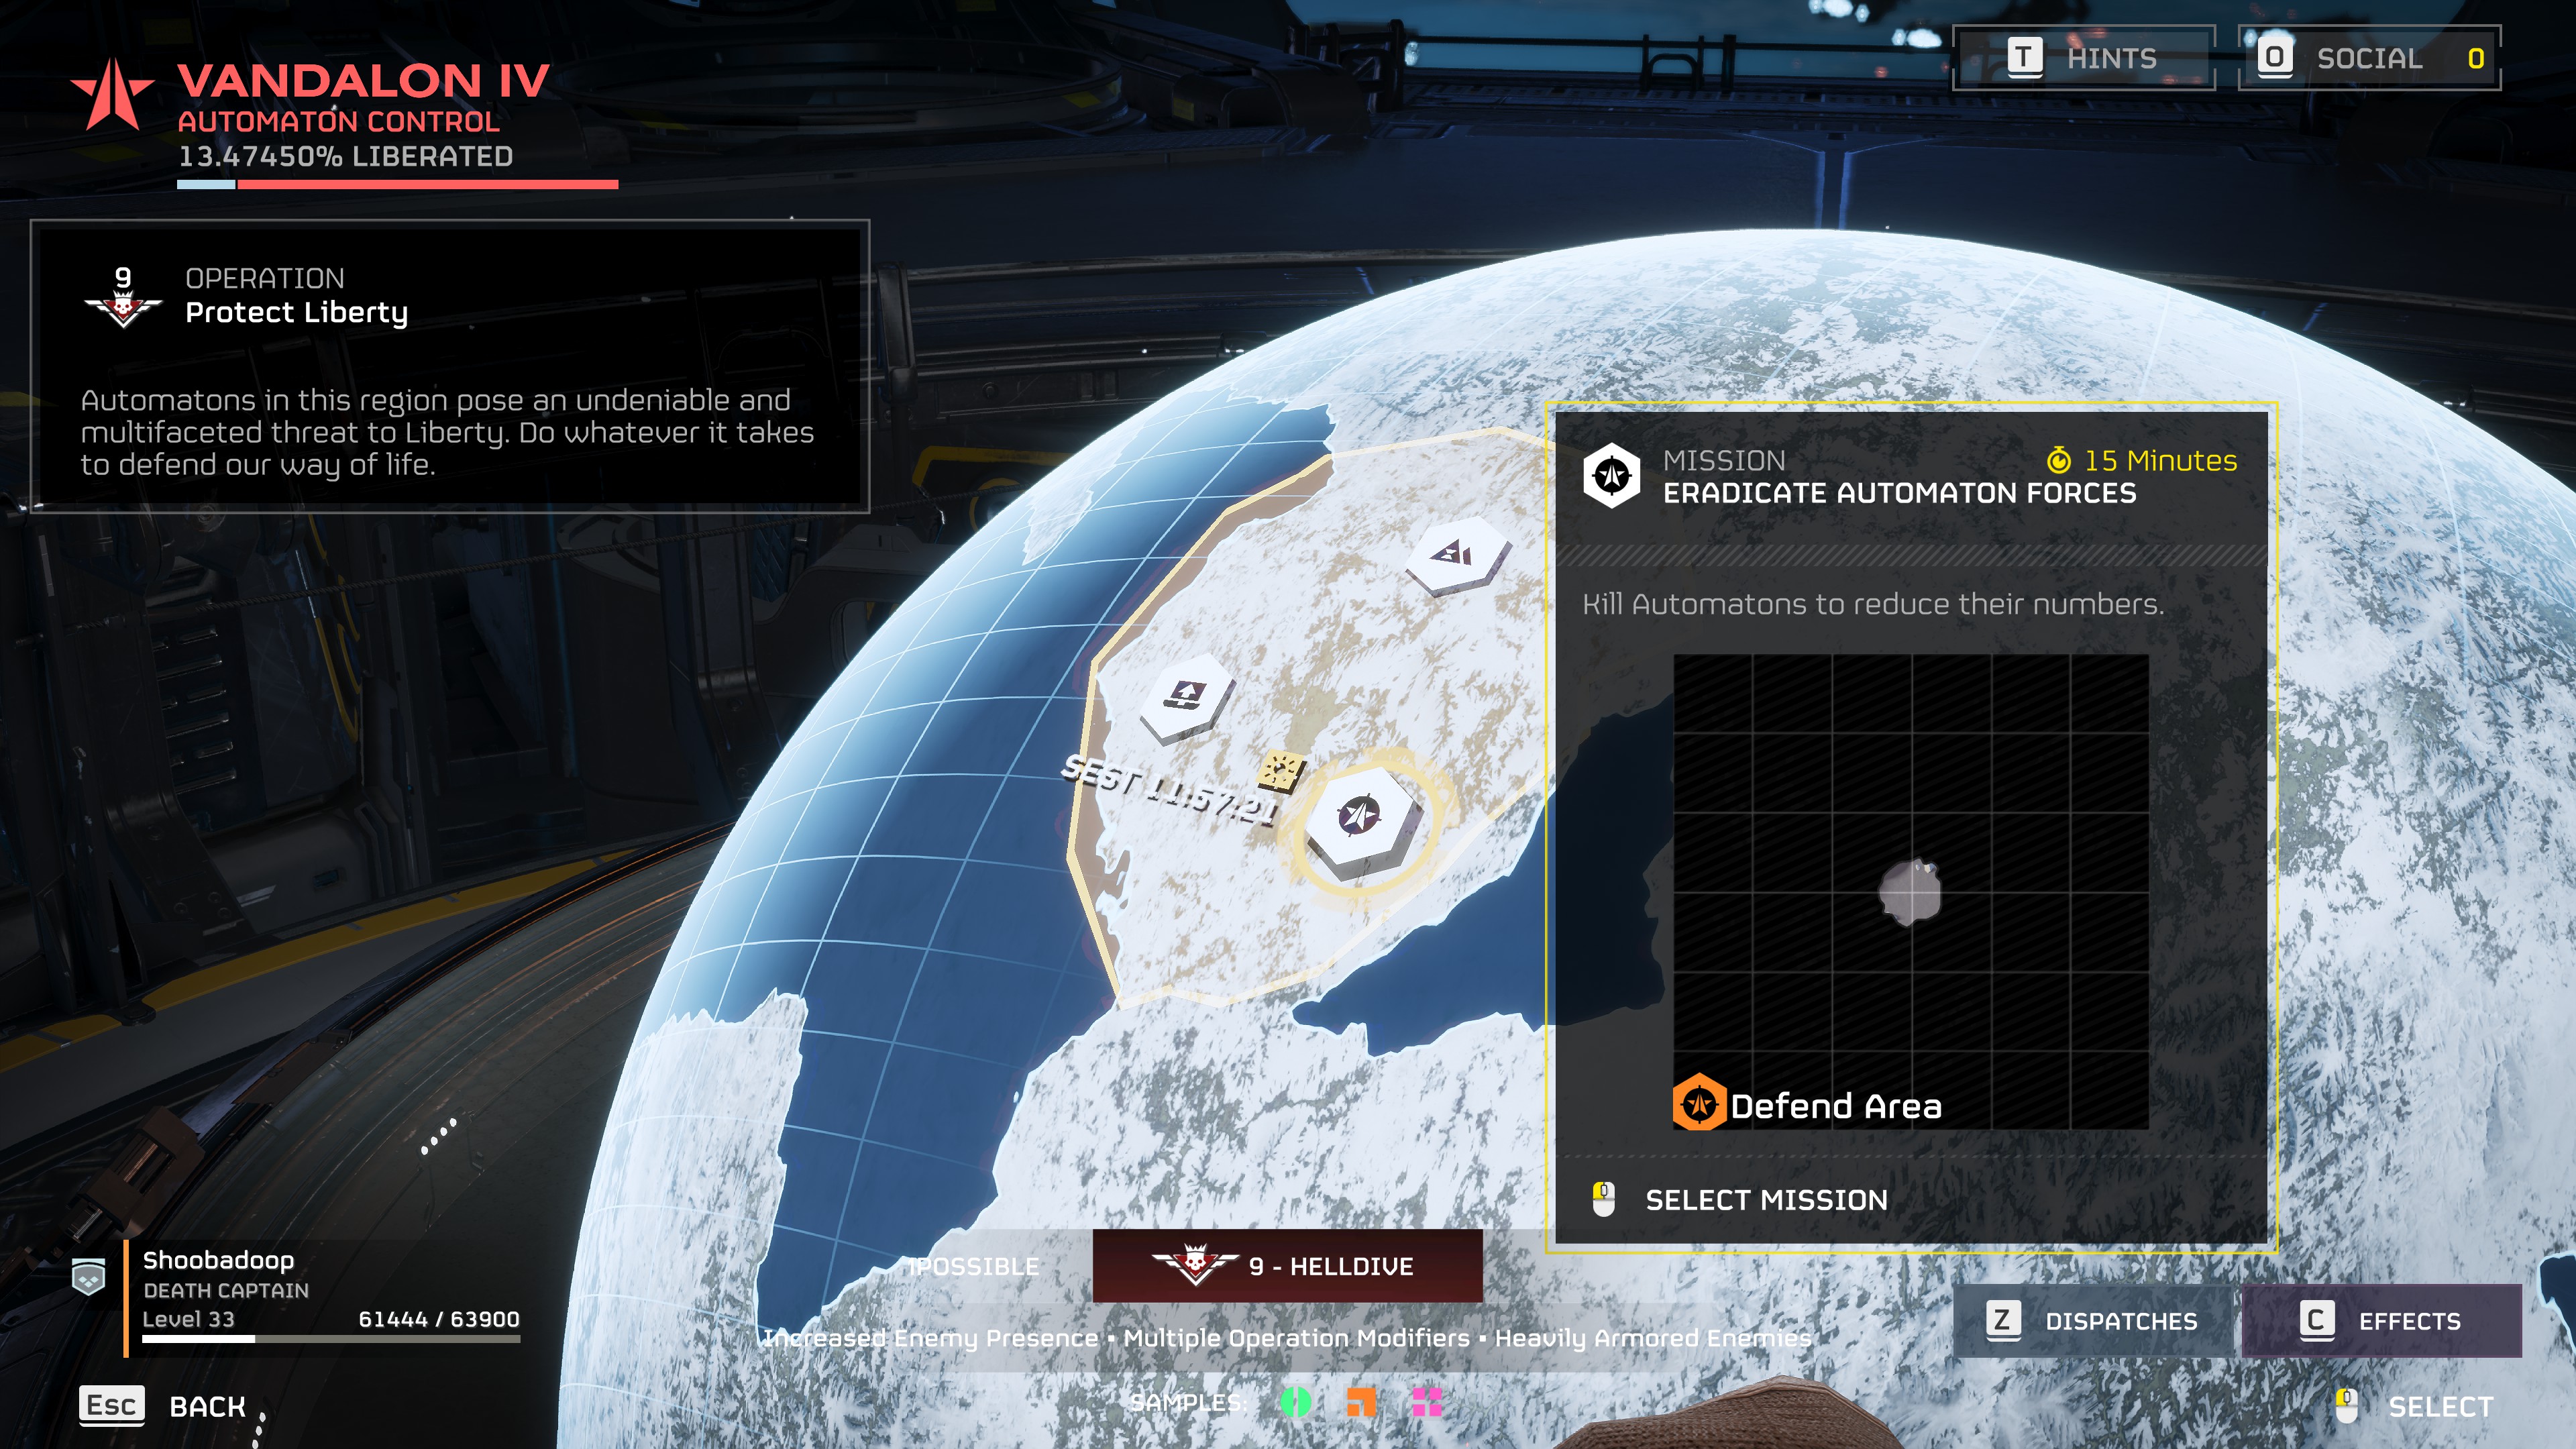
Eradication missions appear on difficulties “3 – Medium” and up. However, the higher the difficulty of the mission, the better it is for farming.
Completing higher difficulty missions adds a multiplier effect to the amount of XP and Requisition Slips that you obtain, so I highly recommend unlocking higher difficulties before attempting this method to obtain maximum rewards. The rest of this section will assume that you’re playing the mission on Helldiver difficulty, but don’t worry – it’s still valid even if you can’t play on that difficulty yet.
Once you’ve chosen an Automaton planet, you will not only have to find an Eradication mission, but also an operation with favorable operation modifiers. Operation modifiers are added to higher-difficulty missions to make them more of a pain in the ass to complete. You can view them by pressing “C” while viewing the planet map. They will then appear in the bottom-right corner of the screen:
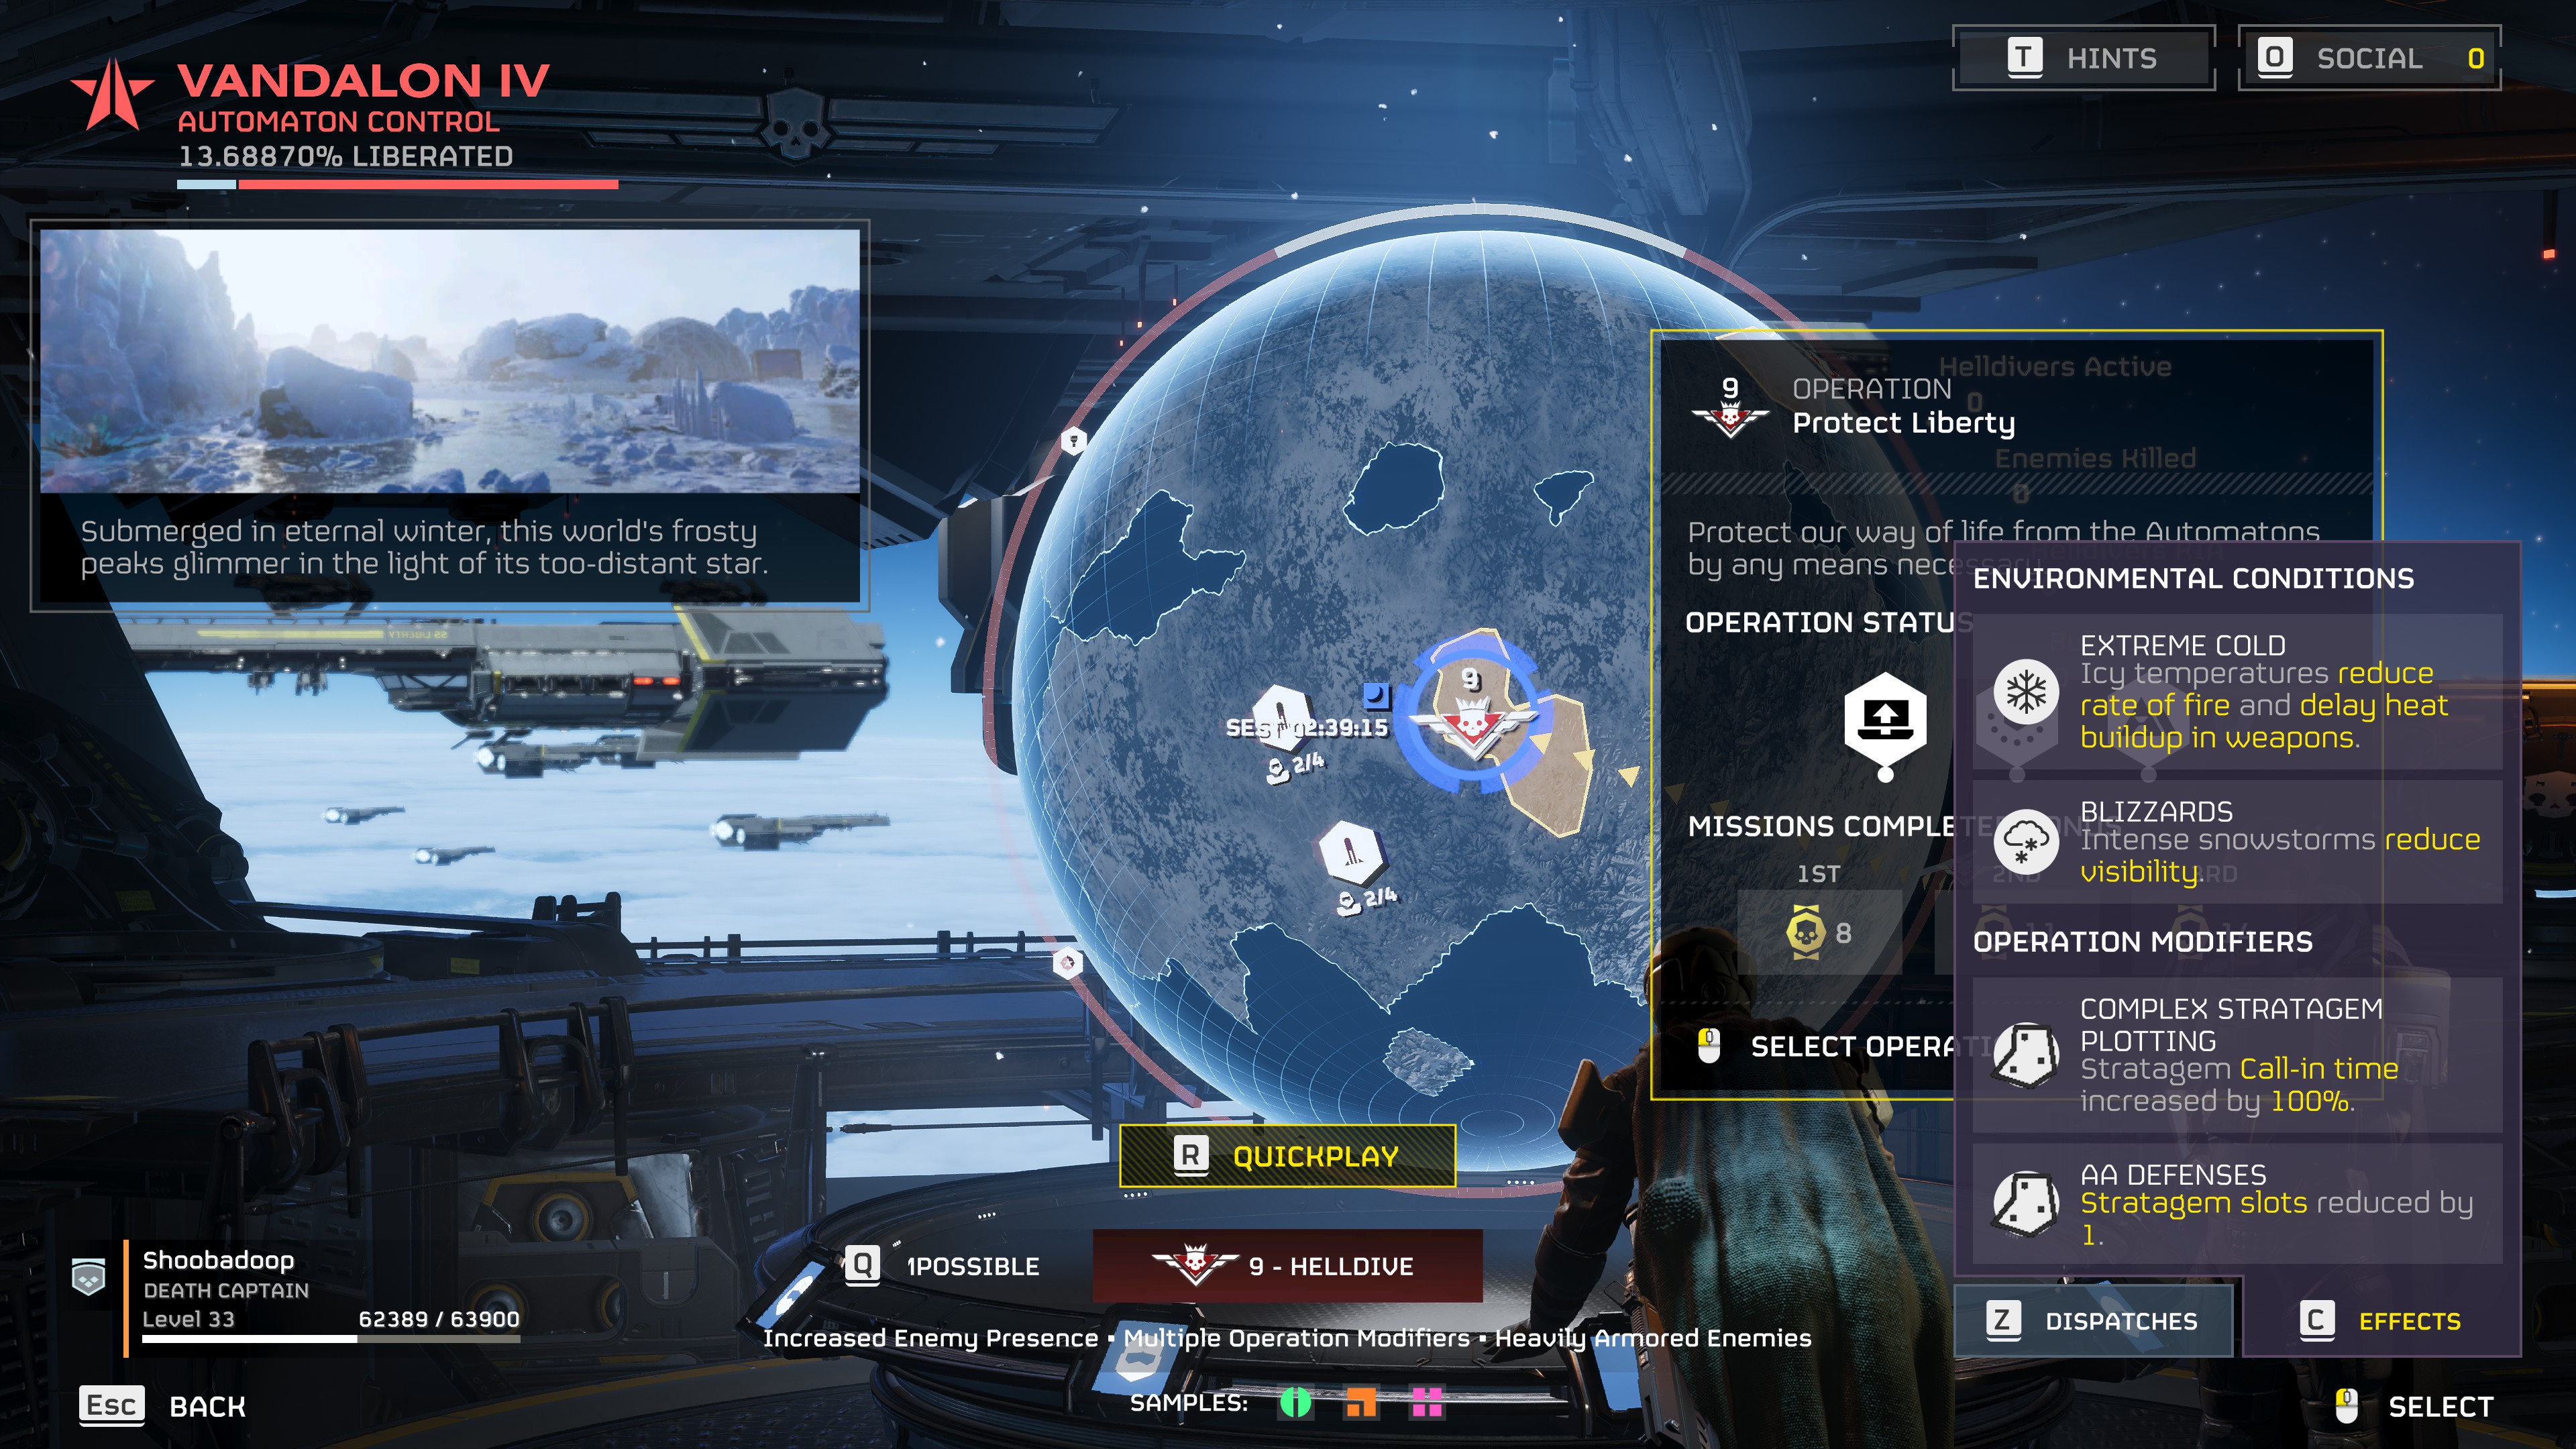
There are four possible modifiers:
- AA Defenses: Stratagem slots reduced by 1. (You can only equip 3 Stratagems in your loadout as opposed to the standard 4)
- Complex Stratagem Planning: Stratagem call-in time increased by 100%. (Stratagems take longer to deploy, so an airstrike that usually takes 3 seconds to hit the map will now take 6 seconds)
- Electronic Countermeasures: Stratagem codes scrambled. (Inputting a stratagem code may make you deploy something else instead. For example, putting in the code for a mortar turret may call in the Eagle to drop a 500kg bomb on your head instead.)
- Orbital Fluctuations: Stratagem cooldown increased by 50%. (For example, if you call in a mortar turret, it usually takes 3 minutes for you to call in another one – now it’ll take 4.5 minutes).
Missions may have 0, 1, or 2 modifiers applied to them based on your difficulty:
- “1 – Trival” to “4 – Challenging”: No modifiers.
- “5 – Hard” to “7 – Suicide Mission”: One modifier.
- “8 – Impossible” to “9 – Helldive”: Two modifiers.
When performing this farming method, it is imperative that you avoid doing an Eradication mission with the “AA Defenses” modifier as you’ll need all the stratagems you can get. If you can avoid doing one with “Orbital Fluctuations” as well, that would be nice too, though it’s not absolutely necessary. The other two are whatever.
Loadout
Once you’ve found your mission, it’s time to choose your loadout.
Armor
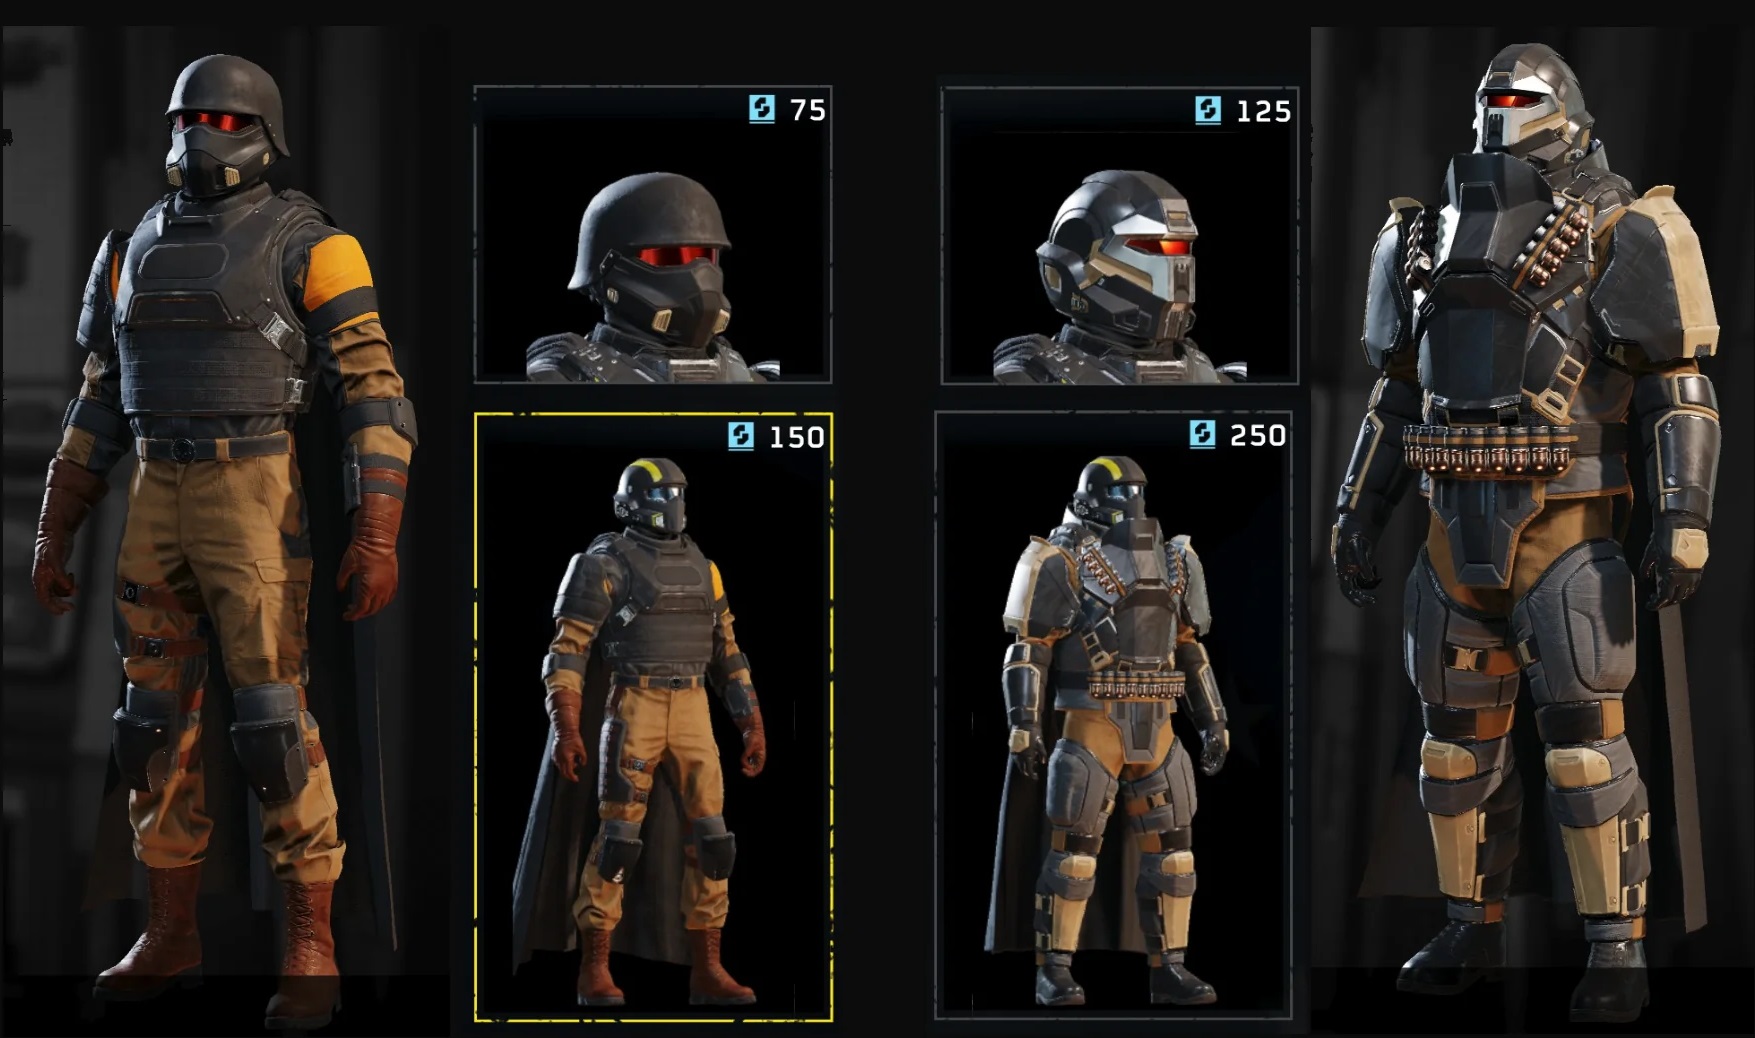
All armors are useful for this strategy except for those that give the “Scout” buff. At the time of publication, Armor is currently bugged and does not actually give you more armor (meaning…choosing anything but a Light Armor set will just slow you down). For this strategy, I usually like to choose a Light Armor with one of these buffs:
- Engineering Kit
- Further reduces recoil when crouching or prone by 30%.
- Increases initial inventory and holding capacity of grenades by +2.
- Fortified
- Further reduces recoil when crouching or prone by 30%.
- Provides 50% resistance to explosive damage.
There are a lot of enemies during this mission and “Engineering Kit’s” extra grenade allowance is nice for when enemies bunch up together. As for “Fortified”, many robots like to shoot rockets at you, so this will help you survive if your shield is down and you happen to take a rocket to the face.
Weapons
Your mortars will be doing most of the killing during this mission. However, some bots will reach the top of the hill and you’ll need to dispatch them quickly. Therefore, I recommend the following:
- Primary: SG-225 Breaker
- Secondary: P-19 Redeemer
- Grenade: G-16 Impact
The Breaker shotgun is borderline broken and can rip anything to shreds (even from long-range!). The Redeemer is great for annihilating anything if you happen to run out of shotgun shells in the heat of battle. As for the Impact grenade, it explodes once it hits the ground or a target, so you’ll want to bring that over a standard fuse grenade if you have access to it.
Stratagems
These two stratagems are absolutely necessary for this method to work:
- A/M-12 Mortar Sentry
- A/M-23 EMS Mortar Sentry
If you’re playing on a lower difficulty, you can probably get away with using just the standard mortar sentry.
Besides those two, I highly recommend the following:
- RS-422 Railgun
- SH-32 Shield Generator Pack
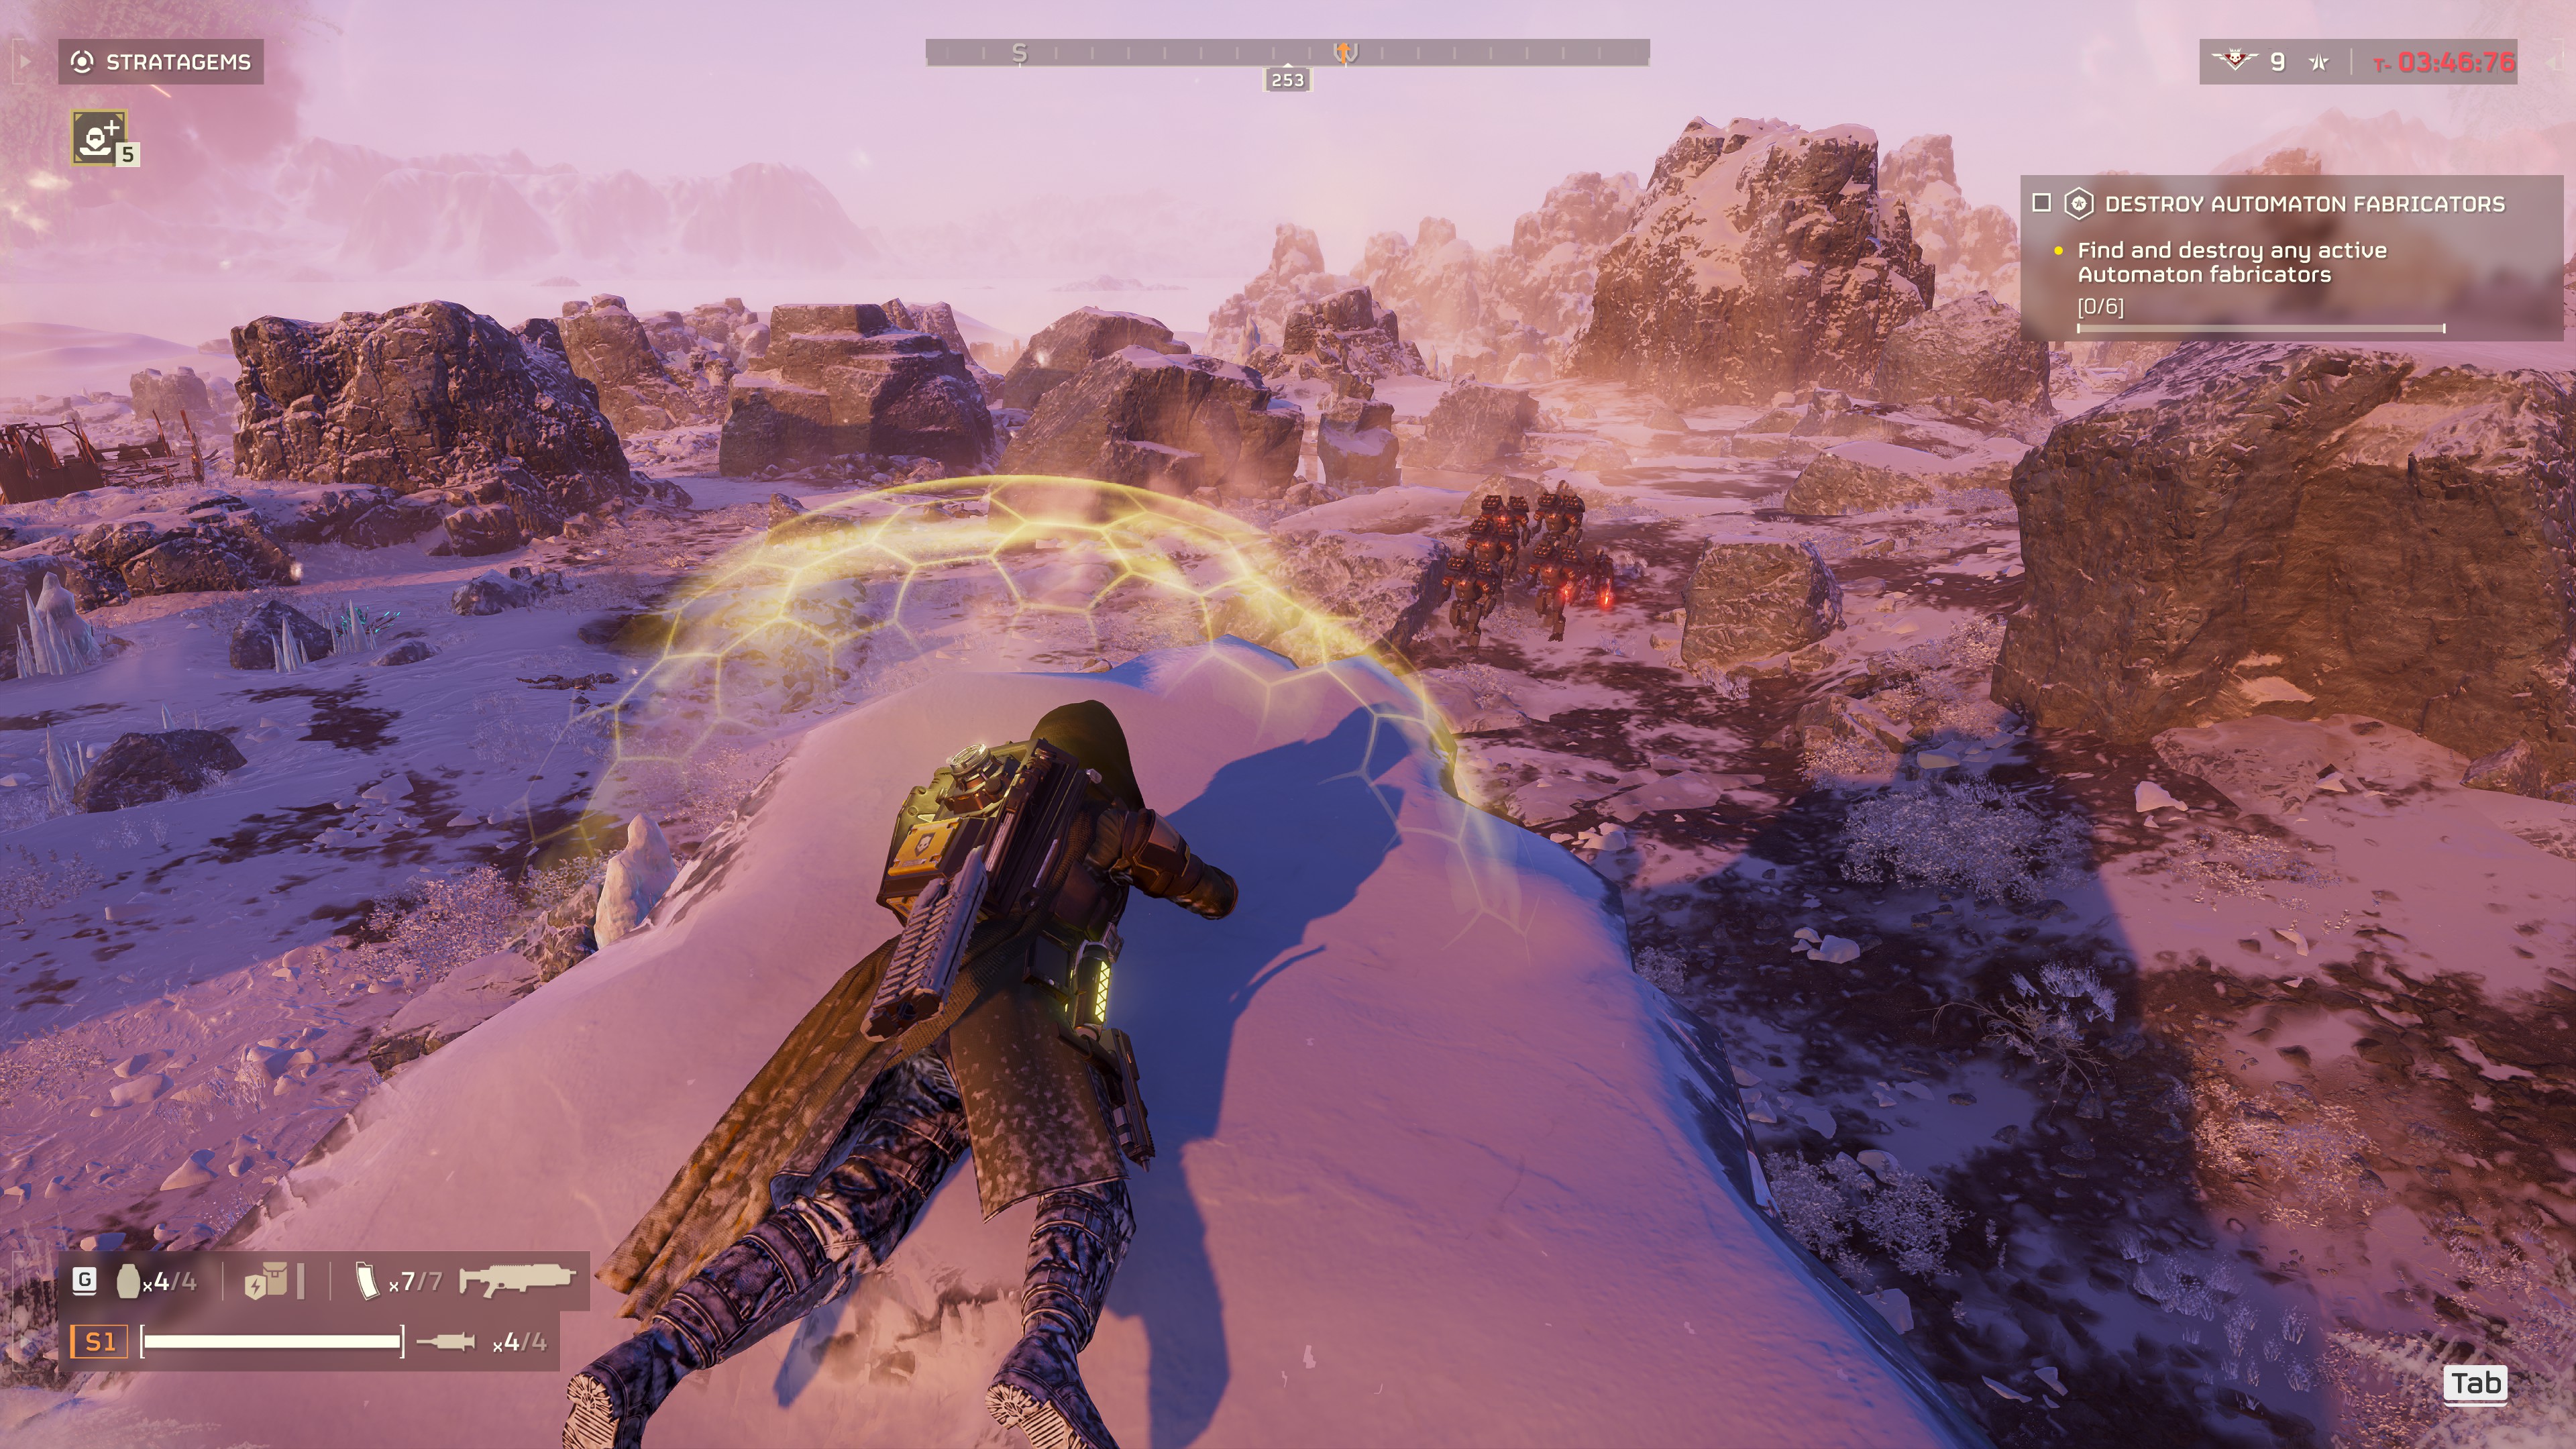
Bigger enemies (Hulks, Tanks, etc.) may occasionally reach the top of the hill, so you’ll want the Railgun to take them out quickly if the mortars aren’t able to dispatch them in time. As for the Shield Generator Pack, that is basically mandatory when fighting robots. Otherwise, one rocket is able to kill you.
Booster
Choosing a booster isn’t super important, but if you get overwhelmed at the top of the hill, “Hellpod Space Optimization” is great for getting you back into the action with full ammo if you happen to get killed.
XP & Requisition Slips (Strategy)
There are two different defense maps when fighting the bots. Neither one makes much of a difference in terms of how this strategy plays out.
When you land on the planet, drop your two mortar sentries in one of these locations (depending on the map that you’re playing on):

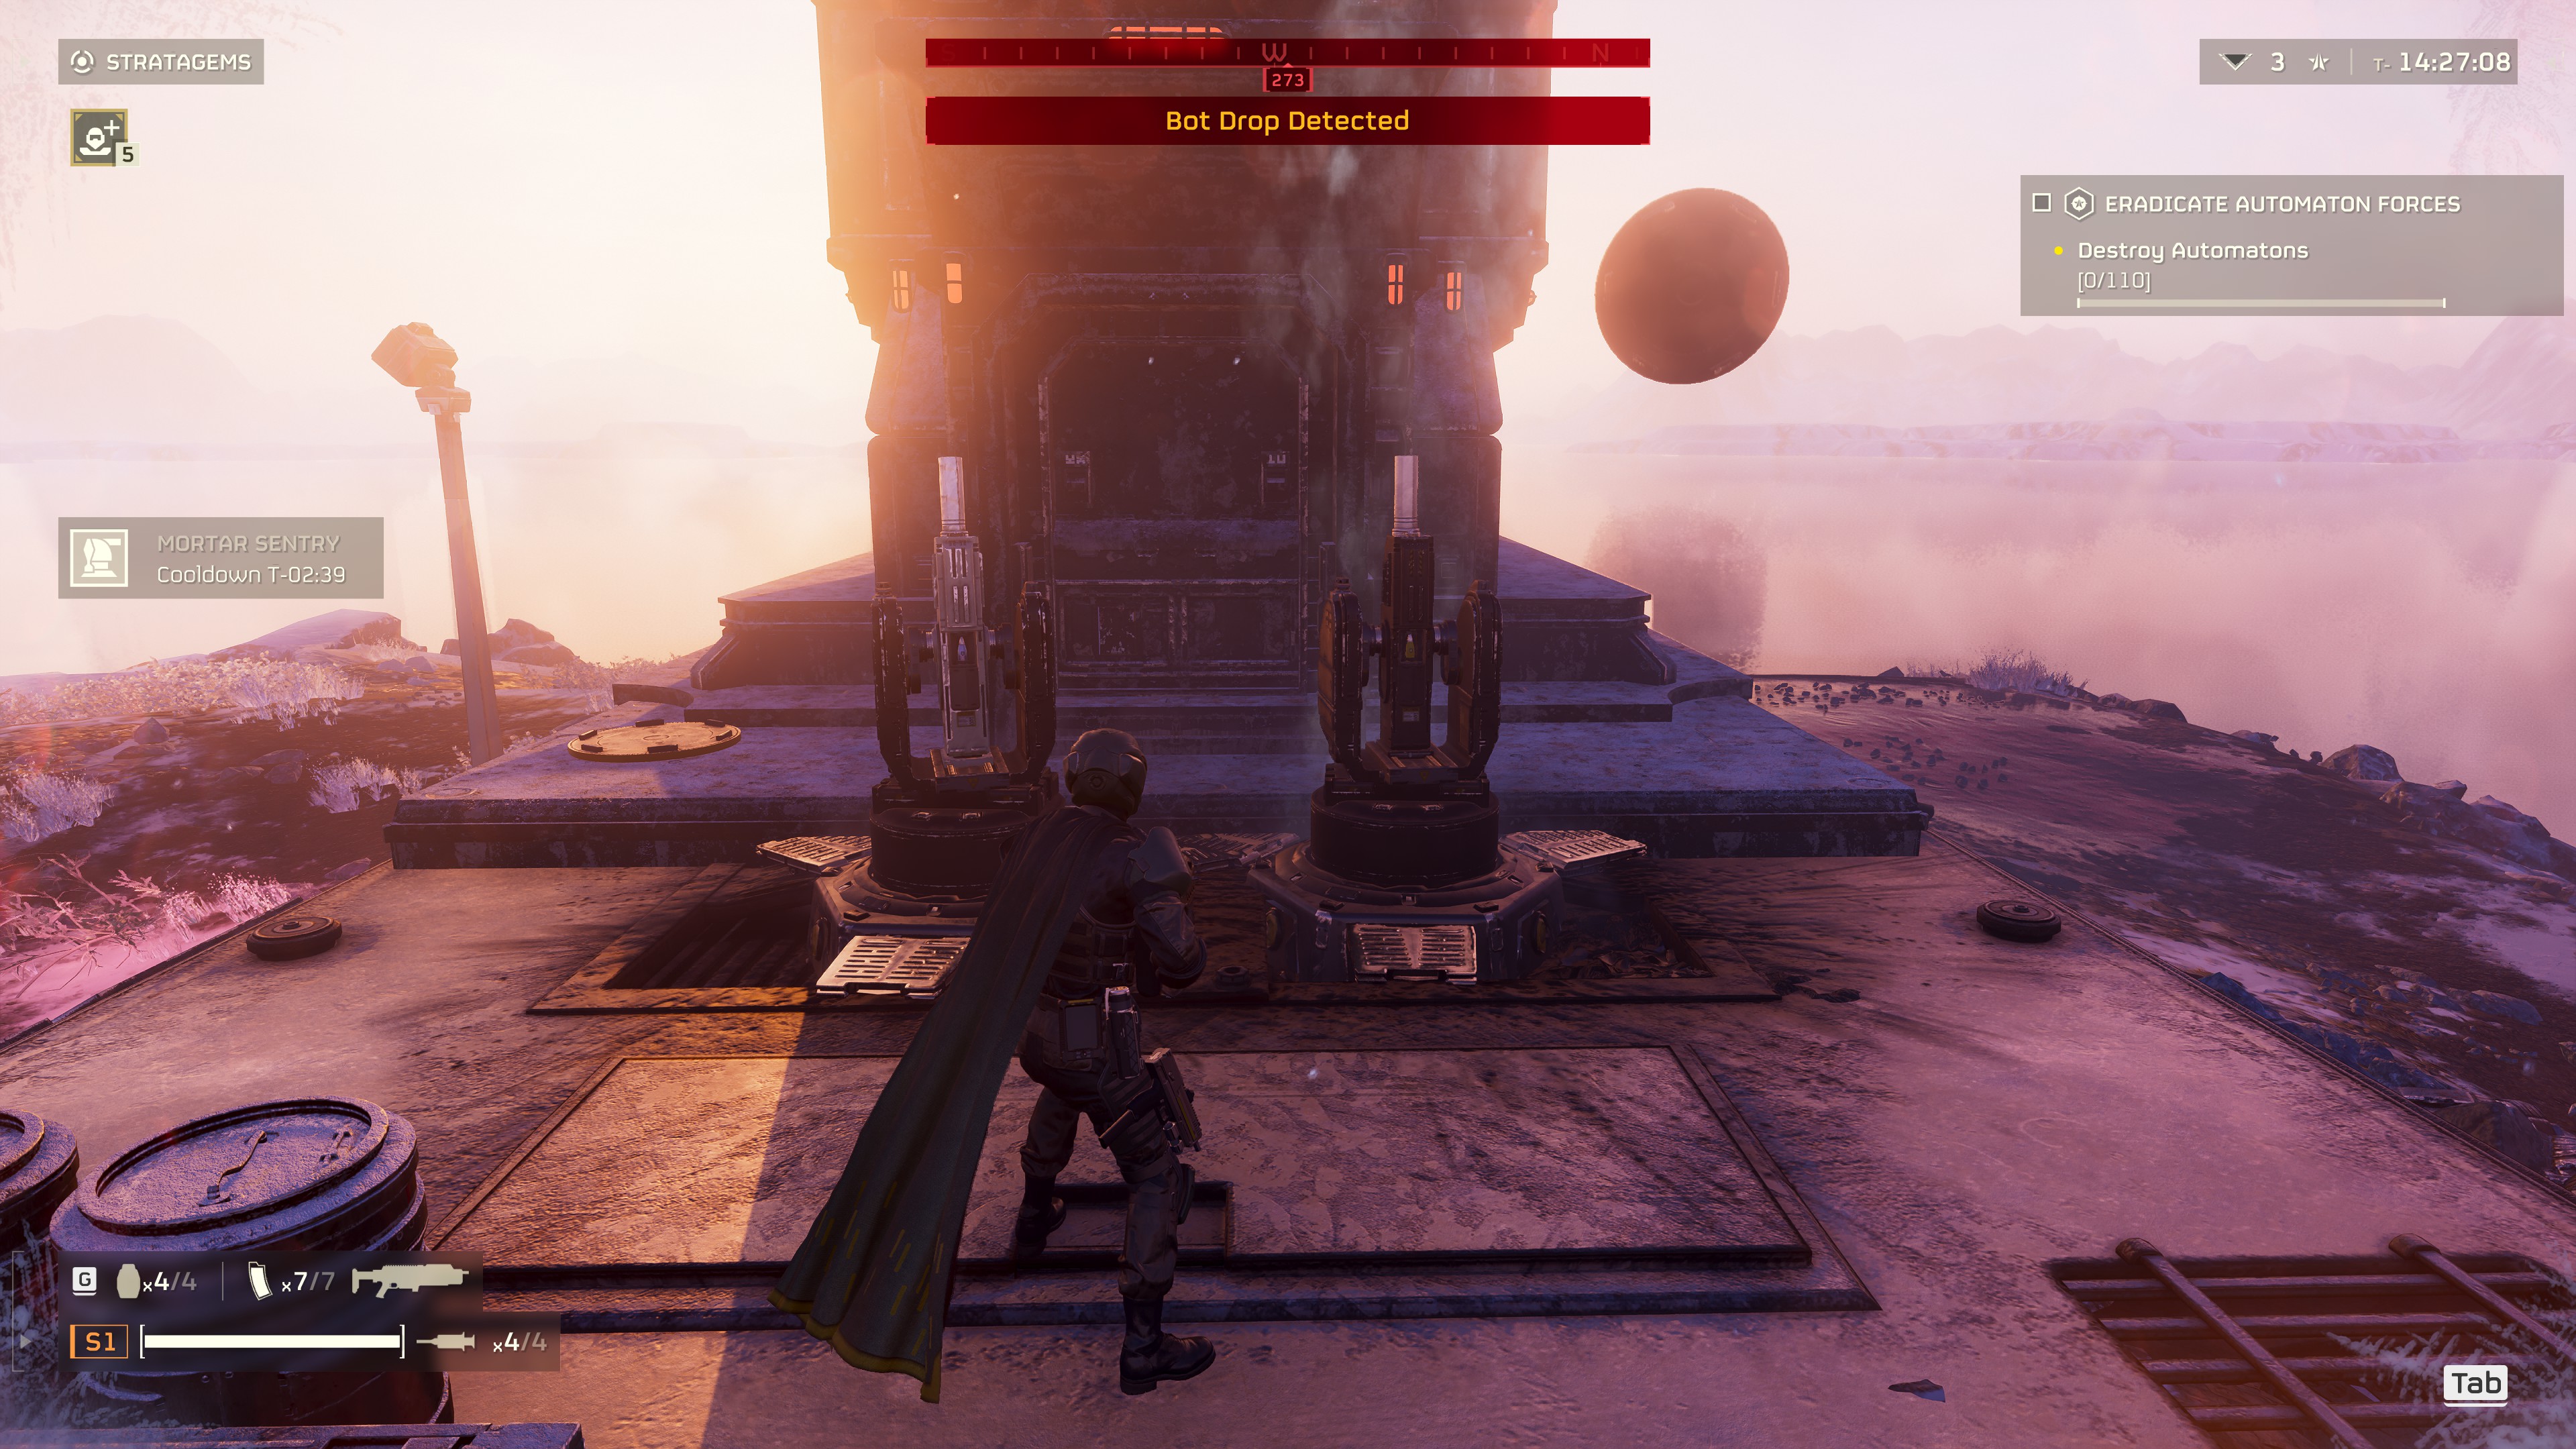
Naturally, you will also want to call down a Resupply, your Railgun, and your Shield Generator Pack nearby.
Now all you need to do is kick back and let the mortars do most of the work for you. The EMS Mortar will slow enemies down to a crawl, preventing the hill from being overrun (for the most part). The standard mortar will then blow everything that was slowed down to smithereens. Help out where you can though – if you see a Hulk entering the fray or a bunch of bots in a cluster begging for a grenade, take them out. This will conserve the ammo of your mortars.
Your #1 objective is to keep your mortars alive.
Don’t get sidetracked by focusing too much on killing distant enemies – be sure to glance every now-and-then at your hilltop position to make sure that no enemies have made it through and are making a beeline towards your mortars.
Unfortunately, the mortars will probably run out of ammo before reaching the kill count needed to complete the mission. This is when things may get a little spicy. Keep control of the hill as best you can with your Breaker, Railgun, and grenades until the cooldown for the mortars completes and you’re able to deploy them again.
If the hill gets overrun and you or your mortars are killed, you may or may not be screwed depending on the number of kills you still need to complete the mission. If you still need like 50-60 kills, it’s probably better just to abandon the mission and try again. However, if you only need a handful of kills, direct your hellpod near the edge or at the bottom of the hill where few enemies have congregated. You may then get lucky and be able to lob grenades up to the overrun hill position to get the kills you need or you may be able to pick off some low-level grunt robots with your shotgun.
Remember: killing a standard rifleman bot and killing a Tank both count as only one kill.
Avoid the bigger robots as best you can if you just need a few more kills to complete the mission.
Now, if you’re wondering why I recommend you do this on an Automaton planet, it’s for these reasons:
- The bugs are very quick and can outrun the EMS mortar, leading to the hill being overrun more easily.
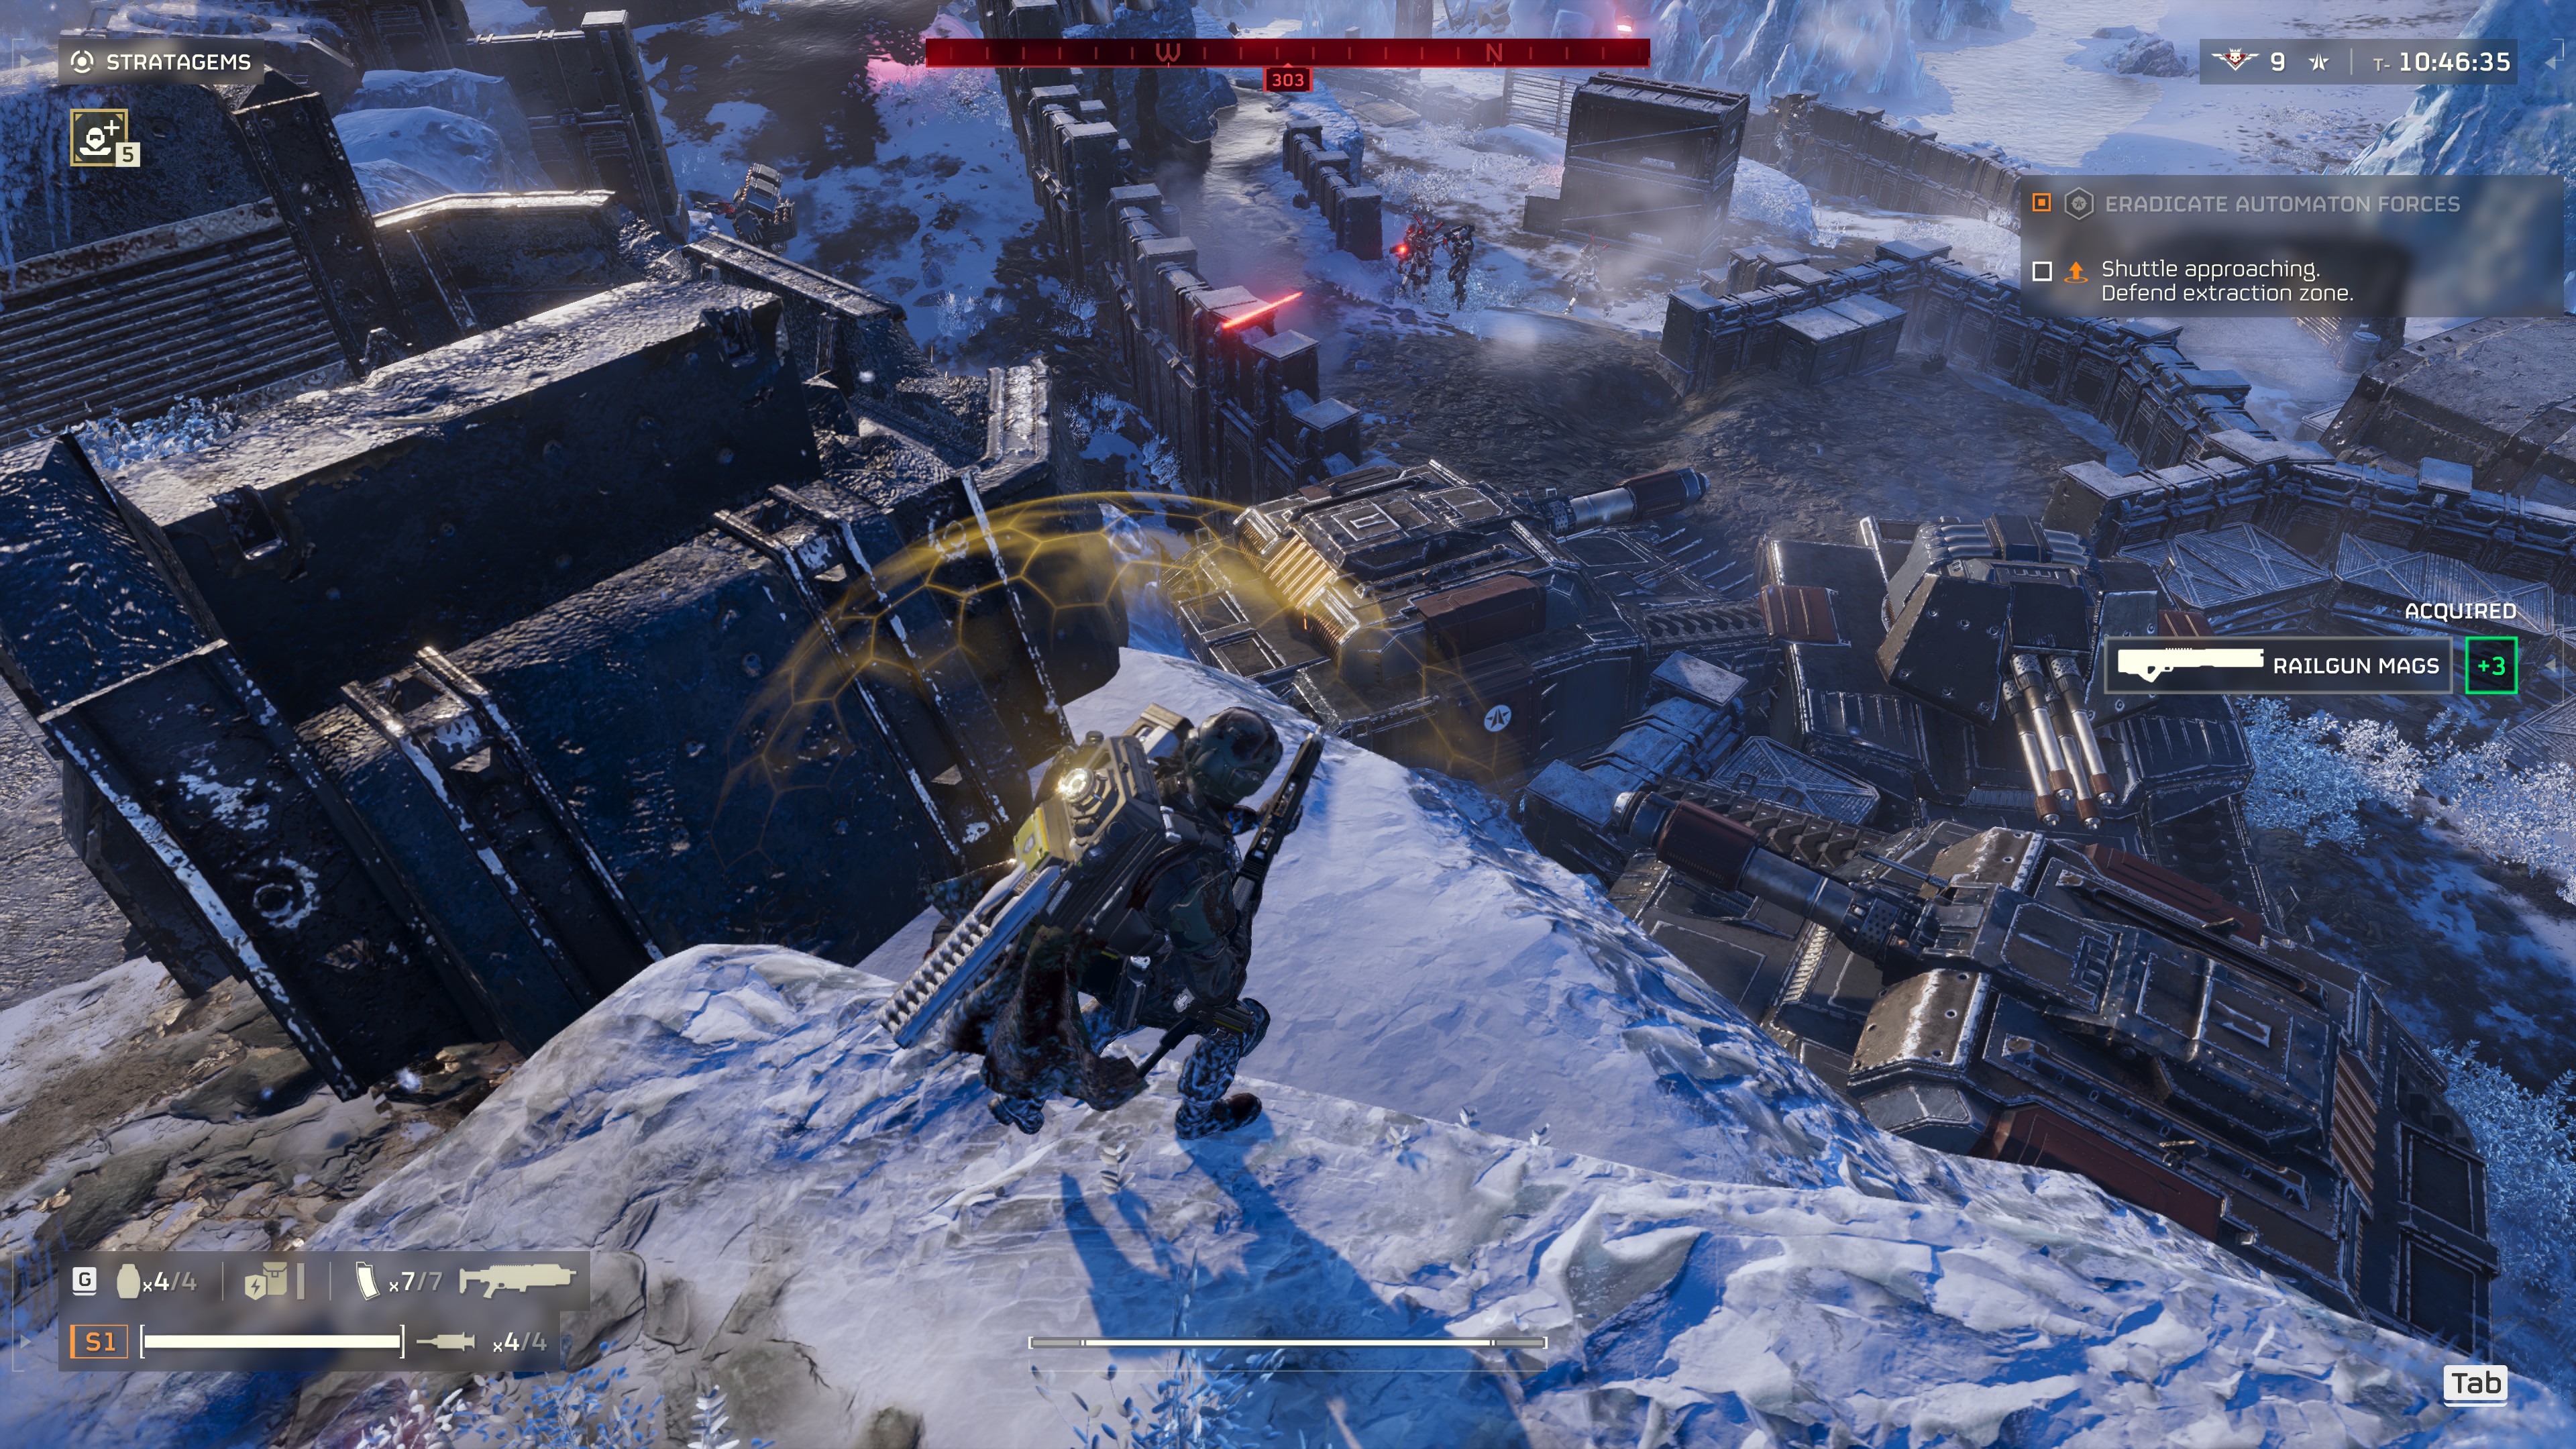
- The stupid bots will sometimes drop Tanks into the base, leading to “traffic jams” and making it so that other bots can’t make it up the hill. Besides keeping your position secure, it also makes the bots bunch up, allowing the mortar to blow up large groups of them at one time without using much ammo. Additionally, once a tank is destroyed, its charred remains will continue to prevent troops from moving up the hill. Just look at this glorious three-Tank traffic jam:
Once you’ve hit the needed kill count, the extraction pod and the Pelican will land soon after (no need to call in the Pelican manually). Extracting or not doesn’t matter that much – you’ll still get rewarded regardless – but you will lose out on some extra XP and Requisition Slips if you fail to extract.
XP & Requisition Slips (Rewards)
Here is a screenshot I took from one of these missions played on “9 – Helldive” difficulty:
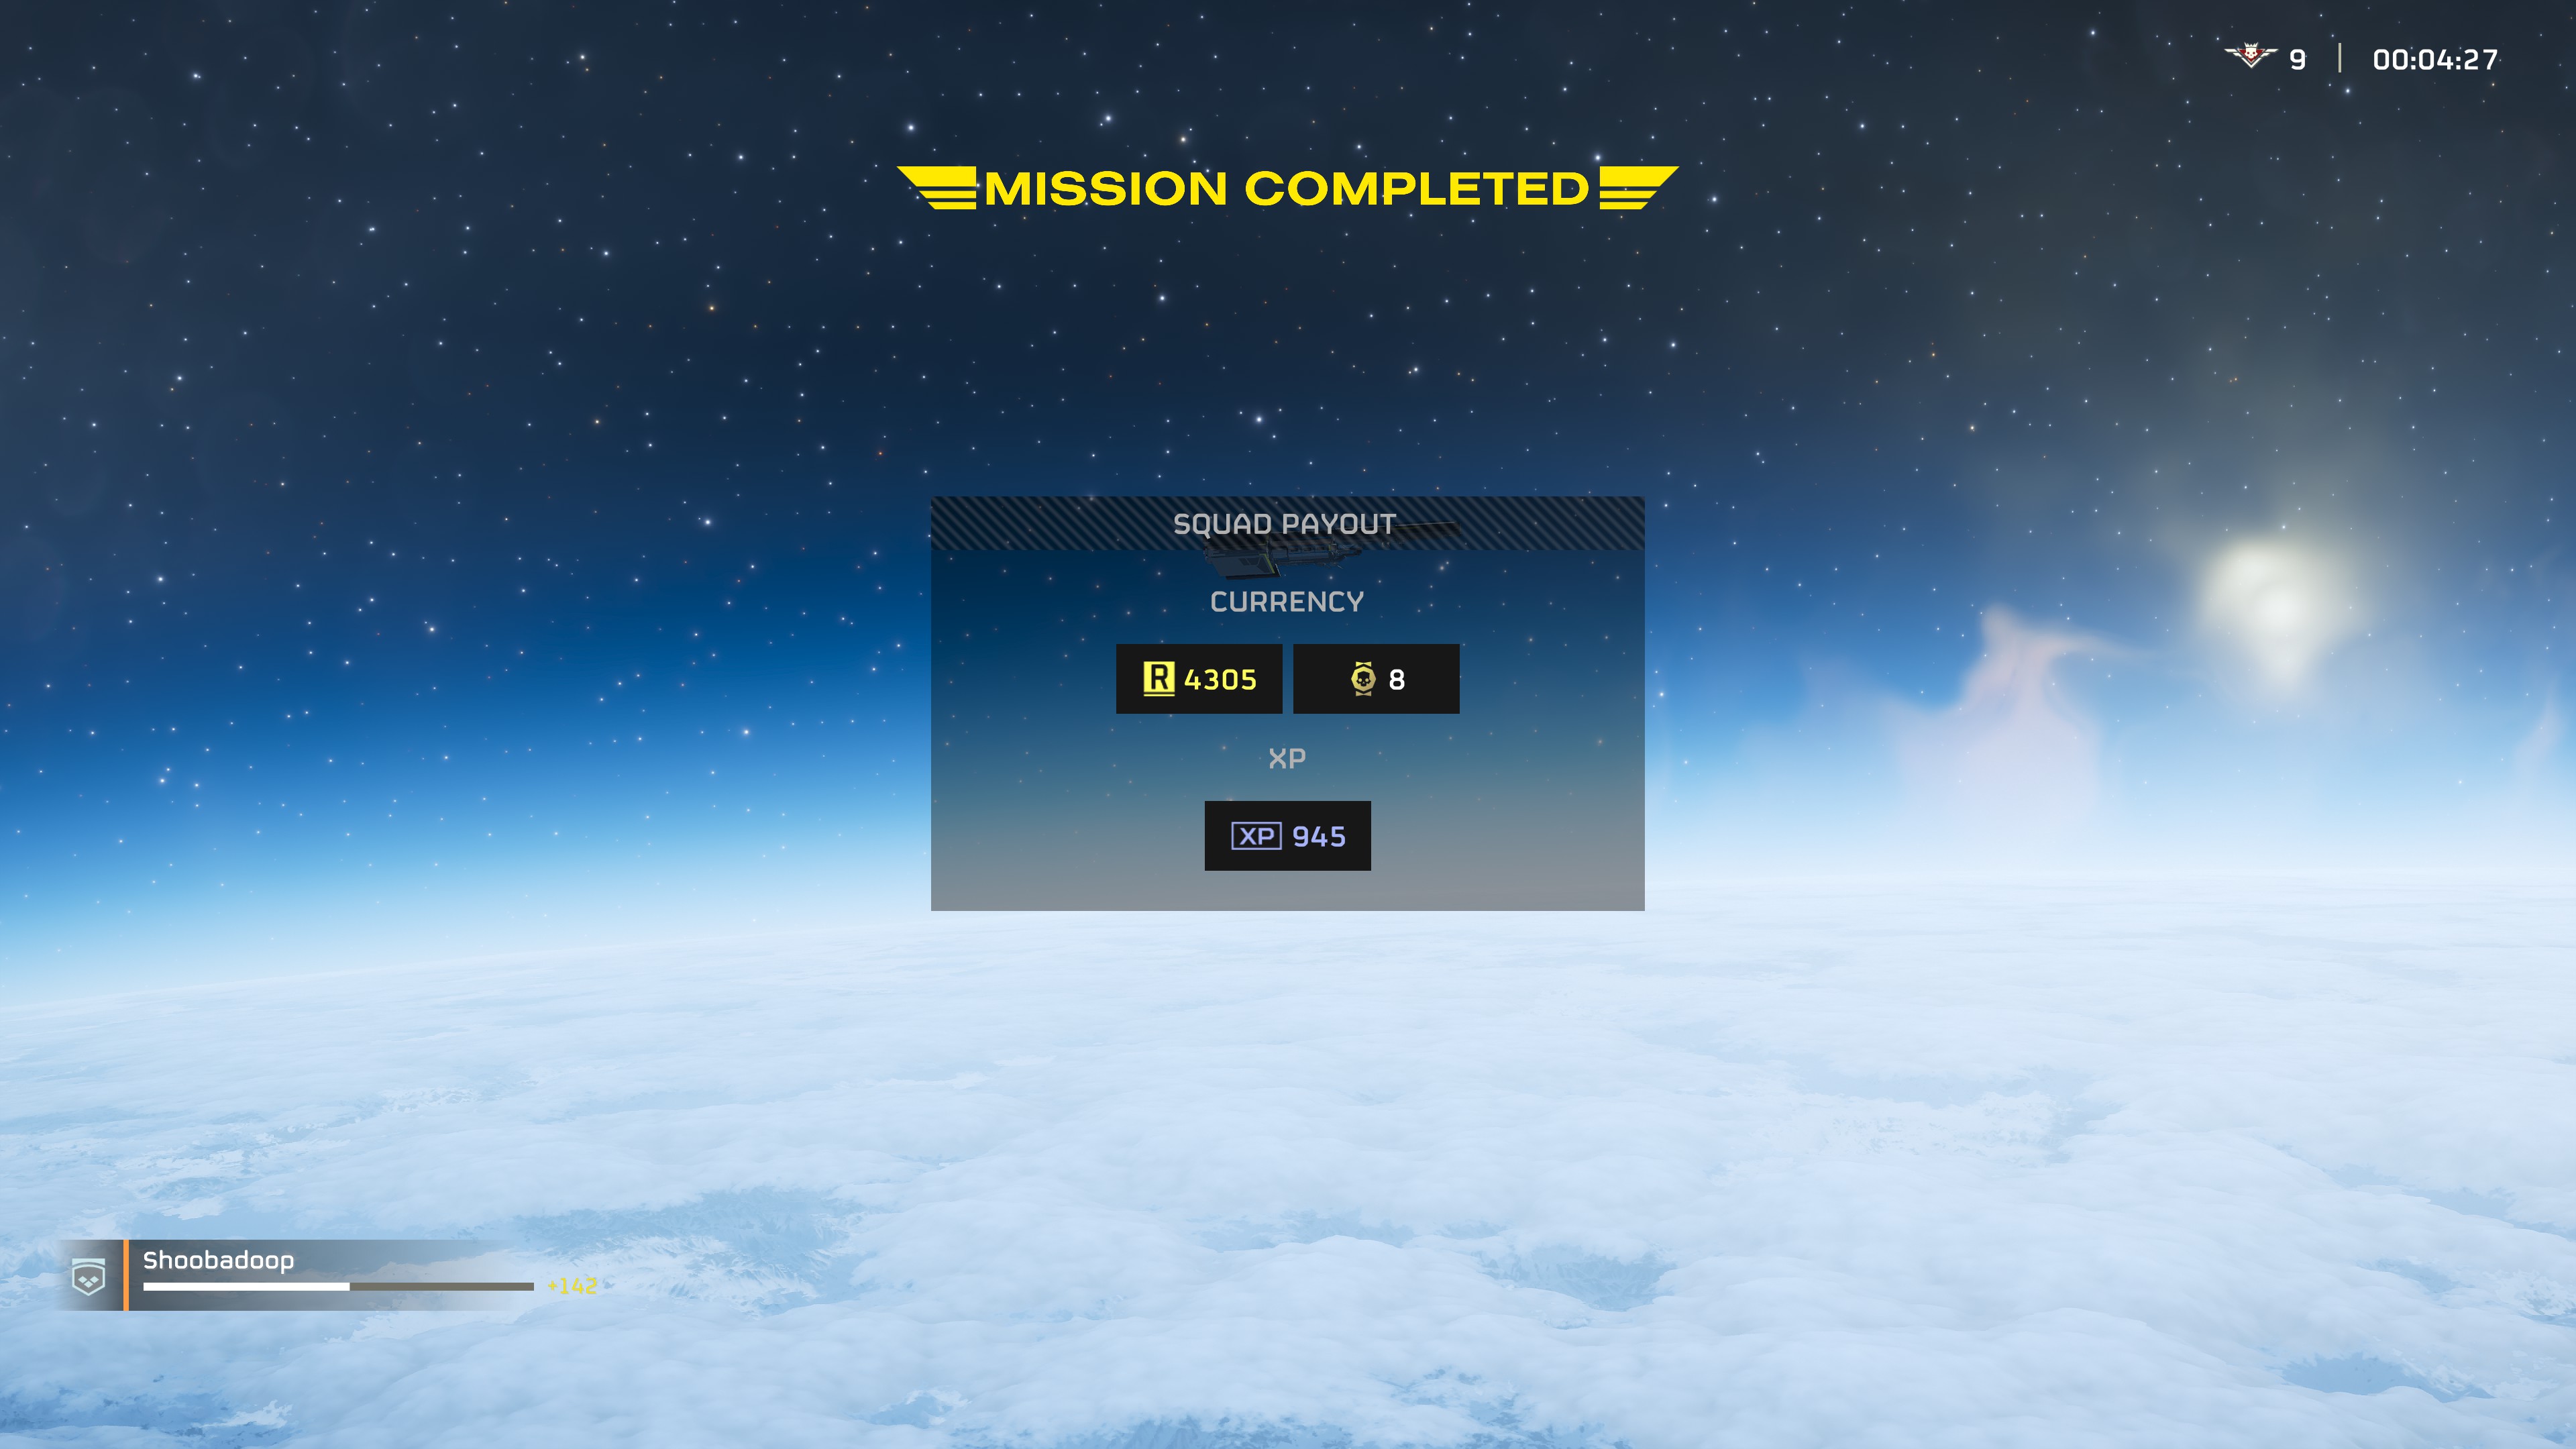
It took me 4:27 minutes to complete the mission and I received:
- 945 XP
- 4,305 Requisition Slips
- 8 Medals
Admittedly, this is probably my best result (this is from the same mission with the three-Tank traffic jam, so the bots didn’t have much of a chance getting up the hill). Some missions may go south and you’ll be overrun, and on some missions the bots will drop a Tank right at the top of the hill while you’re already trying to stop a flamethrower Hulk from turning you into fried chicken. A typical mission will usually be 5:30-6:30 minutes long and the rewards will look more like this:
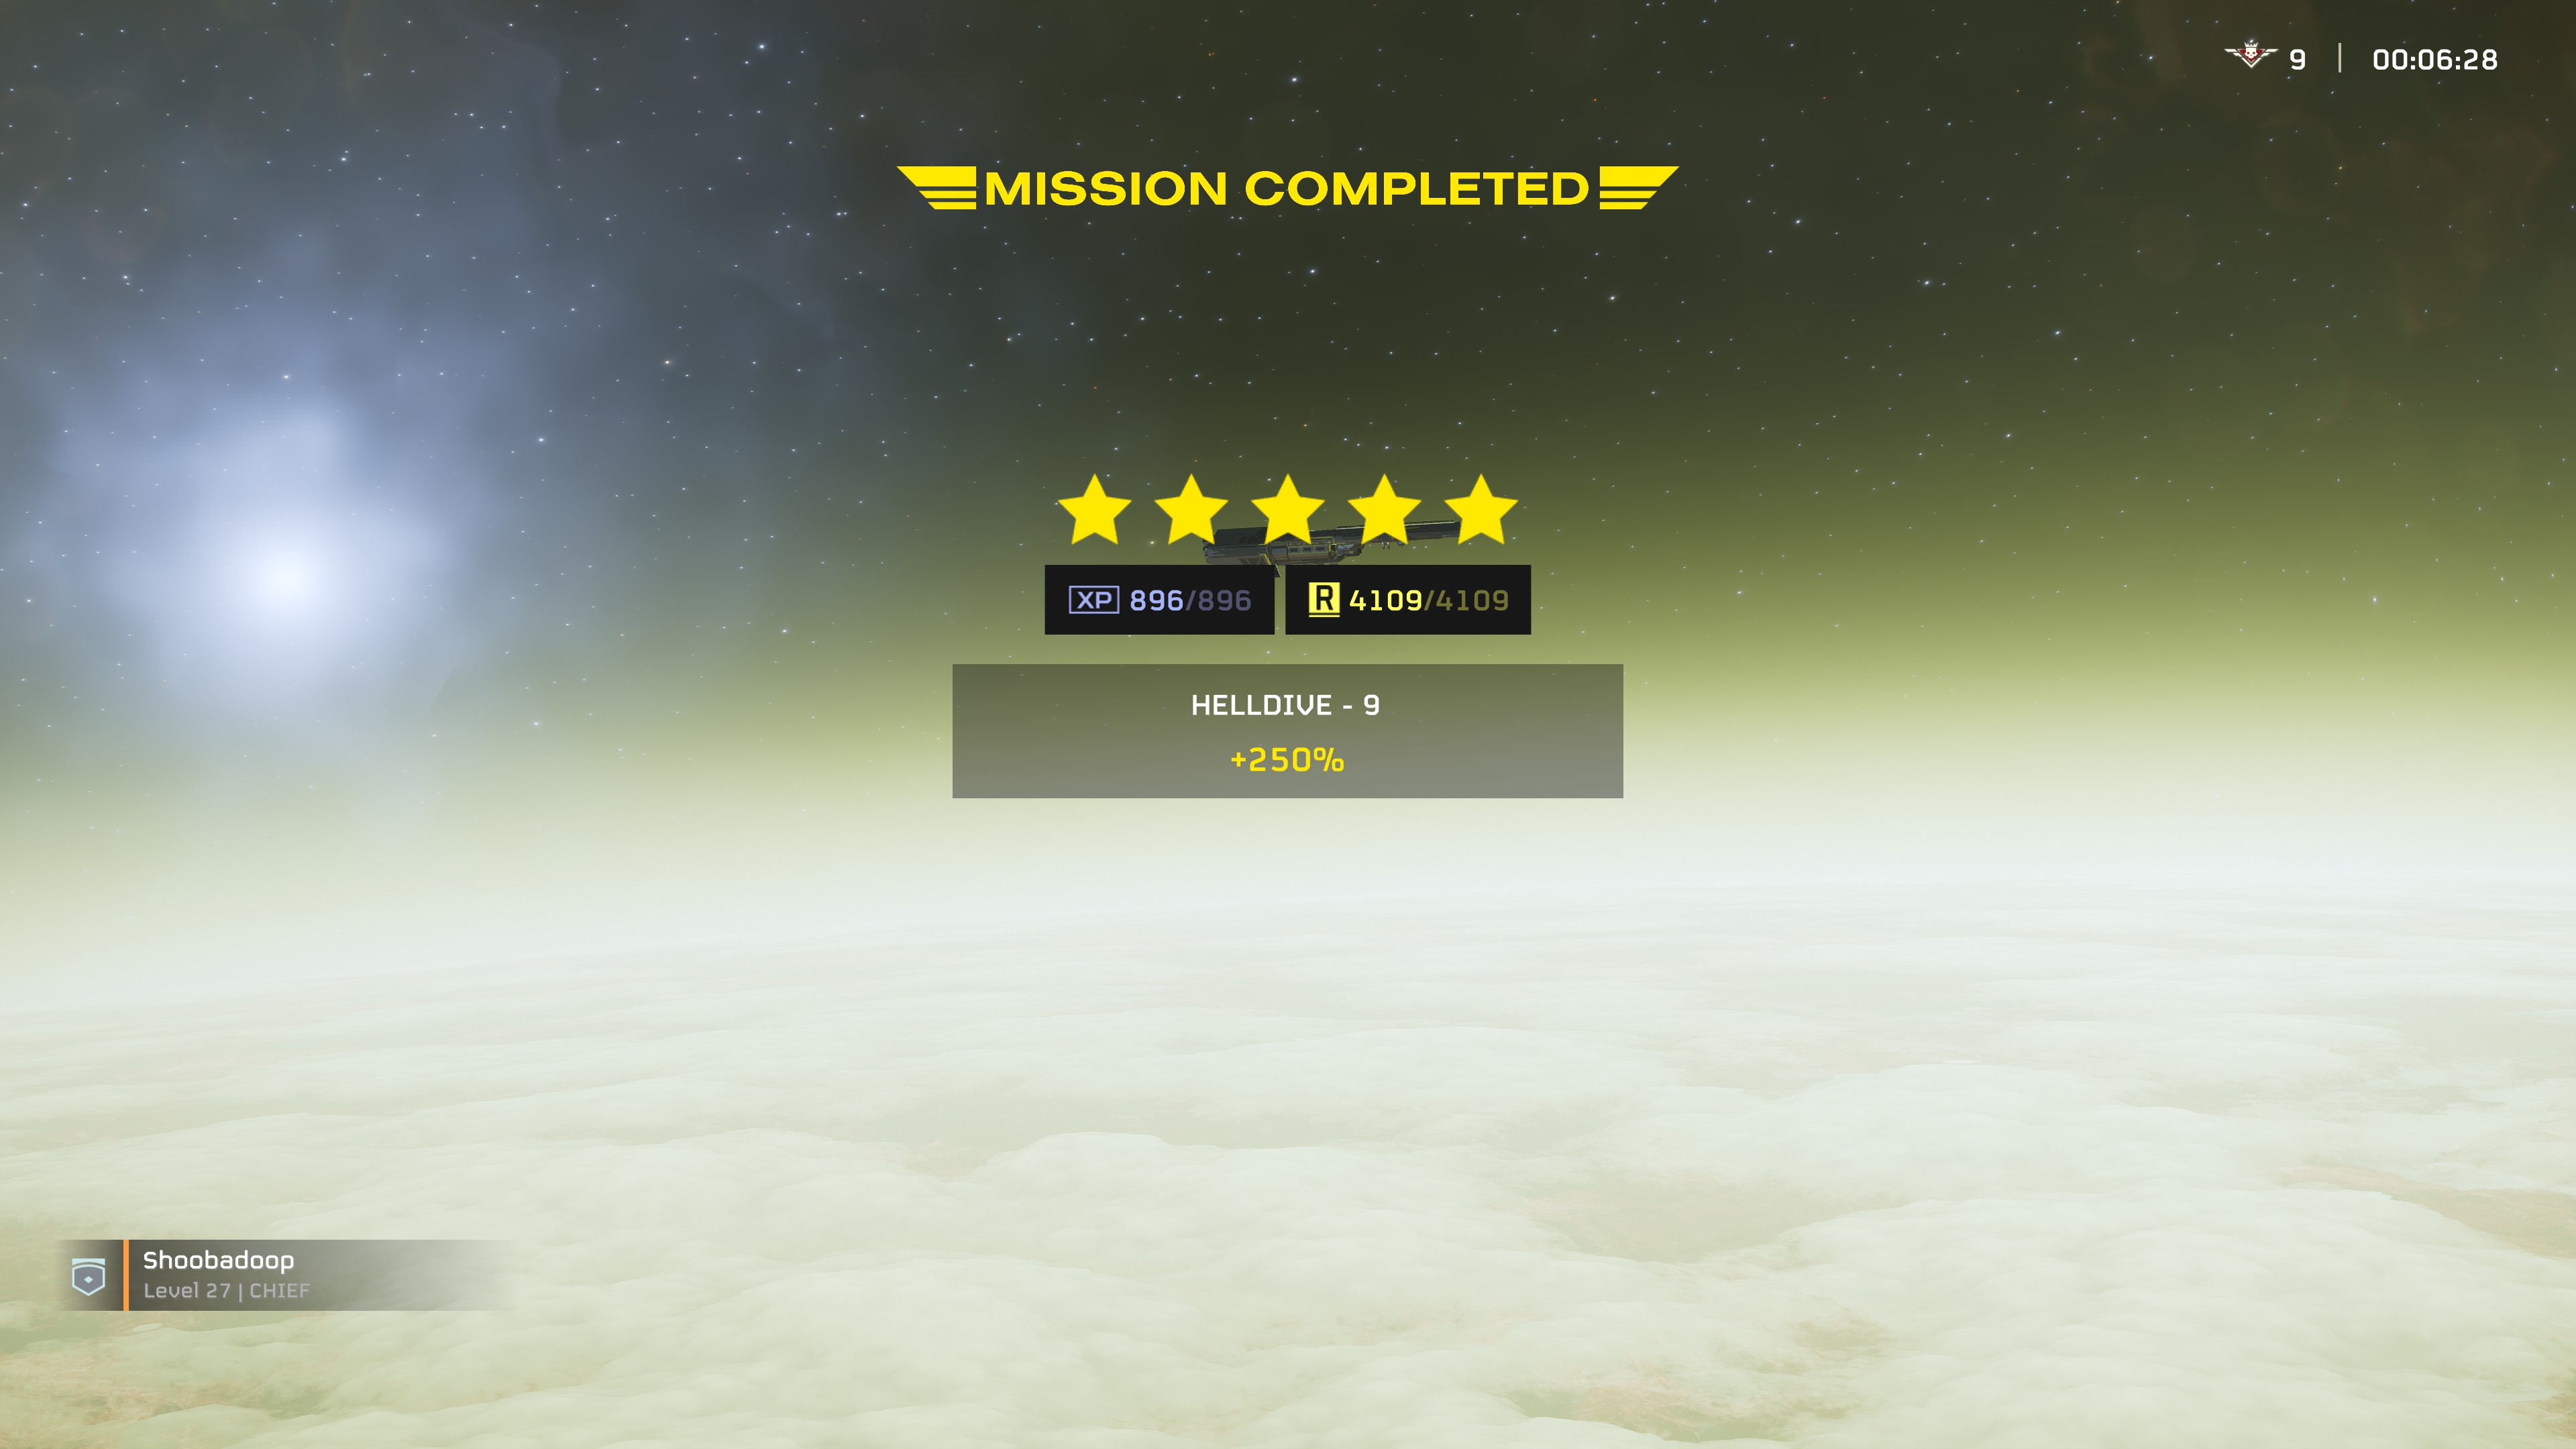
Pretty similar results…just took a little bit longer.
Medal Farming
Unfortunately, farming Medals isn’t as quick-and-easy as farming XP and Requisition Slips. This method will allow you to gain significantly more medals than you would from completing missions, but it’s still going to be a long grind. At the time of publication, there are two War Bonds that you may spend Medals on. You’ll need this many Medals to unlock everything:
- Helldivers Mobilize!: 2,015 medals
- Steeled Veterans: 686 medals
- Total: 2,701 medals
Unlike my other guides, farming medals is done in conjunction with one of my other strategies:
- XP & Requisition Slip Farming: about 70-80 medals an hour after accounting for the time it takes for you to get in and out of the missions + if you don’t fail and have to restart them.
- Super Credit Farming: about 30-50 medals per hour.
Super Credit Farming
The easiest way to farm Super Credits is to be rich and purchase them from the Super Store using real money. However, if you’re poor like me, farming them is thankfully not the worst thing in the world.

Super Credits (Quick Guide)
- Choose a “DEFEND” planet and select a “1 – Trivial” Evacuation Mission.
- If this is unavailable, choose a mission on a Moor-type planet in which the main objective is in the center of the map and there is little-to-no water.
- Equip your fastest Light Armor and the “Stamina Enhancement” Booster if you have it. The rest of your loadout doesn’t matter.
- Land outside of the Evac Zone if you’re doing an Evacuation mission. Otherwise, land wherever.
- Do a loop around the main objective, looking for Points of Interests on your compass.
- Open pods and storage containers to collect their contents.
- Abandon the mission once you think you’ve visited every POI.
Super Credits (Introduction)
The best way to farm Super Credits is to choose a “1 – Trivial” difficulty Evacuation mission on a “DEFEND” planet and to run around the map looking for Points of Interest.
Choosing a Planet
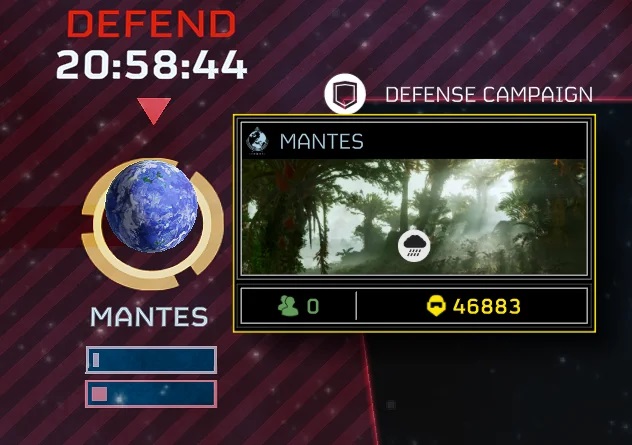
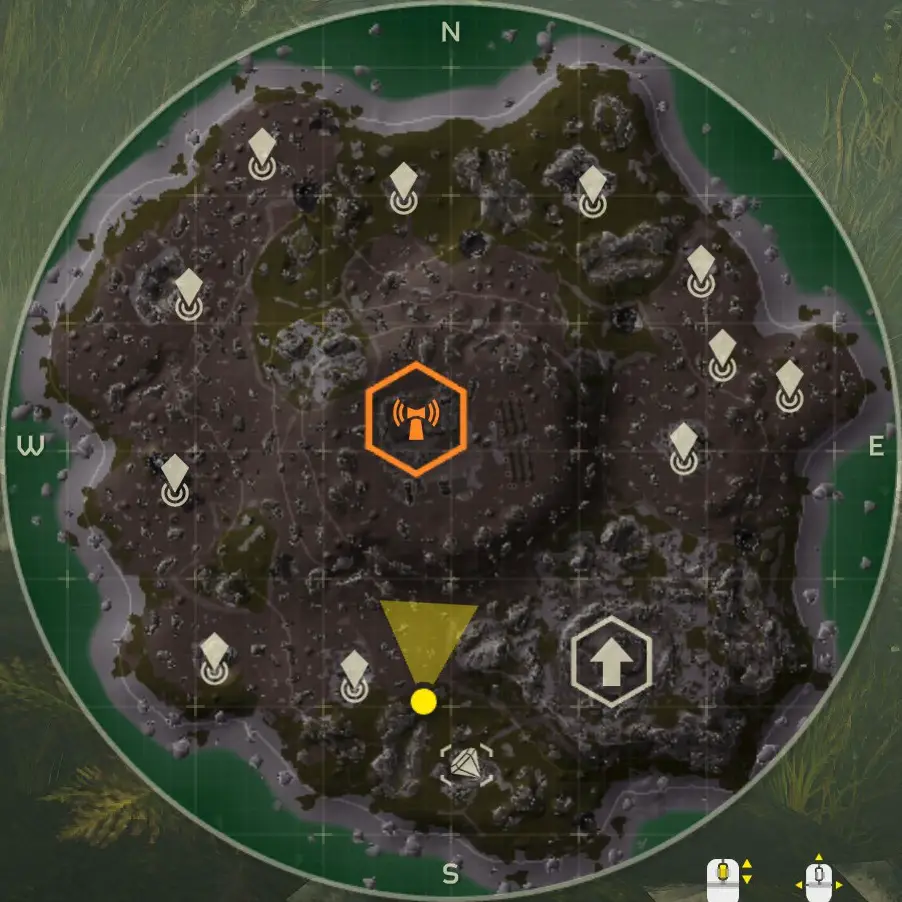
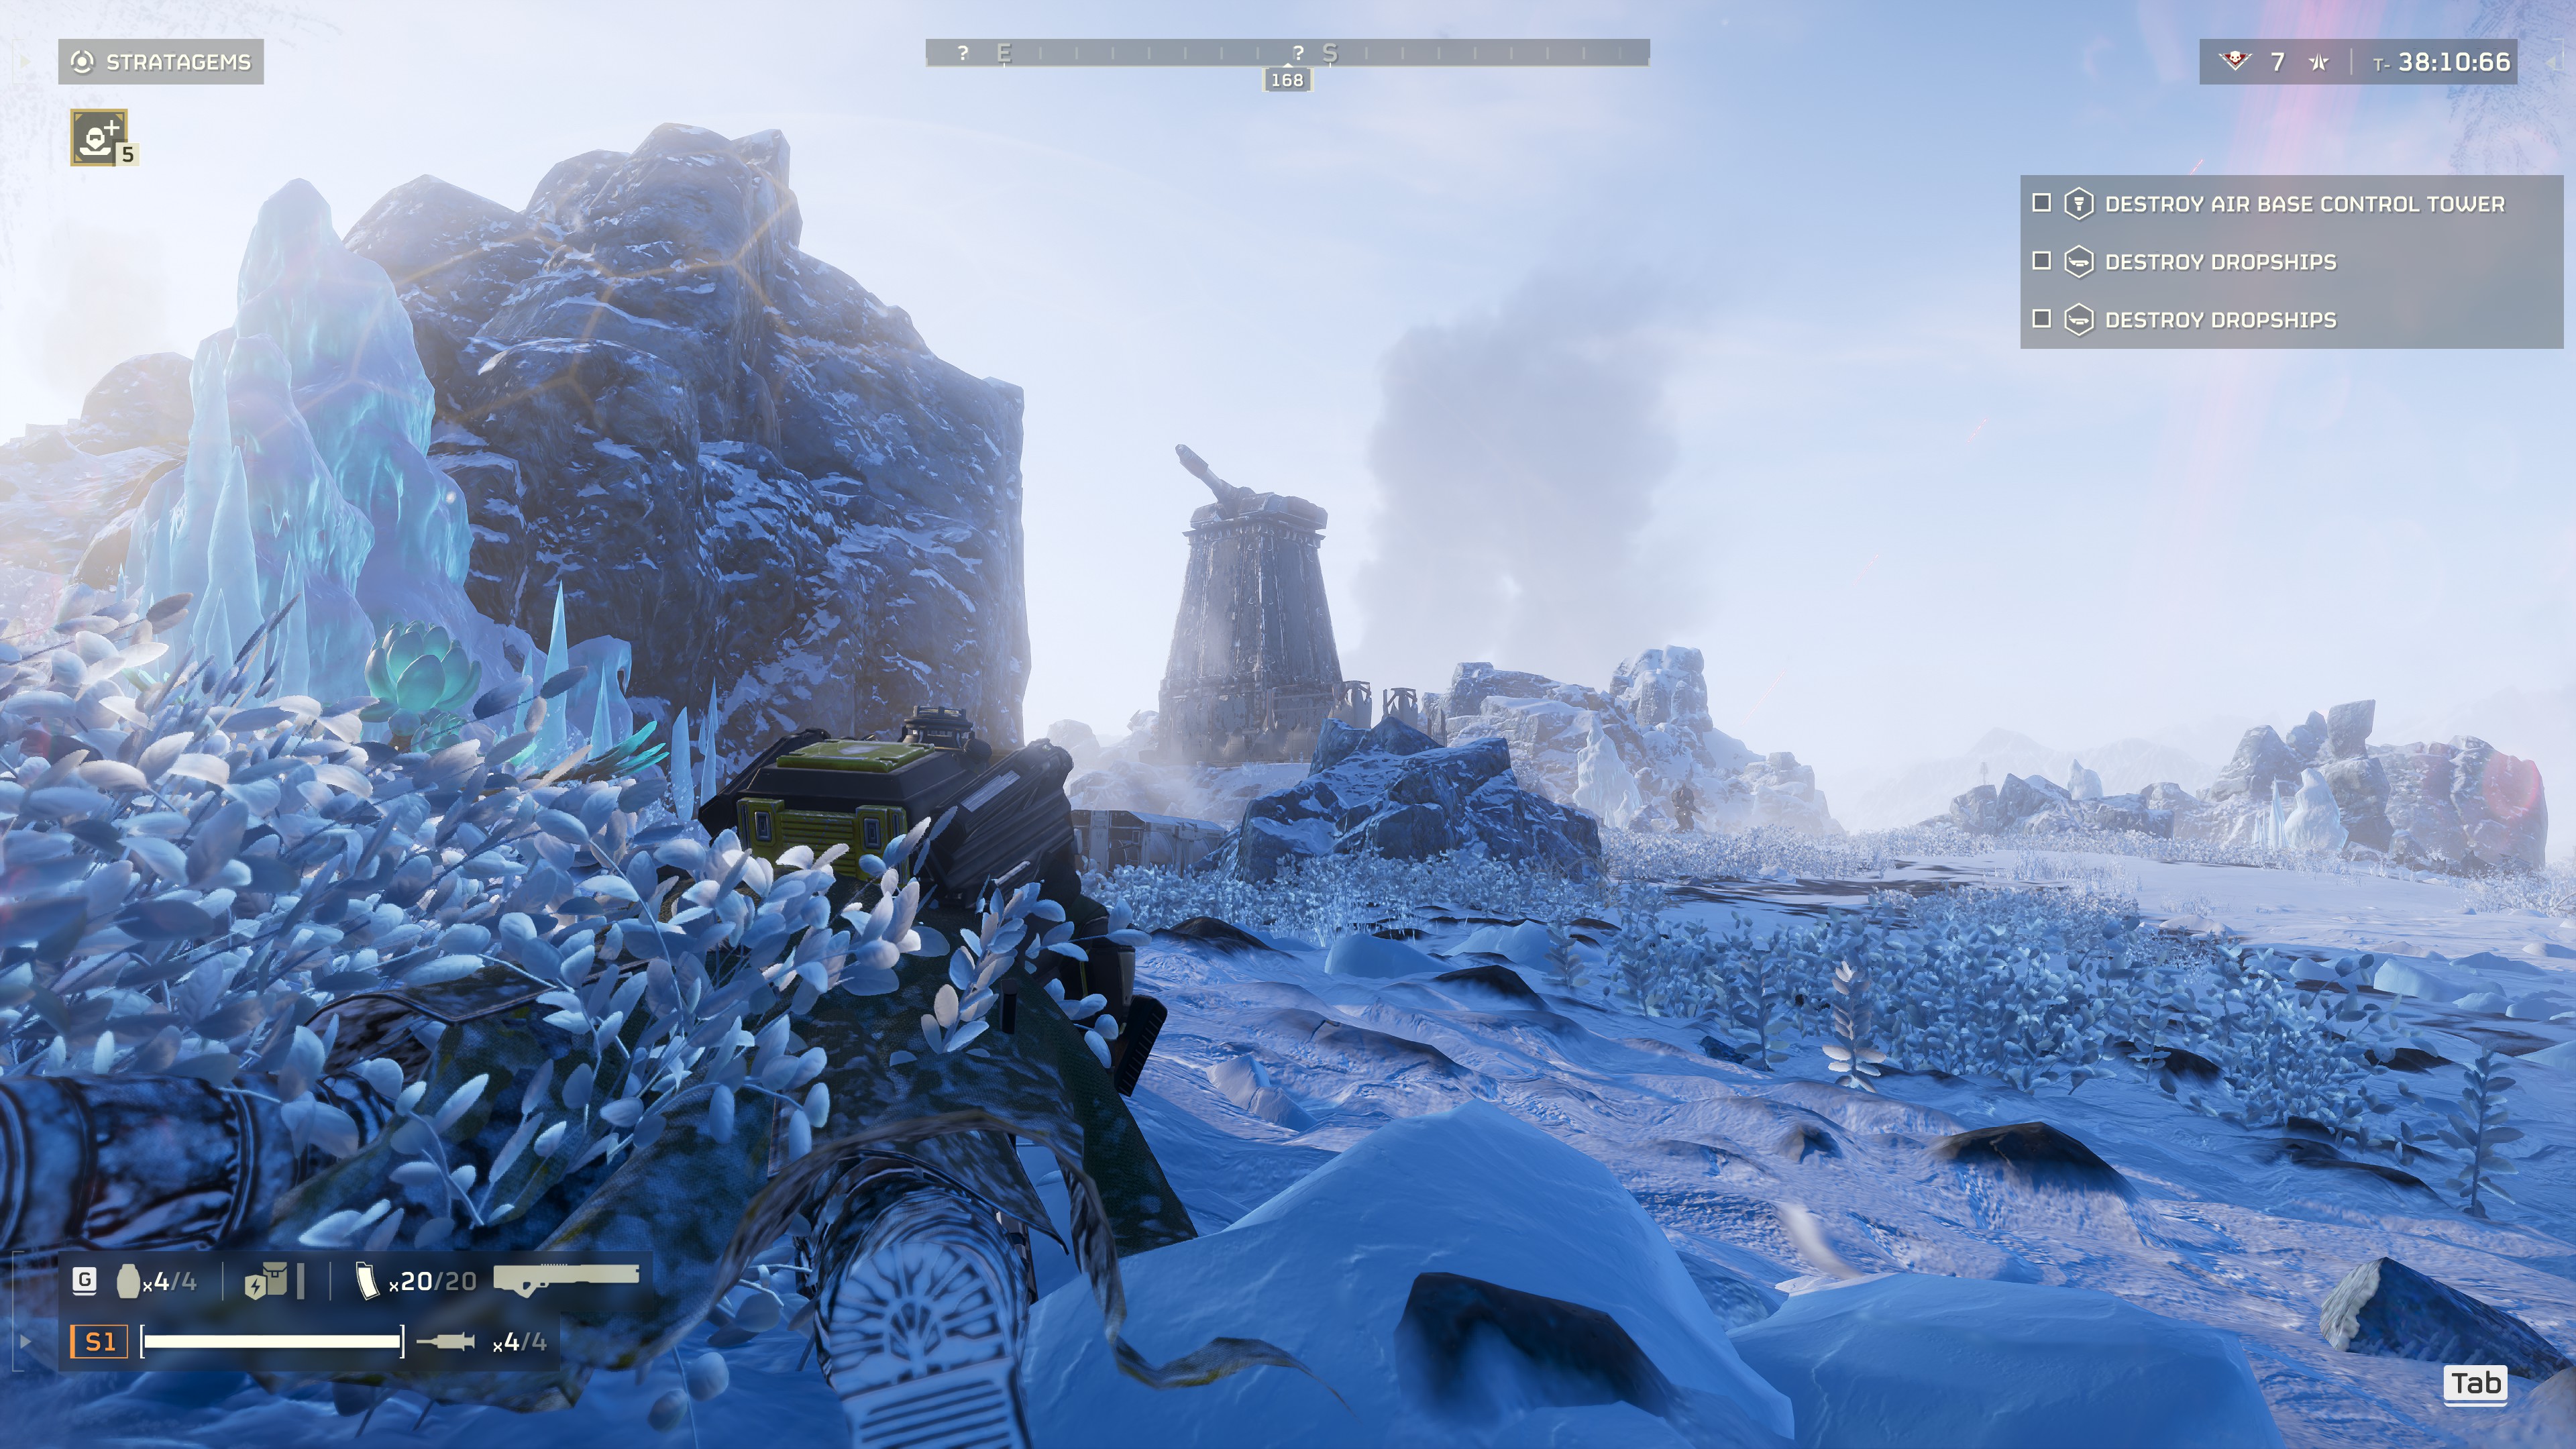
Unfortunately, you are completely at the mercy of the devs when it comes to finding a “DEFEND” planet. They look like this on the map:
The reason for wanting to go to one of these planets is that they typically spawn a nice, circular map that you can do a loop around to look for Points of Interest. The galaxy map will not always have a “DEFEND” planet available though…If that turns out to be the case for when you try to attempt this method, choosing any other mission is fine, though there will probably be fewer Points of Interest on the map than if you had chosen an Evacuation mission.
As far as planetary conditions go, choose one that is a Moor. Some Moor planets include:
- Angel’s Venture
- Crimsica
- Hellmire
- Popli IX
- Ubanea
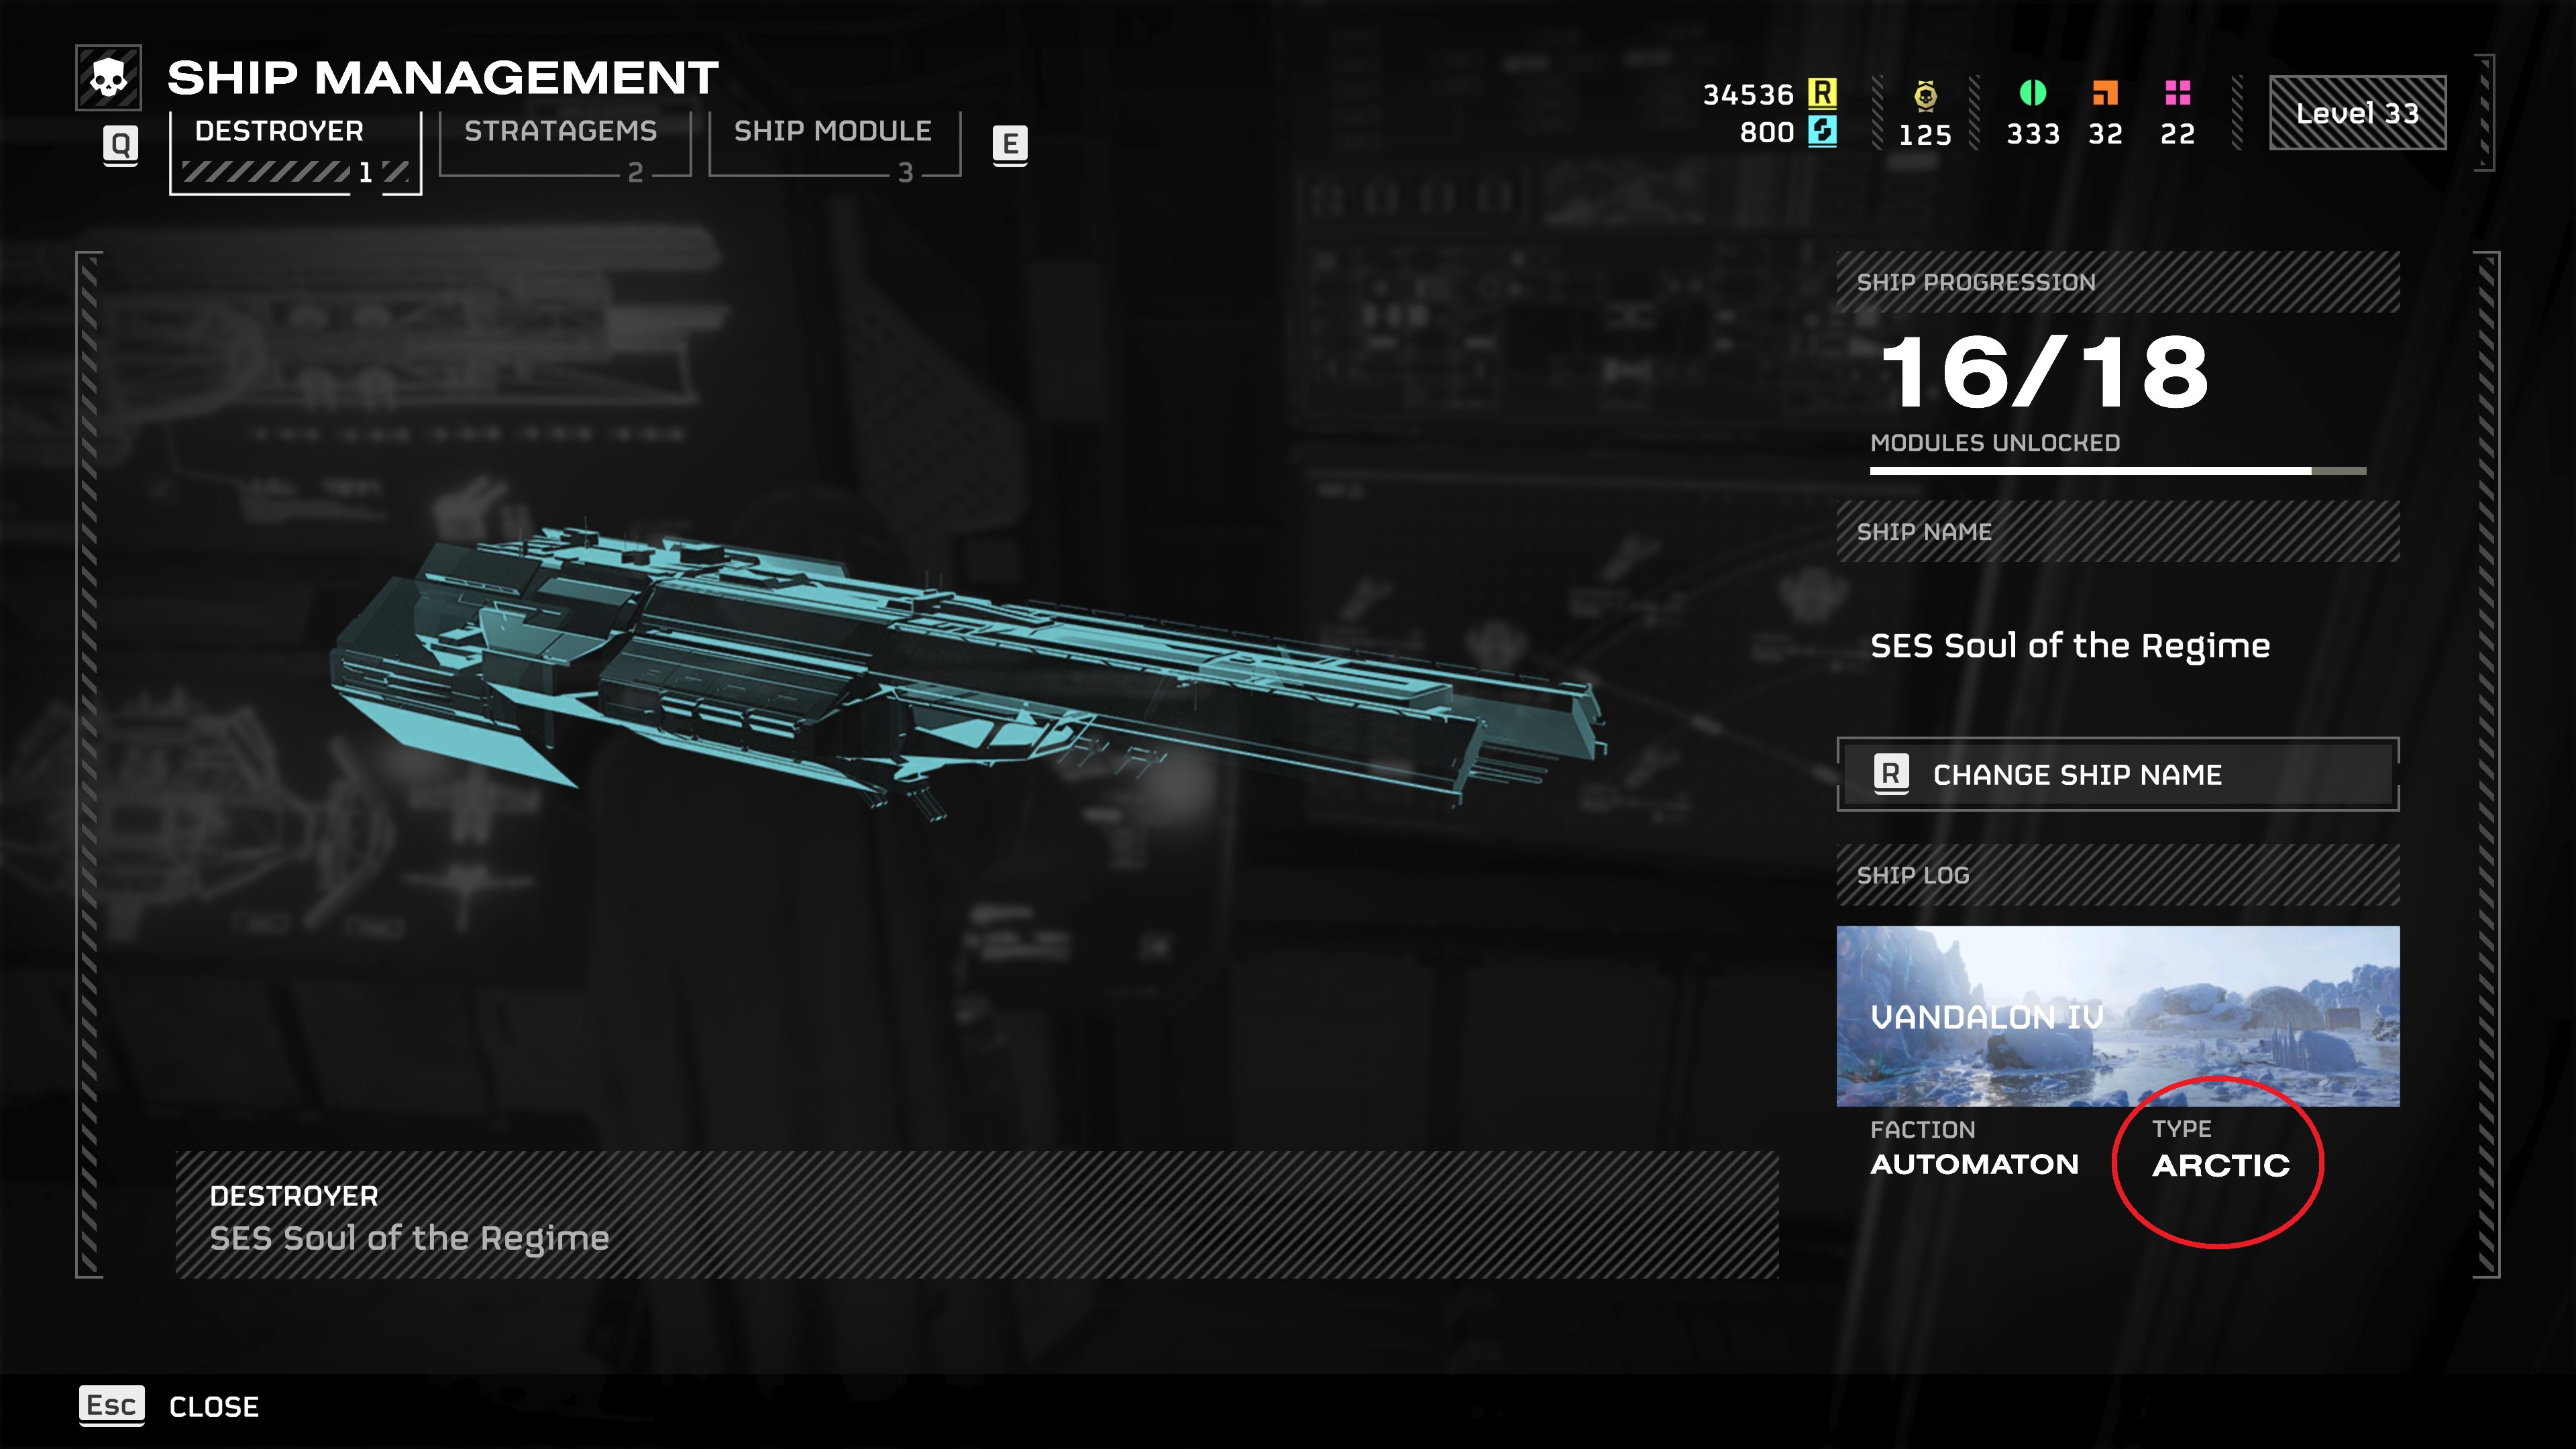
If you’re not sure what type of planet you’re on, go to the terminal where you can upgrade your ship and take a look at the lower-right corner of the “Destroyer” tab:
The reason you’ll want to go to a Moor planet is that they typically have low amounts of rough terrain (mud, snow, etc.) and foliage to slow you down. They also usually have good visibility with no huge mountain ranges or fog to obscure the Points of Interest on the map.
Like I said earlier, if you’re not able to do an Evacuation mission, it’s fine to do any other type of mission. However, you’ll want to pay special attention to the map that is generated when you go looking for a mission to do.
This is basically the most optimal kind of map for doing a run since it mimics the typical Evacuation map (objective is in the center with a ring of POI’s around it):
Avoid choosing any maps that have a lot of water or multiple objectives on it (POI’s don’t spawn near enemy bases or objective points).
Loadout
Since this is a “1 – Trivial” mission which we don’t plan on completing anyway, choose your fastest Light Armor and the “Stamina Enhancement” Booster if you have it. The aim of this strategy is to move as fast as possible.
Super Credits (Strategy)
If you’re doing an Evacuation mission, choose a spot outside of the Evac Point. Outside of random patrols, enemies won’t bother you if you stay away from the base. As for another mission type, landing at the Evac Zone is fine because it usually gives you a wide view of the surrounding area.
As you run around the map, POI’s will show up as question marks (?) on your compass:
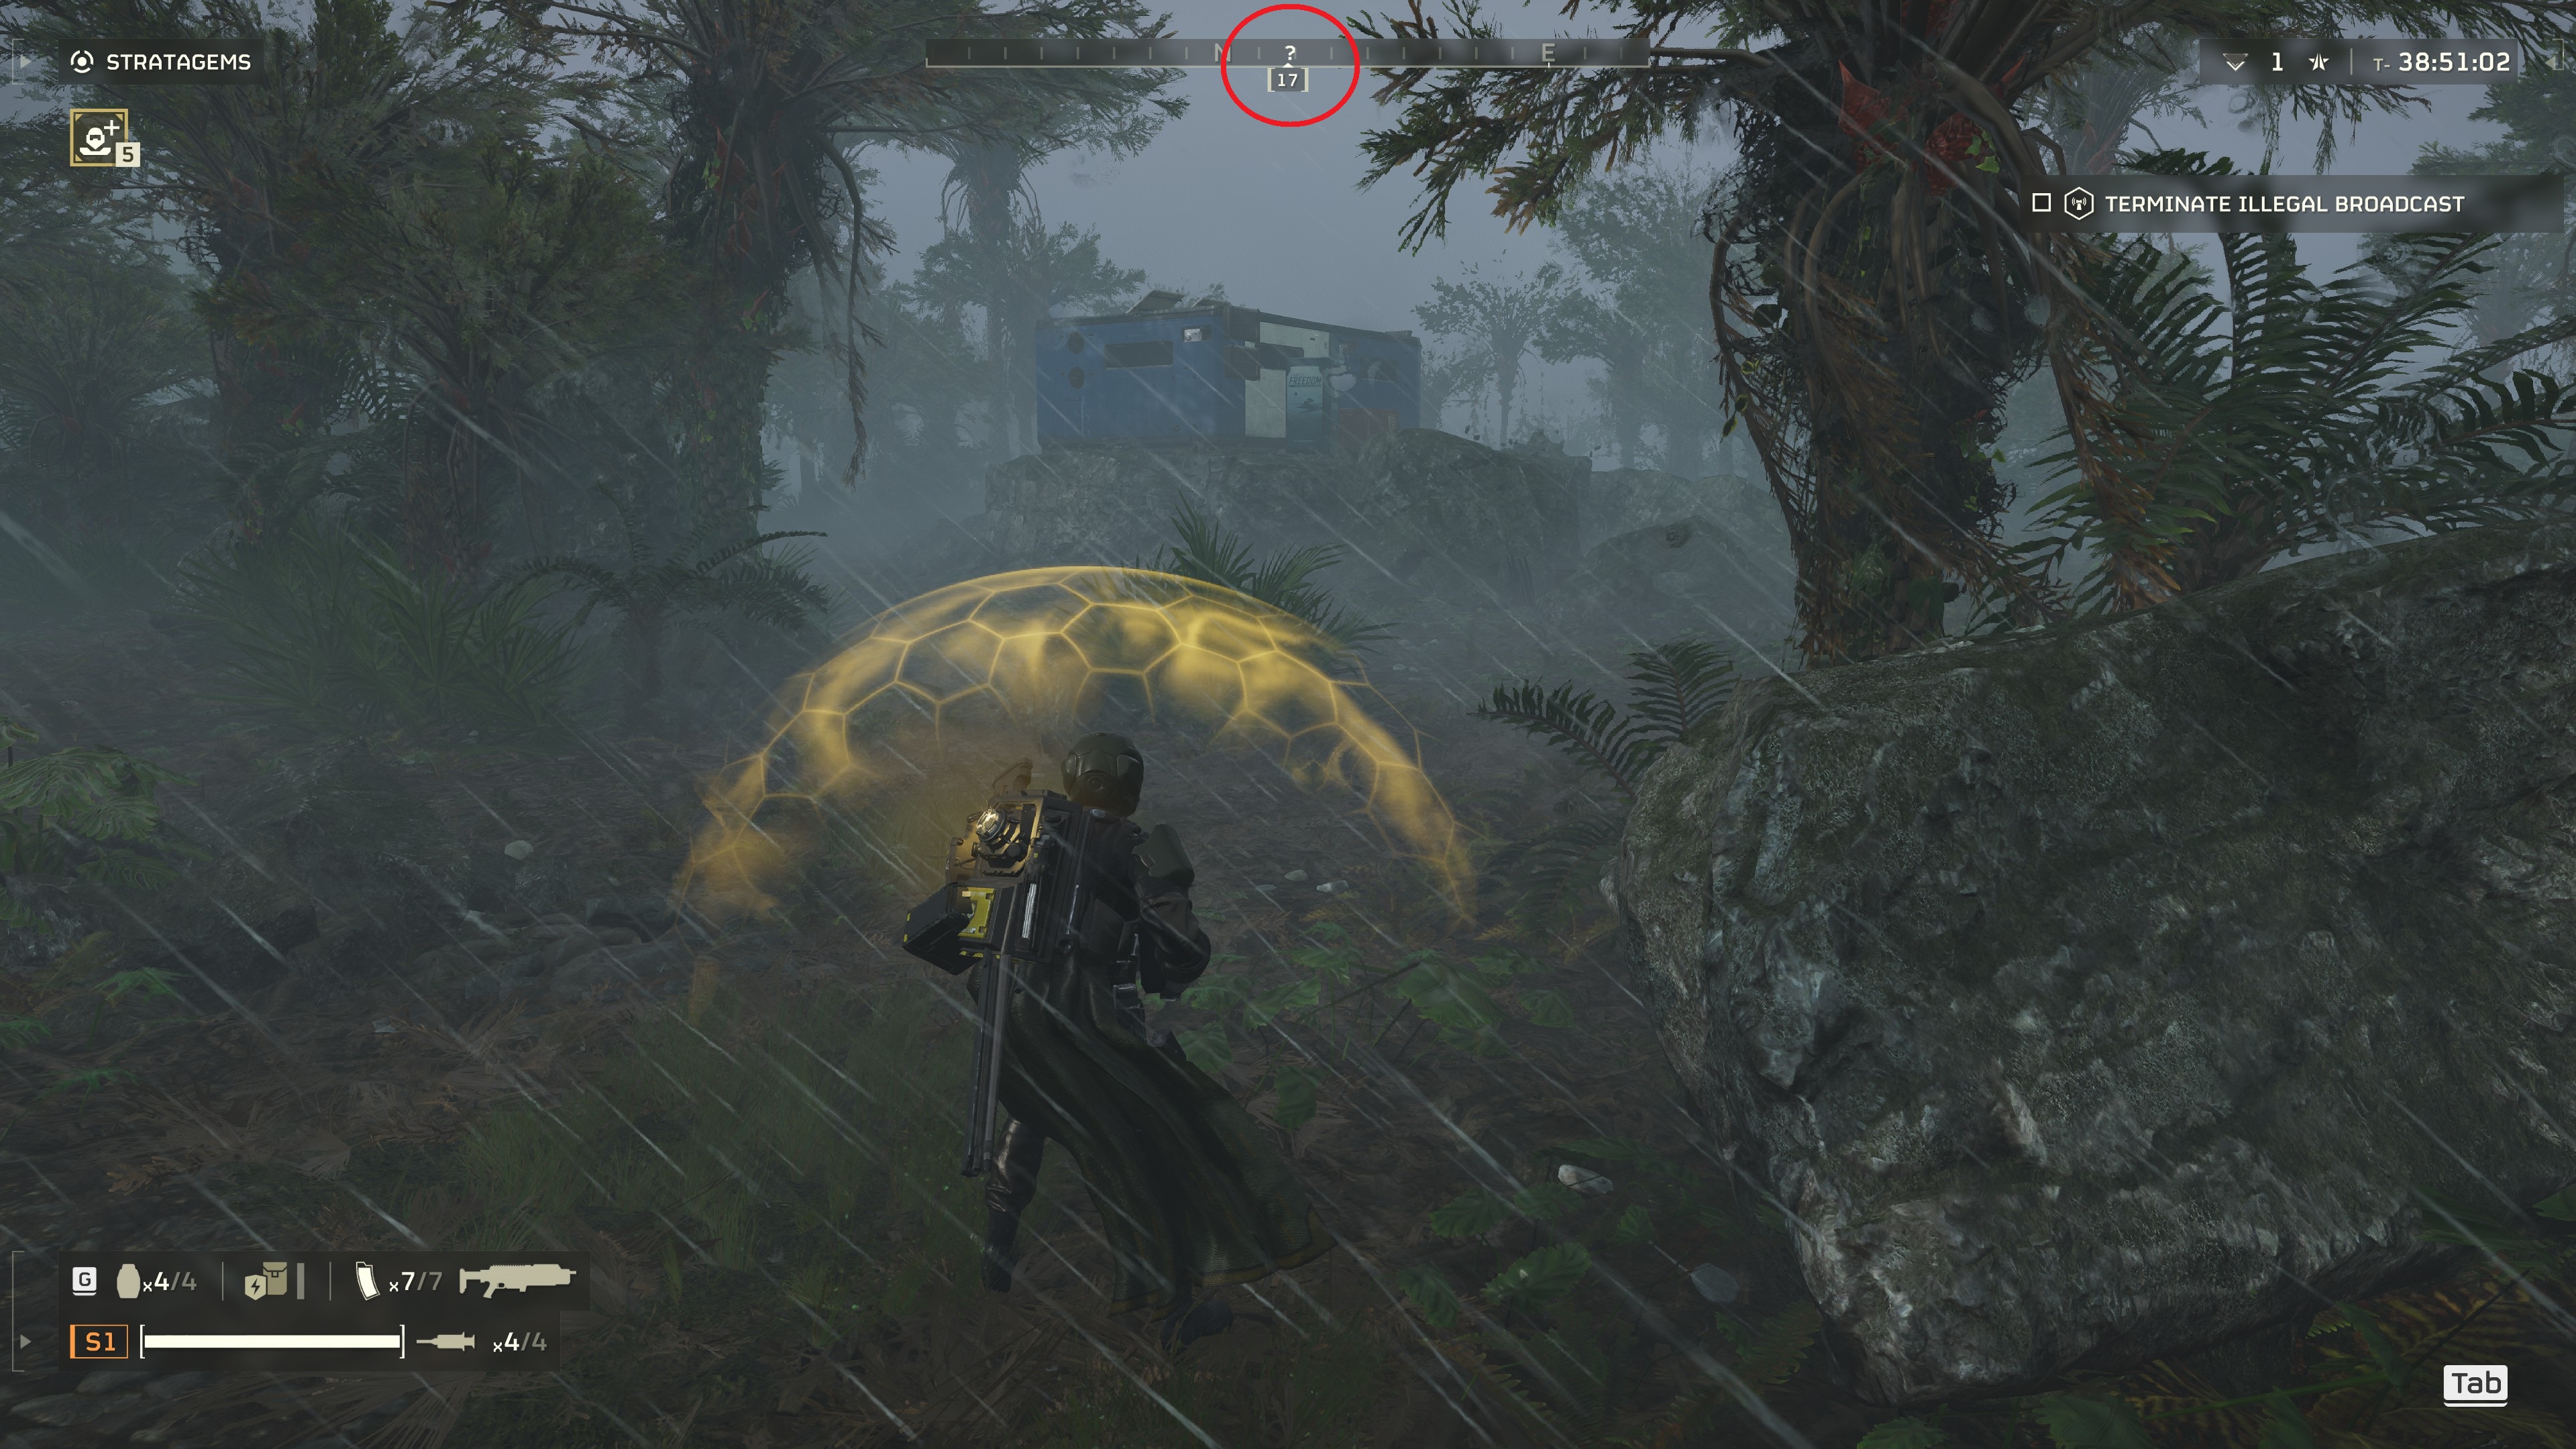
There are many kinds of POI’s on any given map, most of them being useless. There are two that we are primarily interested in.
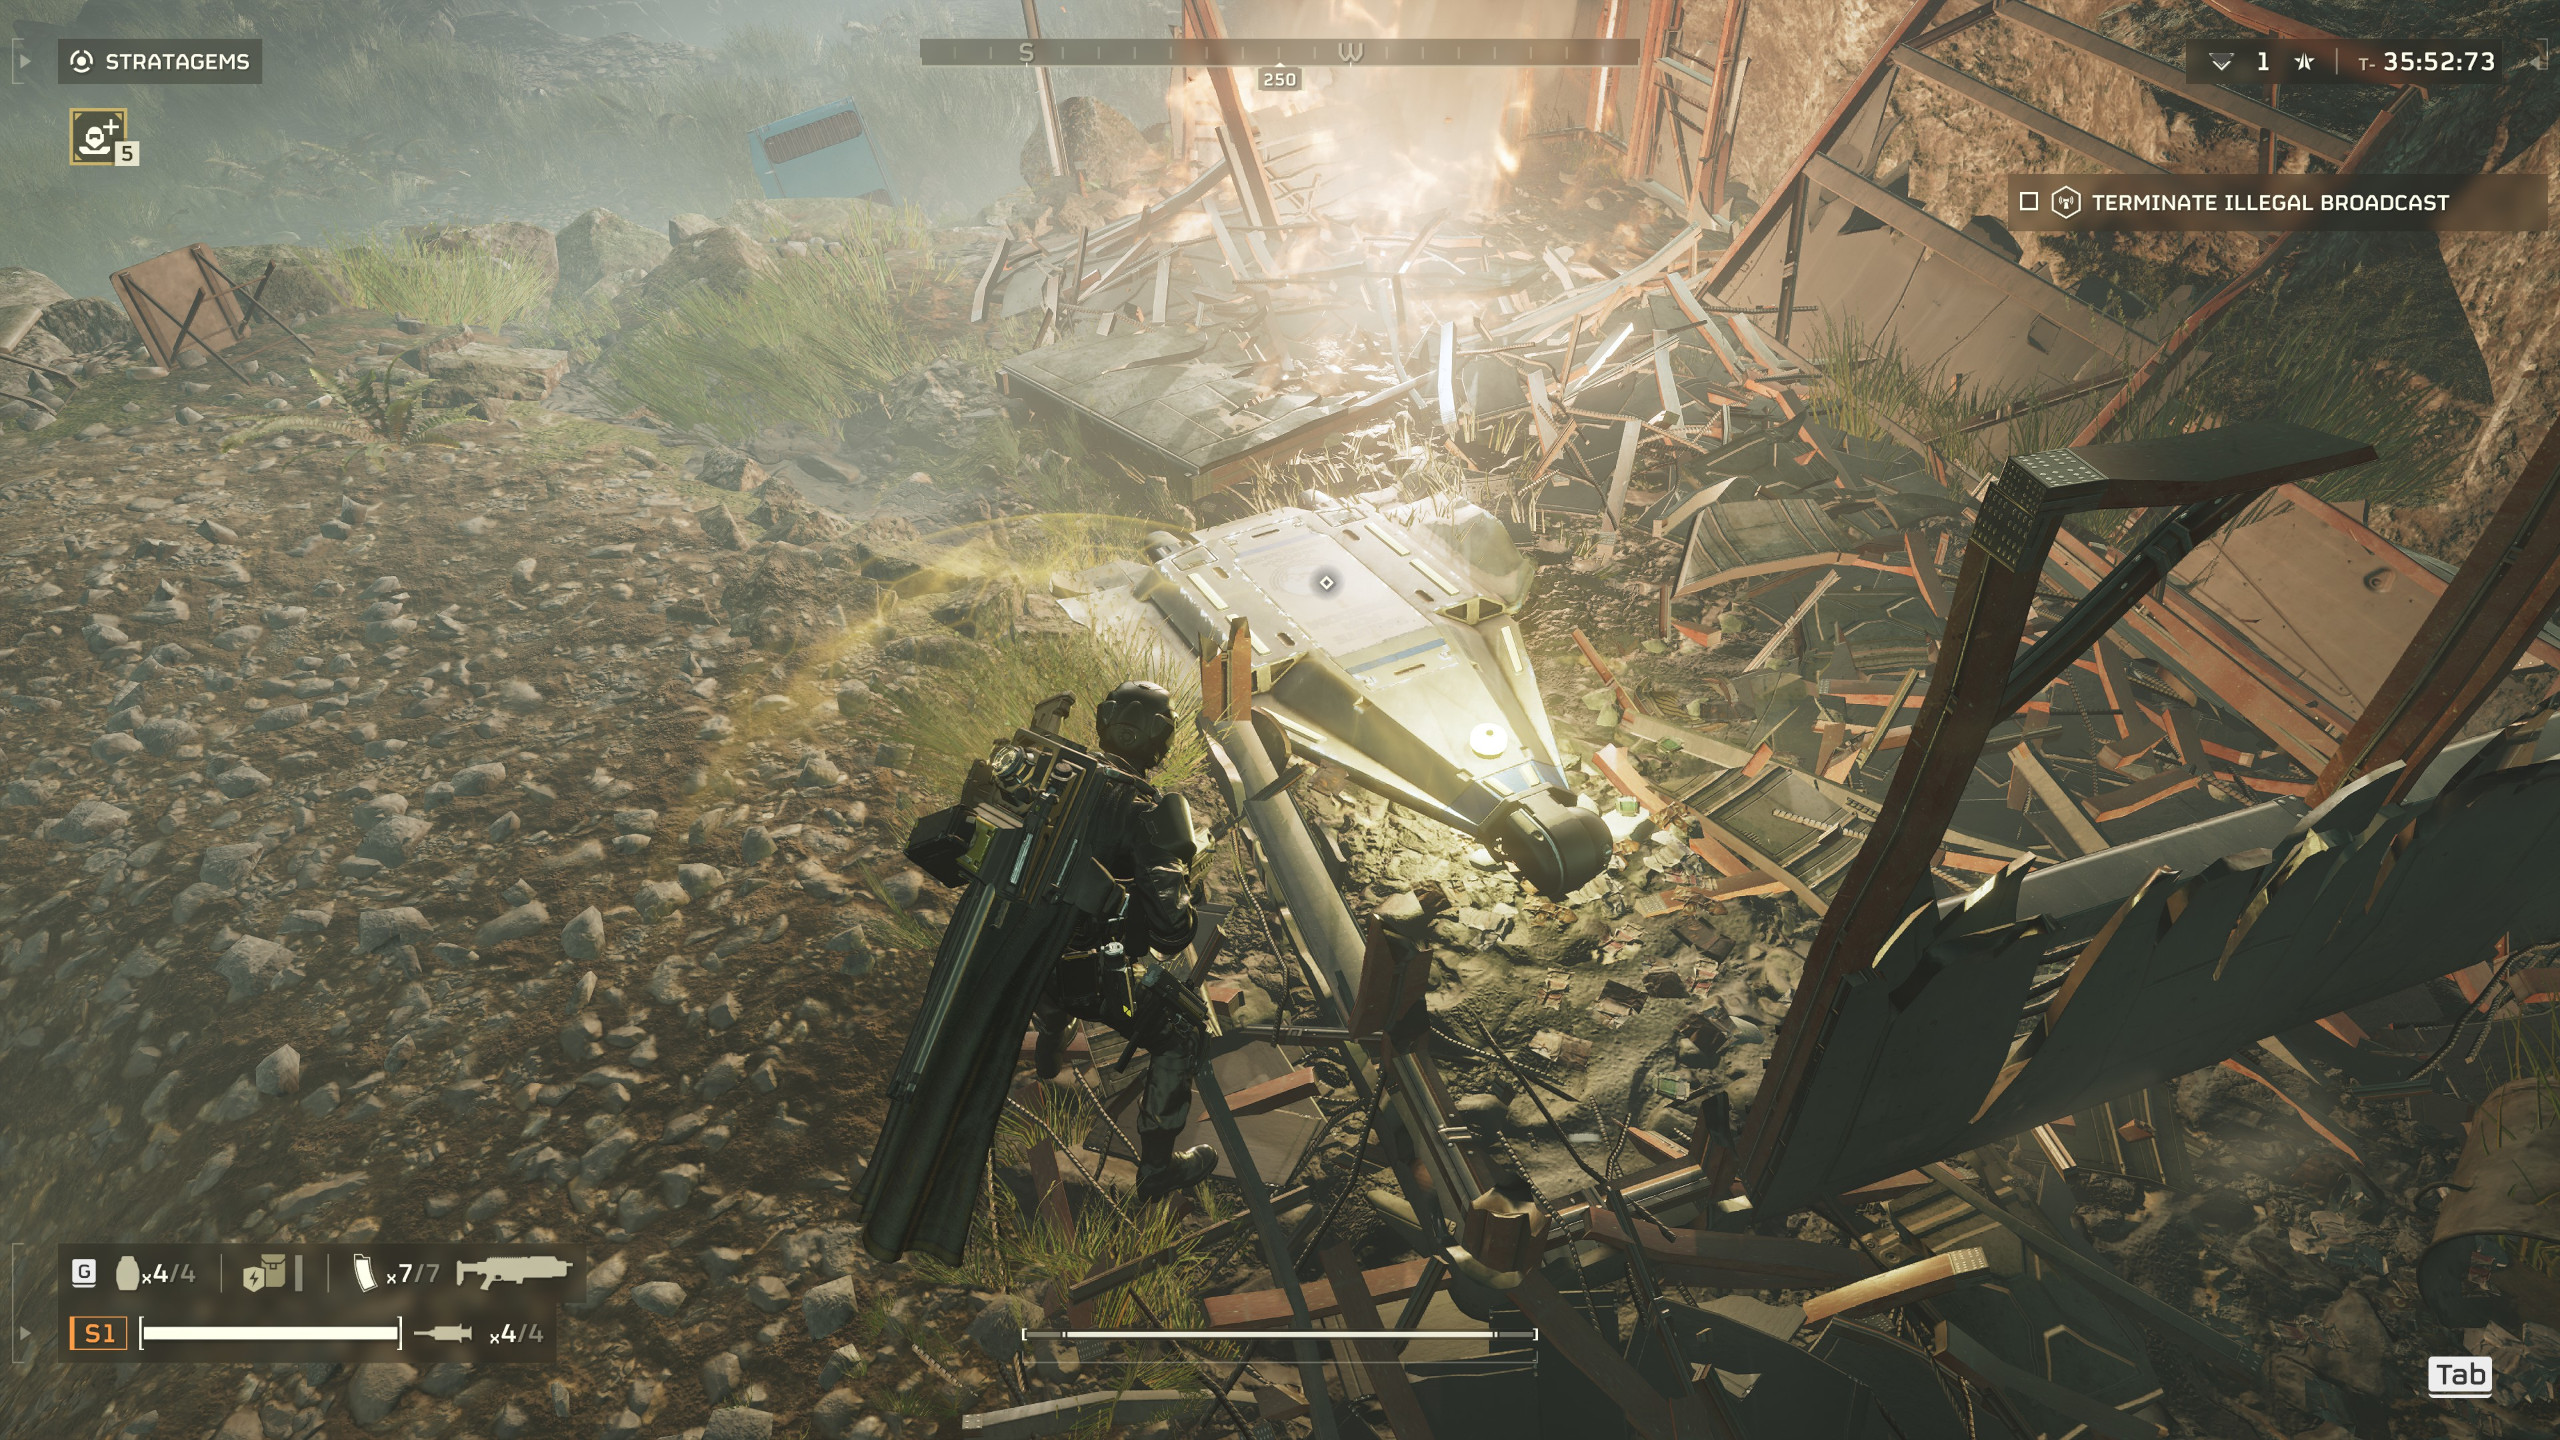
Pods
Pods are easy to find as they flash a light into the sky and can be heard beeping when you get near them. Interact with them to loot their contents.
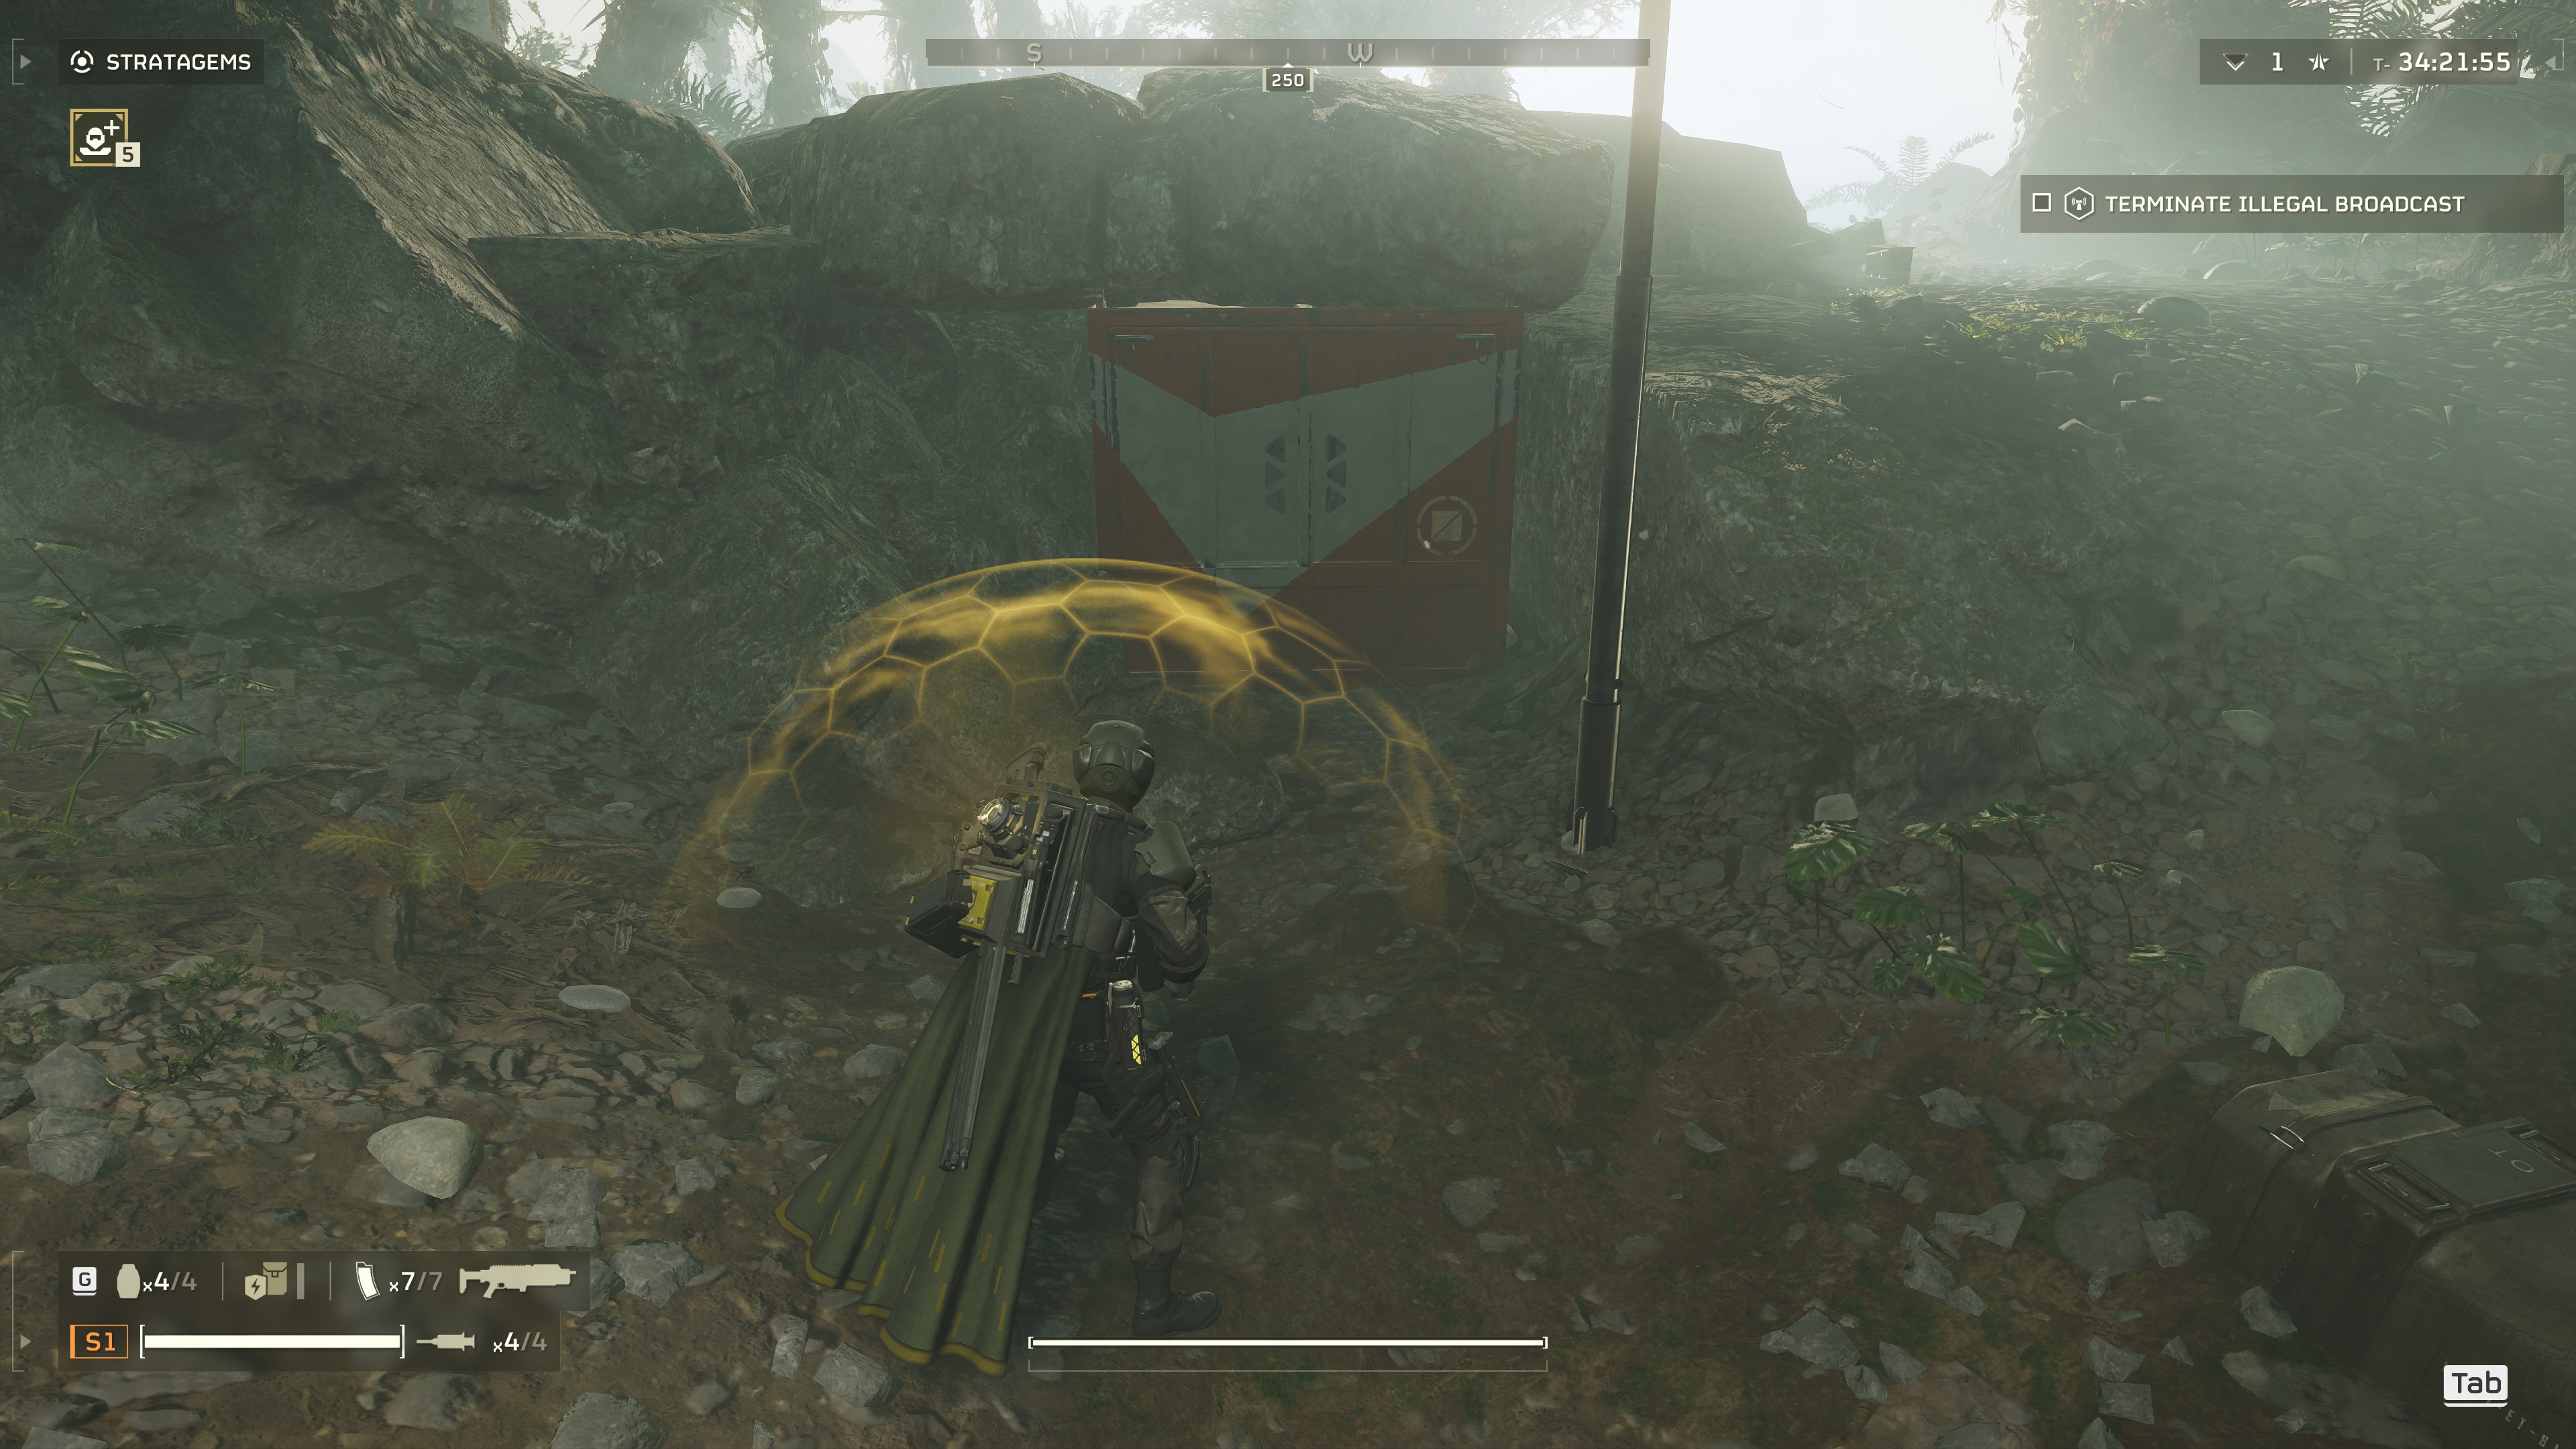
Storage Containers
Storage containers are often found near blue buildings, but can also be dug into rock faces. They can be either red or blue and look like this:
If you lob a grenade at them, they will open to reveal their contents:
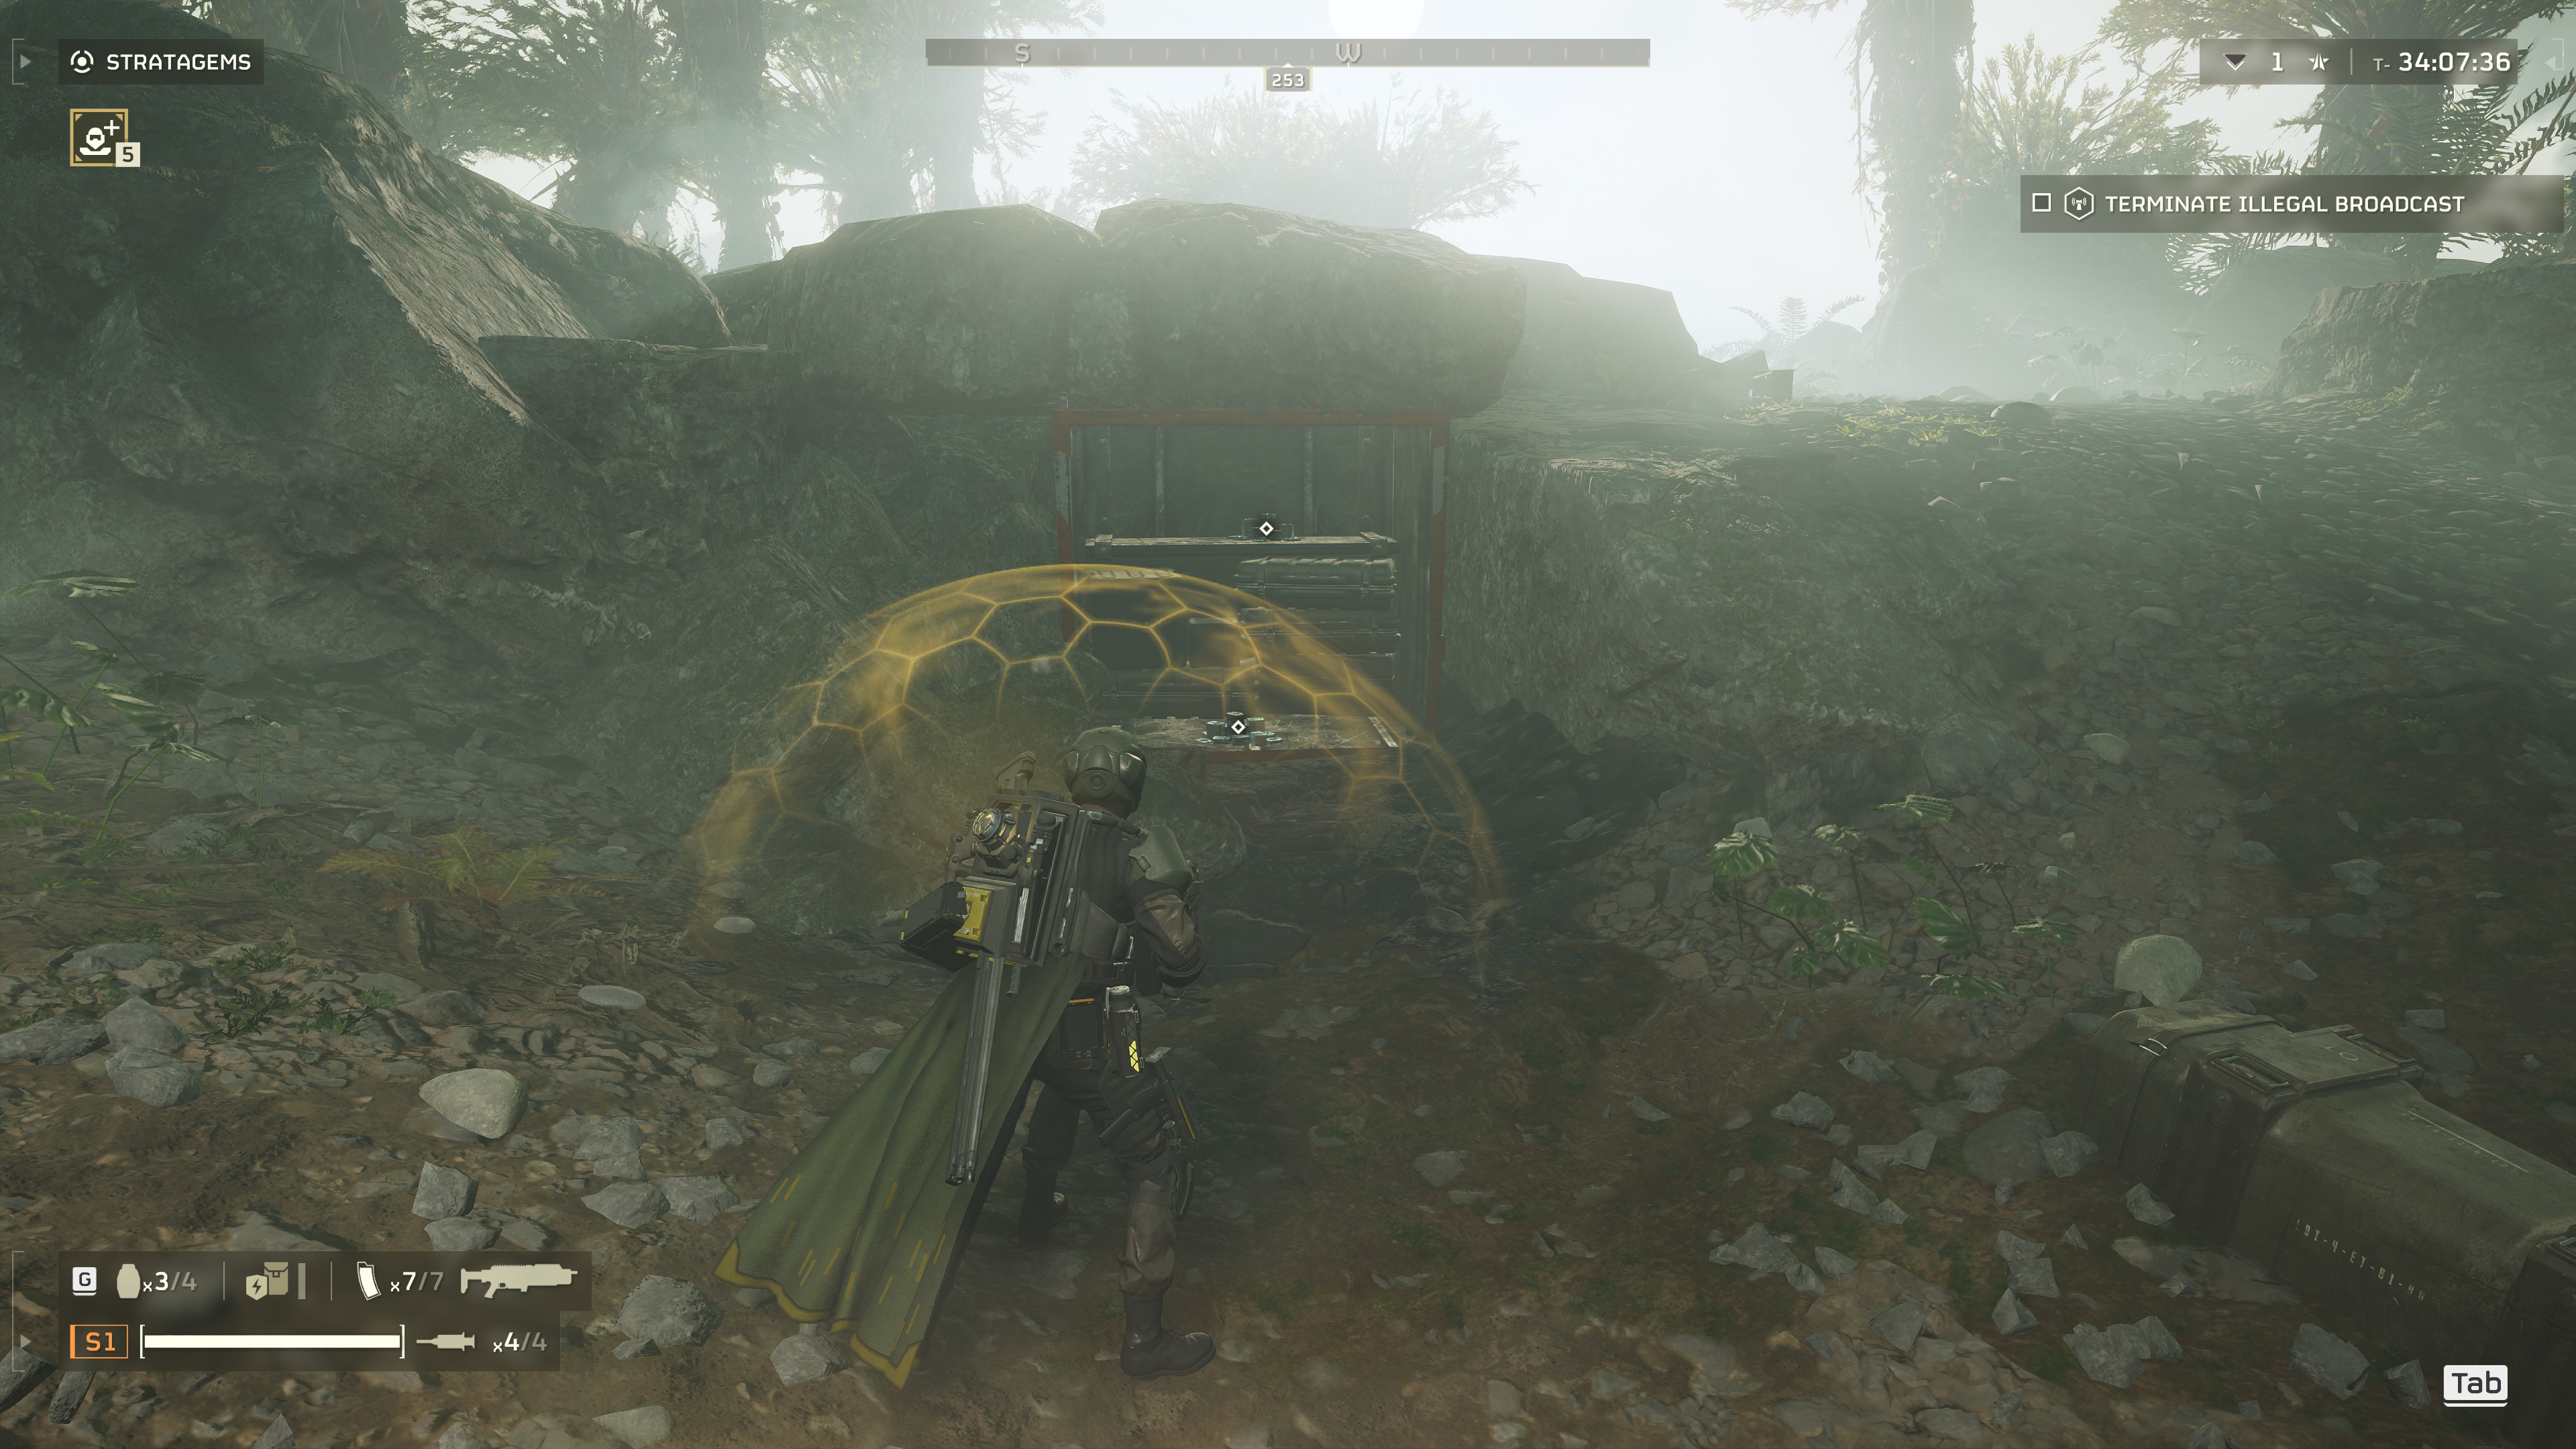
I don’t have all of the weapons unlocked so I’m not able to test it completely, but I know that at least one weapon can shoot the door off if you’d like to save a grenade: the SG-8S Slugger shotgun.
Bunkers
There is another POI too which I’ll mention even though this guide is focused on solo players: the bunker. Unfortunately, you’ll need a friend to help you open it. If you don’t have a friend with you, have a small cry and move on.
Strategy, continued
Pods will give you one reward, Storage Containers will give you two, and Bunkers will give you three (I think…honestly, it’s been awhile since I’ve opened one of those things). What these POI’s dispense is totally randomized, but you can receive one of these things:
- 1-3 Medals
- 10 Super Credits
- 100 Requisition Slips
- Rare Sample (on harder difficulties)
- A random support weapon (Flamethrower, Machine Gun, etc.)
Now that you’ve landed on the planet, run around like a madman looking for POI’s. Ignore any samples you find as you’re not able to take them with you when running this strategy. The game doesn’t tell you if you’ve located all POI’s, but you can usually make an educated guess by just looking at the map. I did a run of the map I showed you earlier and here it is with all POI’s located:
Once you think you’ve found all of the POI’s, abandon the mission. This strategy is specifically for farming Super Credits, so we’ve ignored collecting samples and completing the mission. Running this strategy will only take you a few minutes to rinse-and-repeat between each run, but collecting samples will drastically make the process slower in the following ways (yes, I actually timed some of these things for you people):
- ??? for you to gather all the samples at the POI’s + evac point + objective location
- ??? for you to complete the objective
- 2:18 minutes for the Pelican to land and the back door to open
- 1:18 minutes to watch the Pelican cutscene, Mission Completed stats, and to get back to your ship
I timed myself doing two missions on the planet Mantes (which is a planet I wouldn’t recommend farming on, but my options were limited) to see what the time comparisons were between farming for Super Credits vs. gathering samples and completing the mission. Here’s what I recorded:
- 3:30 minutes to just farm Super Credits
- 11:15 minutes to gather everything + complete the mission (9:57 to complete the mission + 1:18 to go through the end-mission cutscenes)
That was an extra 7:45 minutes just to collect 13 lousy Common Samples! Not worth it bro, not worth it.
Super Credits (Rewards)
Since POI’s are randomized, it’s impossible to expect a set amount of Super Credits per hour. However, I’ve counted up a few runs and it’s come out to something like this:
- 300ish Super Credits per hour doing Evacuation missions
- 200ish Super Credits per hour picking random missions
So let’s meet in the middle and say that it’s reasonable to collect about 250 Super Credits per hour. I’m not sure how much future War Bonds will cost, but I’ve seen the armor sets range in price from 600 credits to 975 credits, so it will take you about 3-4 hours of farming to buy all available armors until the next rotation. Or you could spend 5 seconds whipping out your credit card. Your call!
Common Sample Farming
Farming for Common Samples is basically the same as farming for Super Credits, except that you’ll actually want to complete the mission this time. Unlike other resources, samples aren’t added to your inventory unless you leave the mission with them.
Unless you really need them though, I wouldn’t recommend farming Common Samples exclusively. Instead, I’d recommend you follow my Rare Sample Farming Guide instead. Following that guide will net you both types of samples during the same run, albeit at a slower rate than if you were to just focus on farming Common Samples exclusively.
Rare Sample Farming
Farming for Rare Samples is both stressful and exciting. Unlike the other resources mentioned so far, there is a decent chance that you may die and lose everything using this strategy. However, the alternative is to spend 40 minutes running around a map destroying bot outposts or bug holes. Ain’t nobody got time fo’ dat.
Rare Samples (Quick Guide)
- Choose an Automaton-controlled “DEFEND” planet and choose an Evacuation mission that is either “4 – Challenging” difficulty or “6 – Extreme”.
- Take this loadout with you:
- Armor: Light Armor with Scout Buff
- Weapons:
-
- Primary: SG-225 Breaker
-
- Secondary: P-19 Redeemer
-
- Grenade: G-16 Impact
- Stratagems:
-
- RS-422 Railgun
-
- SH-32 Shield Generator Pack
-
- Whatever else you want. Choose the two mortars if you’re not sure.
- Booster:
-
- Stamina Enhancement if the planet has easy terrain.
-
- Muscle Enhancement if the planet is sandy or snowy.
- Land outside of the base and start making a loop around it, looking for POI’s.
- Keep running and gunning, not allowing yourself to get bogged down by enemies.
- When the mission timer is almost at zero, kill any remaining enemies that are chasing you and go prone.
- Crawl to somewhere outside of the base but near the evac zone.
- Stay out of sight until the Pelican is about to land. Dying now will make you lose everything.
- Run to the Pelican without alerting any enemies. If the enemies are directly in your path and you have no choice, throw a grenade and do your best to run past them – you don’t have time for a shootout.
Rare Samples (Introduction)
The best way to farm Rare Samples is to choose an Evacuation mission on an Automaton-controlled “DEFEND” planet and run around the map screaming while trying not to get your head blown off.
Choosing a Planet
Unfortunately, the only way to run this strategy is to do an Evacuation mission on a “DEFEND” planet. If a “DEFEND” planet is unavailable to you, you’ll have to wait for one to become available. If you actually have multiple planets that are able to be defended, choose one with favorable terrain. The game is still young so we haven’t been able to visit all the planets yet, but my order of preference for running this sort of strategy would be:
- Moor with no fog (has little water and not a lot of mountain ranges)
- Arctic with no blizzards (lots of snow to trudge through and mountain ranges blocking you from seeing POI’s, but visibility is otherwise good)
- Sandy with no sandstorms (lots of sand to contend with and the heat will kill your stamina quickly, but no mountain ranges)
- Primordial with no fog or rainstorms (the foliage will block you from seeing POI’s and slow you down…good luck if this is your only option)
As for difficulty, there are three main choices to go with:
- 4 – Challenging: about 13 Rare Samples per map.
- 5 – Hard: about 18 Rare Samples per map.
- 6 – Extreme: about 20 Rare Samples per map.
I wouldn’t recommend doing difficulties 7-9 unless you’ve got a group with you. Super Samples are easy enough to gather on their own using a different method and the difficulty spike for a solo player would be brutal.
As for what to choose between difficulties 4-6, “5 – Hard” feels basically the same as “6 – Extreme” to me, so I would rule Hard out. As for the differences between 4 and 6, I would break down the two experiences like this:
- 4 – Challenging: A somewhat leisurely stroll through the countryside.
- 6 – Extreme: Running through the Battle of Stalingrad in 1942.
While it’s true that Extreme difficulty puts more guaranteed samples on the map, the difficulty between 4 and 6 is so large that you probably won’t have the time to actually find and collect the extra samples. You spend much more time hauling ass and beating back foes on 6 than you do on 4, and if you play on 4, you can usually make up for the lack of samples by collecting some in pods and storage containers. On that last point, in case you didn’t know: Rare Samples that appear in pods and storage containers aren’t a part of the guaranteed Rare Sample pool, so you can actually collect more Rare Samples than what the game tells you are there on the map:

So if you’d like a less-stressful experience where you might get a few less Rare Samples per run, I’d recommend “4 – Challenging” difficulty.
Loadout
Now that you’ve chosen your mission, it’s time to choose your loadout.
Armor
This is important: choose a Light Armor with the “Scout” buff. This may seem odd as you’ll be doing a lot of running and gunning, but stealth becomes critically important near the end of the run. The “Scout” buff also includes another nifty feature that I’ll explain in more detail below.
Weapons
I recommend the standard blitzkrieg loadout:
- Primary: SG-225 Breaker
- Secondary: P-19 Redeemer
- Grenade: G-16 Impact
The Breaker will allow you to clear out enemies quickly and the Redeemer will get you out of a bind. The Impact grenade is necessary for blowing open storage containers and for deleting enemies who get in your way.
Stratagems
There are two stratagems which I highly recommend taking on this run:
- RS-422 Railgun
- SH-32 Shield Generator Pack
You will encounter a lot of the bigger bots on this run, along with a ton of pesky Walkers. You may even run into a Hulk or two. As for the Shield Generator Pack, that’s basically mandatory on higher-difficulty bot missions to prevent you from being one-shotted by rockets.
As for the two remaining slots, it’s up to you but here are some suggestions:
- A/M-12 Mortar Sentry + A/M-23 EMS Mortar Sentry: I’ve recently started using these two stratagems for these runs and have been finding them really useful. The EMS mortar will slow enemies down while the other mortar blows them up. After you set them down, you can start sprinting towards the next POI. Even if your enemies manage to get through the EMS field, they’ll focus on destroying your mortars while you’ll be long gone by then.
- Eagle Airstrike: Good for sending groups of bot troopers or larger enemies to Hell quickly.
- Eagle Smoke Strike/Orbital Smoke Strike: If you’re getting overwhelmed, dropping one of these and hauling ass should get you out of the fight quickly.
- Orbital EMS Strike: Will slow enemies down to a crawl, letting you run for your life in peace.
- Orbital Laser: If you find yourself facing a large group of enemies and a Hulk (or, God forbid, a Tank), the Big Reset Button in the Sky will clear the way for you. Can really only be used once per run though.
Booster
Depending on the type of planet you’re visiting, I would go with either the “Stamina Enhancement” Booster or the “Muscle Enhancement” Booster (if the planet is sandy or snowy). There’s no time to stop and smell the roses on this run – you’ve got to move fast and not let yourself be bogged down by enemies.
Rare Samples (Strategy)
You’ve got two choices when it comes to the landing zone:
- Land at the Evac Zone for a moment’s worth of safety, but farther away from a POI.
- Land outside the base where you think a POI is but into potential danger.
I usually choose to do the latter, but I’ve also been burned by doing that a couple of times (landing next to a POI guarded by multiple rocket bots was not cool, mang).
Once you’ve landed, quickly obtain all the gear you need and start running a loop around the map, looking for POI’s. Unlike the Super Credit Farming run, POI’s on harder difficulties are guarded by enemies, so you’ll have to deal with them at each stop. While this is a pain in the nuts to deal with, it also provides a small benefit – if you chose an Armor with the “Scout” buff, placing tags on the map will show you where enemies are…and where the enemies are, so are the POI’s. I don’t recommend stopping constantly to place tags on the map since you’ll be short on time, but if you have no idea where the next POI might be, going prone and dropping some tags here and there might help you out.
Whatever you do, don’t let yourself get bogged down. If you see a drop ship release some troops, run. If you accidentally walk into a bot patrol, run. Not only do you not have the time to deal with all of these enemies, the situation can quickly turn from bad to worse – the drop ships are relentless during this mission. Sometimes the situation can get out-of-hand despite your best efforts though…for each POI, you’ll have to stop to clear the enemies and then stop to gather the resources. Many times I’ll be busy trying to clear out a POI when a bot patrol happens to putz on by. Then while I’m busy trying to contend with them, two drop ships will swoop on in to toss even more foes into the fray. Sometimes it’s better to just cut your losses and run. It sucks to miss out on some resources, but it sucks more to die and then be air dropped right back onto the same battlefield, only this time with half the ammo and no Railgun or Shield Generator Pack. Just run, bro.
Once the mission timer has one minute remaining, it’s time to start mentally preparing yourself for the toughest challenge yet: extraction. After the timer hits zero, you will run out of reinforcements and stratagems, meaning that being killed will result in you losing everything. It’s time to take a deep breath and focus.
Stop looking for more POI’s and start making your way towards the base. Do not enter the base. Once the timer hits zero, kill any remaining enemies that are on your tail and then go prone. It’s time to put your Scout armor to use. Stealth is borderline broken in this game and Scout armor allows you become almost invisible when prone. While you’re outside the base, crawl to where the Evac Zone is. Do not crawl to the Evac Zone – just be near it. The evac terminal drop will have alerted any enemies inside the base and they’ll probably be swarming the area where the Pelican will land. You’ll want to be close to the Evac Zone but not too close, like this:
Enemies will still walk around the base and patrols may enter or leave, so keep an eye on your map for the next two minutes and get out of their way if you feel like you’re directly in their path. Once the Pelican is about to land, it’s time to go. If the Pelican pilot is a bro, he might clear out some nearby enemies to help you on your way. Almost all of my extractions have gone off without a hitch, but there was one time where a huge group of bots were between me and the Pelican. If you find yourself in that same situation, shout “For Democracy!”, throw a grenade at their feet, and then march over their corpses on your way to victory.
Rare Samples (Rewards)
Depending on the difficulty chosen, you’ll typically be able to walk away from each run with about 15-20 Rare Samples (and an equal number of Commons). After you factor in the hellpod loading screen, Pelican evacuation, and Mission Completion screen, I’d say that each run is about 20 minutes long, equating to about 45-60 Rare Samples per hour…given you survive each mission. Good luck, brother.
Super Sample Farming
If you can believe it, collecting Supers is much easier than getting Rares. The hardest part about obtaining Super Samples is unlocking the higher difficulties in the first place. Let me tell you, dawg: completing an entire “8 – Impossible” operation solo just for the privilege of unlocking “9 – Helldive” difficulty was not fun.
Super Samples (Quick Guide)
- Choose an Automaton-controlled planet and select a “Blitz: Search and Destroy” mission on “9 – Helldive” difficulty that does not have the “Complex Stratagem Planning” modifier.
- Take this loadout with you:
- Armor: Light Armor with Scout Buff
- Weapons:
-
- Primary: SG-225 Breaker
-
- Secondary: P-19 Redeemer
-
- Grenade: G-16 Impact
- Stratagems:
-
- RS-422 Railgun
-
- SH-32 Shield Generator Pack
-
- Whatever else you want.
- Booster: Hellpod Space Optimization
- Call down your gear immediately upon landing.
- Go prone and search for the Chicken Leg Rock in the interior of the map or around its edges. Look for it where you’d expect other POI’s to spawn.
- Once you’ve acquired the samples, sneak back to the Evac Zone.
- Find an elevated position that you can perch on and wait for the mission timer to run out and for the Pelican to arrive.
- Extract out of the mission.
Super Samples (Introduction)
The best way to farm Super Samples is to choose a “Blitz: Search and Destroy” mission on “9 – Helldive” difficultly, become a ghost, locate the samples, and then extract from the mission.
Choosing a Planet
Super Samples appear on difficulties 7-9:
- 7 – Suicide Mission: 3 samples per run.
- 8 – Impossible: 5 samples per run.
- 9 – Helldive: 6 samples per run.
I would forget about doing “7 – Suicide Mission” altogether since the payout is poor and focus on doing either 8 or 9 instead. The payout isn’t much different between either difficulty, but the actual “difficulty” is exactly the same between the two, so if you’ve unlocked Helldive, you may as well choose that one. However, if you’ve only unlocked Impossible, that’s fine too.
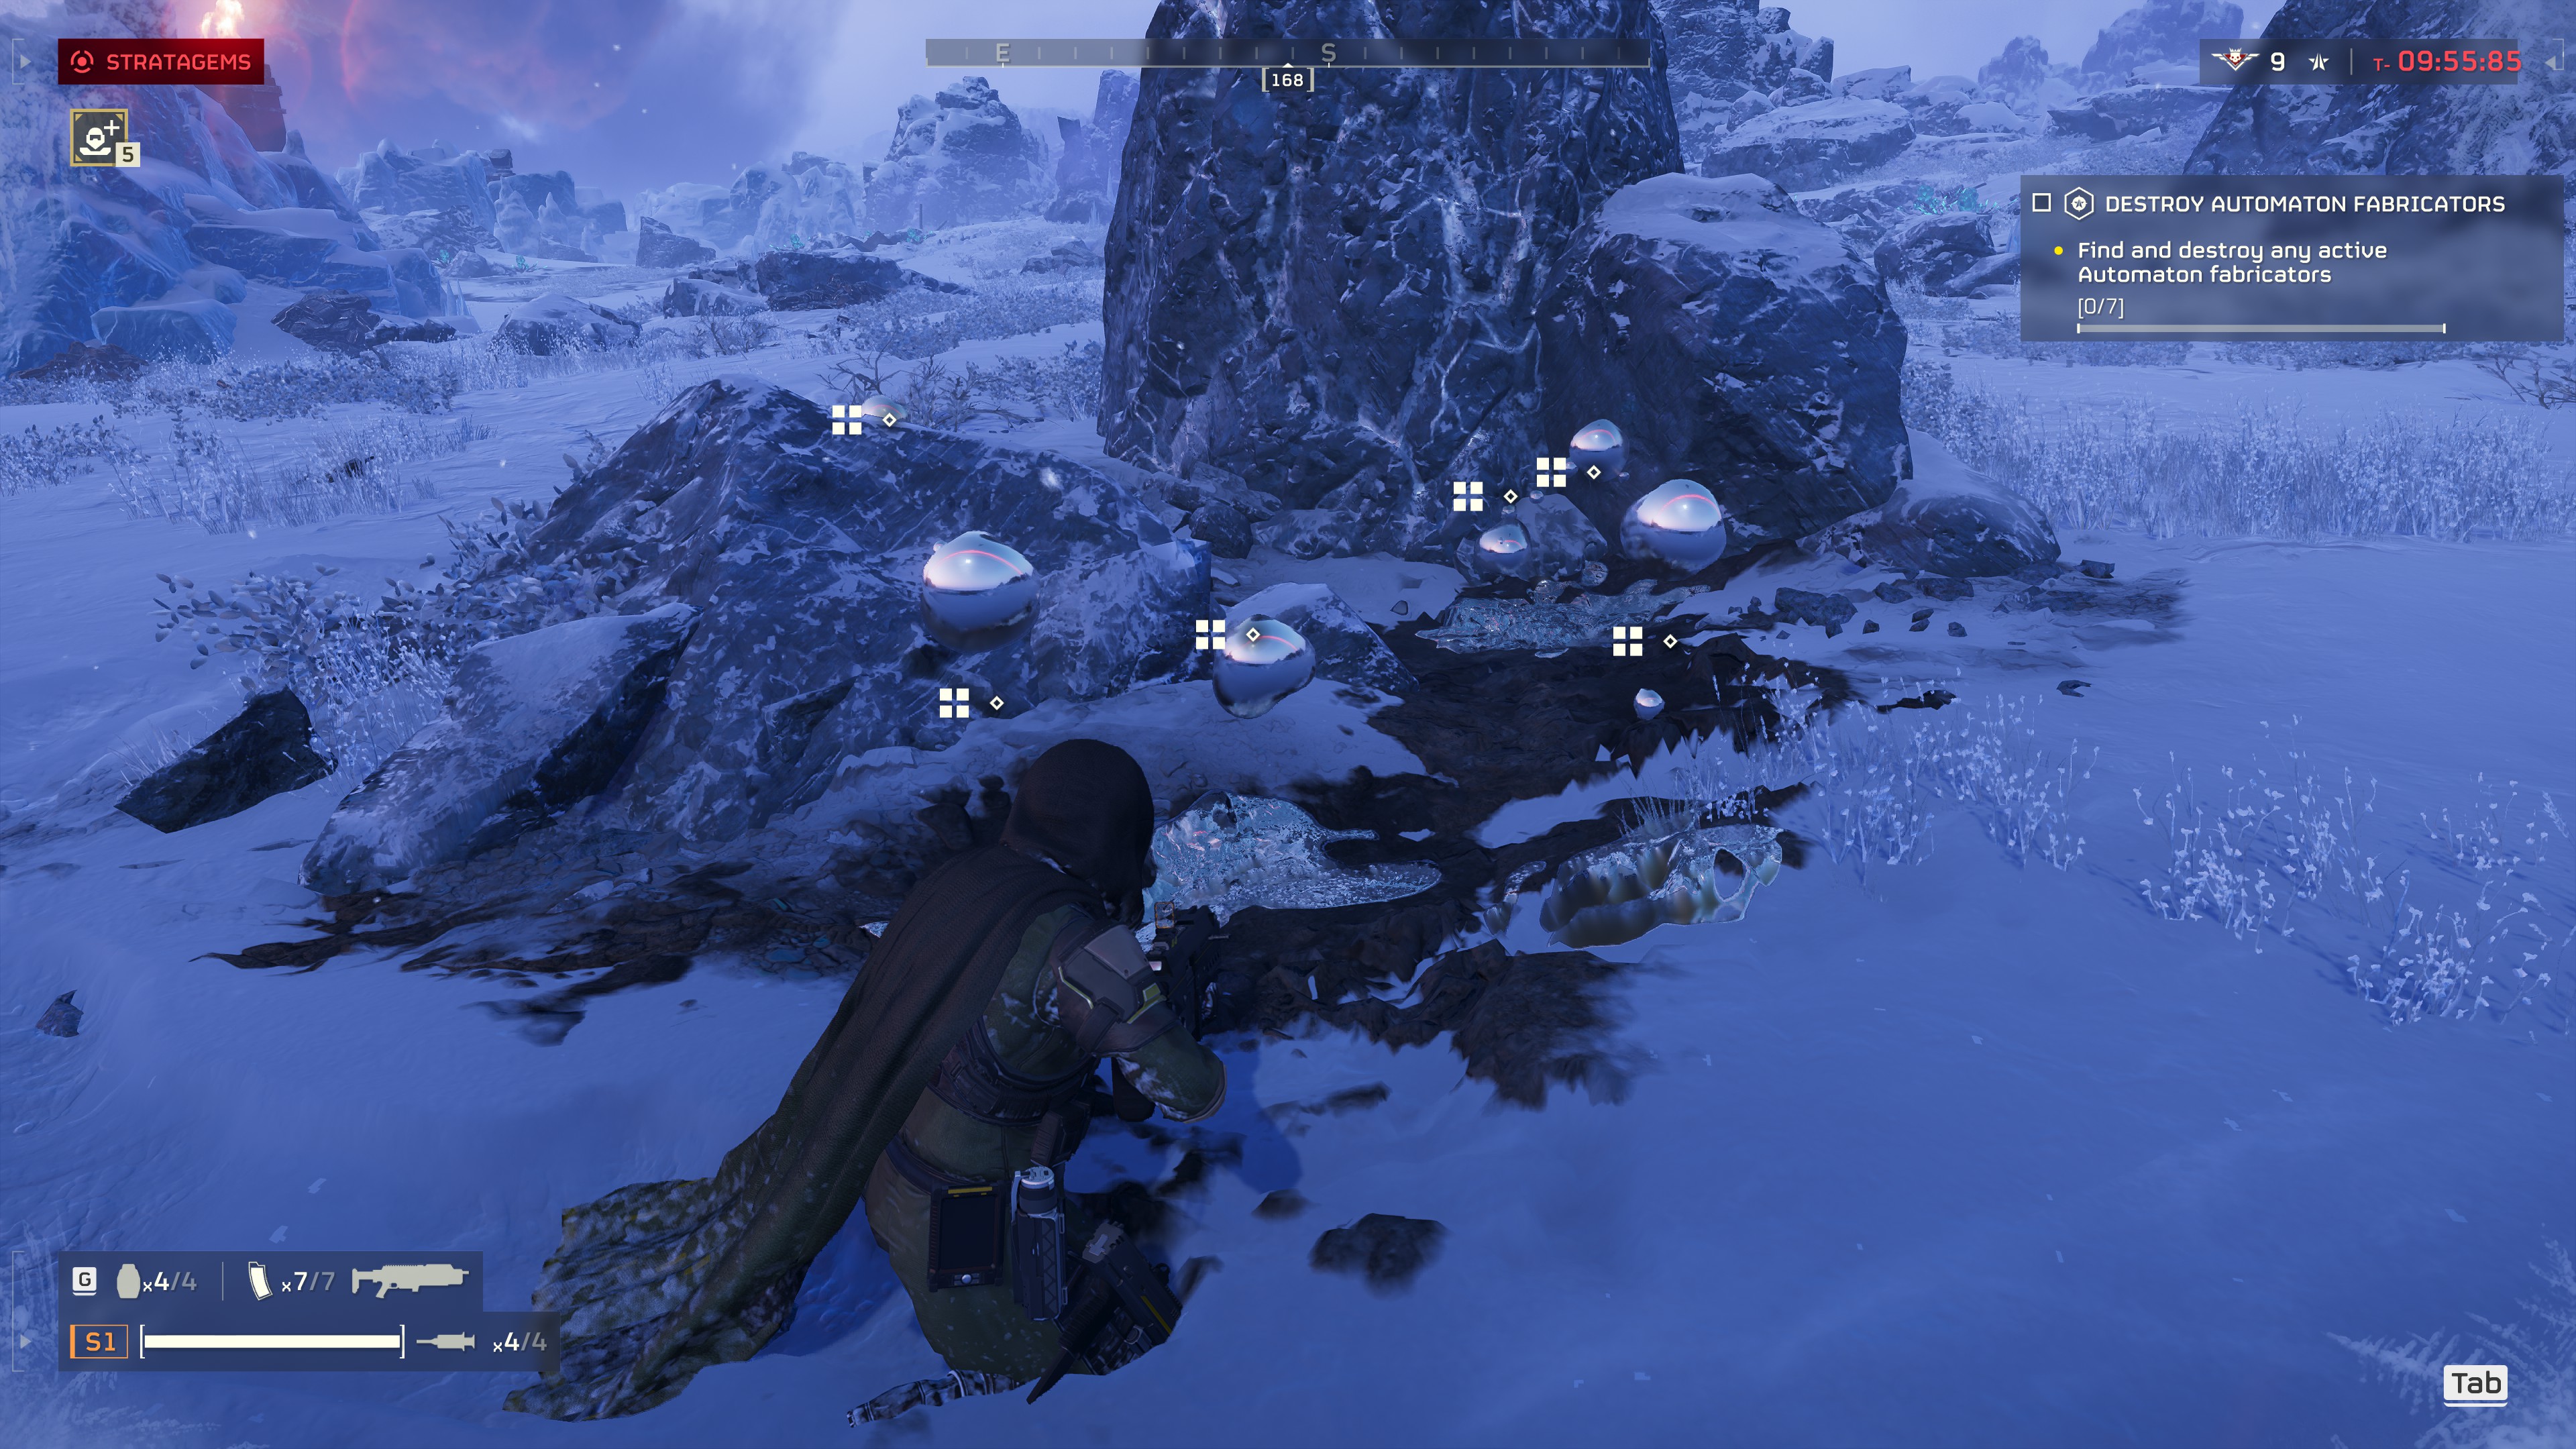
The #1 factor in successfully following this guide is visibility. Super Samples can only be found at a special POI that looks like this:

I’ve heard many colorful names for this rock, but I like to call it the “Chicken Leg Rock”. I’ve seen people online mentioning that they’ve seen this rock spawn multiple times with only one of them having the samples around it, but in my experience, I’ve only ever seen it once per map. I think this may be because I mostly fight the bots though… here’s an image I found from a reddit post:
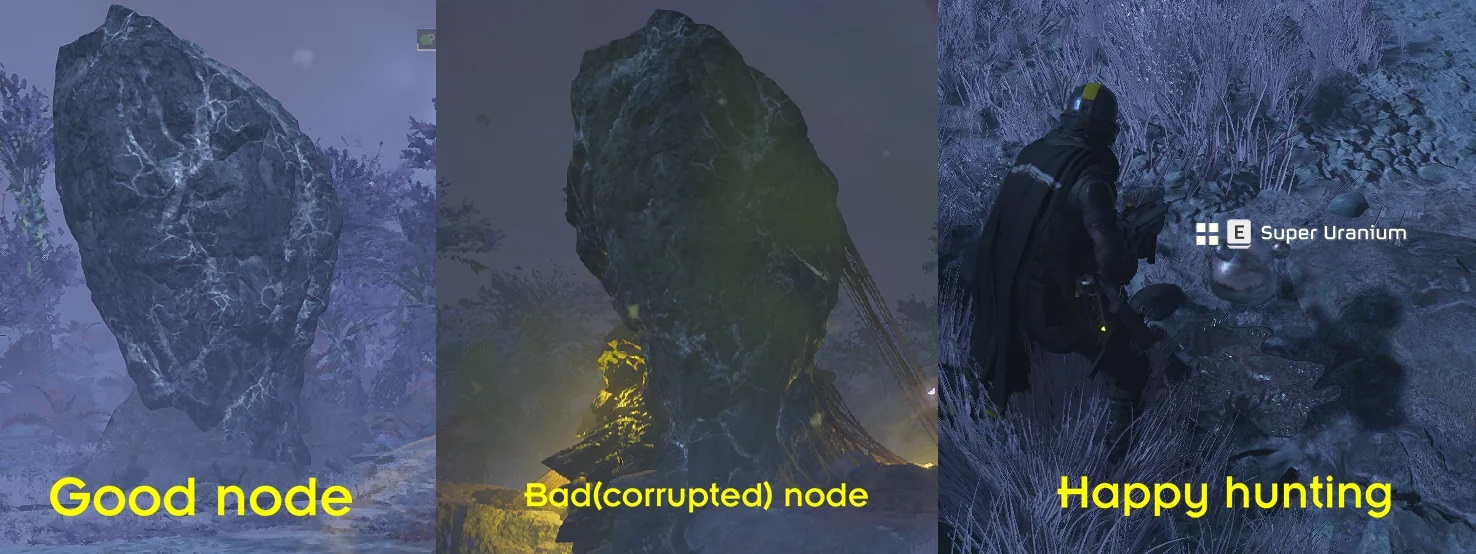
It looks like on Terminid planets, the Chicken Leg Rock may spawn in two different configurations – a “good” version and a “corrupted” version – and only one of these will have the samples nearby. I got all of my Super Samples from running Automaton missions though, so I can’t really say I’ve seen this personally.
Besides this duplicate Chicken Leg trickery, I don’t recommend farming for Supers on bug planets for the following reasons:
- The Spore Spewers severely restrict visibility and you really don’t want to make your presence known by blowing these things up.
- No matter how sneaky you are, Stalkers will always find you and stab your ass like it’s the Ides of March.
- F***ing Bile Titans, dude. I’d rather fight half the robot army and a goddang Balrog than one of those things.
As for other planetary details, I did pretty much all of my farming on the Arctic planet of Vandalon IV. The rocky mountains made finding the Chicken Leg Rock a little difficult at times, but the crisp, clear air gave me perfect visibility across the map and the rock always stood out among all the others. I even got lucky a few times and could see it directly from the Evac Zone:
Since you’ll be crawling throughout most of the mission, the snow that would typically slow you down on a map like this is a non-factor.
Besides visibility, the most important thing to consider when choosing a planet and operation are the operation modifiers. I gave a detailed explanation of how those function in the XP & Requisition Slip Farming Guide section if you want more information on them.
Do not choose an operation with the “Complex Stratagem Planning” modifier.
For some reason, the game treats the evac terminal as a “stratagem”, so playing a mission with this turned on will make it so that the Pelican takes 4 minutes to arrive instead of 2. If you’re thinking this is a bug, it’s sadly not – the radio commander actually says things like, “ETA 3 minutes,” so the devs recorded these lines expecting this behavior. Waiting 4 minutes for the Pelican to arrive on Helldive difficulty is torture.
Loadout
Your objective is to remain hidden throughout the entire mission. Therefore, stealth armor is your friend here.
Armor
Choose a Light Armor with the “Scout” buff. This will turn you into a ghost and let you sneak around the battlefield, Solid Snake-style.
Weapons & Stratagems
Bring whatever you want. The point of this mission is to not use any. I’d recommend taking the loadout recommended in the Rare Samples Farming Guide just in case things get dicey for whatever reason.
Booster
“Stamina Enhancement” is always nice, but since you’ll do most of this mission crawling, it isn’t totally necessary. “Hellpod Space Optimization” might not be a bad idea if you’re afraid you’ll screw up and find yourself in combat.
Super Samples (Strategy)
Landing on a bot planet on Helldive difficulty is a gamble and there are a lot of things that can ruin your day right off the bat:
- Typically, an Evac Zone is safe, but sometimes the game will screw you over and you’ll find that the Evac Zone has been taken over by the bots for them to use as some sort of pseudo-base. Worse yet, the game doesn’t tell you this when you’re choosing a place to land on the map.
- If you choose to land outside of the Evac Zone, you may end up landing near a bot base or bot-protected POI instead, which is just as bad as landing into an occupied Evac Zone.
- No matter where you land, you always run the risk of landing within range of an enemy mortar base (this includes the Evac Zone!). Dealing with a base like that is a risky endeavor on Helldive difficulty, especially if you’re unable to call down your support weapons to deal with it.
With all of that said, I would just choose to land at the Evac Zone and hope for the best. If it’s occupied by enemies or within range of a mortar base, just abandon the mission and try again.
Now that you’ve successfully landed and kissed the ground, call down your support gear immediately (Resupply, Shield Generator Pack, etc.). Ideally, you won’t need them, but it’s better to be safe than sorry. I recommend calling them down immediately because bot patrols will start walking by the Evac Zone soon after you land and you don’t want to draw their attention with the sound of your drop pods landing.
After you’re geared up, it’s time to hit the bricks and start looking for that rock. The Chicken Leg Rock can appear wherever any other POI can spawn, so it will always be some distance away from enemy bases on either the fringes of the map or within the interior. From my own experience, I usually found it by heading inland and just looking around.
Thankfully, unlike other POI’s on harder difficulties, the Chicken Leg Rock will have no enemies guarding it. It will still be a challenge getting to it however. Besides your typical array of enemy bases and guarded POI’s, the bots have a few other delightful defenses which you will need to be on the lookout for.
Cannon Turrets
Cannon Turrets can merk your ass from a mile away if you let them spot you. They can’t see you if you’re prone though (the position you’ll be spending 90% of the mission in), so unless you feel like it’s completely safe for you to stand up, remain as low to the ground as possible.
If a Cannon Turret spots you, the light on the front of it will glow red and it will turn to face you. At this point, you have about 2 seconds to make either one of these important decisions:
- Leap behind a rock and wait for it to give up on killing you.
- Quickly make amends with Jesus Christ and accept your fate.
Thankfully, it doesn’t take long for the cannon turret to lose track of you once you go into hiding, so you should be good to go if you can leap out of sight in time.
Detection Towers

Resembling the Eye of Sauron atop Barad-dûr, Detection Towers will call in drop ships if they detect you. If the Chicken Leg Rock happens to spawn near a Detection Tower base, wait for the tower’s gaze to point away from the rock before crawling over to collect the samples. I think the only way to destroy a Detection Tower is to call in a Hellbomb next to it (which would entail killing everyone in the base first), so don’t risk it and just try to get in and out. If you do get spotted by a Detection Tower, run for your life before the drop ship armada arrives and wait for things to blow over before heading back out again.
Strategy, continued
Once you’ve collected the samples, it’s time to slowly make your way back to the Evac Zone. Don’t do anything stupid and crawl all the way back there if you need to. Once you’re back to the Evac Zone and the coast looks clear, you can spend some time looking around for some Rare Samples (there’s usually about 4 lying around on Helldive difficulty).
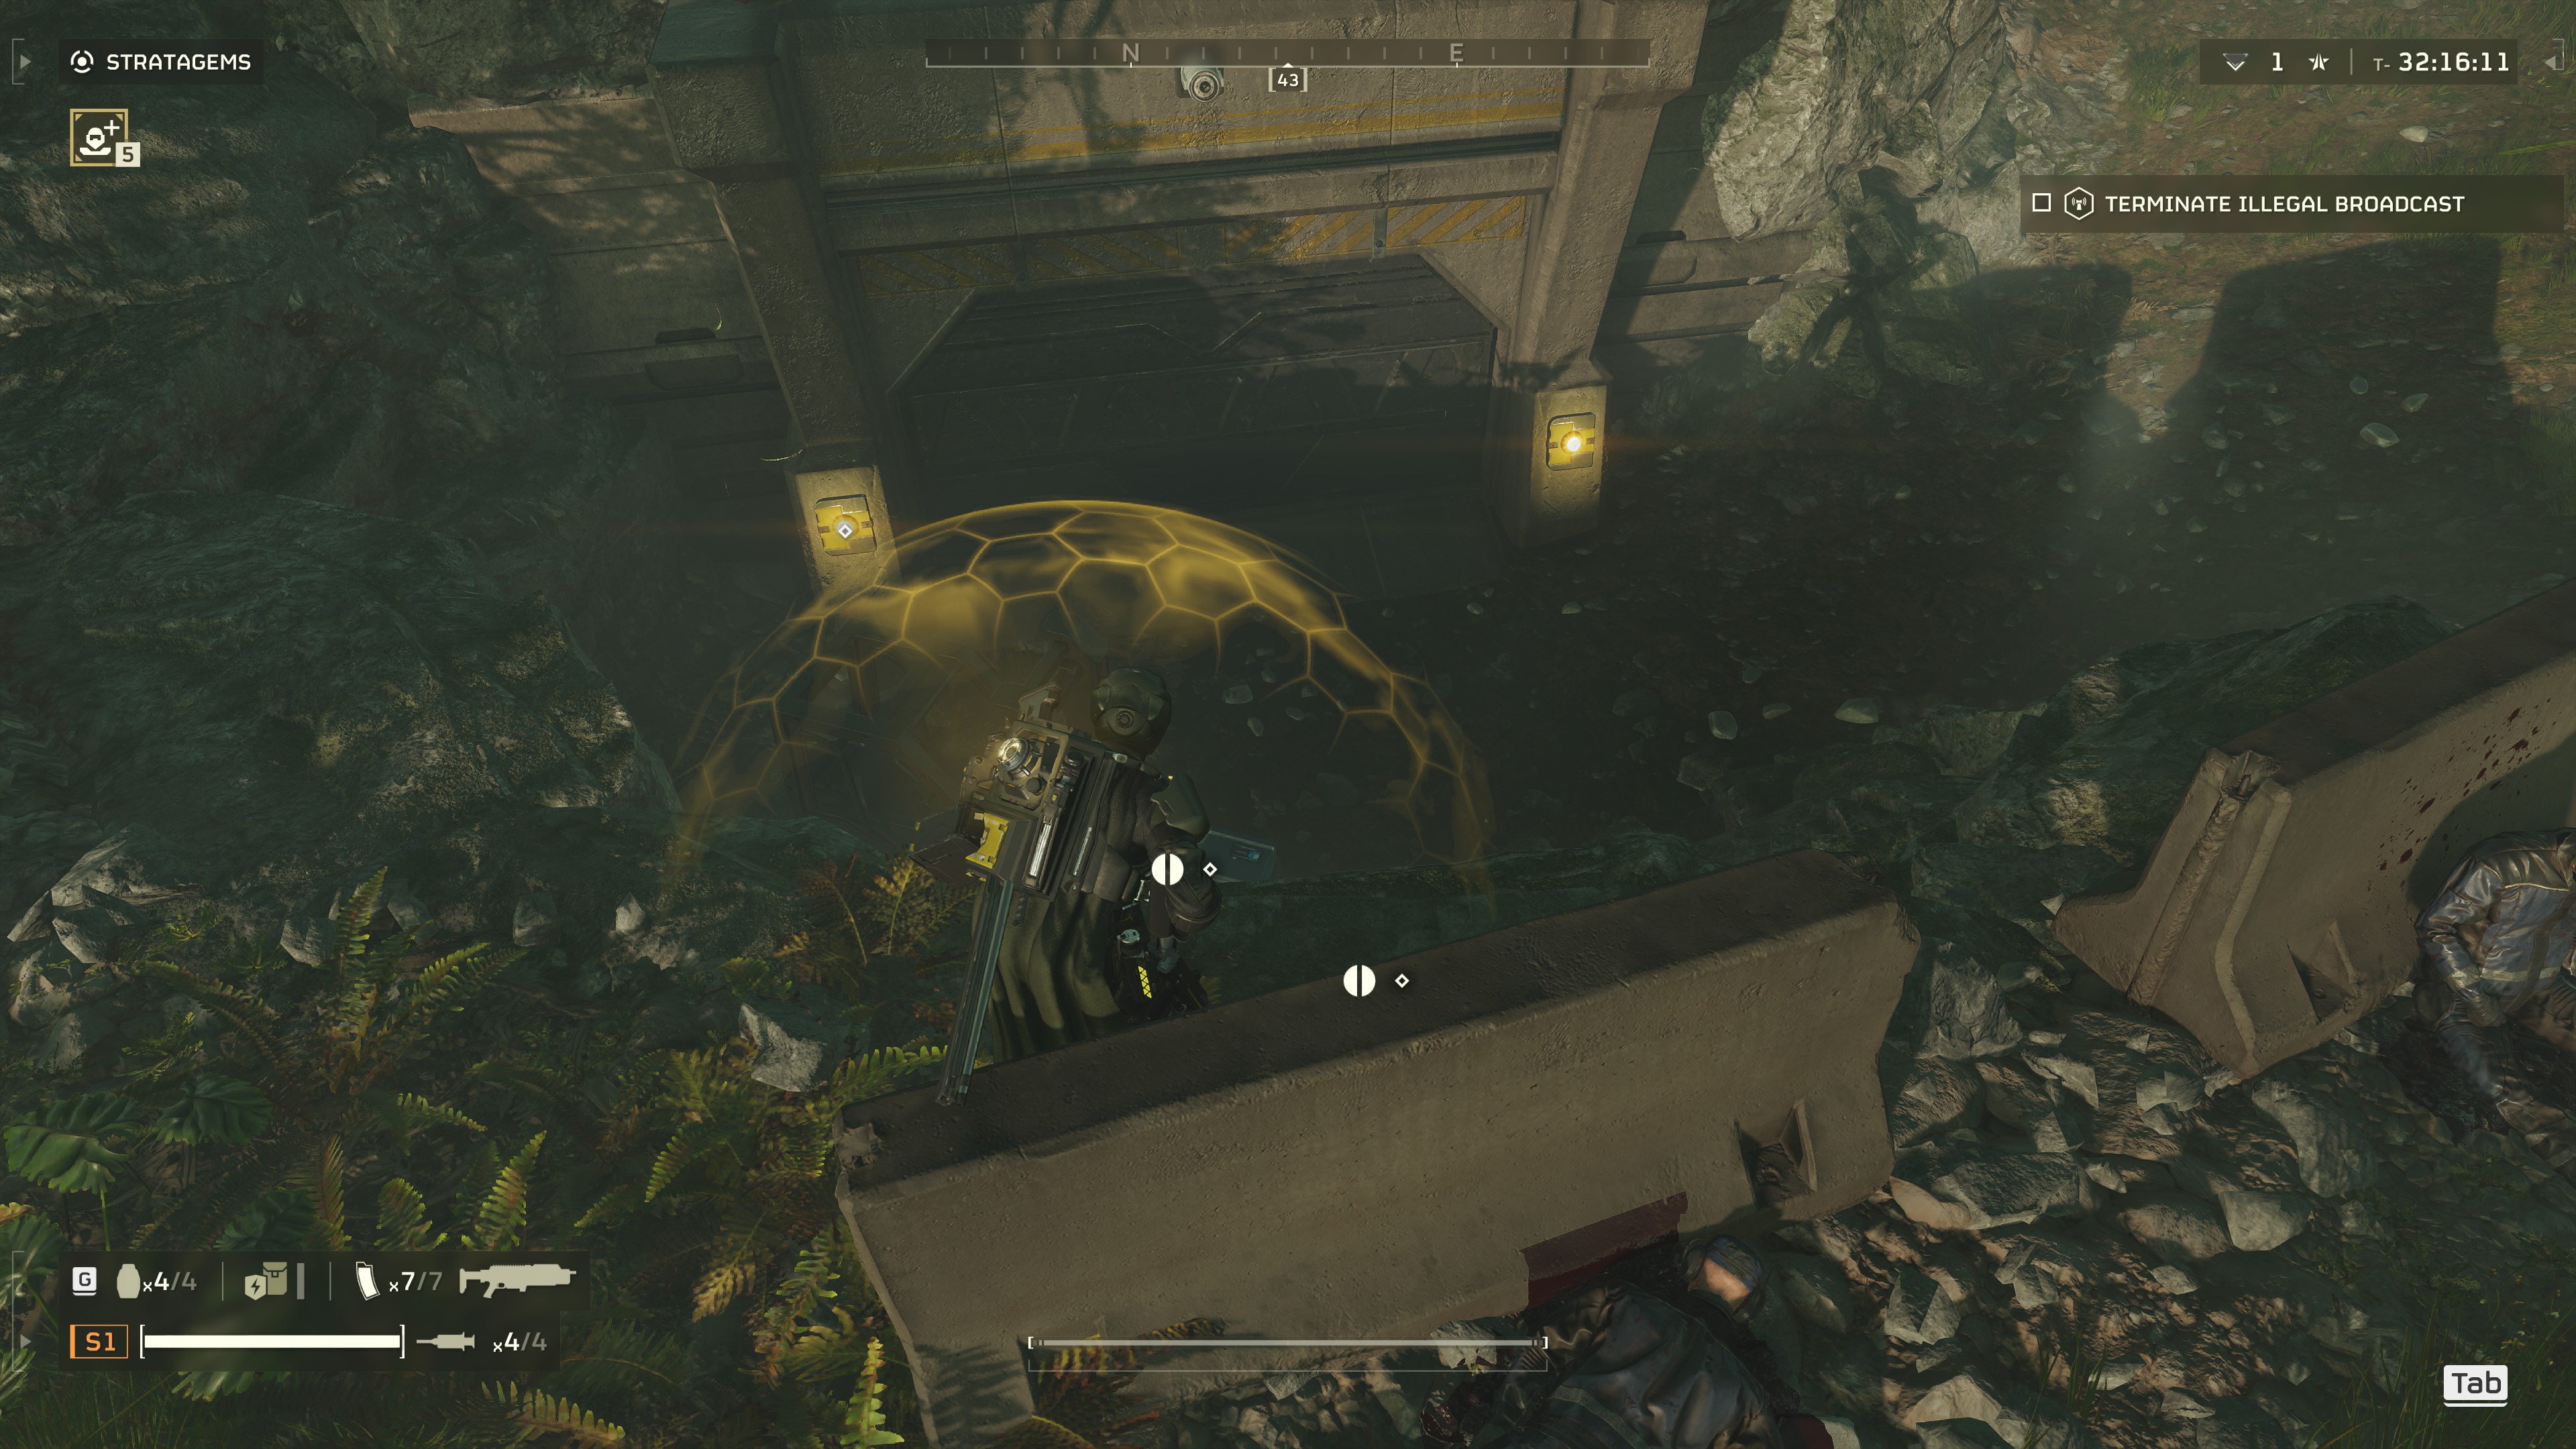
Now you need to wait for the mission timer to run out and for the Pelican to land. If you can, find a nice perch like this to wait things out on:
Enemies typically won’t be able to spot you when you’ve got the high ground like this. If you can’t get yourself to a higher position, keep your eyes glued to your map and avoid any incoming enemy patrols. Like in the Rare Sample Farming Guide, you’ll want to be close to the Evac Zone, but not exactly where the Pelican will land. It’s possible that multiple enemy patrols will criss-cross the base while you’re waiting for extraction. Once the Pelican is about to land, get down from your perch and start crawling towards it to leave the battlefield behind.
Super Samples (Rewards)
Depending on the difficulty chosen, each run takes about 20 minutes (factoring in cutscenes and extraction time) and will net you either 5 or 6 Super Samples, equating to about 45 or 48 Super Samples per hour. Since higher-tier ship upgrades only need 5 or 10 Super Samples each, you don’t really need to farm very many of them. I recommend knocking out a few of these runs when you get tired of farming other things.
Concluding Remarks
Thanks for reading my guide! If I get some more time, I’d like to write more guides in the future (maybe on weapons or how to complete missions solo). Let me know what you think in the comments section or if there’s any better farming techniques that you can think of.